For years, I have been making colorful pancakes. It’s a great way to spend a morning, it’s fun for kids and adults, and the results are stunning. You can mix any pancake batter recipe with food coloring in a kitchen squeeze bottle, and make your own.
In this post I’ll cover the tools and ingredients needed, the method I use, share a sourdough pancake recipe, and a gallery of pancake paintings.
Have fun!
Tools and Ingredients
Here’s what you’ll need:
> Pancake batter from scratch or a mix.
Use your favorite recipe or try a mix. A sourdough recipe is included at the bottom of this post. My favorite mix is Kodiak Cakes Buttermilk mix.
> Food Coloring
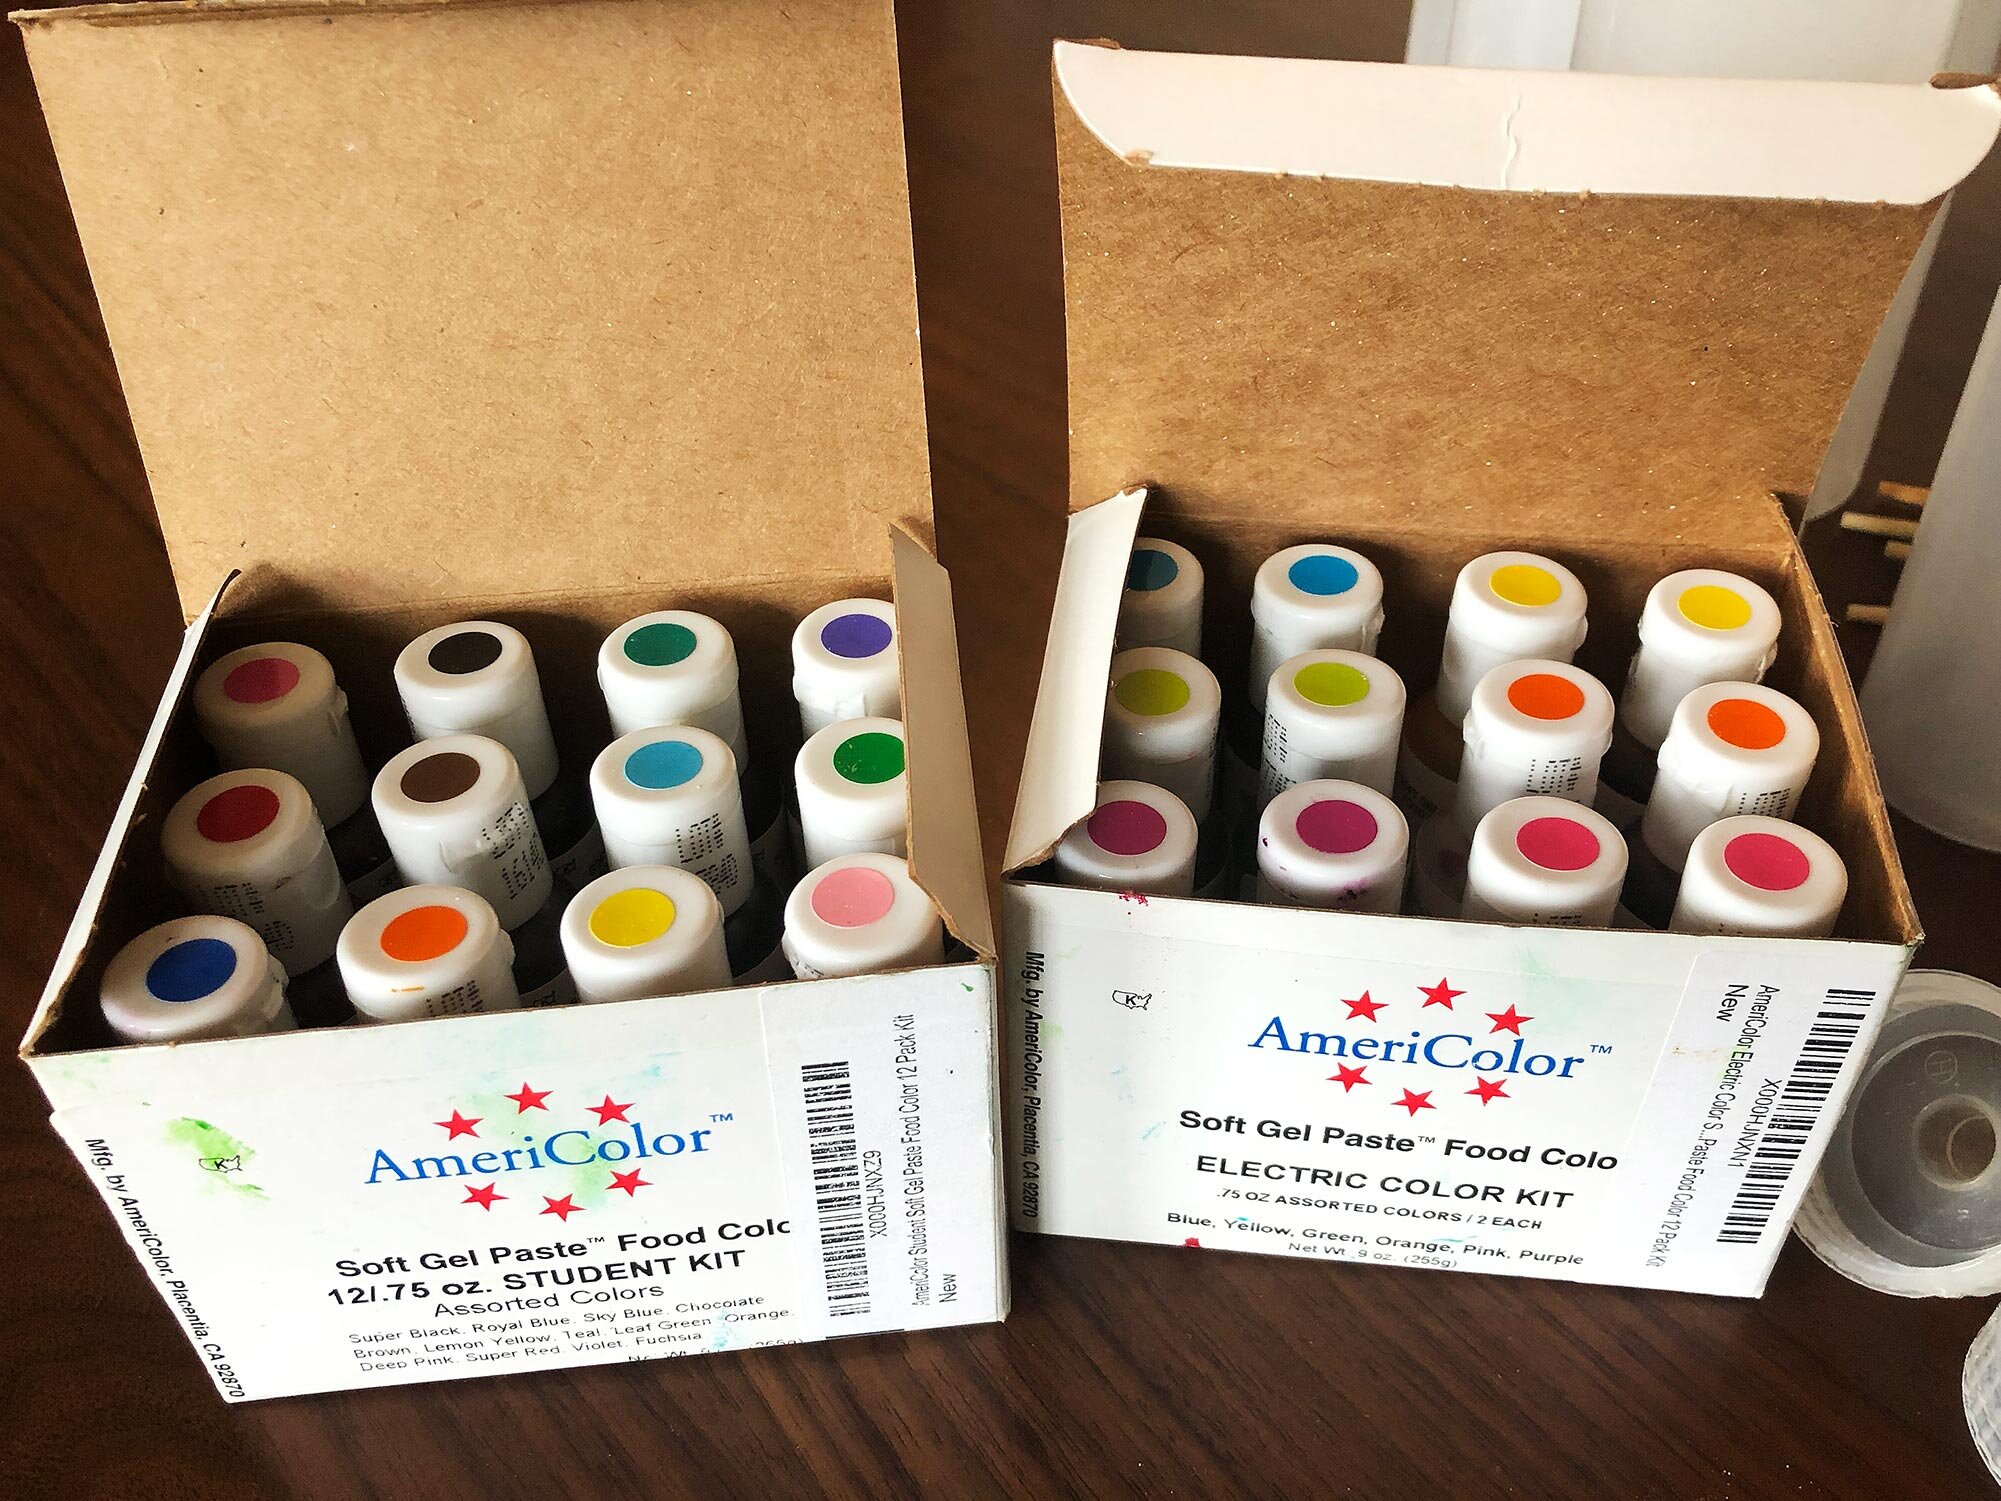
The key to the whole operation. I use the Americolor Electric and Student set, but you can use any food coloring. Or try making natural food coloring from blueberries etc.
Shop Americolor Electric Food Coloring at Amazon
> Wide-mouth plastic kitchen squeeze bottles .
My preference is 16 oz bottles, but you can use anything that will squeeze out batter with some accuracy. I have tried the pancake batter dispensing bottles and they aren’t as accurate for painting as basic ketchup/condiment squeeze bottle.
Shop 16 oz Squeeze Bottles at Amazon
> A cup and funnel to add the batter to the bottles.
I like colorful kitchen accessories such as the orange funnel set linked below. You will also need a whisk and chop sticks to mix batter in the bottles.
Shop Orange Funnel Set at Amazon
> Wide spatula or turner
If you keep your pancakes small, any spatula will do, but a jumbo plastic spatula or an oversized steel turner might help with larger creations. Look for a spatula with a low handle angle, which makes it easier to get underneath your pancakes.
Shop Nor-Pro Pancake Spatula at Amazon
> Large griddle
A low-side griddle or pan will make it easier to get your spatula underneath your pancakes, and a 2-burner griddle will give you plenty of room for pancake painting or making multiple pancakes at the same time. I use a 12x20” stainless steel griddle but there are a lot of cast iron and non-stick griddle options. If you want to really control the low heat needed for pancake painting, a standalone electric griddle is a great way to go too, if you have space to store it.
How to Make Pancake Paintings
Step by step tutorial
Step 1: Mixing in a custom Merkelware batter bowl
Step 1: Mix
Mix a semi-thin pancake batter from scratch or a mix.
The batter should be free of any lumps. It needs to be thin enough that it will squeeze out of the bottles, but thick enough that your pancake has some body. Adjust as necessary; you may need to add milk or water to thin your batter, or more flour to thicken it up.
Lately, I’ve been using sourdough batter for a few reasons:
1. I have leftover sourdough starter from baking bread and more importantly,
2. the sourdough culture stays active in the bottles so the batter doesn’t get “flat.”
Each pancake takes a few minutes to paint and cook, so if you want to have tasty pancakes, sourdough really helps. But if you’re not into the trouble of keeping sourdough (and it is a lot of time!) just use any pancake recipe or mix.
Step 2: Add to Bottles
Step 2: Add batter to squeeze bottles
After mixing add batter to your wide-mouth squeeze bottles.
A funnel really helps this process. These days, I usually make 6 bottles of batter, but I have done up to 12. It’s fun to have a lot of colors but. . . there’s always clean up to consider too.
For clean up, I’ve found that cold water works best for getting flour off of bottles and utensils. Once free of stuck-on flours, then use hot water and soap.
Step 3: Add Color
Step 3: Add color to bottles and mix
You can make awesome pancake paintings without color. But adding color can be a lot of fun and really opens up what you can do on the griddle.
Typically, I will do one bottle of plain batter with 12-16 oz of batter. And then I’ll do 5 more bottles with about 1 cup / 8 oz of batter each.
To make colors, I’ll start by adding 3 drops of food coloring per cup of batter, and mix with the back end of a chop stick. If the color is not intense enough, I’ll add a few more drops. You can also mix colors. But be aware, if you add too much food coloring you can introduce off flavors into your pancakes.
Be sure to mix well. You may need to turn the bottle to the side to really get the bottom mixed.
More images of mixing batter:
Step 3: mixing
The back end of chop sticks are great for mixing
A bottle that needs a bit more mixing
The finished line up of colors. Even one or two colors can be a lot of fun.
Step 4: Paint
Step 4: painting. The “top” side can be a bit more colorful than the side that is on the griddle first.
Preheat your griddle. Give it time to heat up so the temperature is evenly distributed, then oil your pan. Make sure the temperature is on low to give yourself time to paint. The hotter the griddle, the faster you will have to paint.
After oiling the griddle, it’s time to paint!
If it’s your first time painting, be sure to cut the nozzles on your bottles wide enough (approx 3mm) so that batter will dispense easily. I use a pair of kitchen shears for this, or a knife.
Step 4: The flipped pancake.
The painting is up to you, have fun and just see what happens. The results will always be tasty. 😋 You can make patterns, landscapes, portraits, marbleized color—anything. One of my favorite projects was making a self-portrait on Father’s Day for my kid to eat.
The first side that cooks can be a bit less colorful than the second side. But that first side is where you can be more exact. Remember, you paint “backwards” in that the first thing you put down will be at the front of the finished pancake.
Step 5: Enjoy
Time to enjoy your tasty creations. Will you go with the traditional maple syrup and butter? Yogurt and jam? Or do you make your own fruit sauce? Whatever you do, it will taste good and look great.
Have fun.
Sourdough Pancake Recipe
I use a modified version of this recipe. In short, I took out the baking soda and baking powder and added more flour, some milk, and time. You have to let the sourdough grow a bit after mixing, but the result is a batter that stays fresh in the bottle and tastes great.
Ingredients:
500 g (approx 2 cups) mature 100%-hydration sourdough starter
3/4 c all purpose flour
1/2 c milk
2 T. maple syrup
2 T. vegetable oil
2 eggs
1/2 t. salt
Directions:
1. Mix all ingredients together with a whisk
2. Batter should flow easily, add milk if necessary
3. Cover and let stand for 1-2 hours until bubbles form on surface, then add to bottles for painting.
Image Gallery
I started making pancake paintings in 2013. I saw this article and realized I could do the same thing, but with color. Here’s a few of the pancakes I’ve made.
Do you make pancake paintings? Let us know about your experience in the comments.

