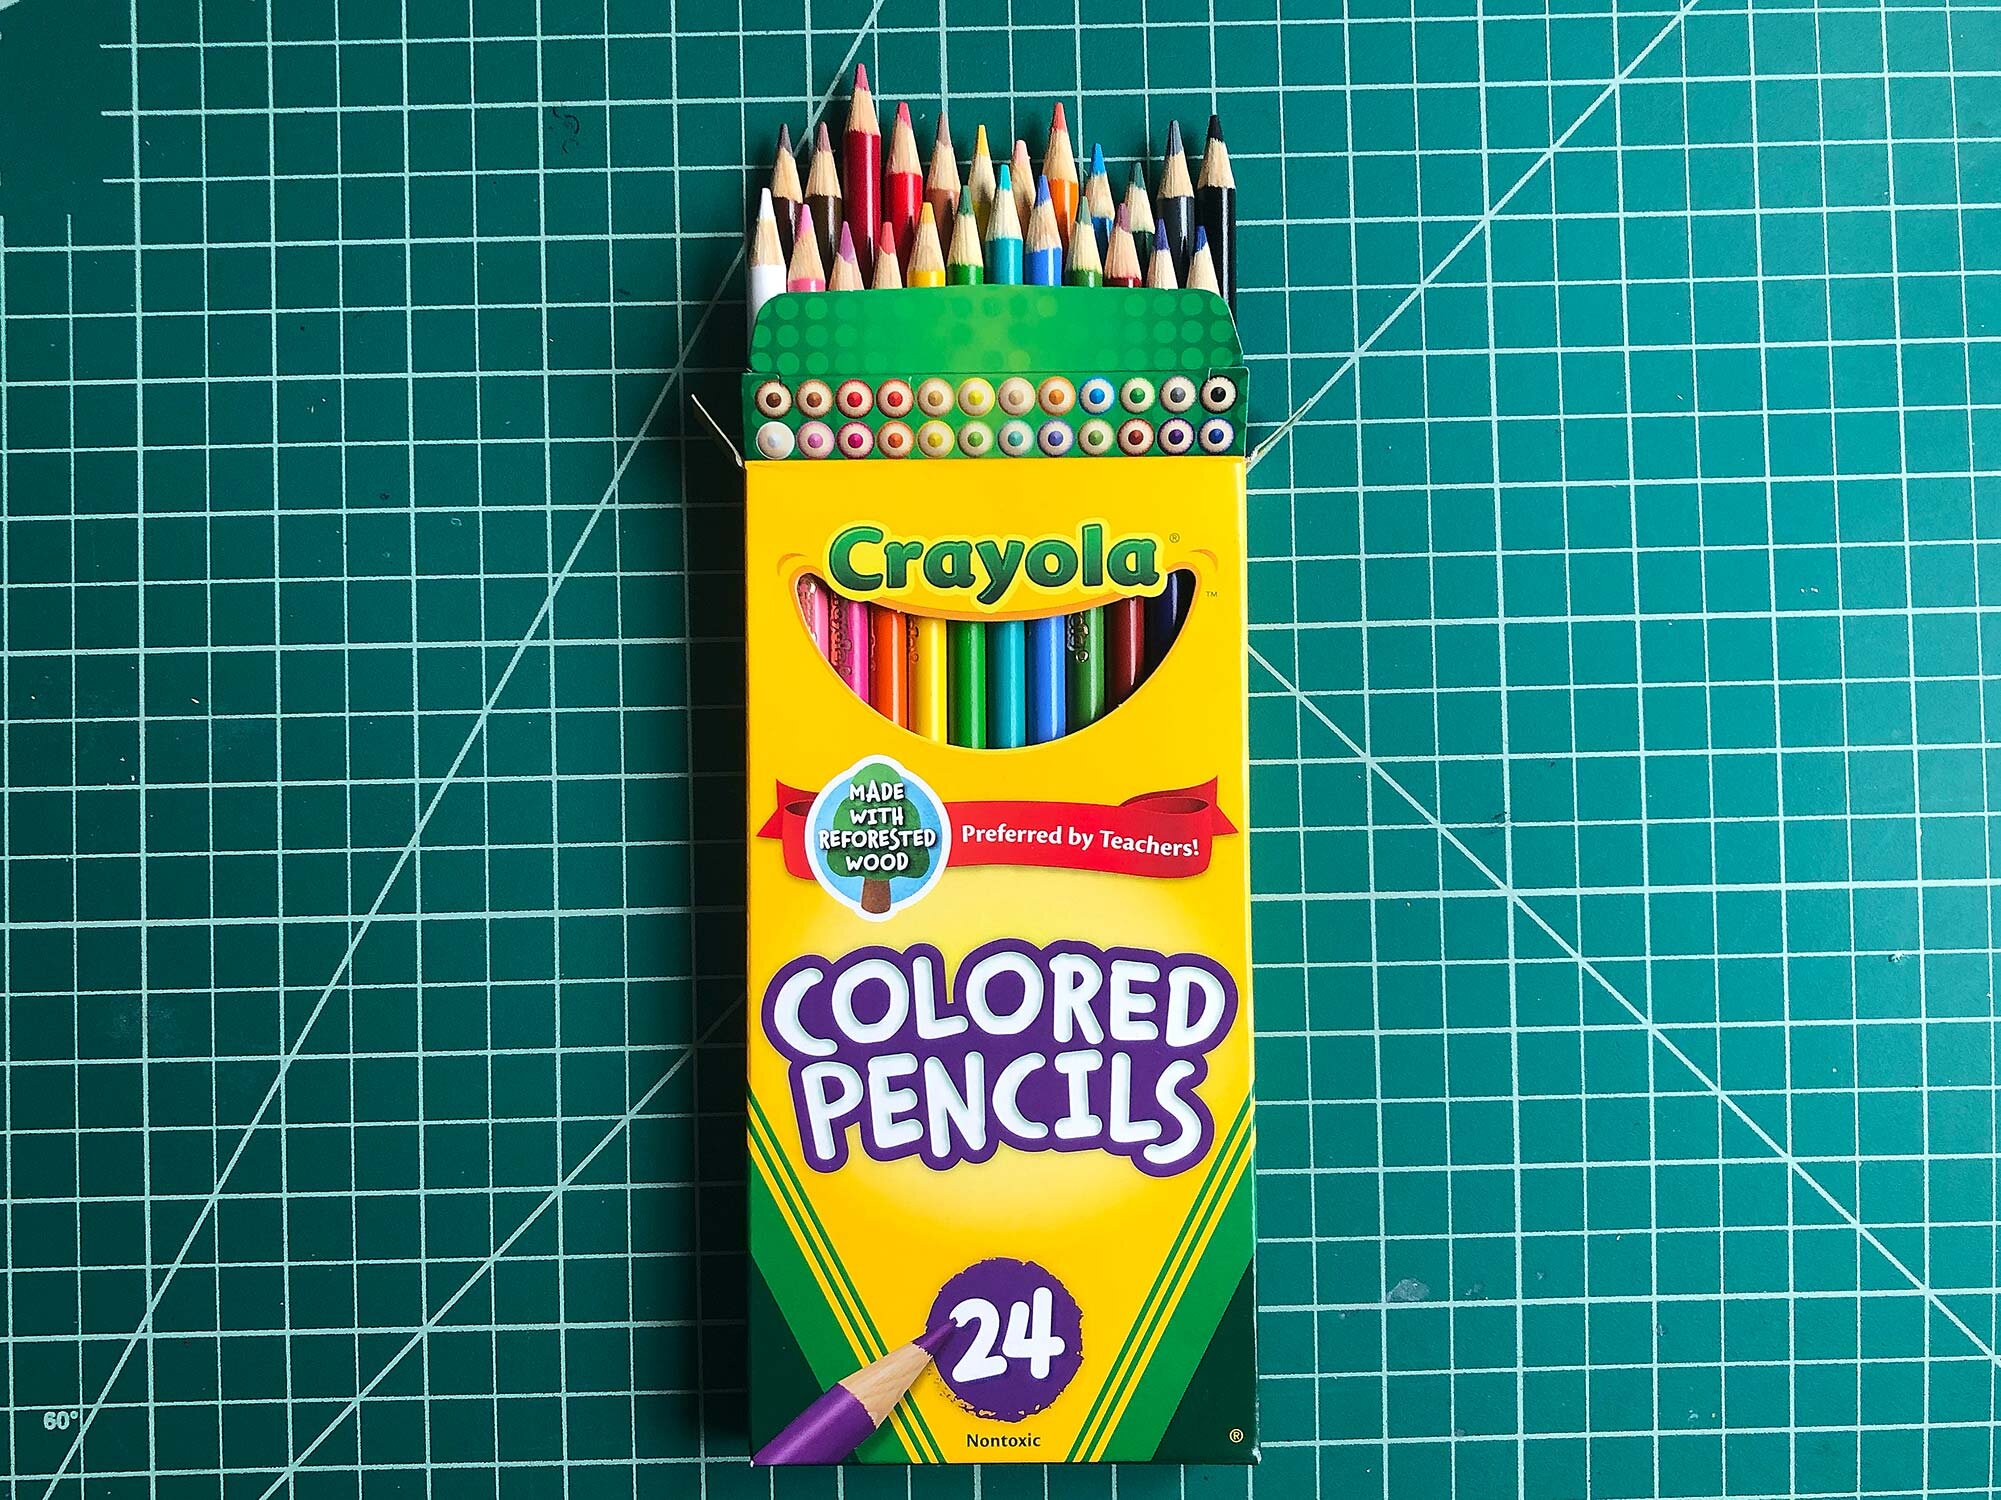
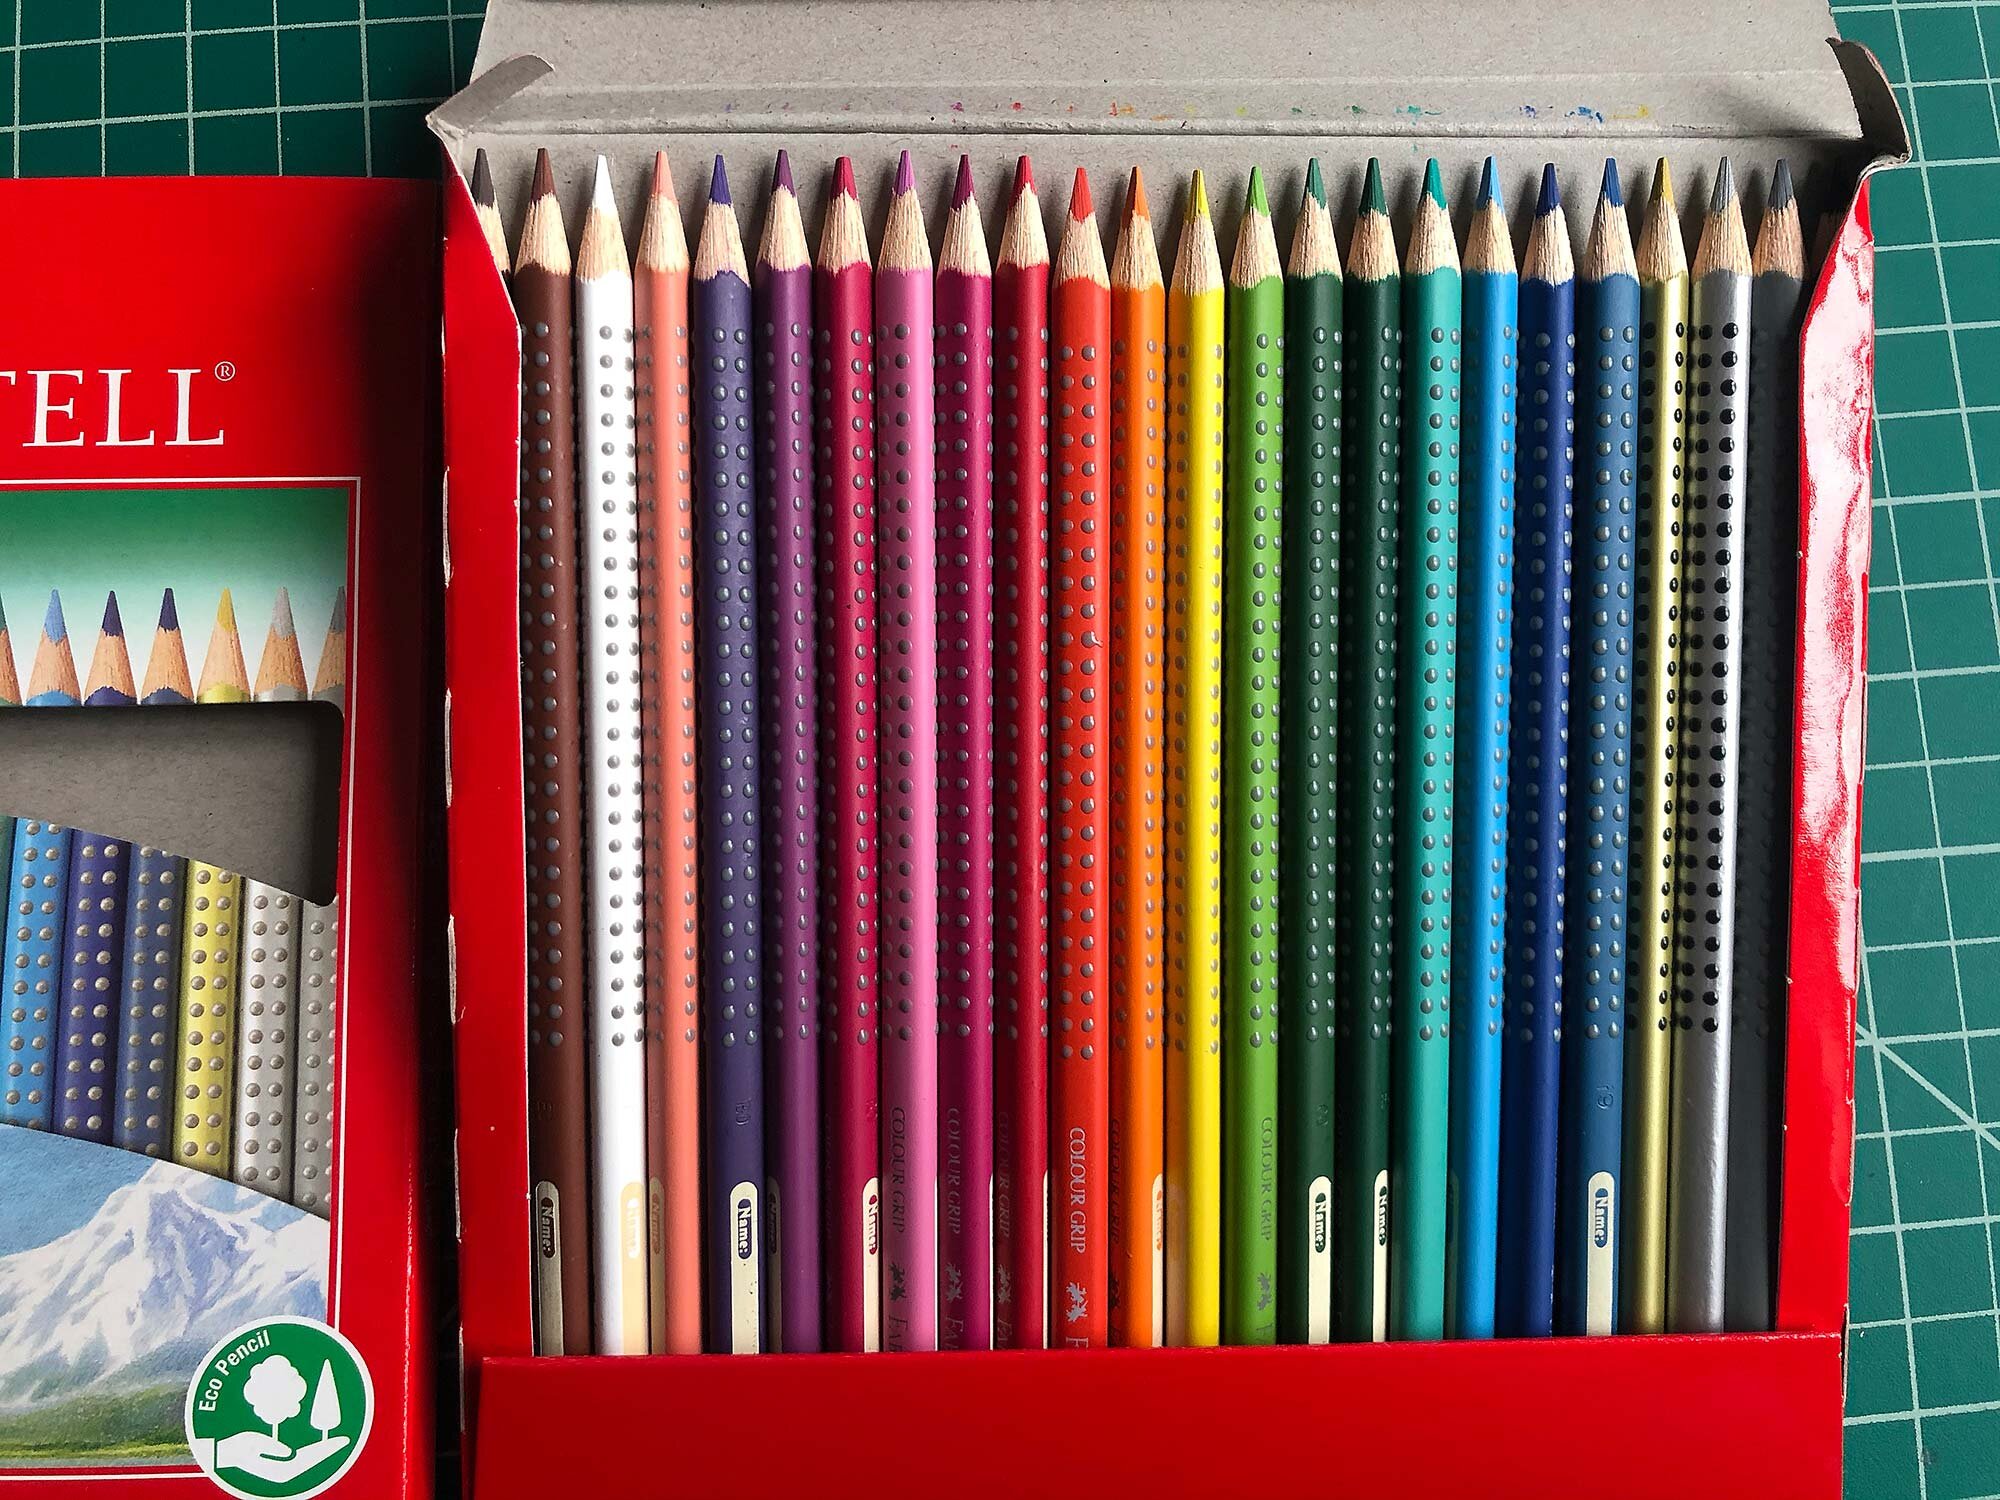
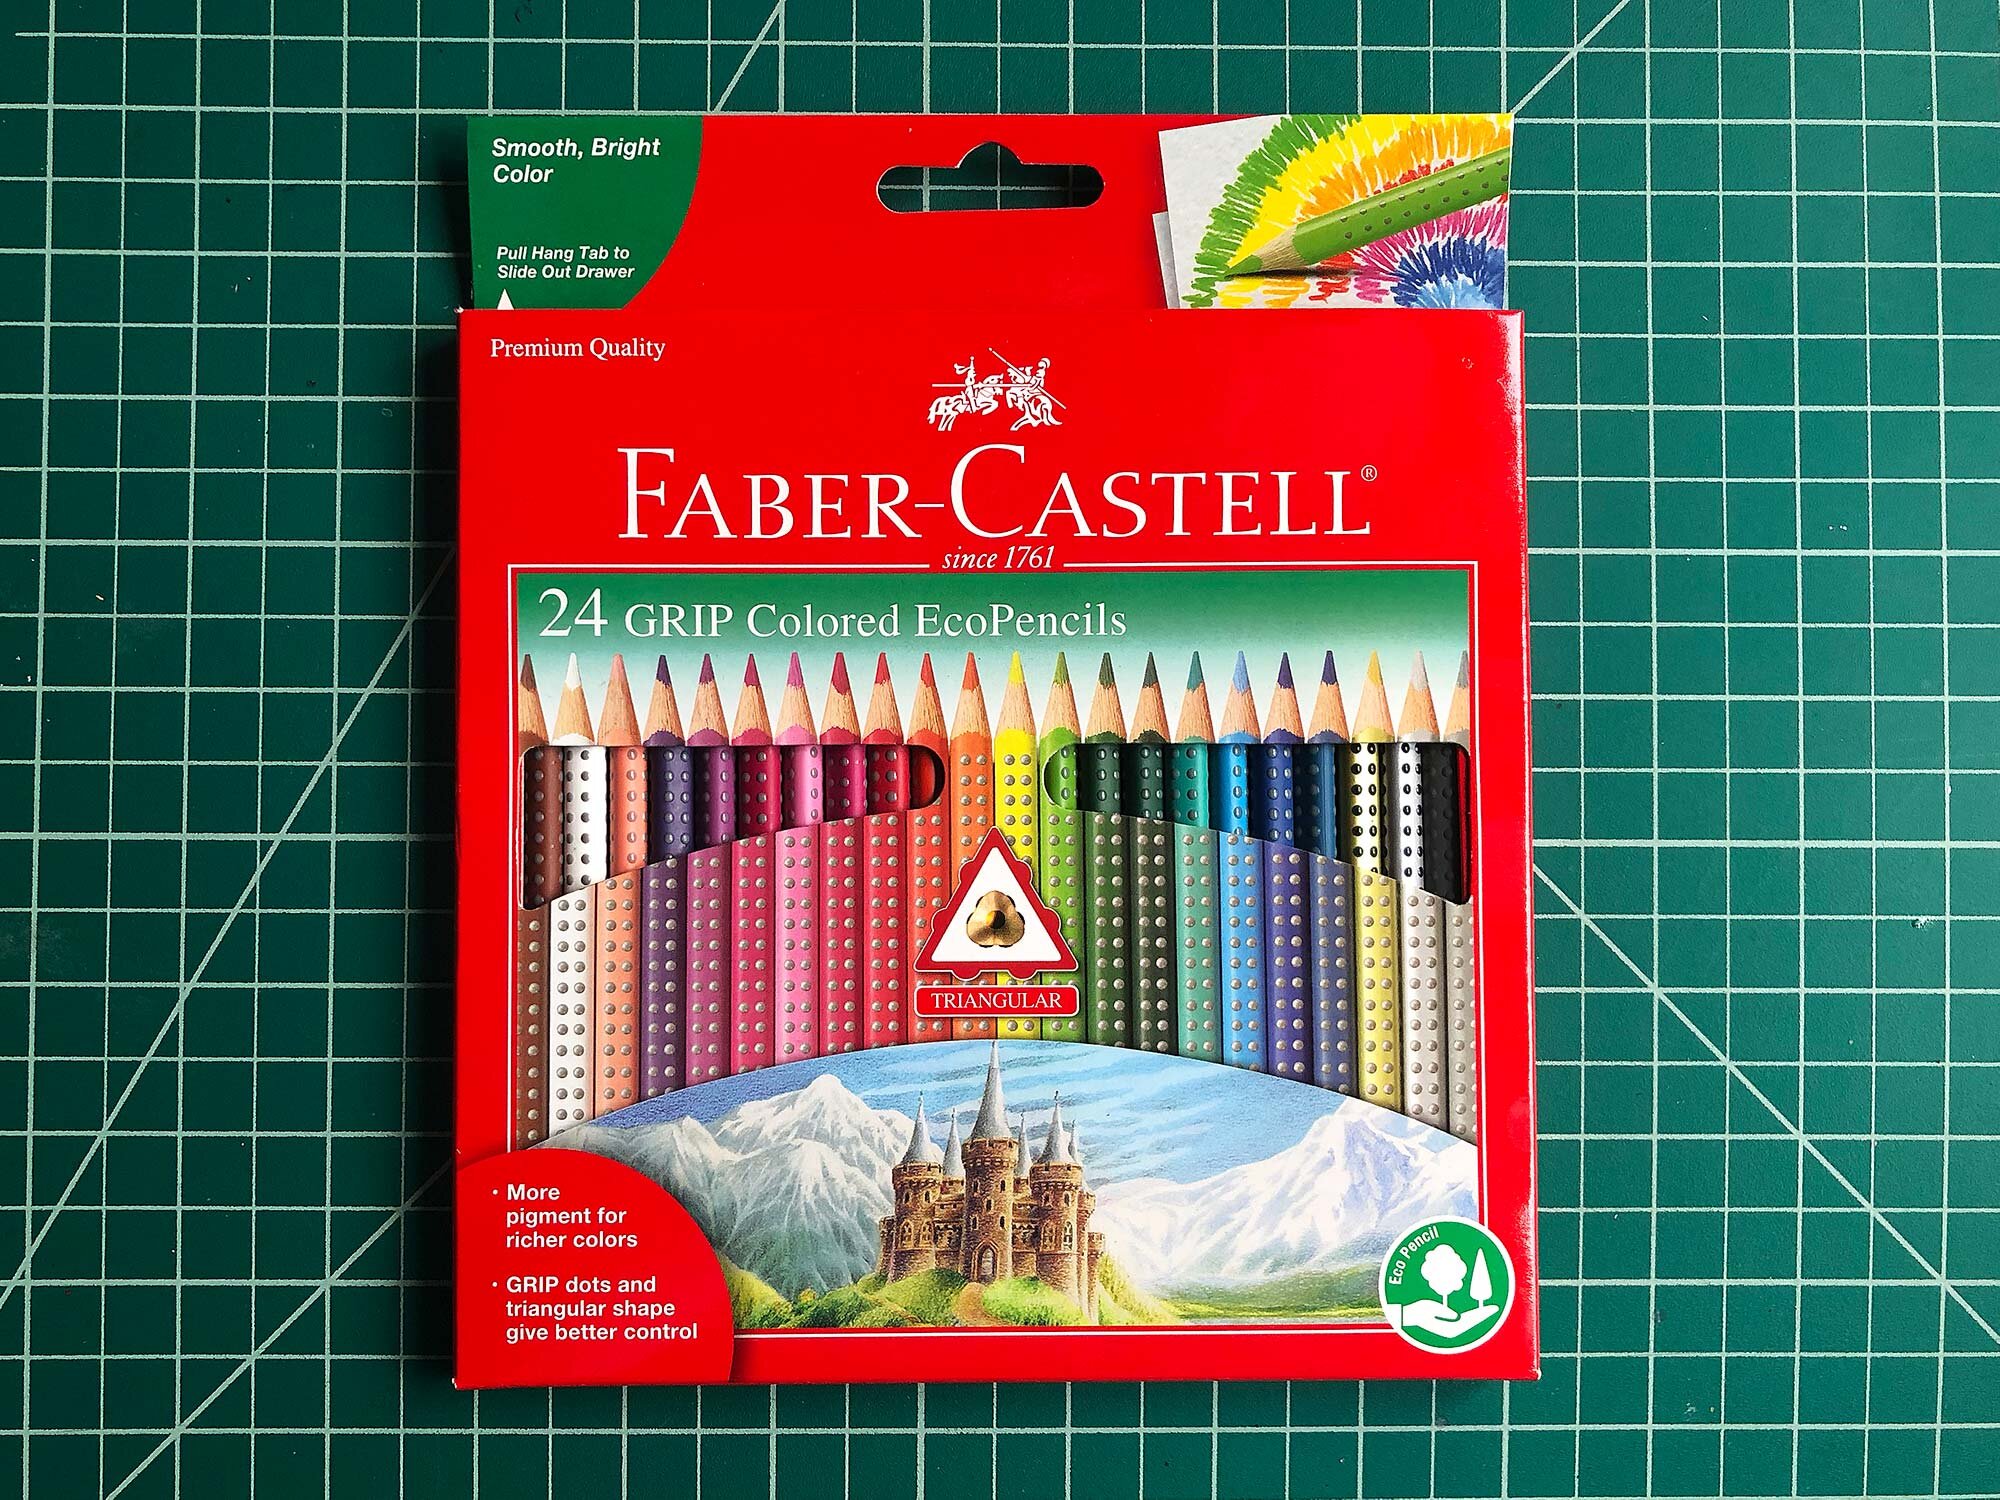
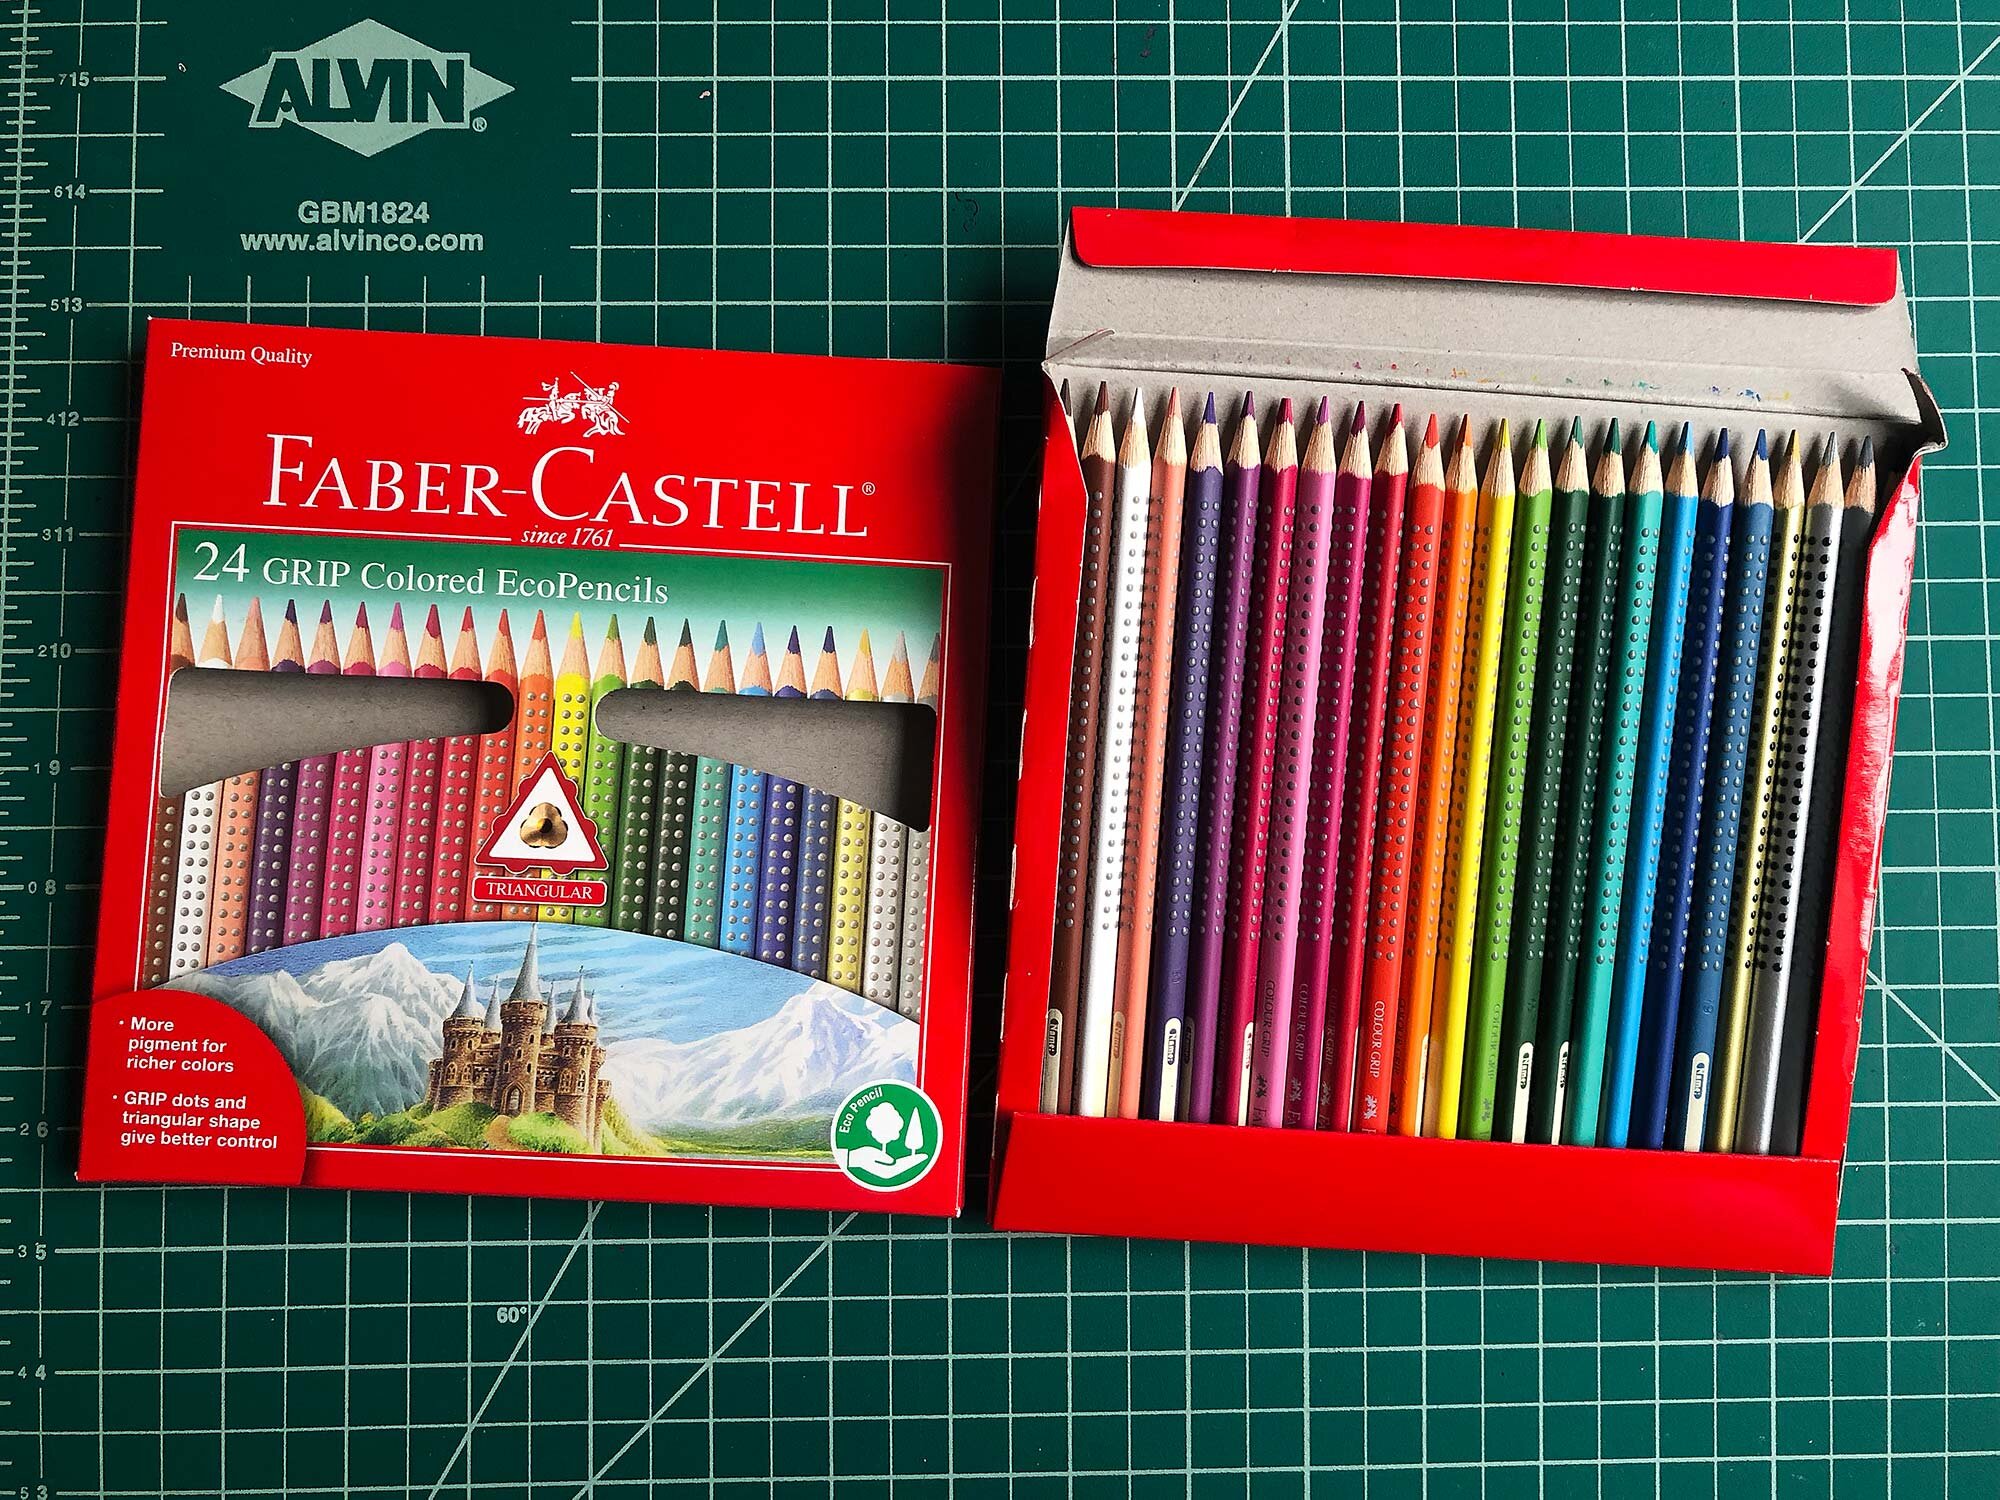
Gift Guide for Young Artists and Creative Kids

Art supplies make a wonderful gift for kids and this guide will cover a wide variety of quality tools and kits for kids of all ages.

As an artist and a parent, my philosophy is to provide quality supplies such as colored pencils and paper and let kids follow their own ideas. But it can also be fun to work with a kit or set, so I have included a few favorites here too. And sometimes a special tool or supply is just the thing to unlock a whole world for a kid, and for adults too.

This post has a variety of ideas for kids of all ages, including art supplies, kits, books, and supplies.

Note: This site uses affiliate links for sites such as Amazon and Blick. If you click the links and complete a purchase, we may receive a percentage at no extra cost to you.


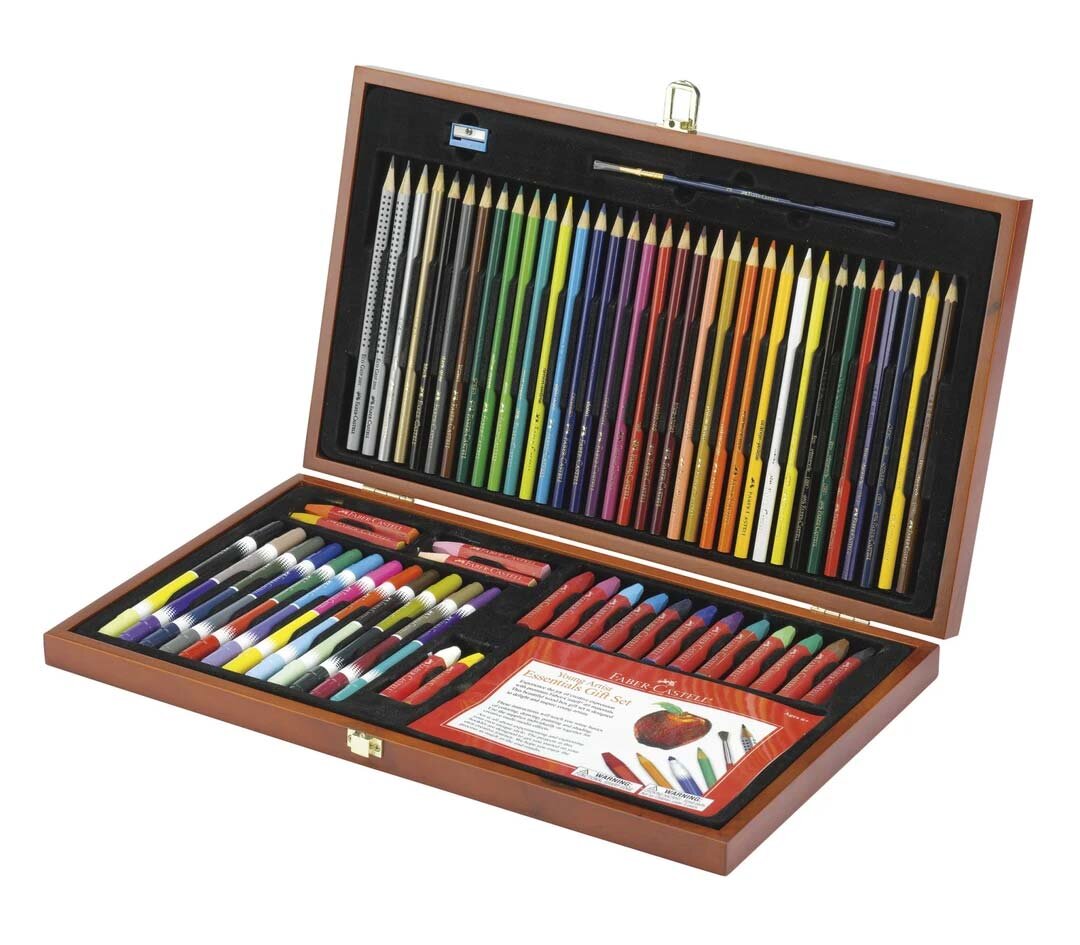
Faber-Castell Young Artist’s Essentials Gift Set

3 Faber Castell Young Artist Essentials copy.jpg

This kit, from the venerable German art supply manufacturer, includes 64 pieces in a handsome wooden box. The kit includes colored pencils, watercolor pencils, graphite pencils, oil pastels, markers, small sheets of watercolor paper, and a sharpener. Pair this with a drawing pad and your kid is set for hours and hours of drawing and painting. Kids love having these sets and it also helps organize their materials. This kit is listed at $50 but I’ve seen it on sale for half that.


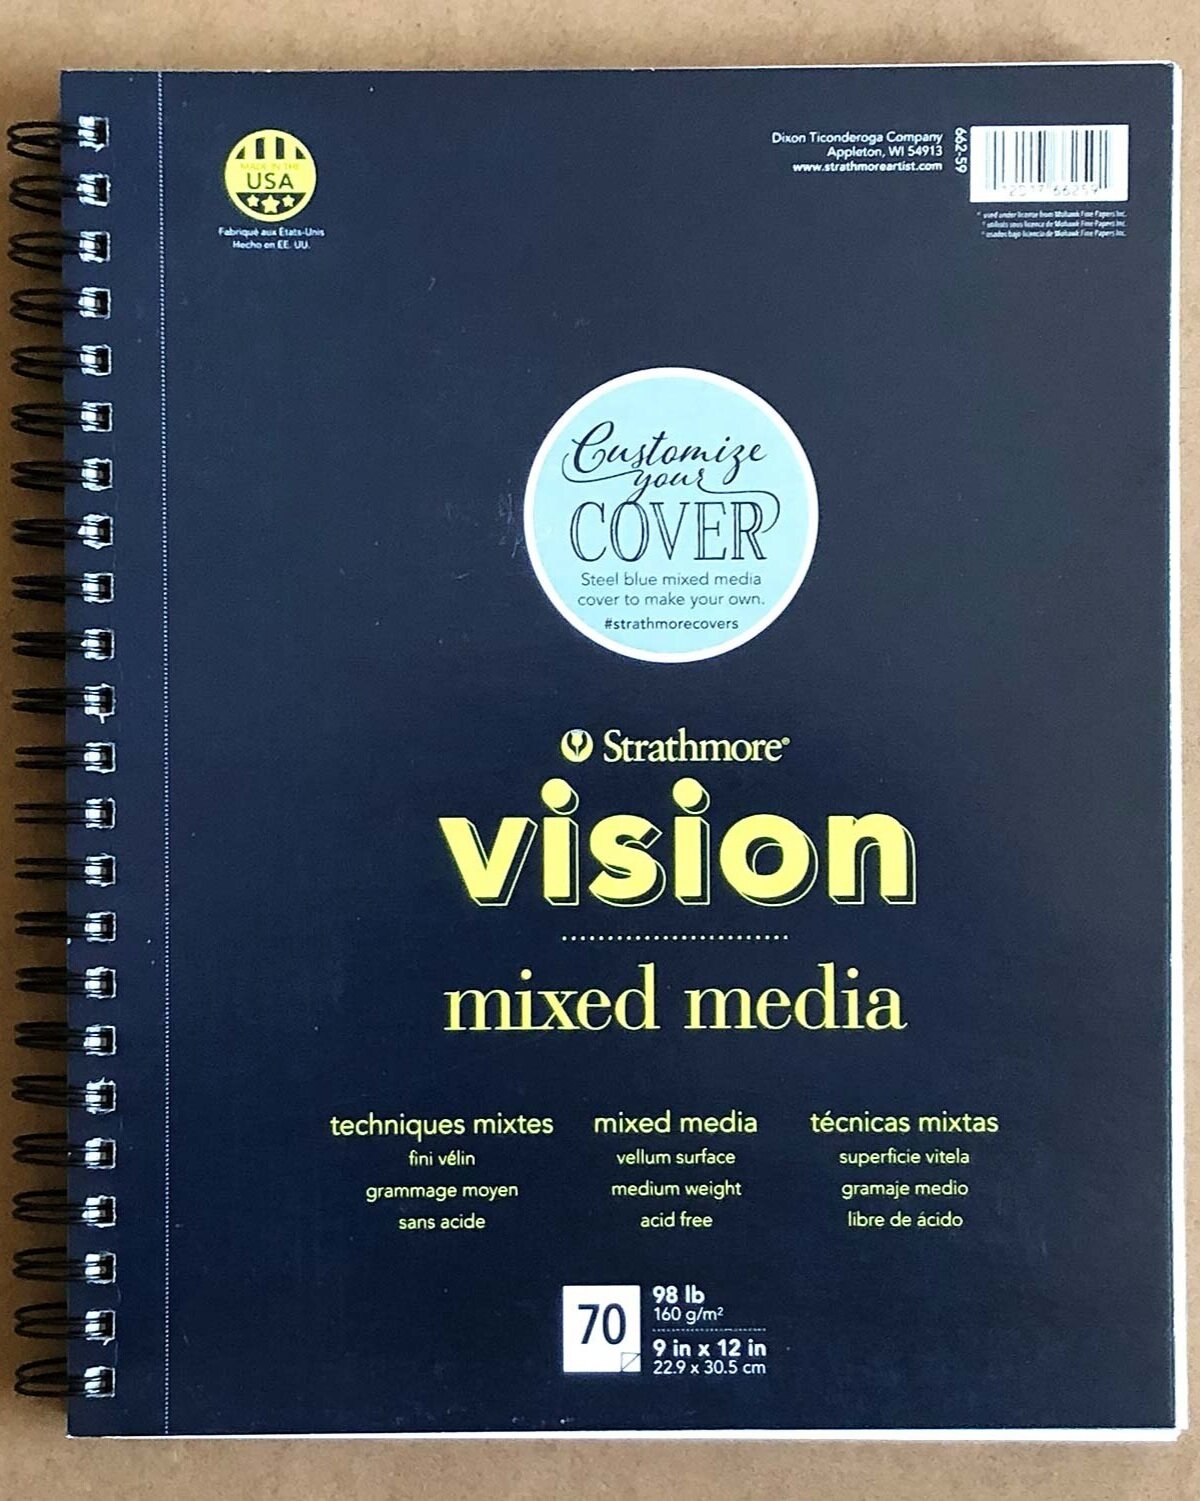
Strathmore Vision Sketchbook

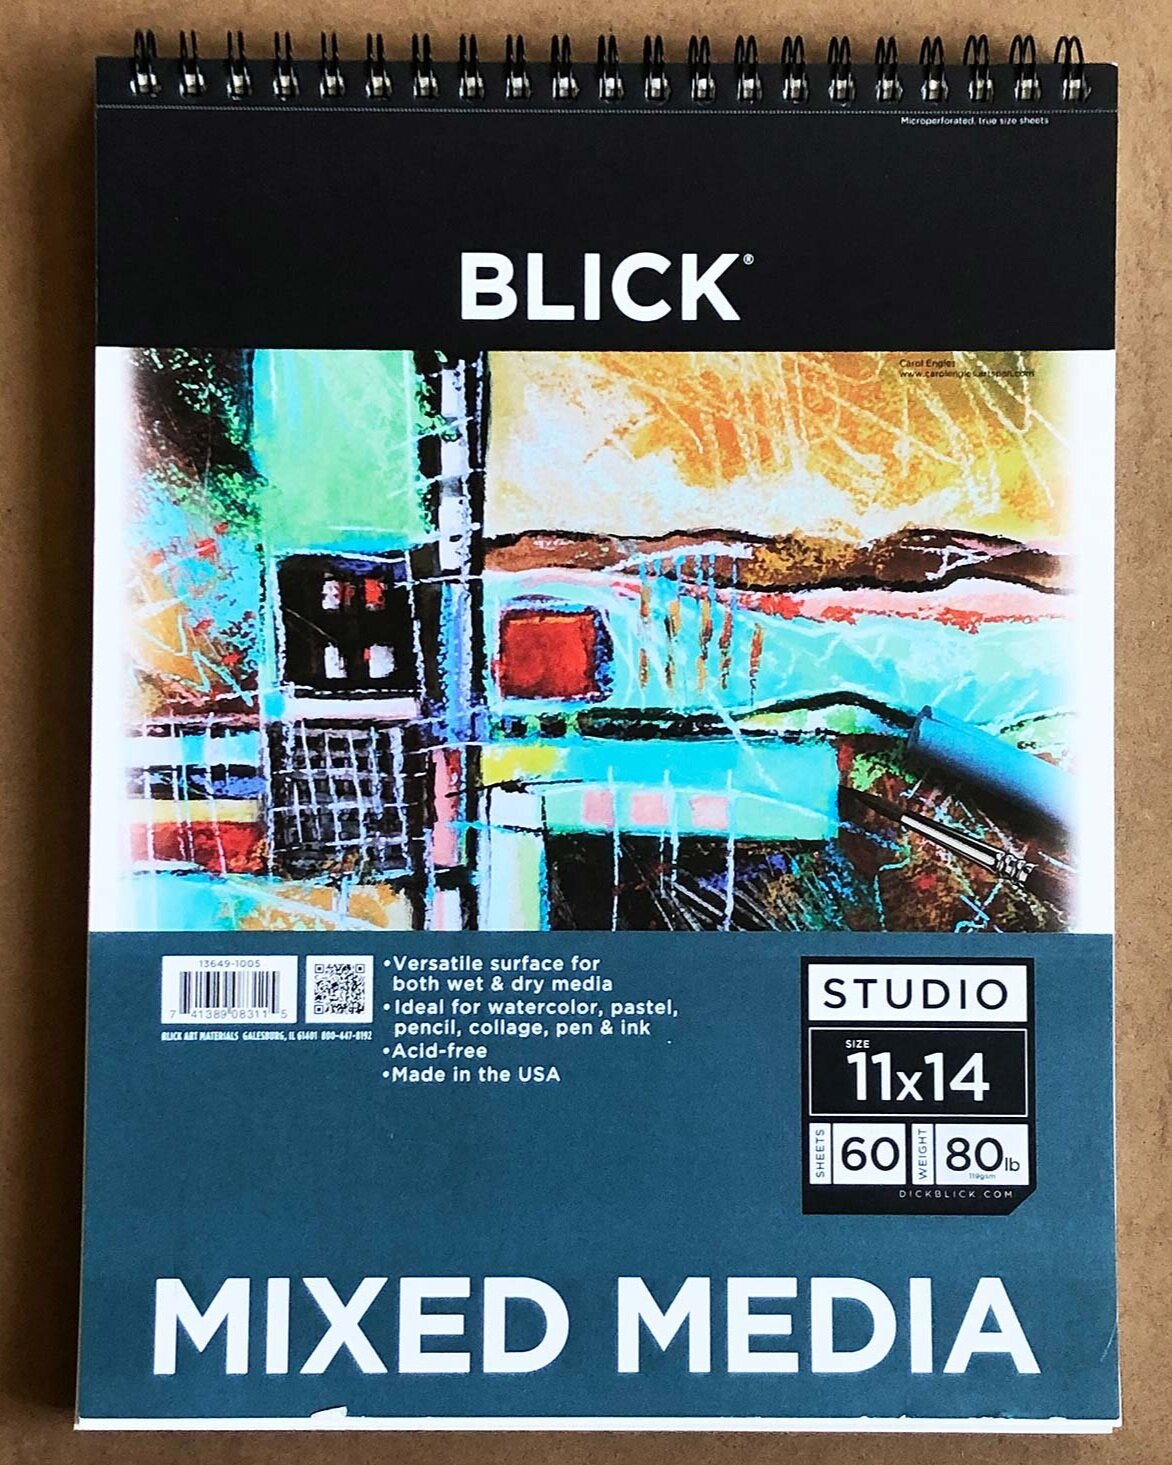
Strathmore Vision Mixed Media sketchbook is great for anyone.

Strathmore Vision Mixed Media sketchbook is great for anyone.

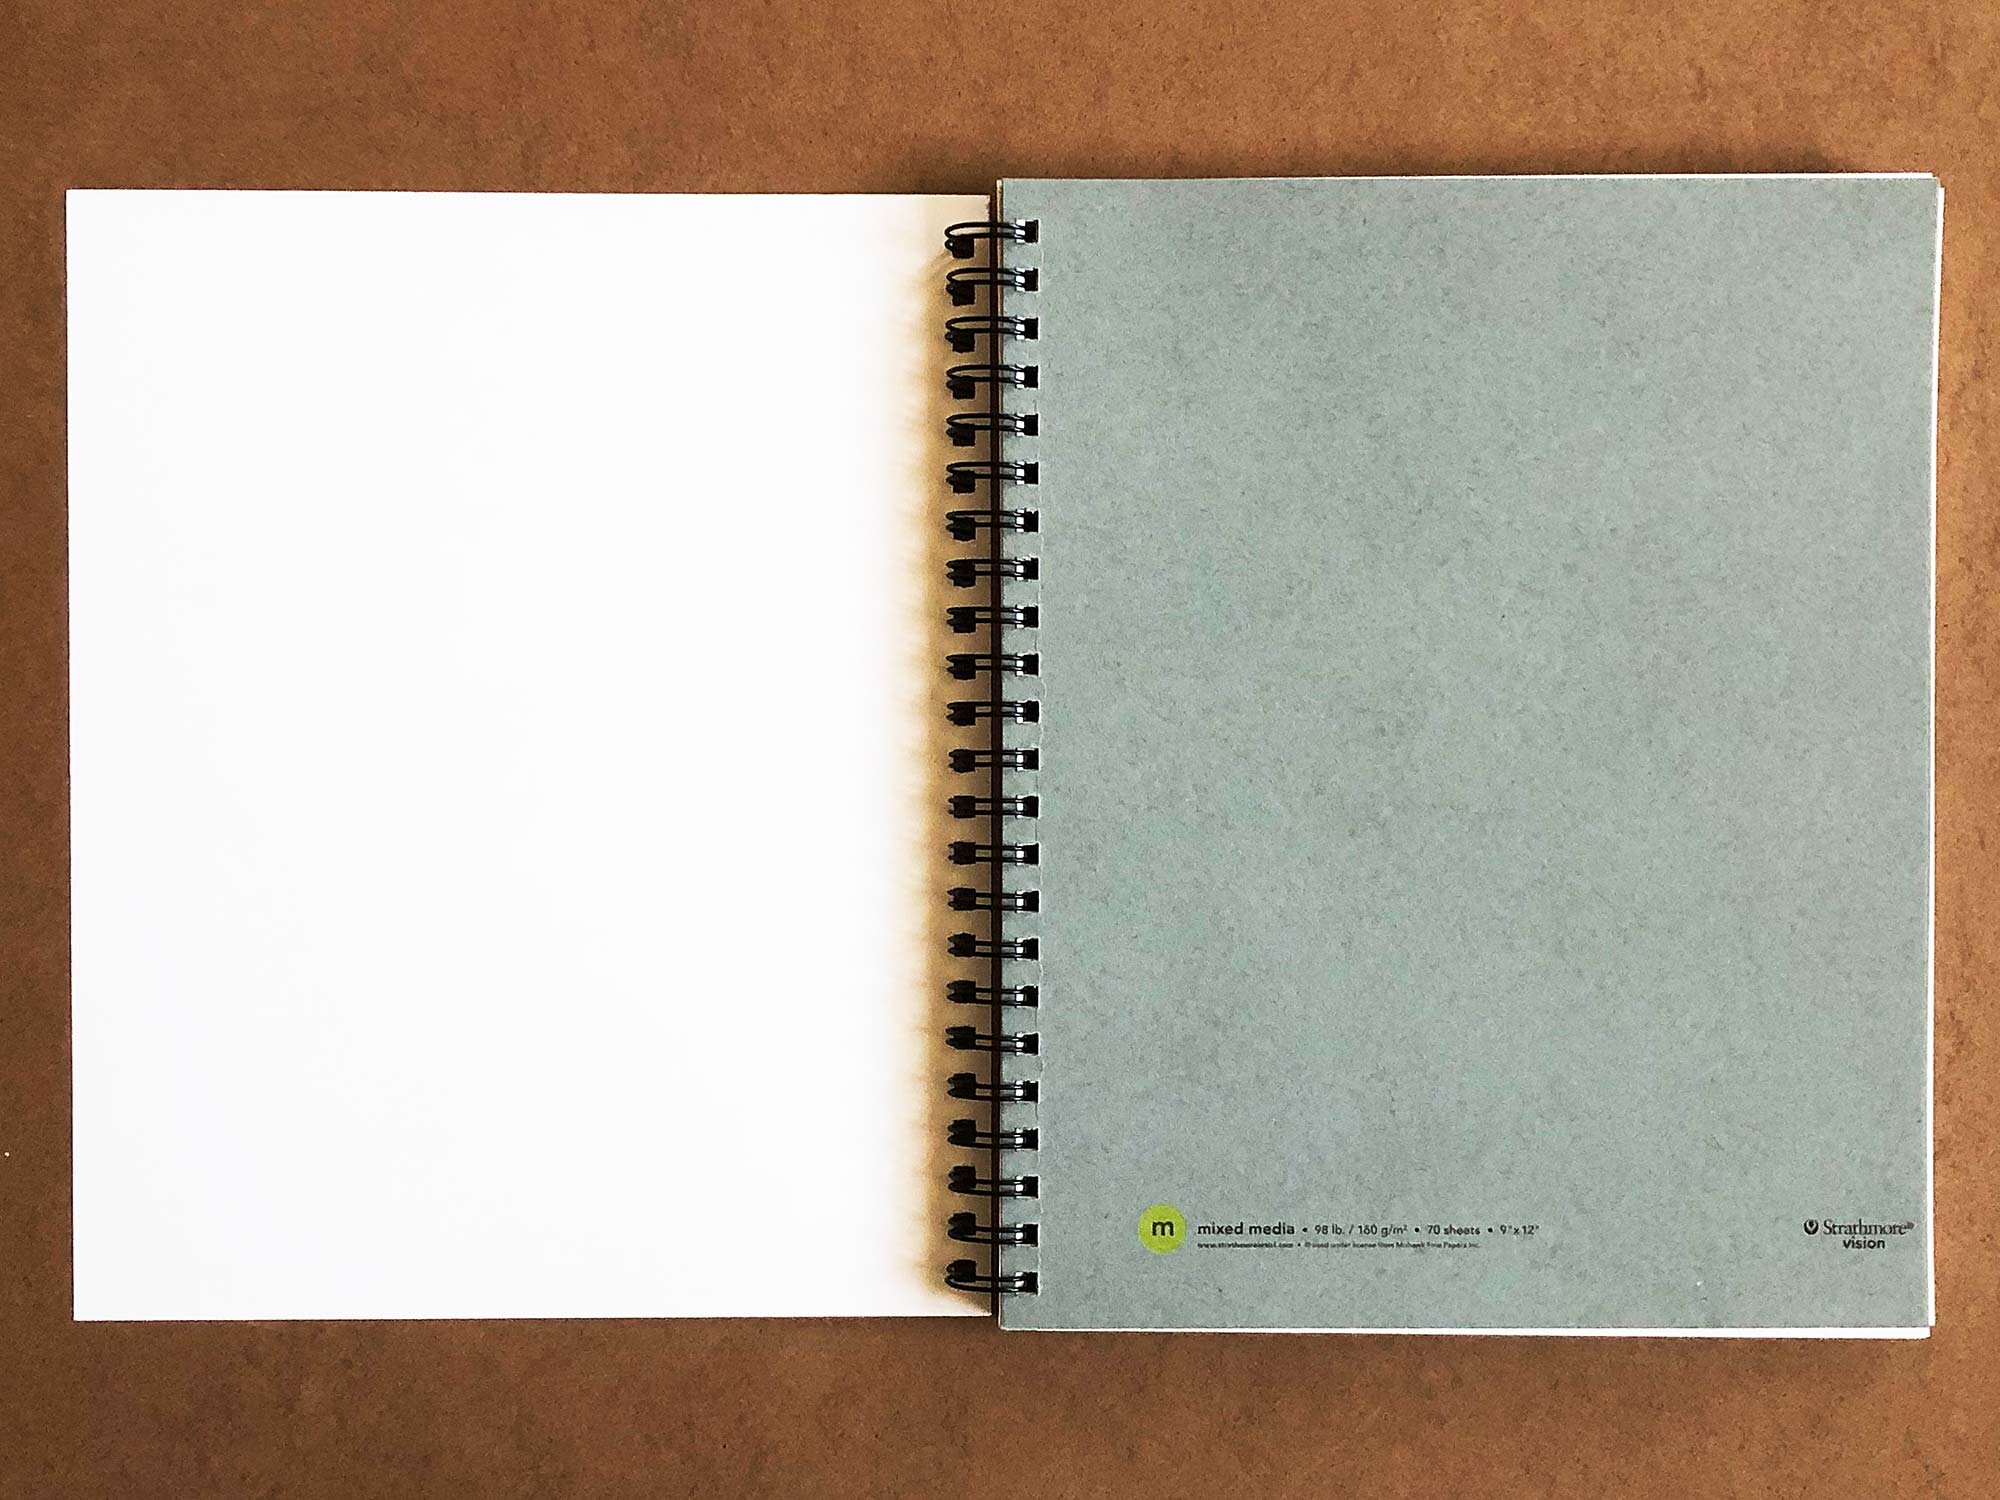
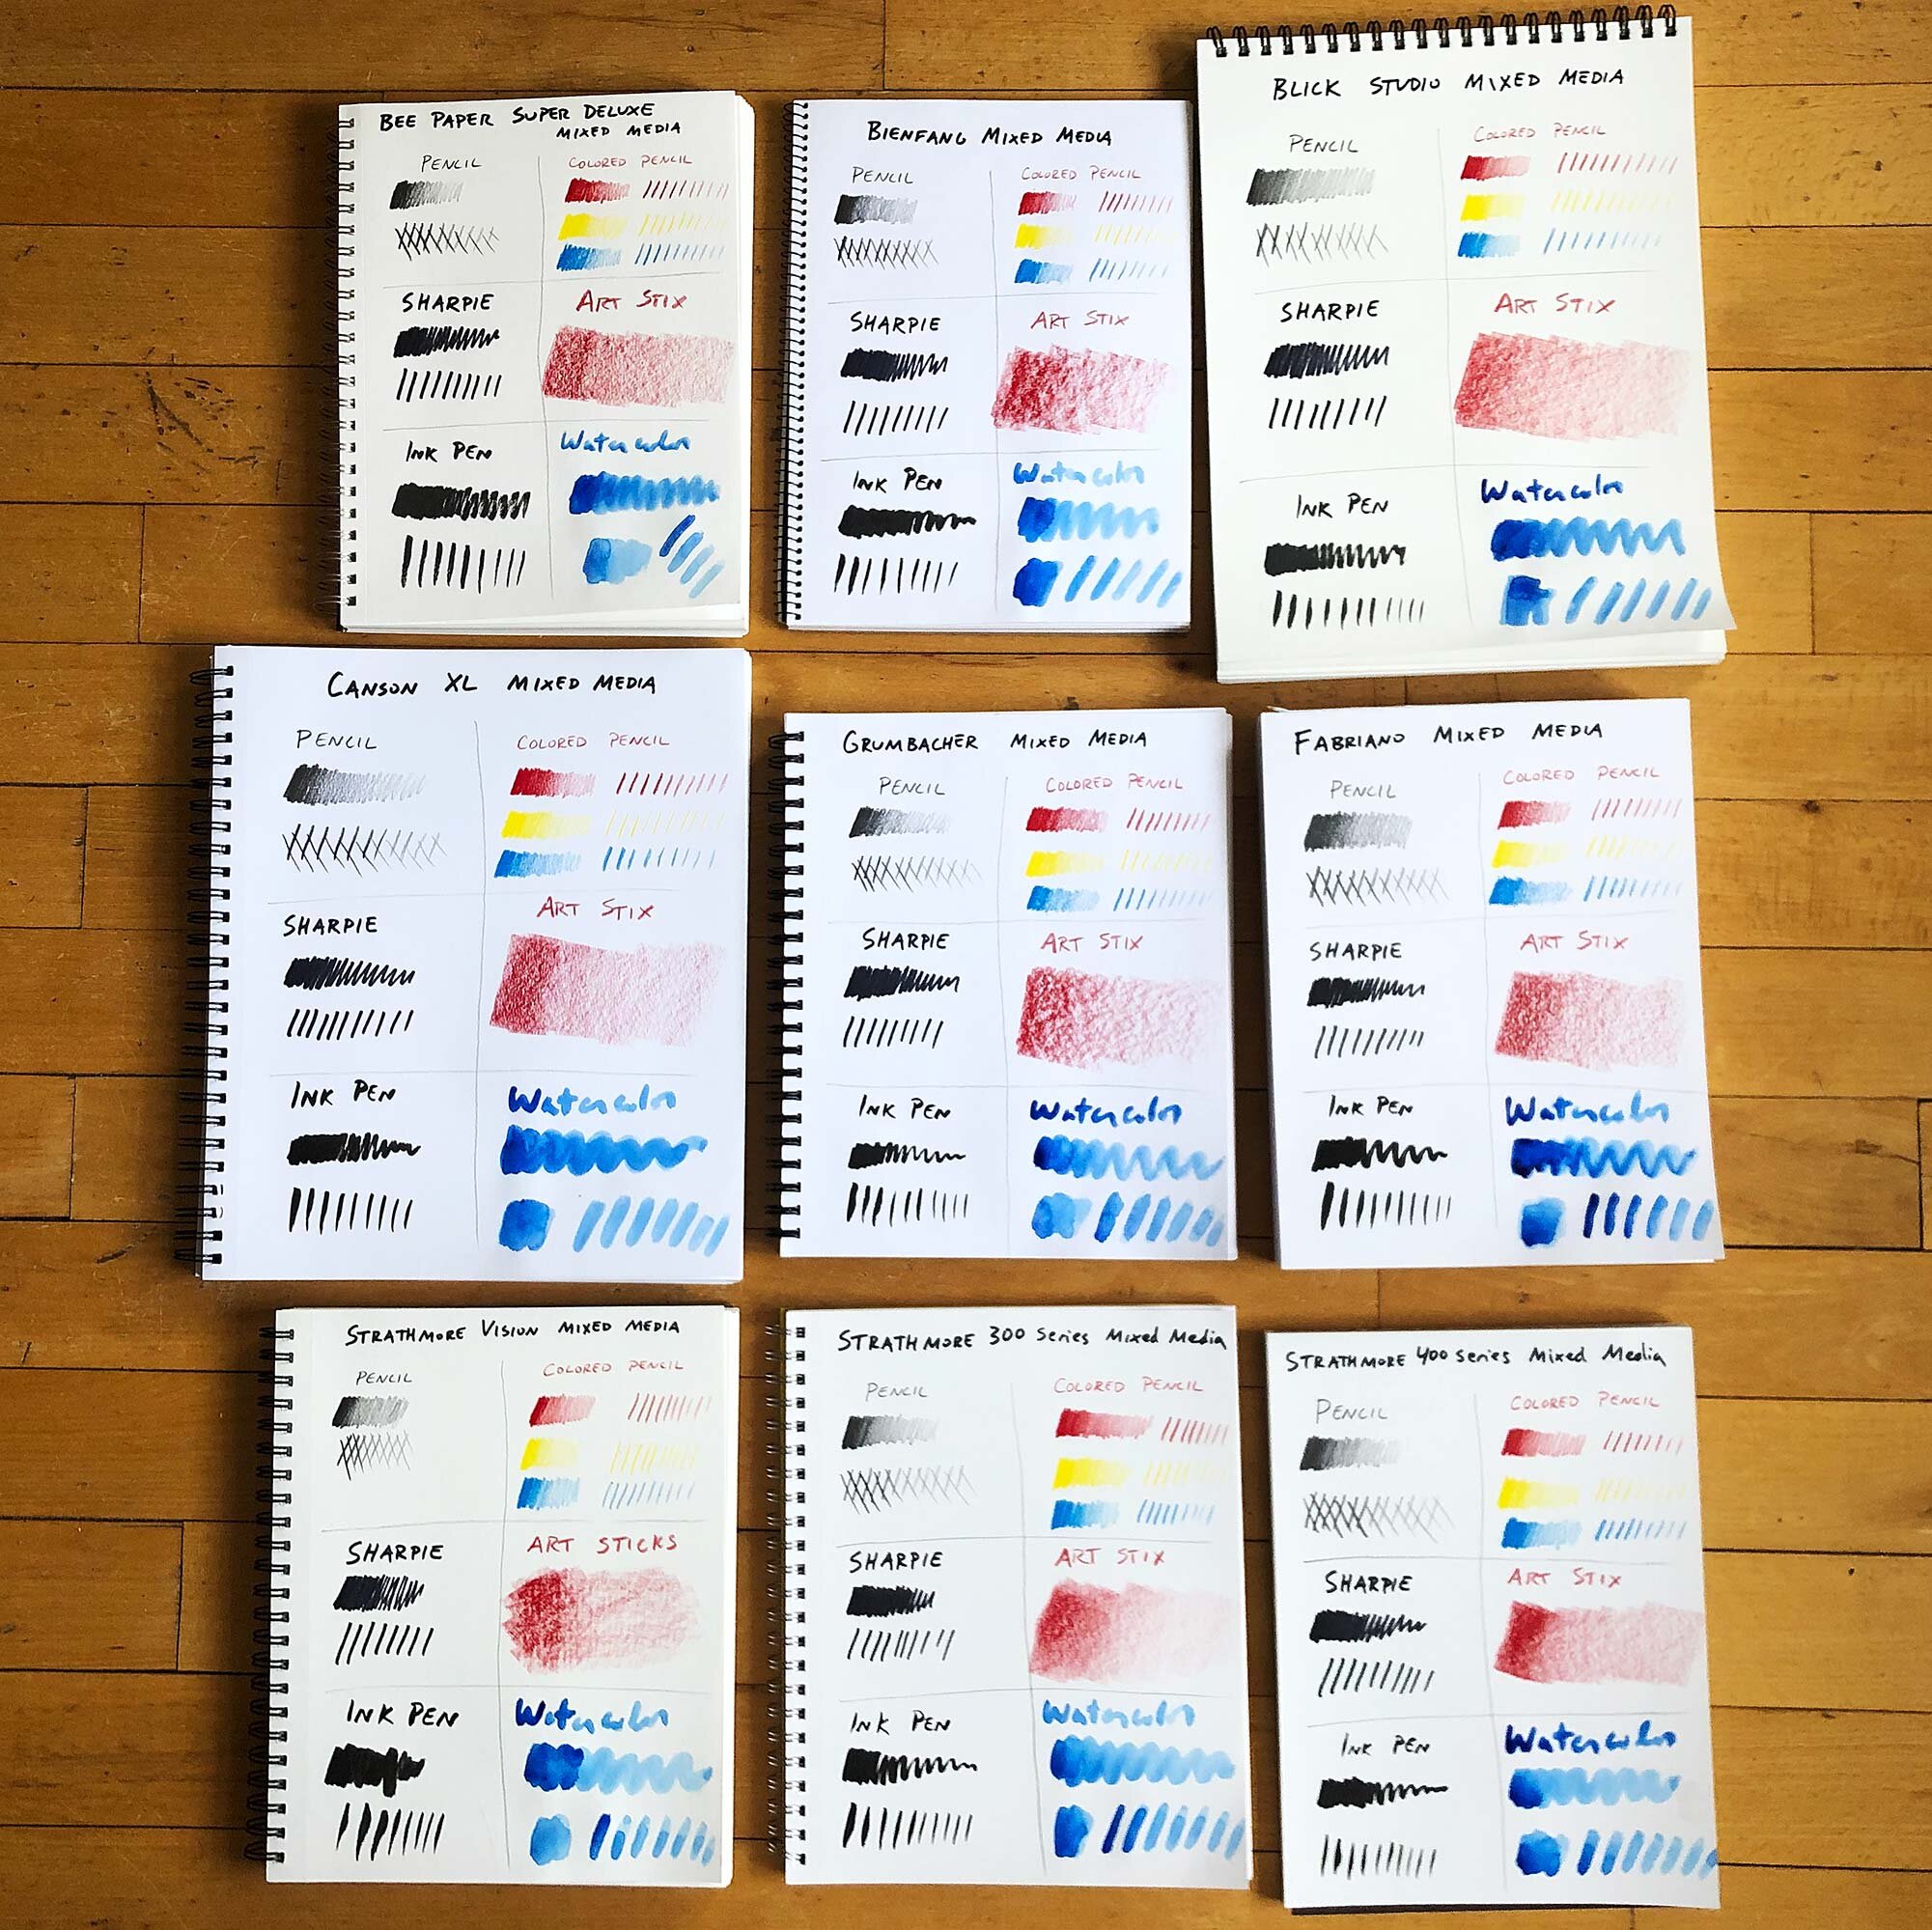
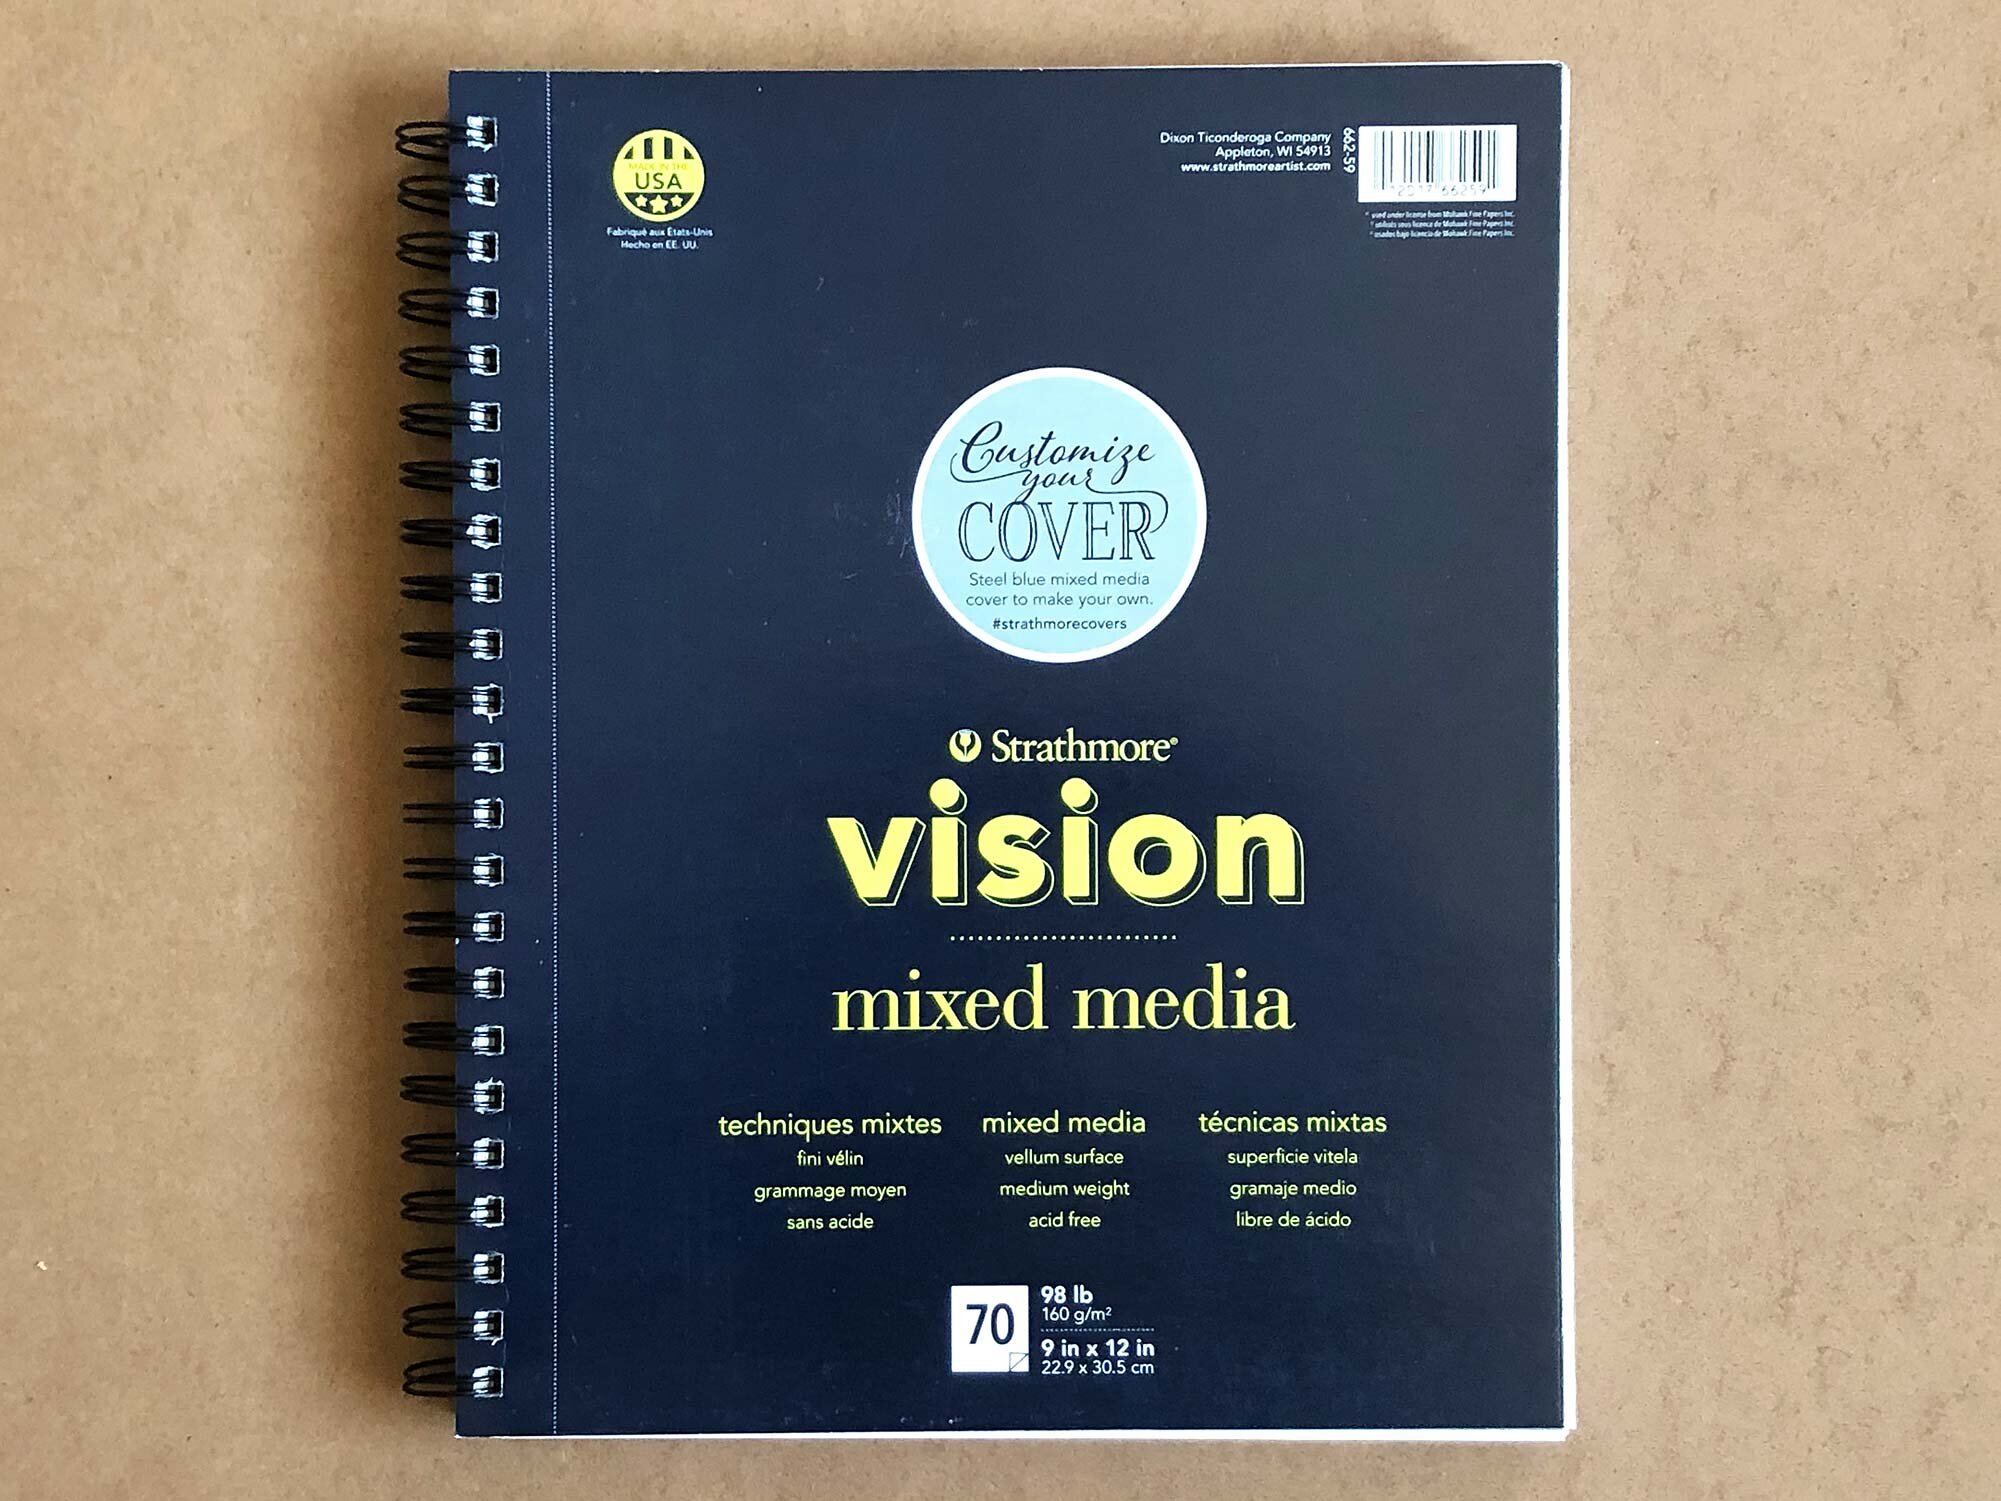
The Strathmore Vision Mixed Media sketchbook has great paper and a second, customizable cover in slate blue cardstock. Simply rip off the first cover and start drawing and painting! And the thicker, 98lb mixed media paper works well with pencils, crayons, markers, and can even be used with ink and light washes of watercolor. Any mixed media pad is better than a drawing sketchbook because of the thicker paper (check out our mixed media sketchbook review here) but this pad is a great option for kids, teenagers, and students. It usually costs around $10 for a 9x12'“ pad.

The customizable, blank cover is a great feature of the Strathmore Vision mixed media pad.

The customizable, blank cover is a great feature of the Strathmore Vision mixed media pad.


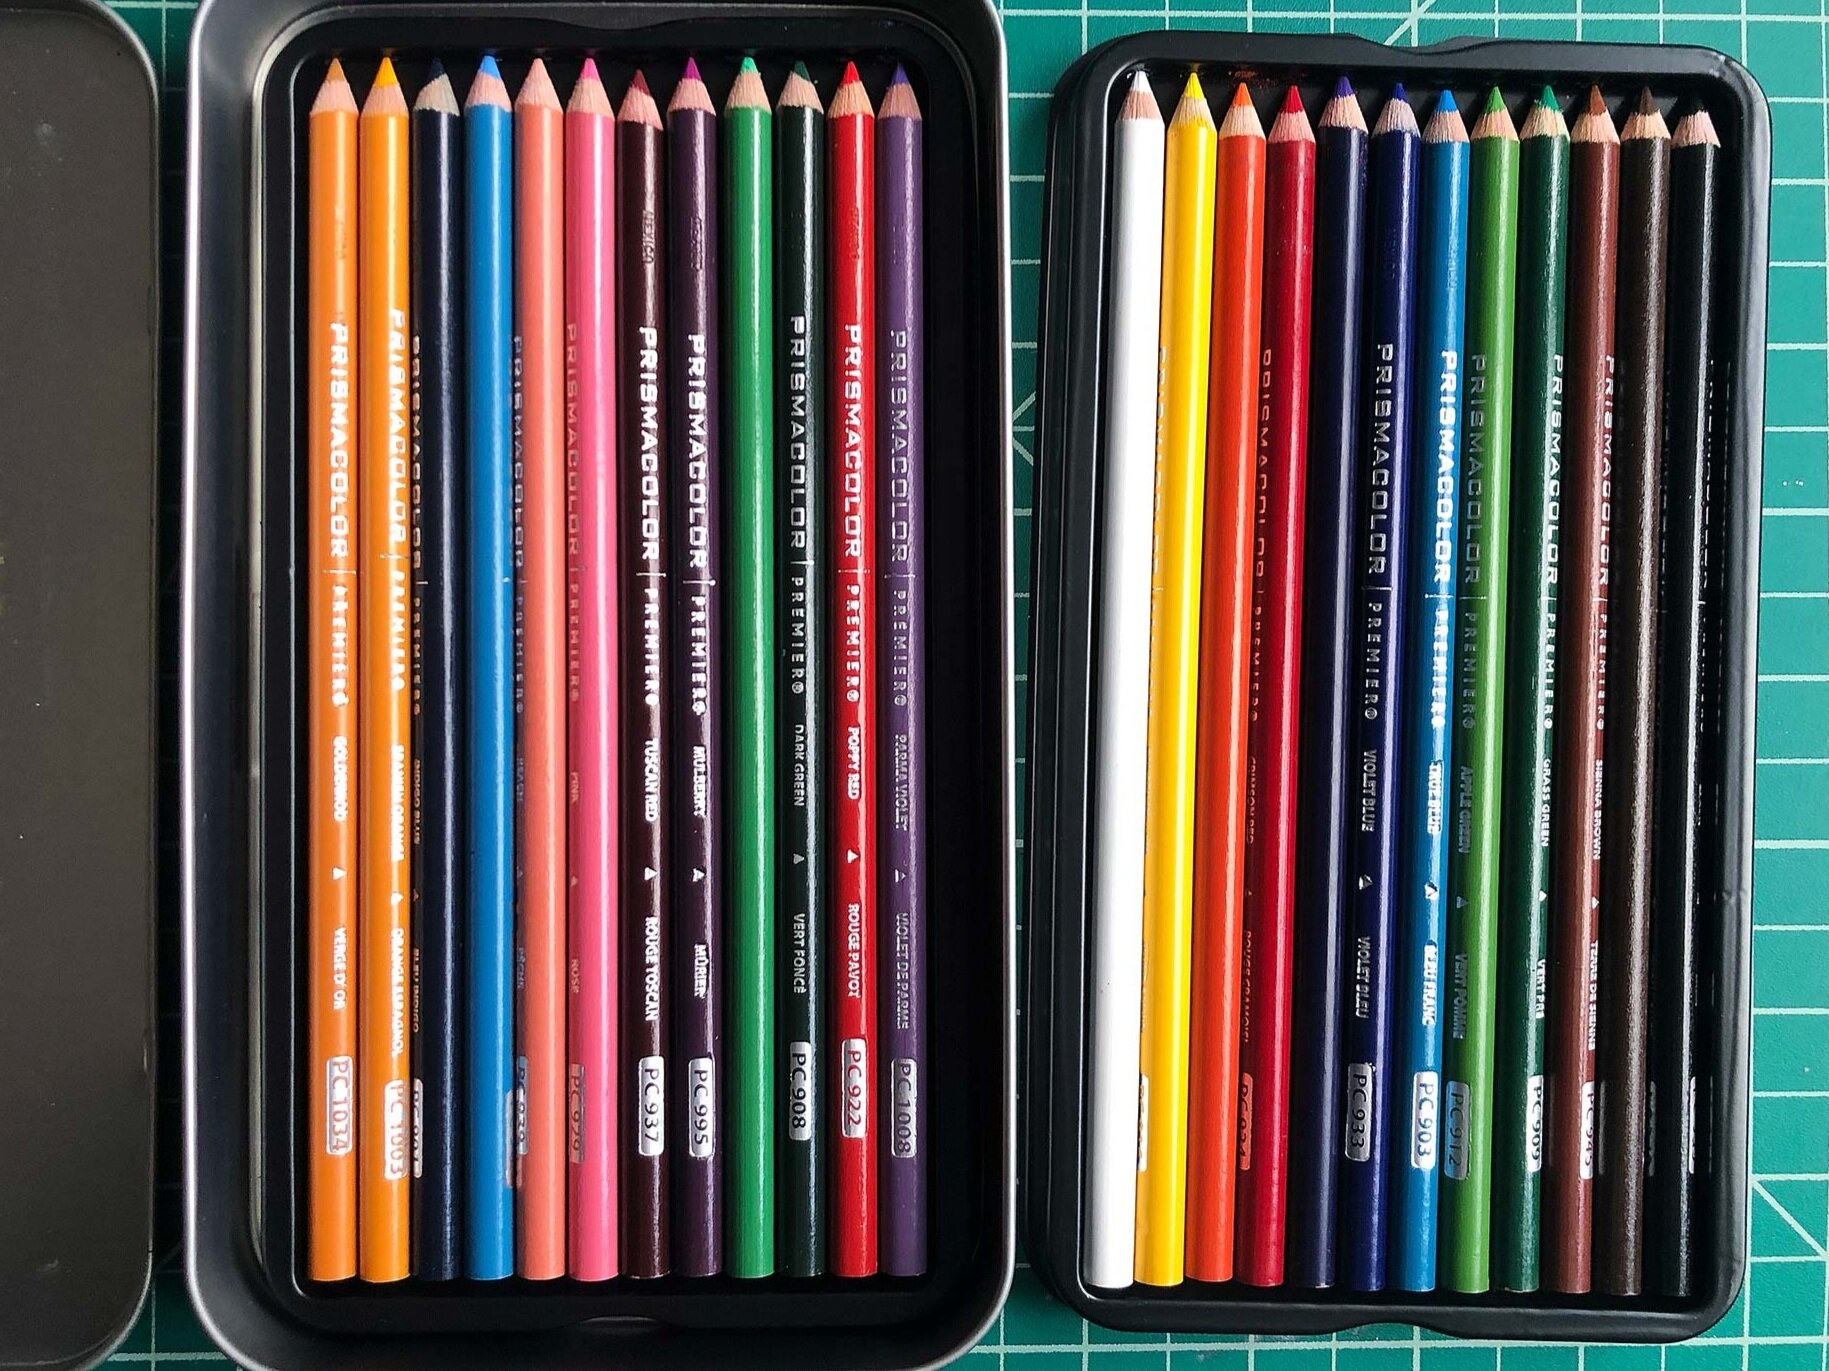
Prismacolor Premier Colored Pencils

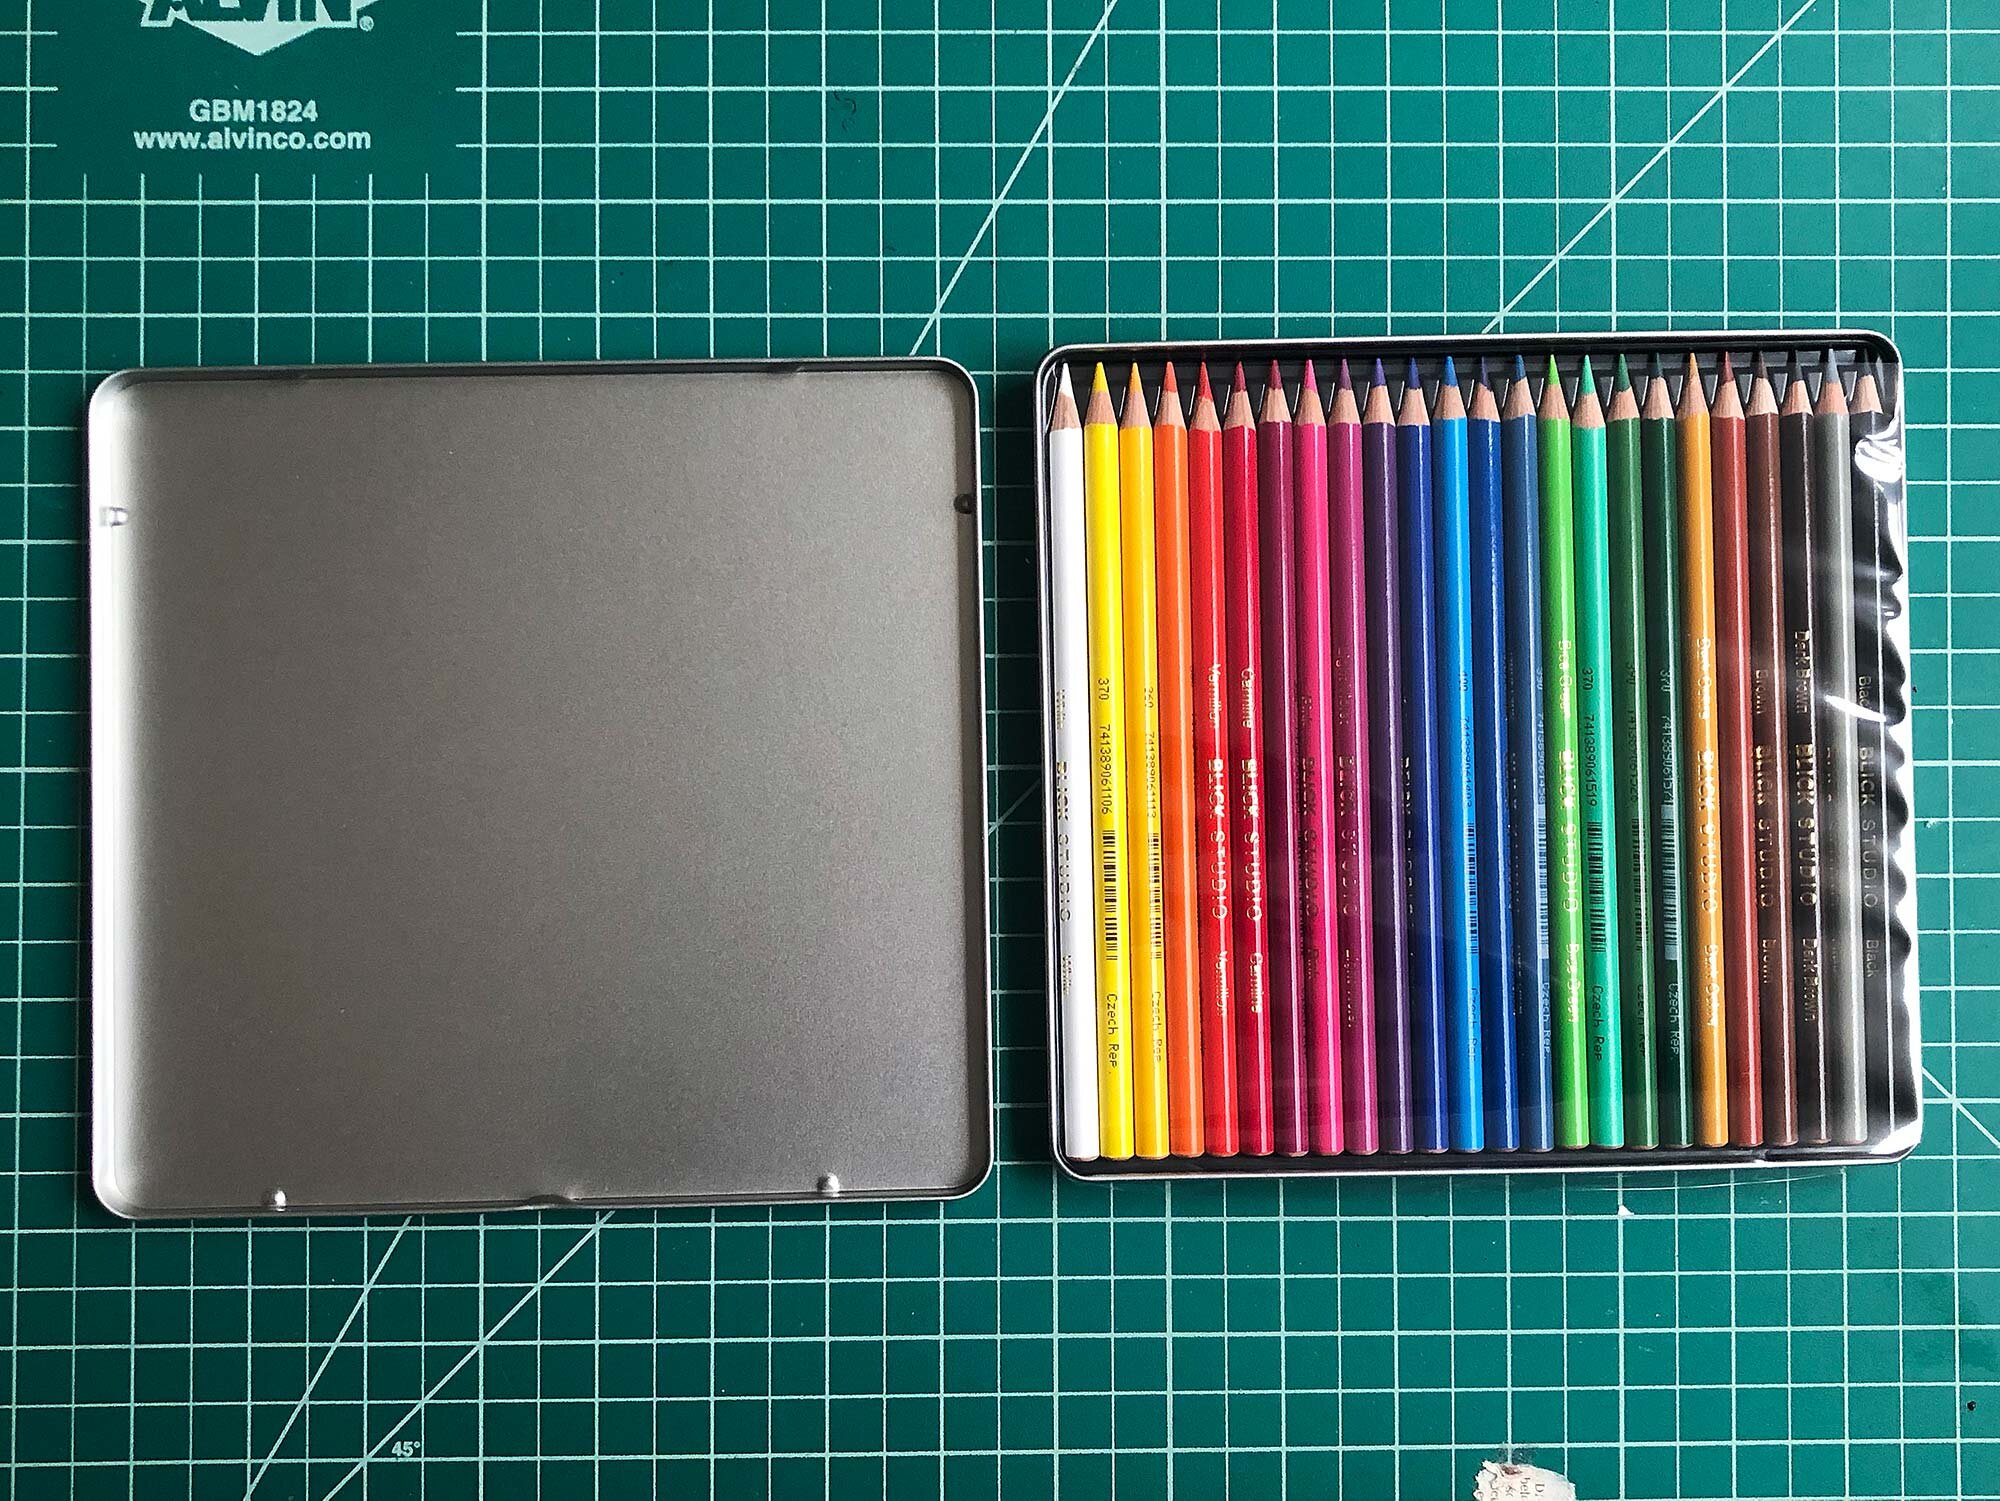
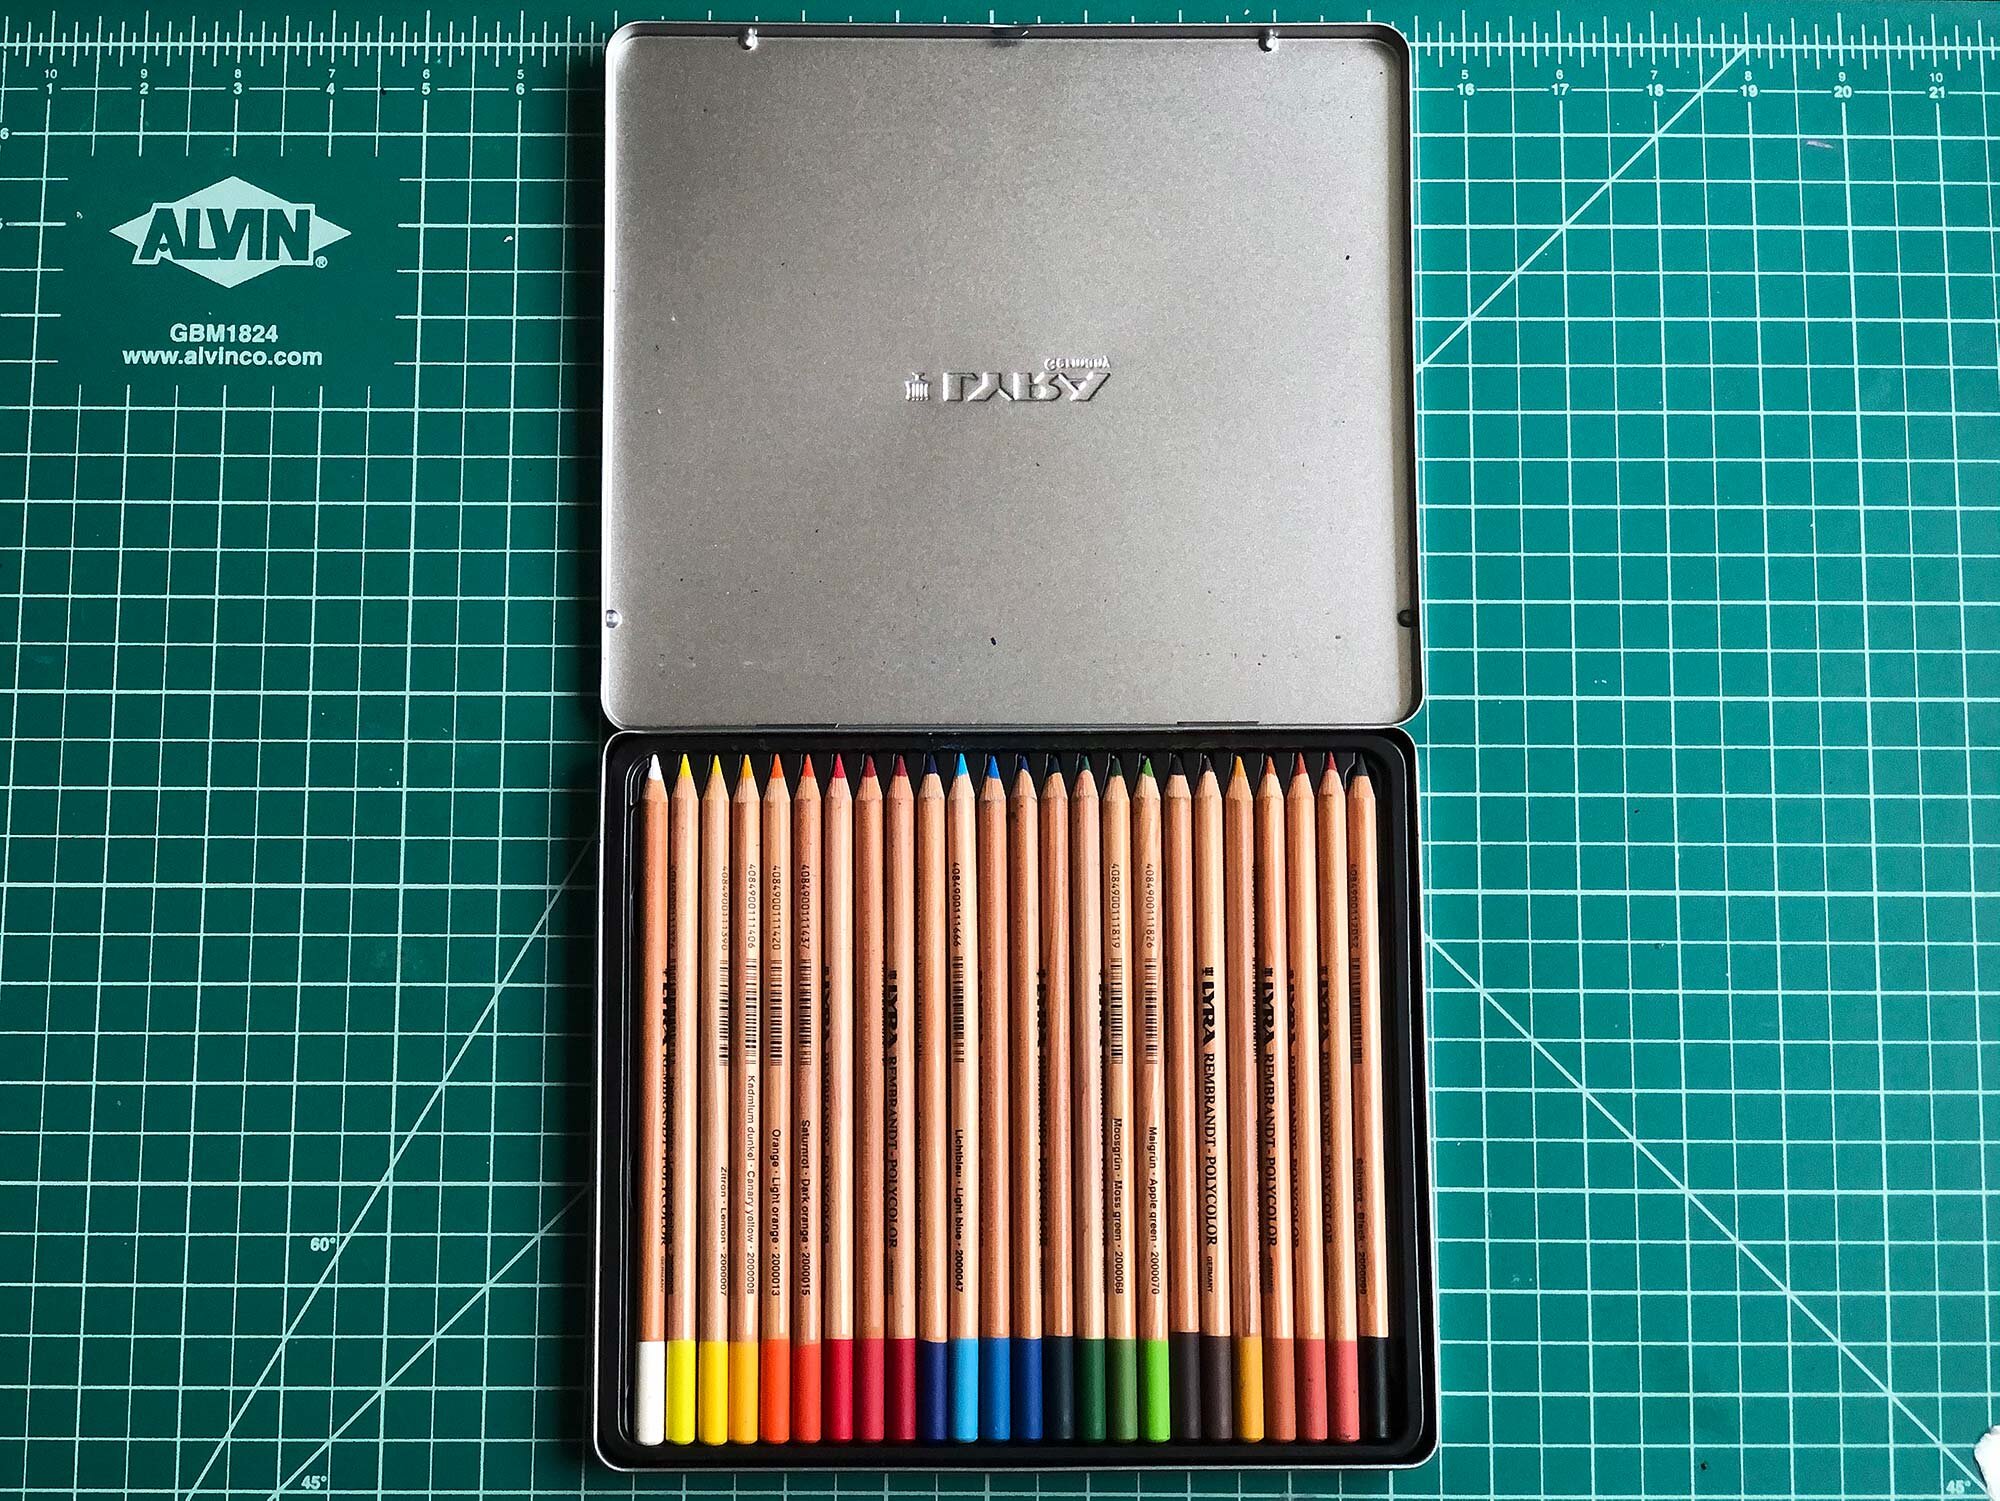
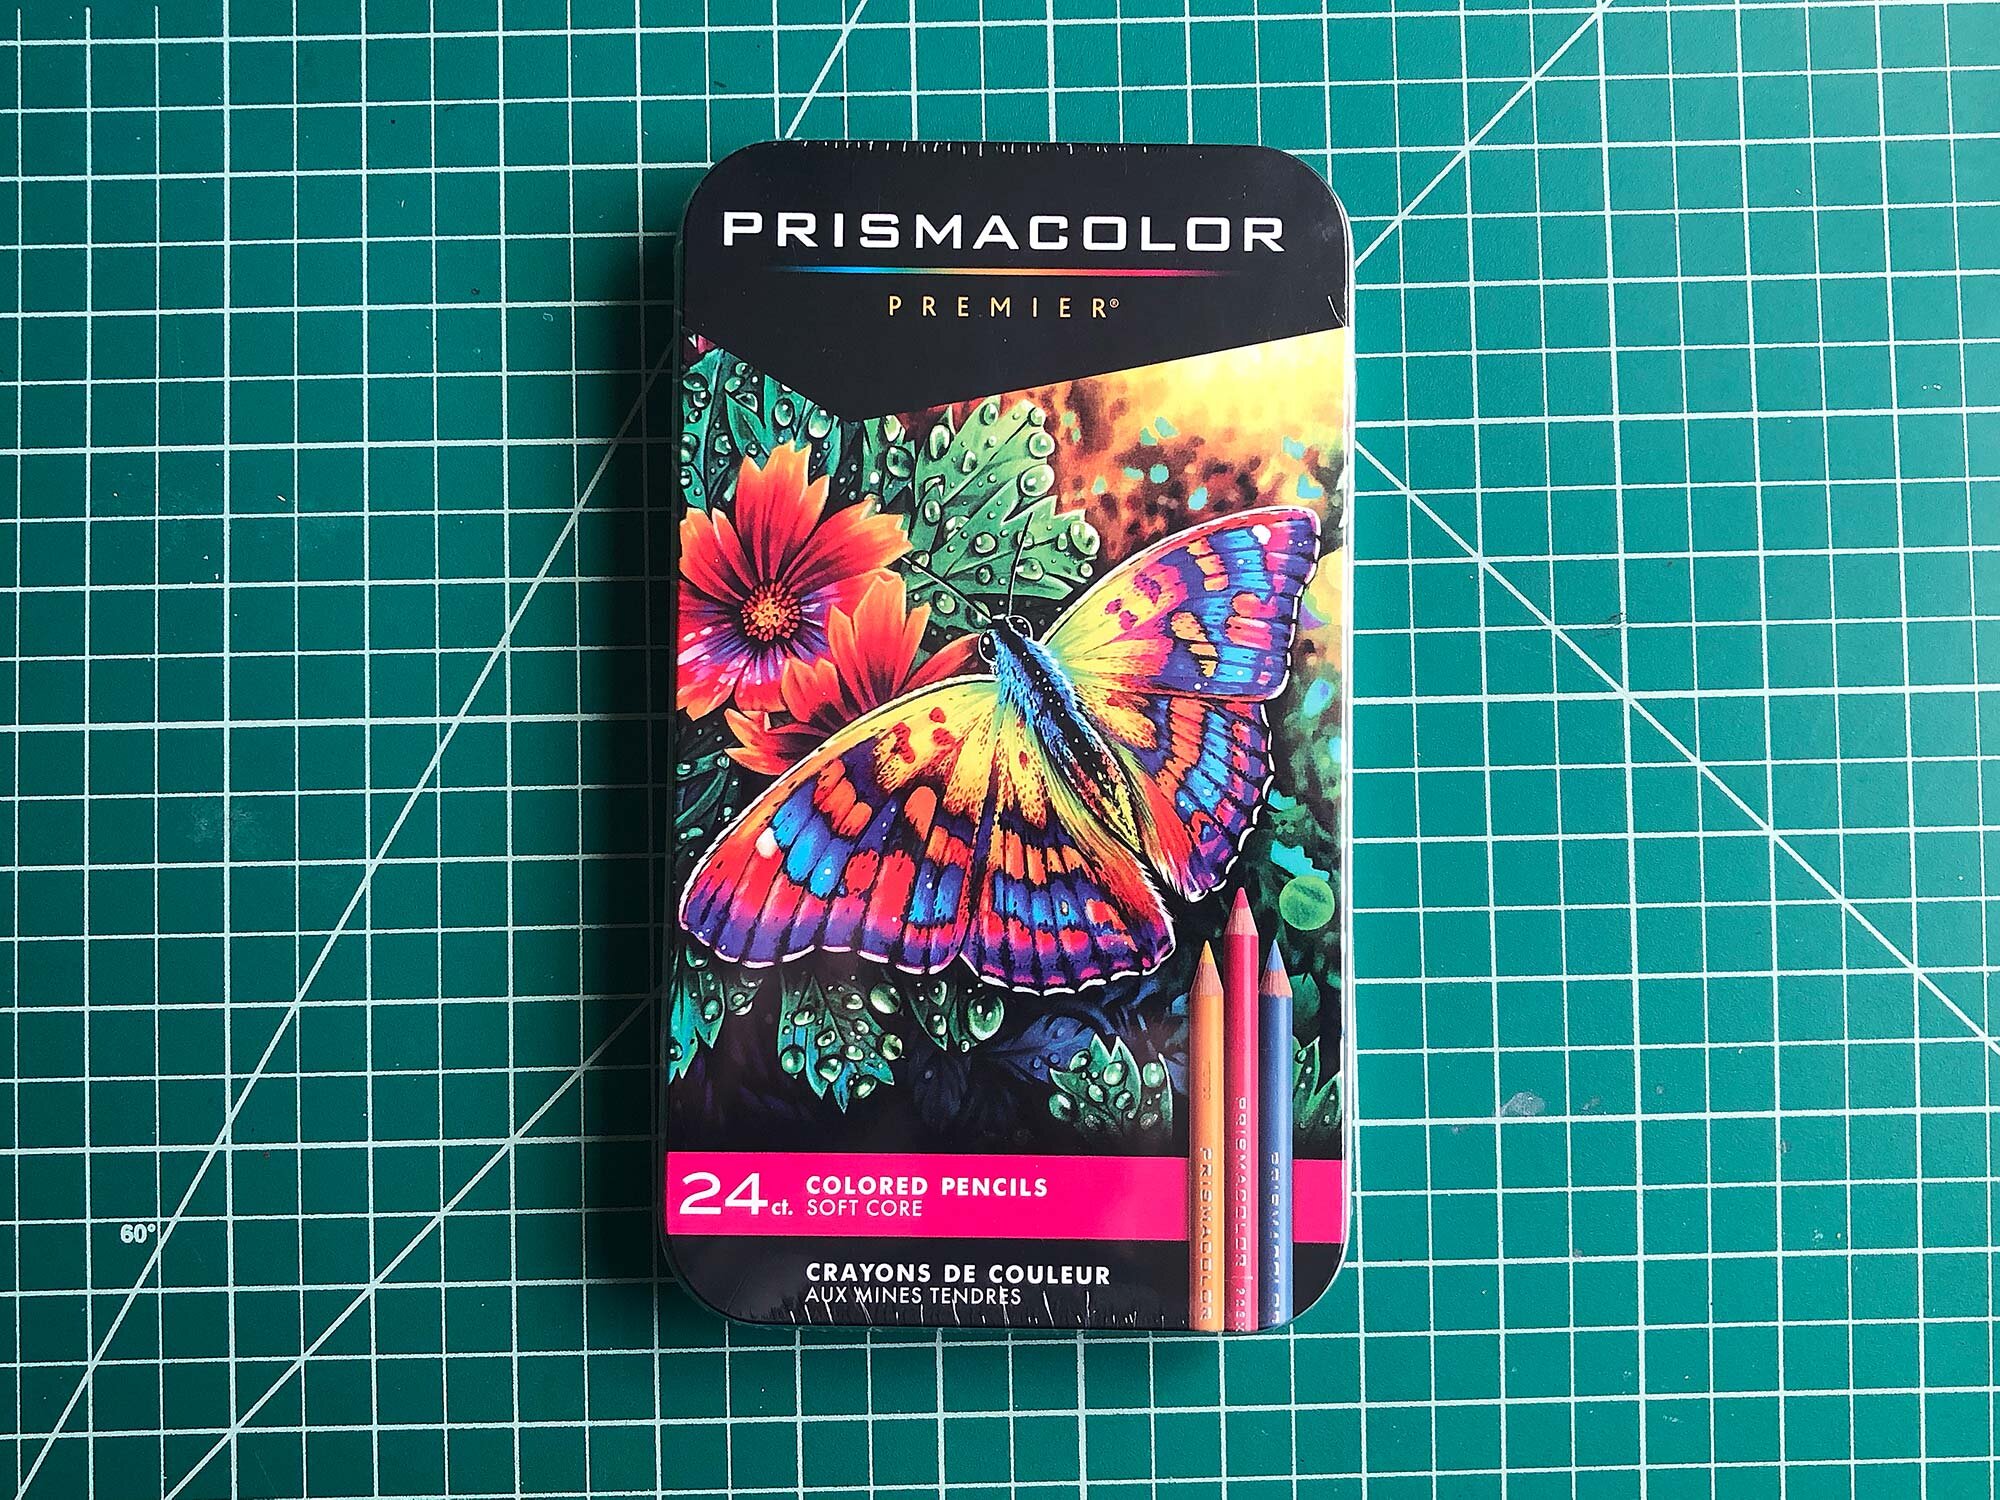
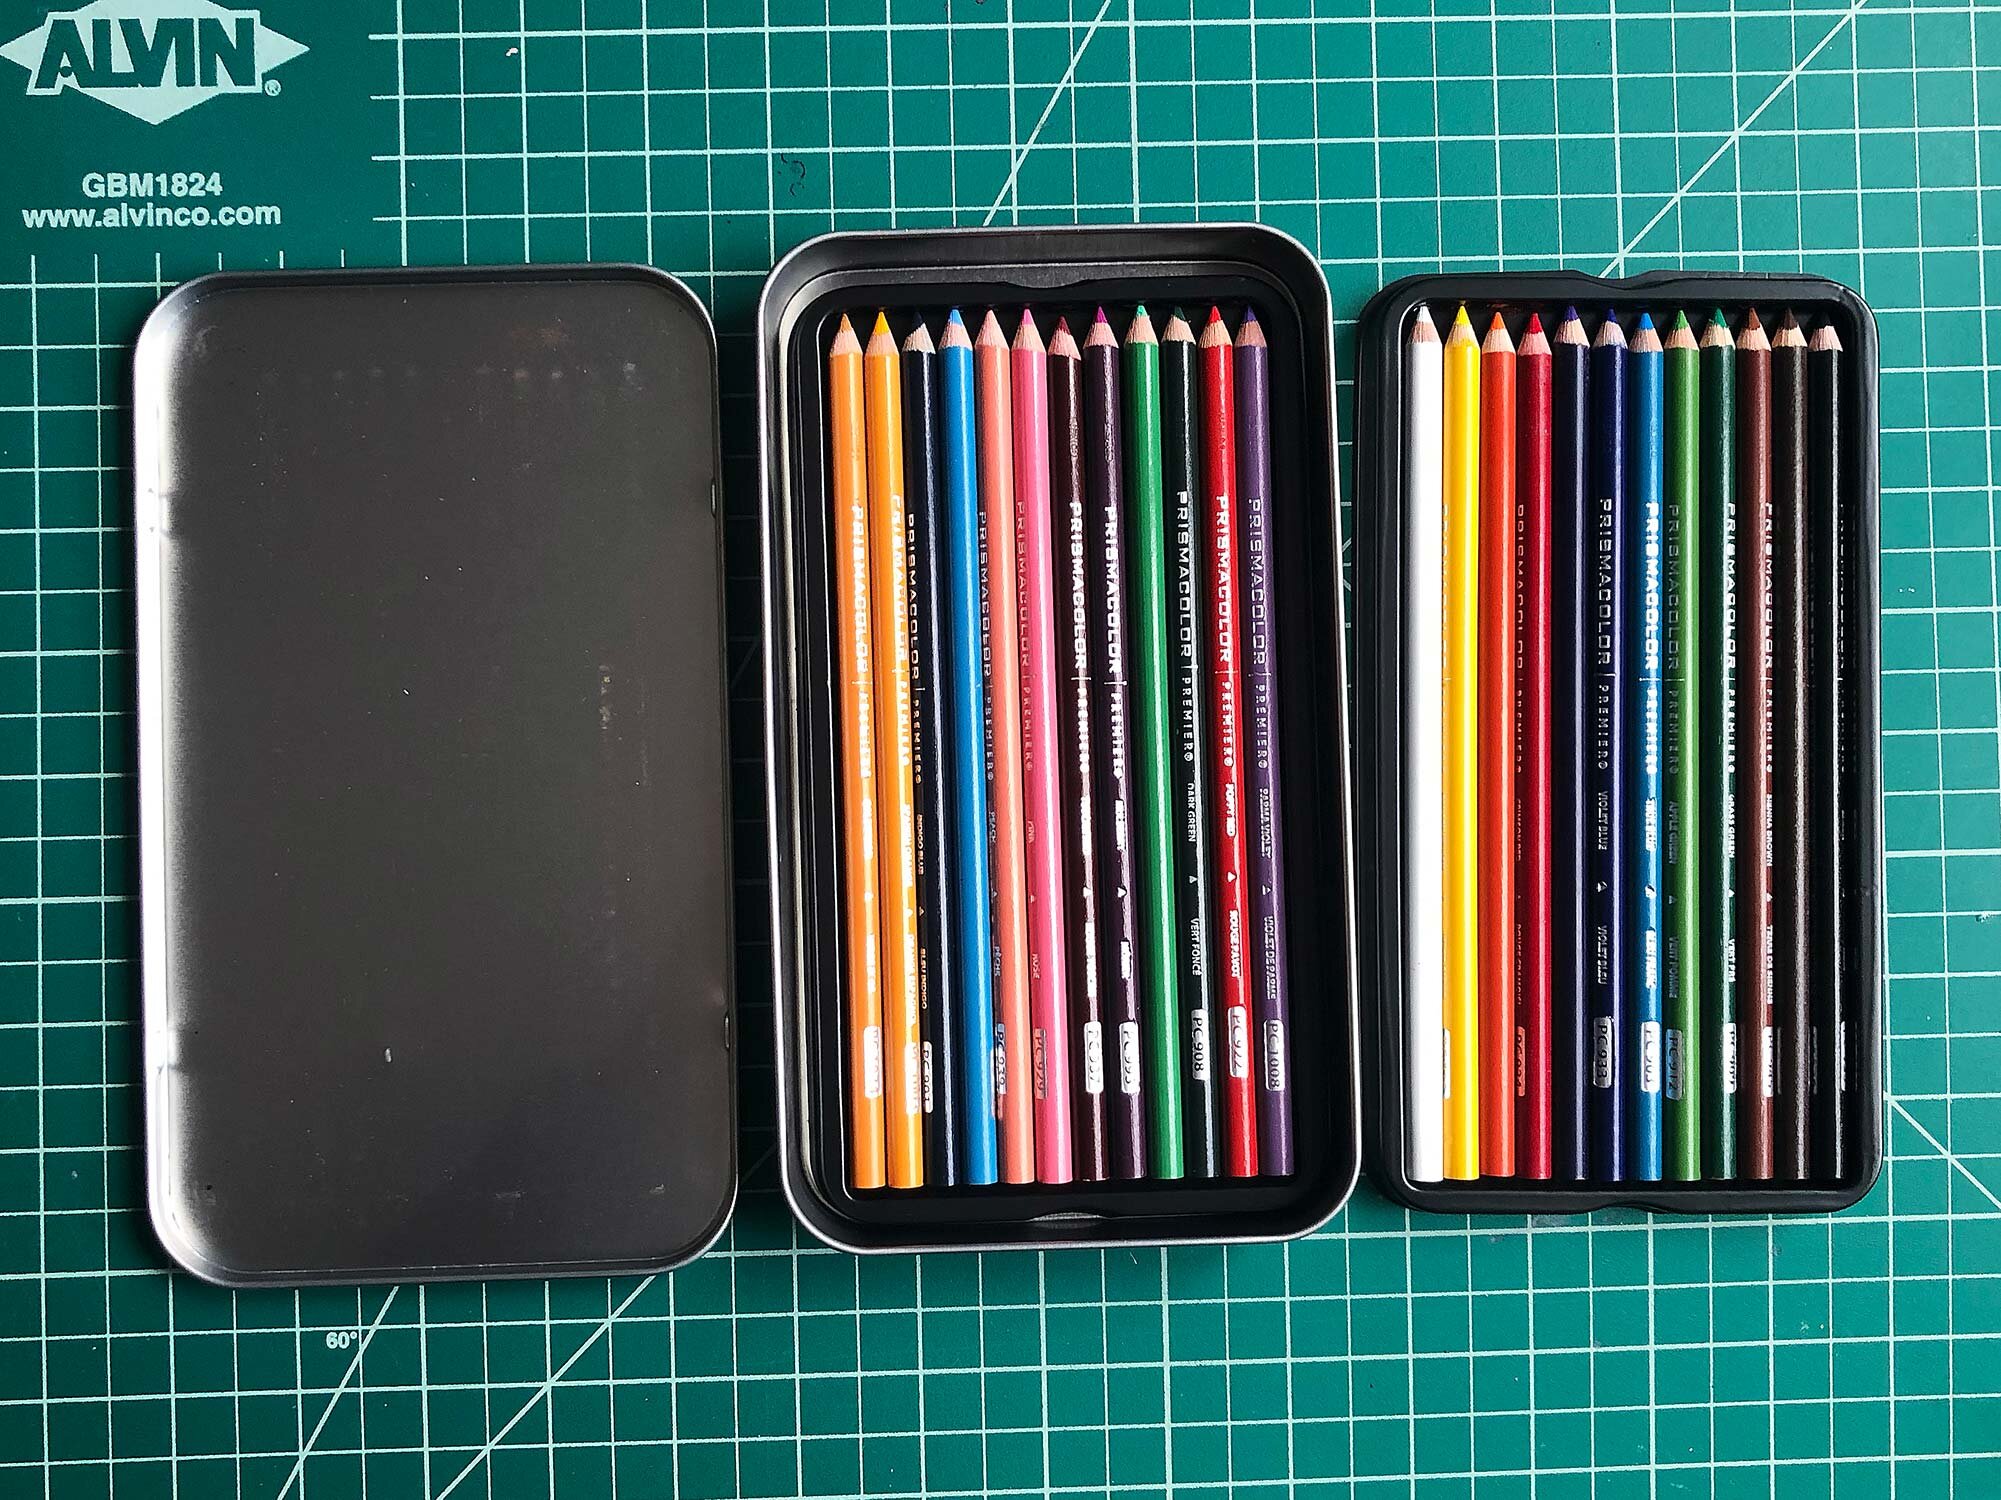
The Prismacolor Premier 24 count pack in a metal tin with two plastic trays of pencils.

The Prismacolor Premier 24 count pack in a metal tin with two plastic trays of pencils.

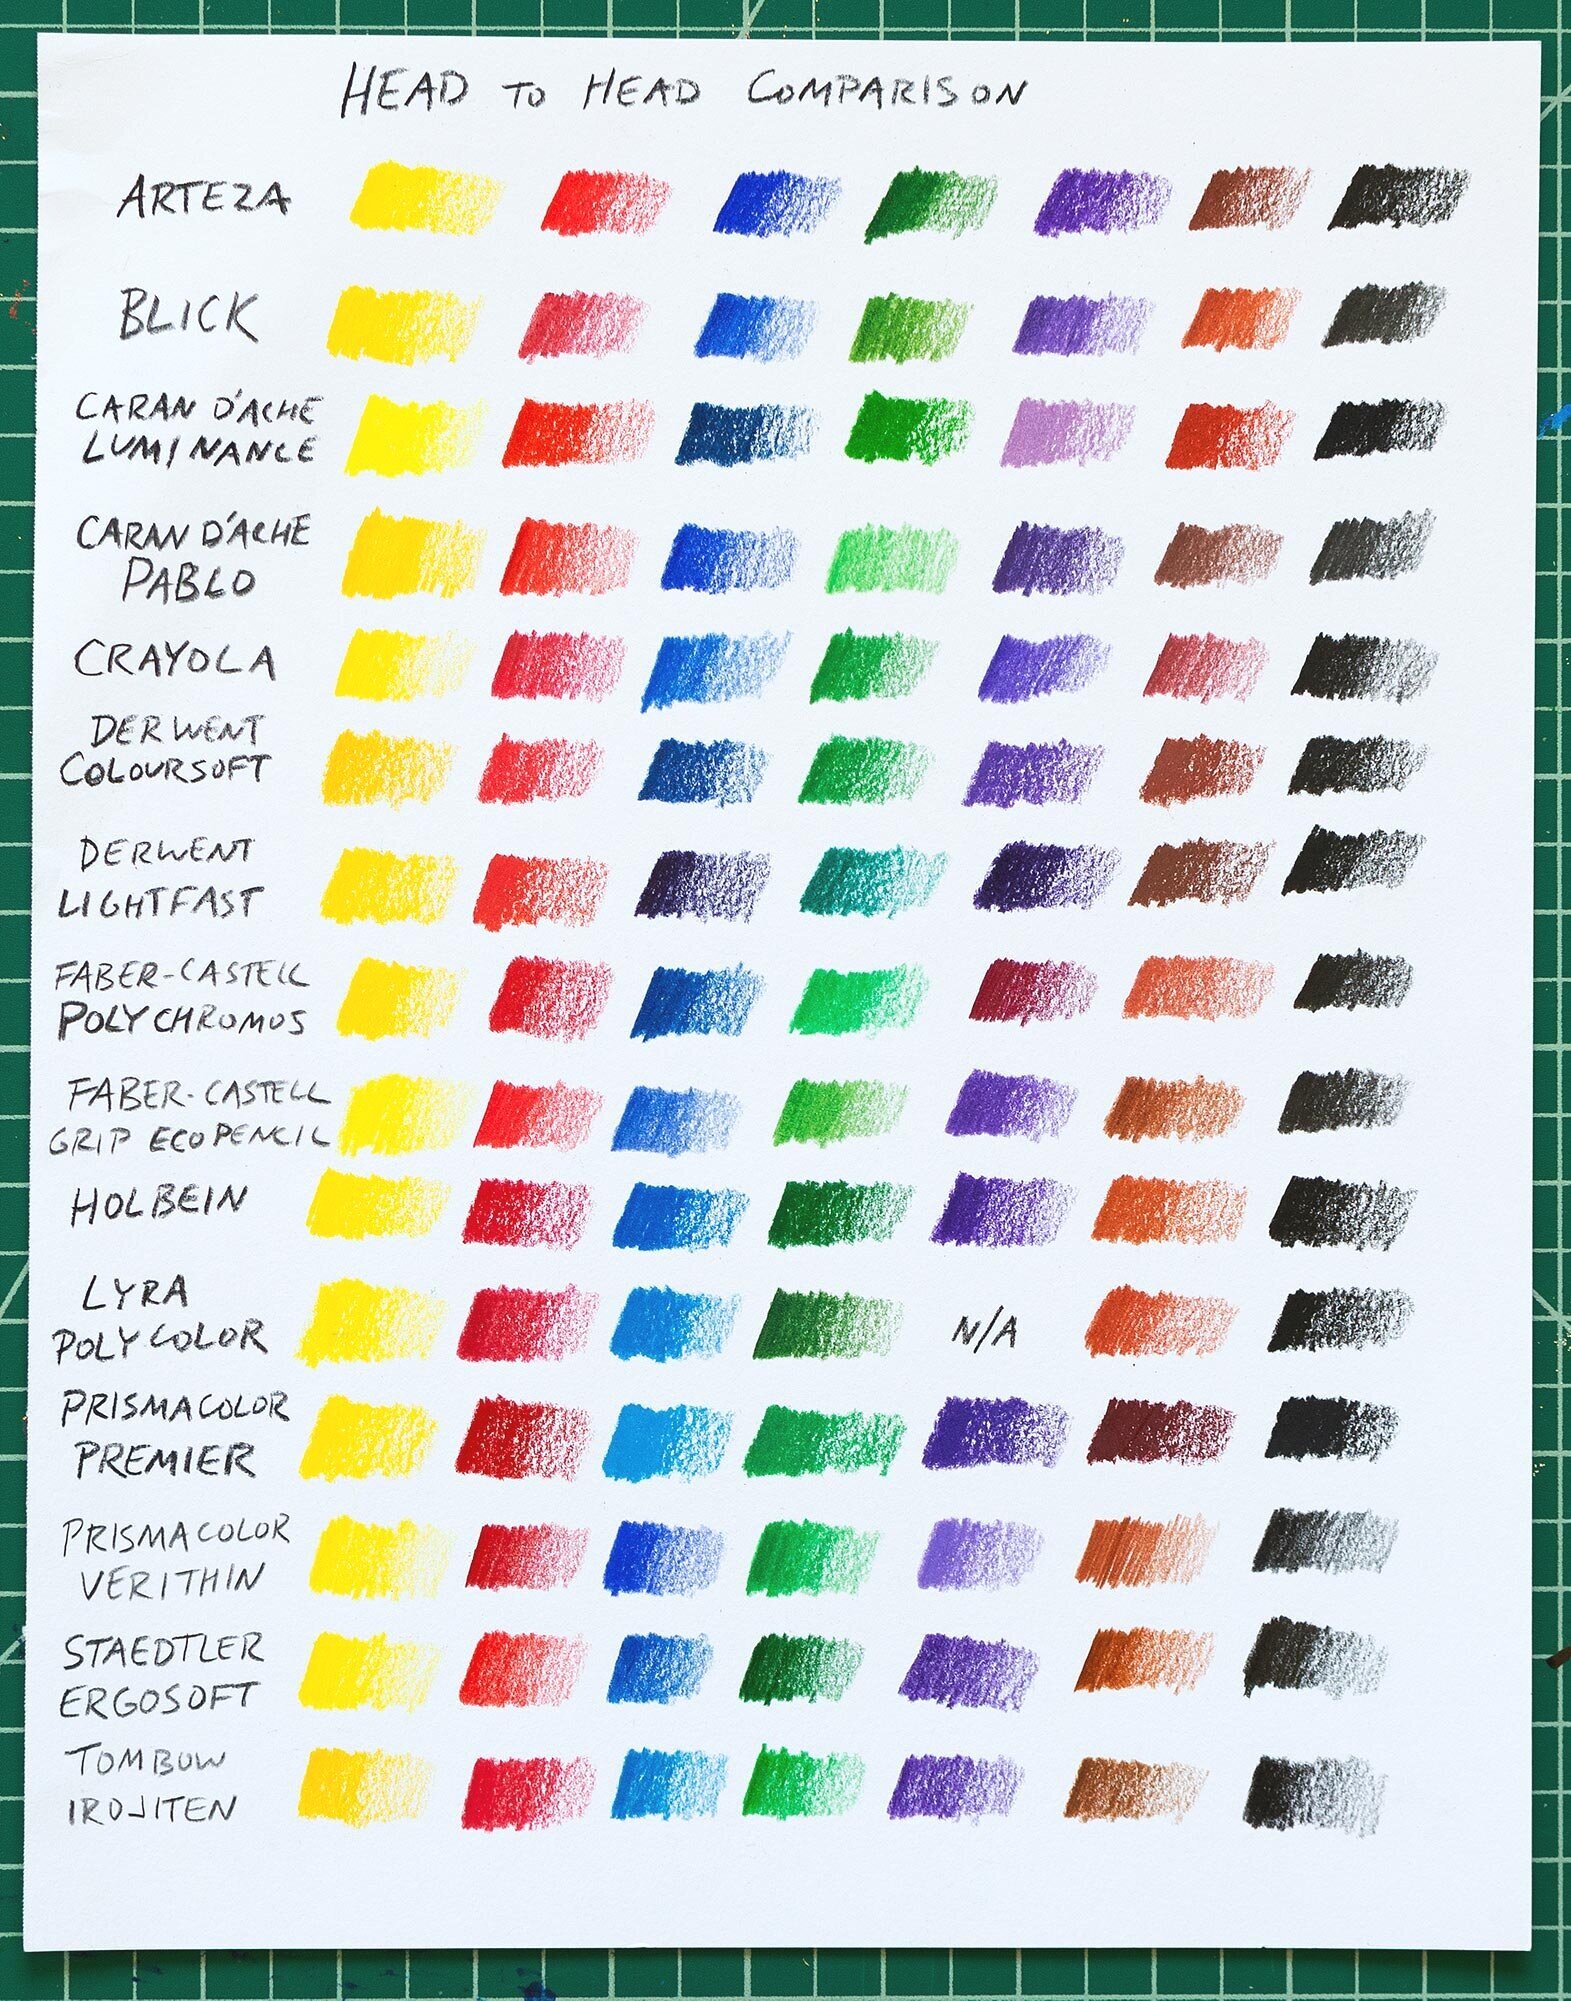
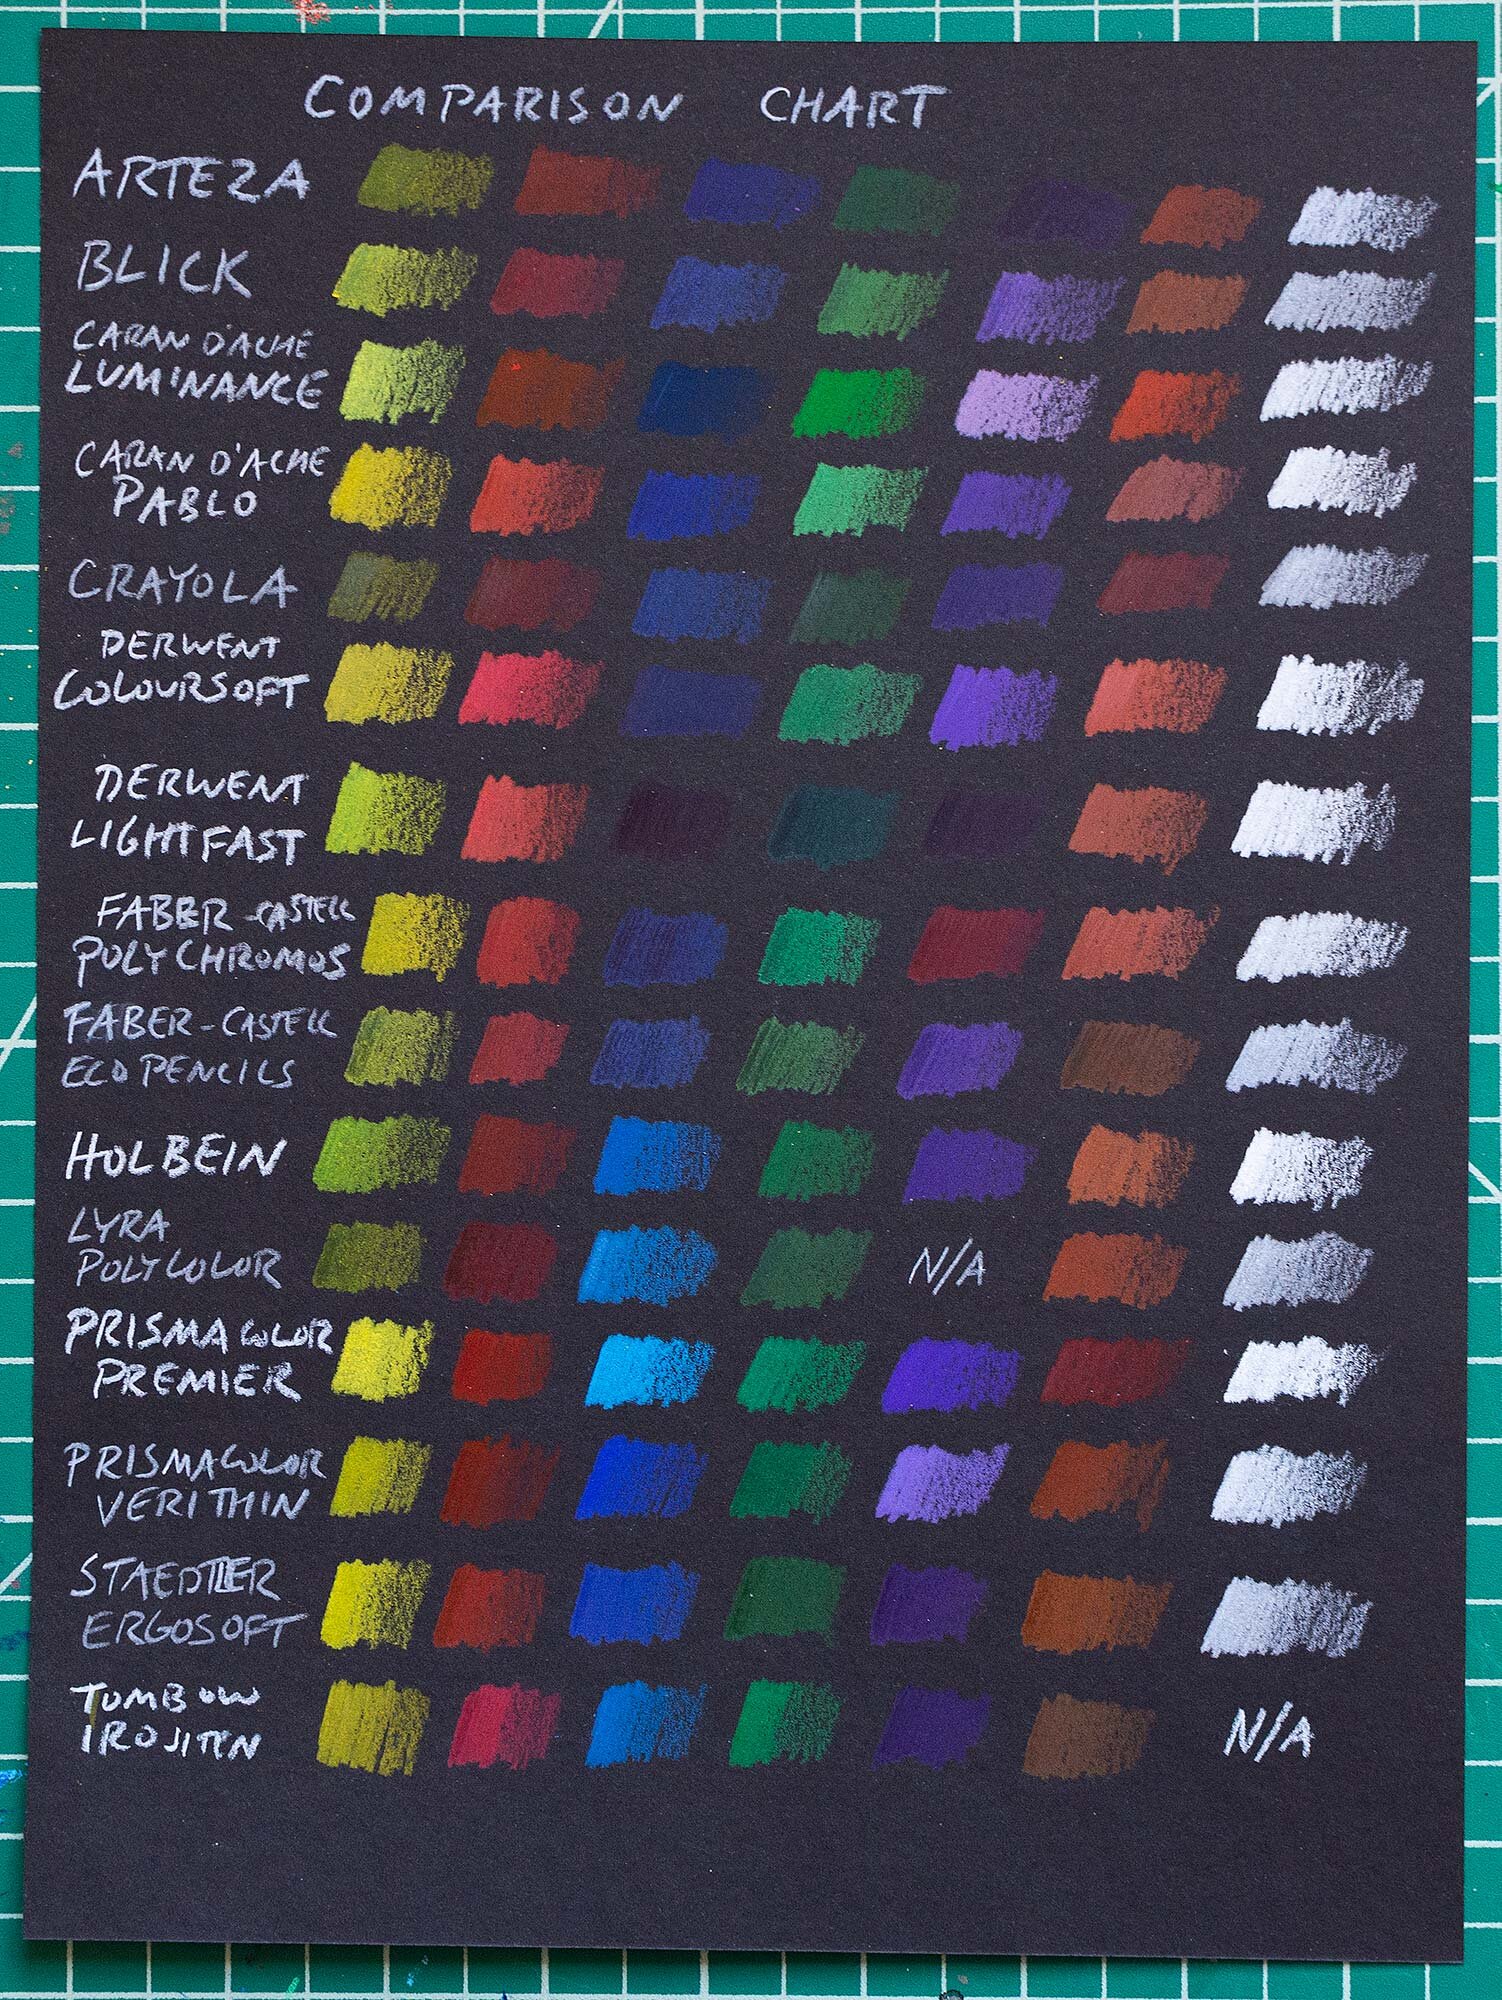
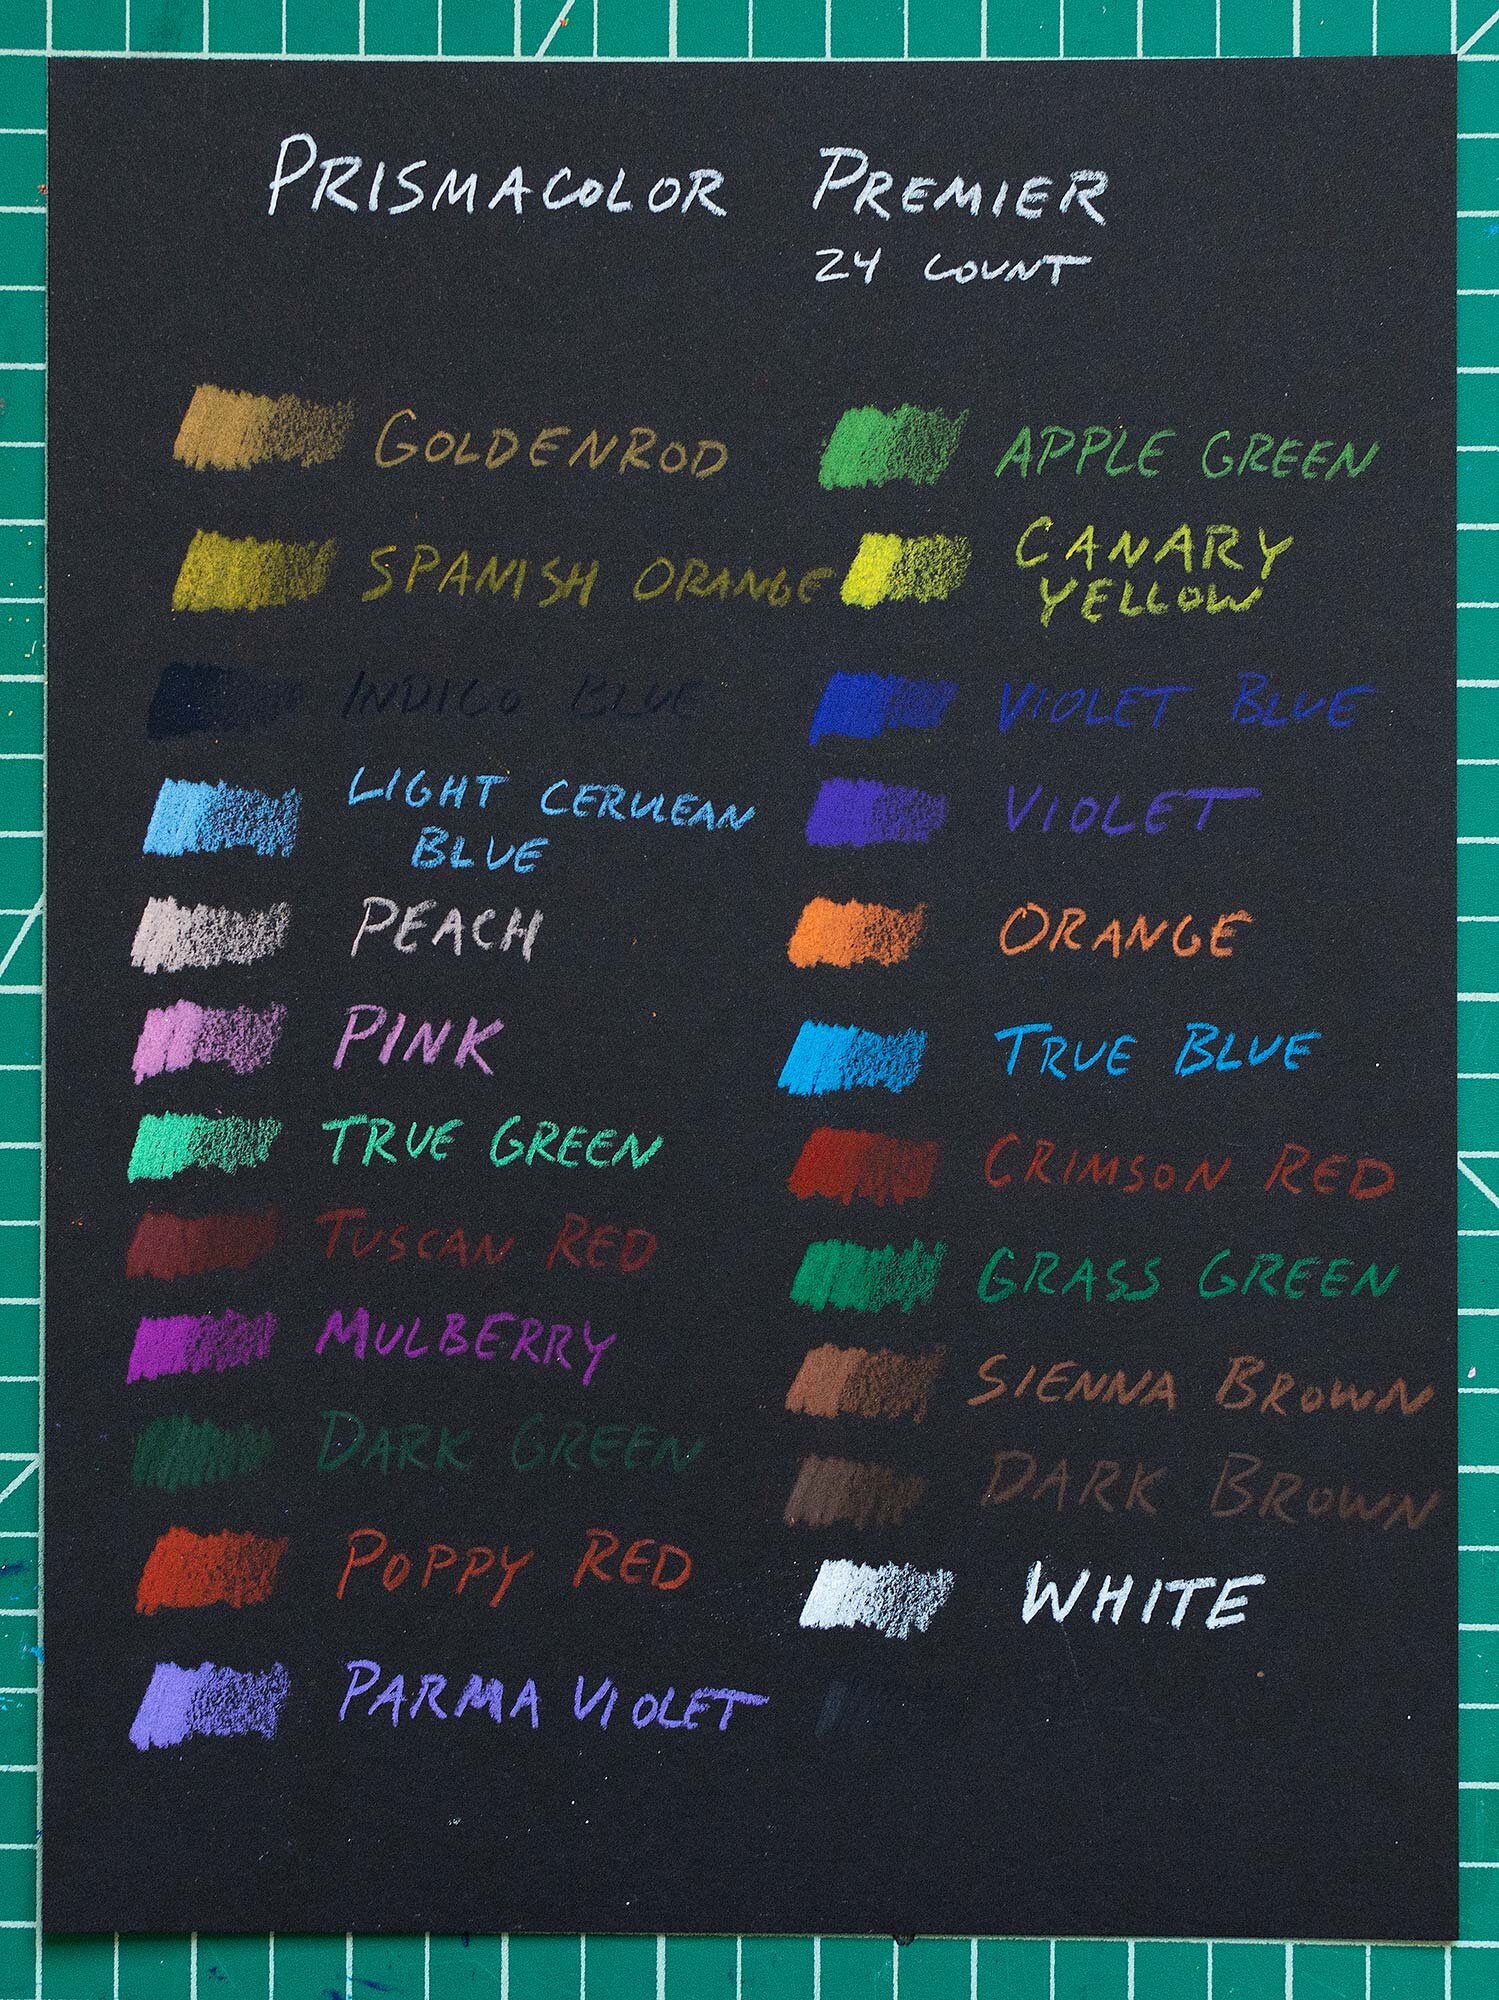
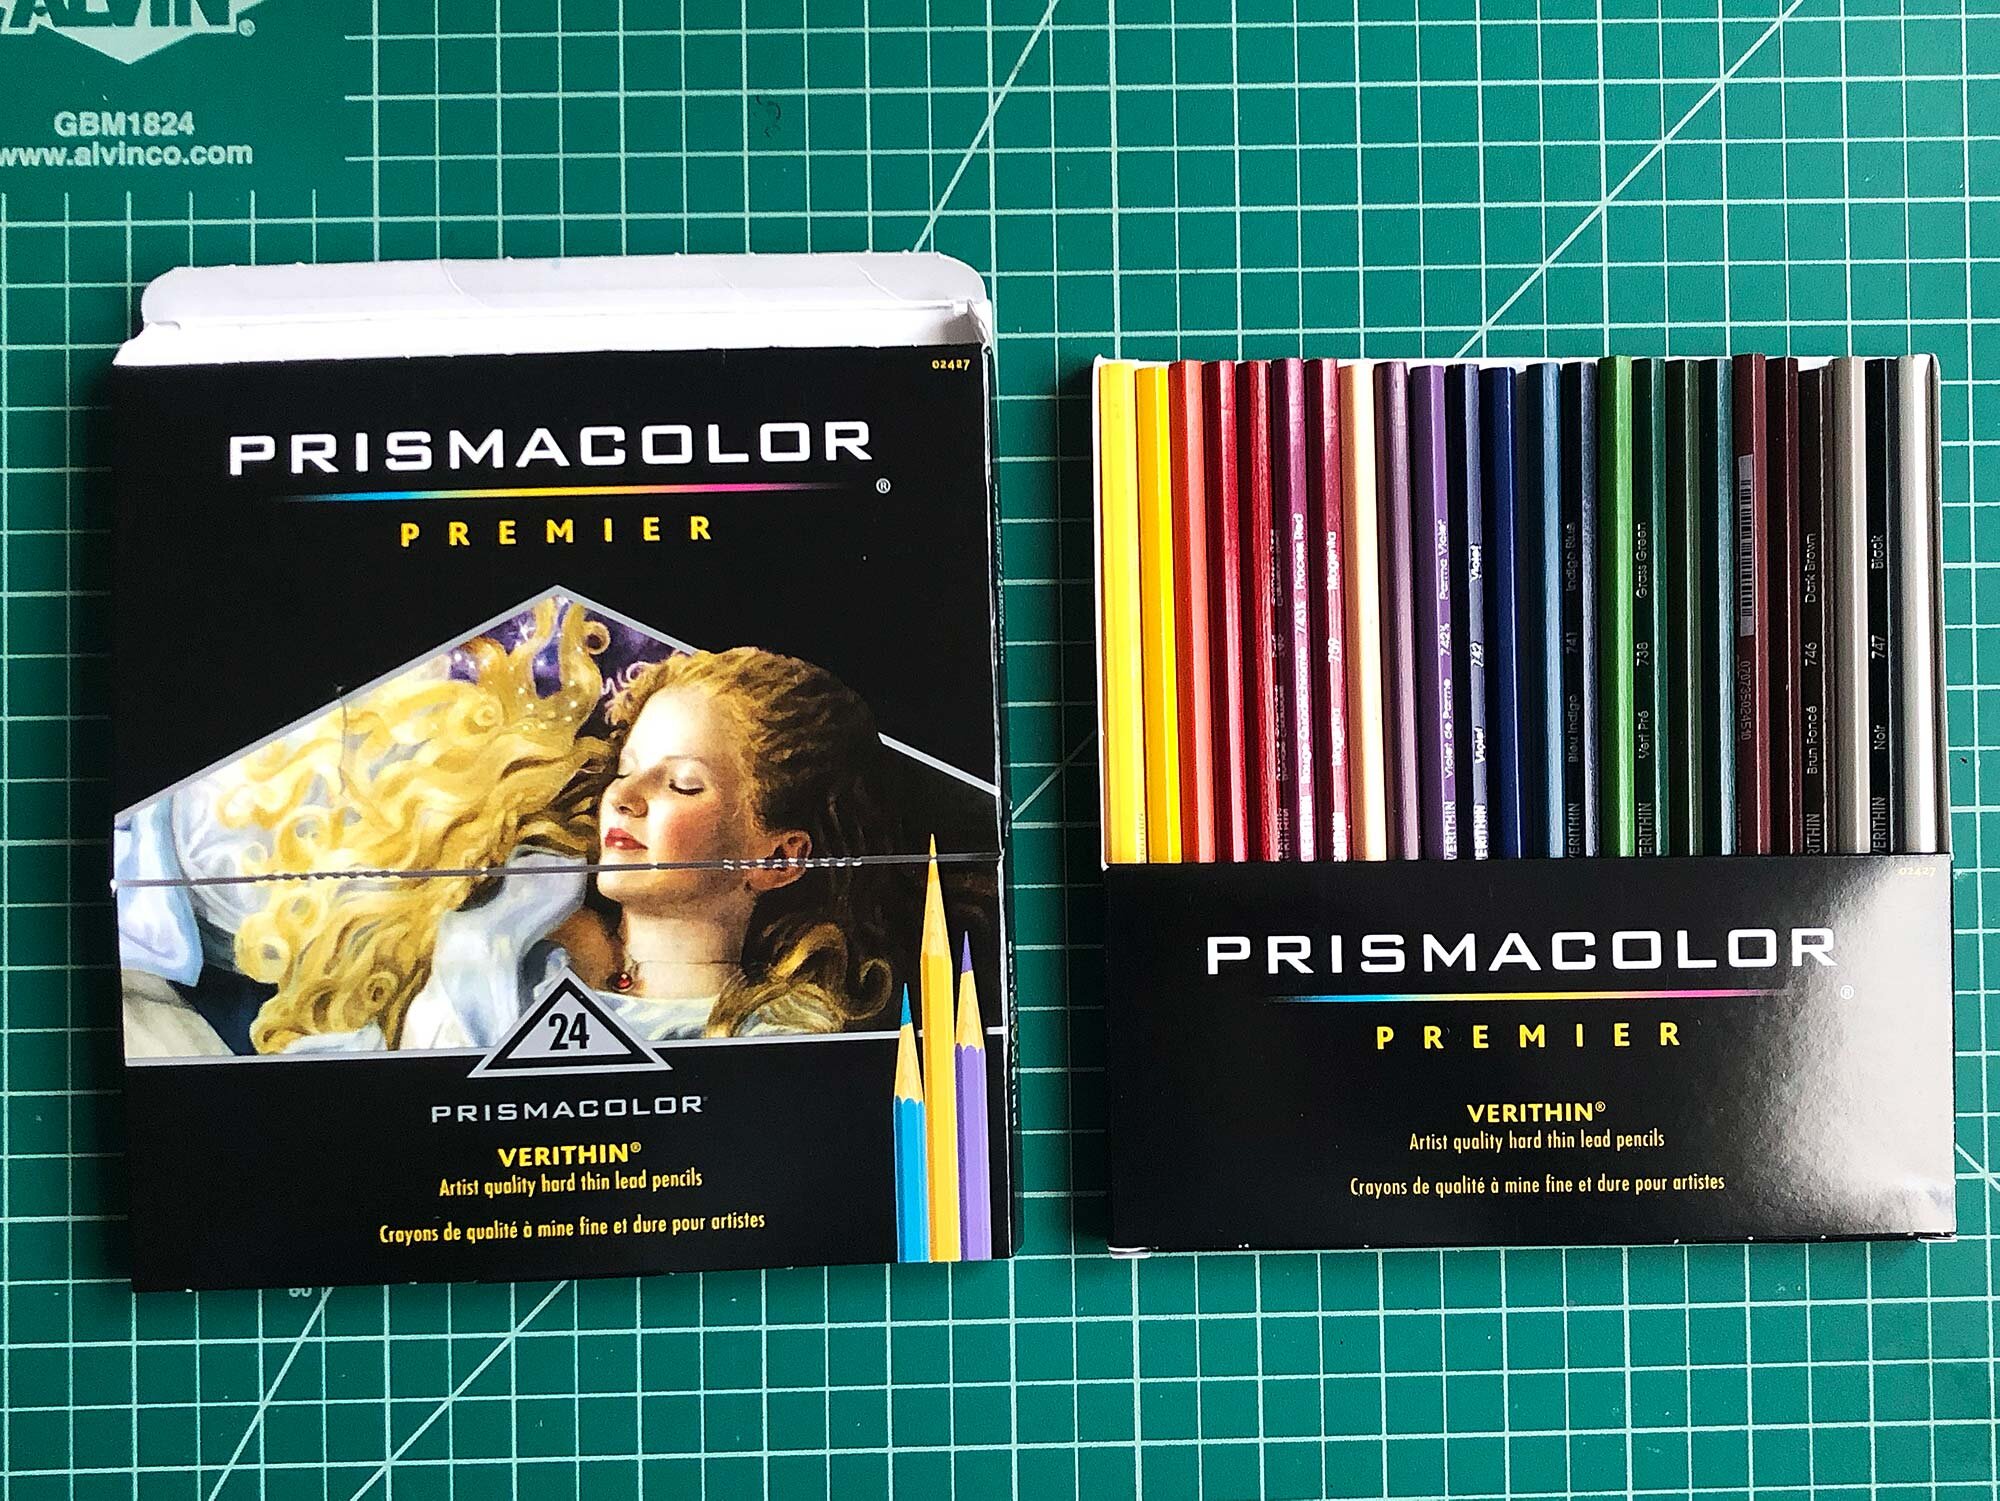
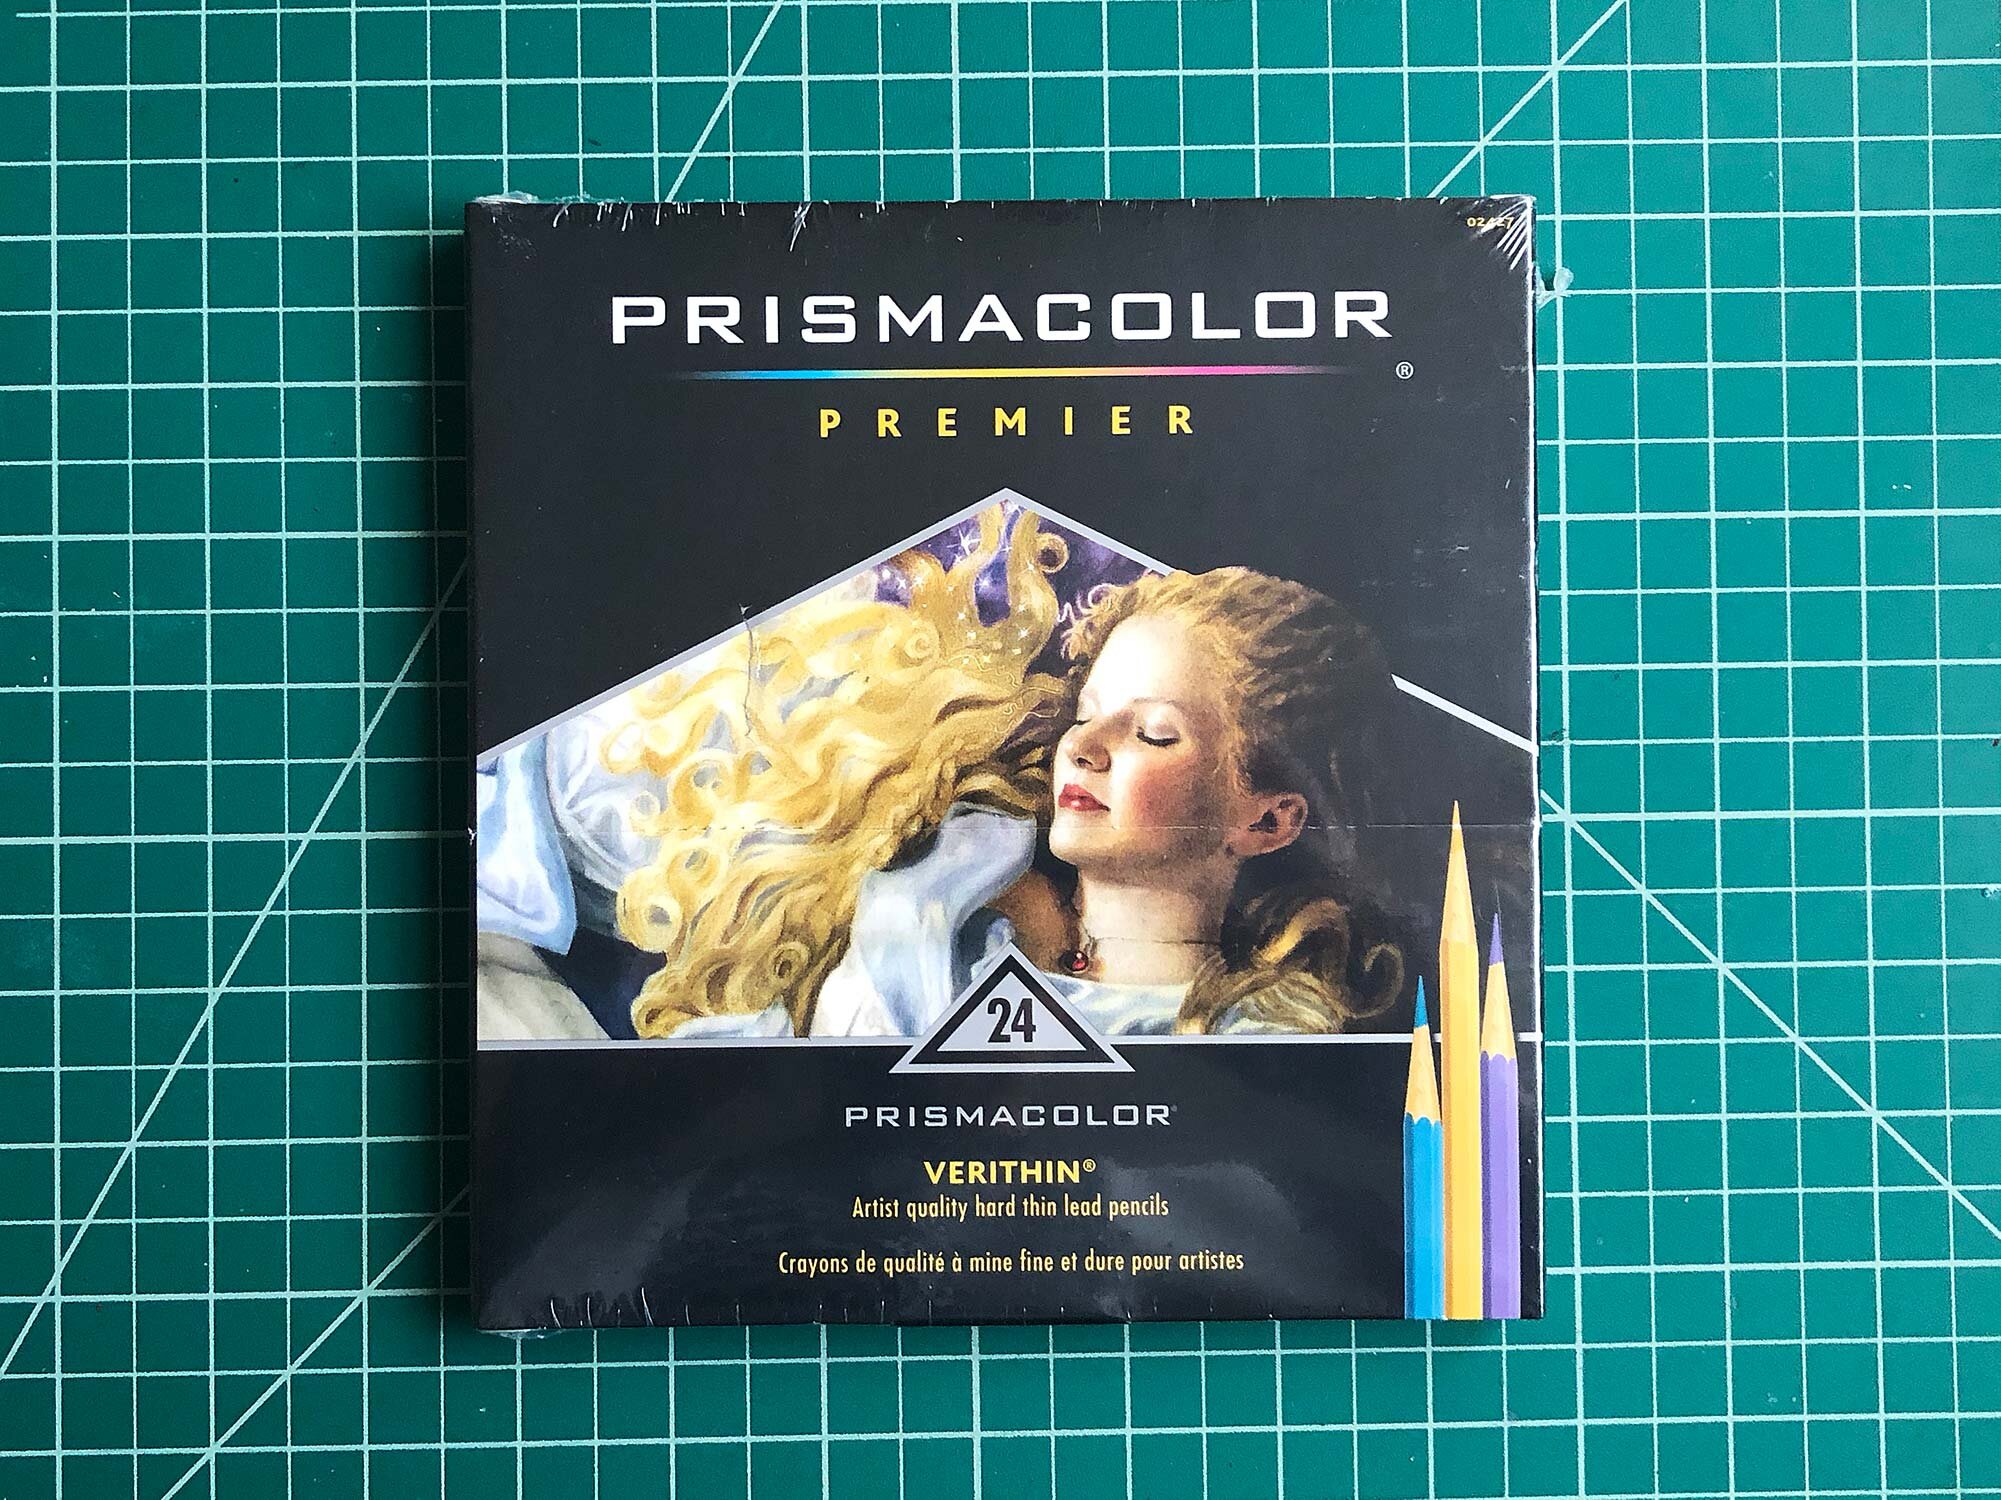
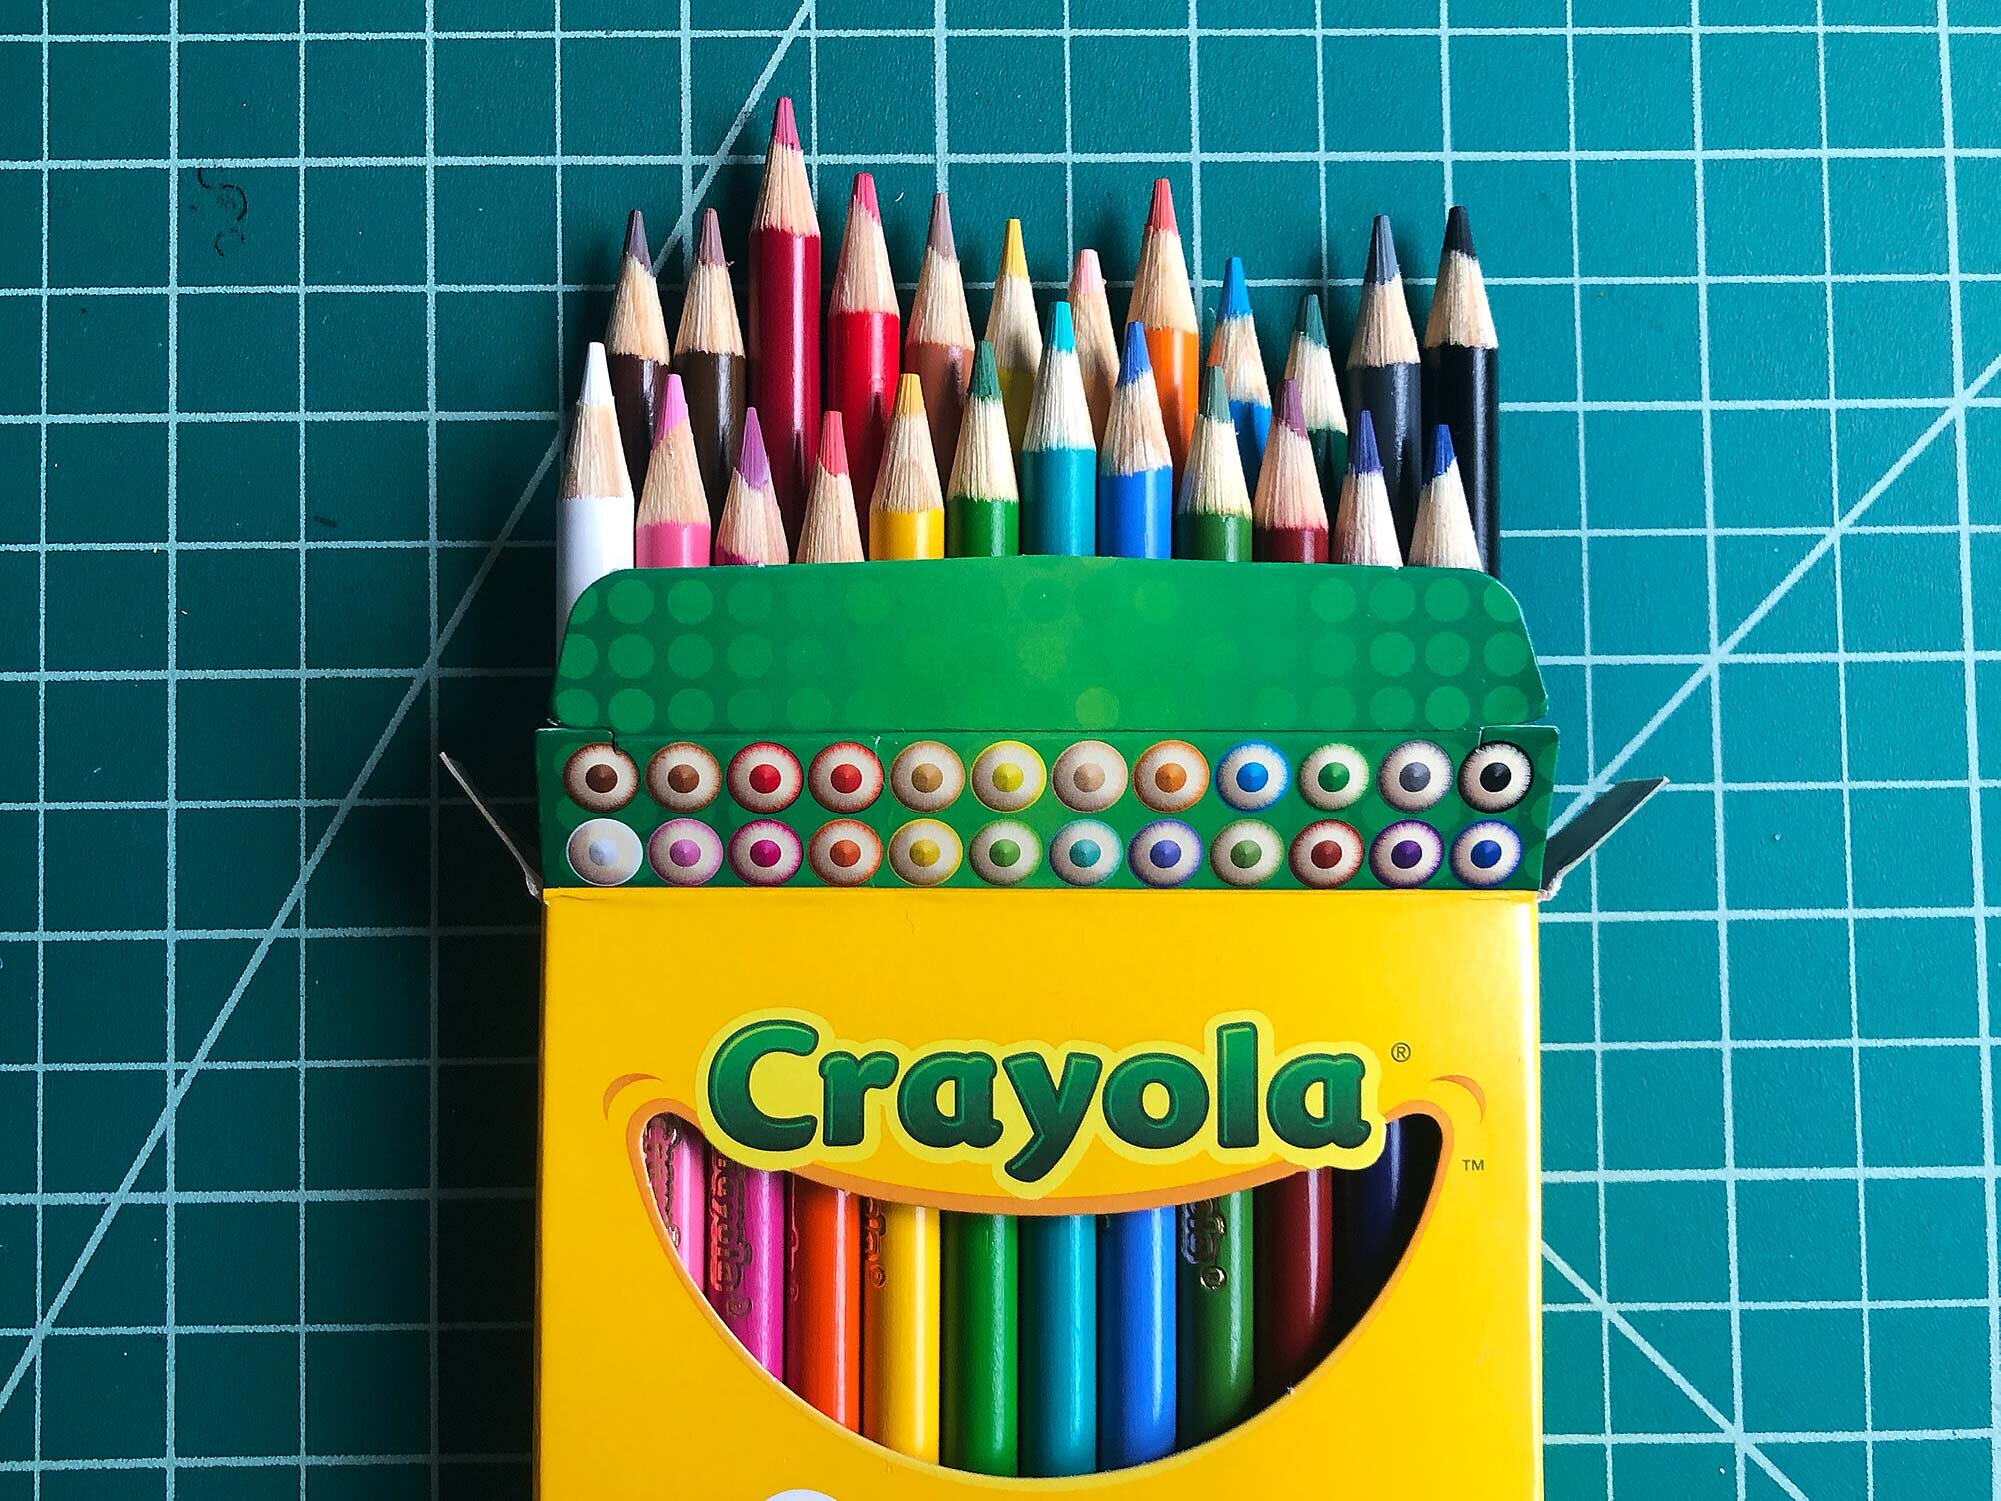
Prismacolor Premiers are some of the best and most affordable artist-grade colored pencils on the market. They are great for adults but kids will also appreciate the soft cores and vibrant colors. And they are quite affordable too. They do cost more than Crayola or other school brands, but those pencils are have hard cores and inferior pigment. Go with the bold colors of Prismacolor Premiers, or click here to see our full review of colored pencils.

Prismacolor Premier Colored Pencils are available individually or in sets ranging from 12 to 150 colors. A 24-count tin typically costs around $25.


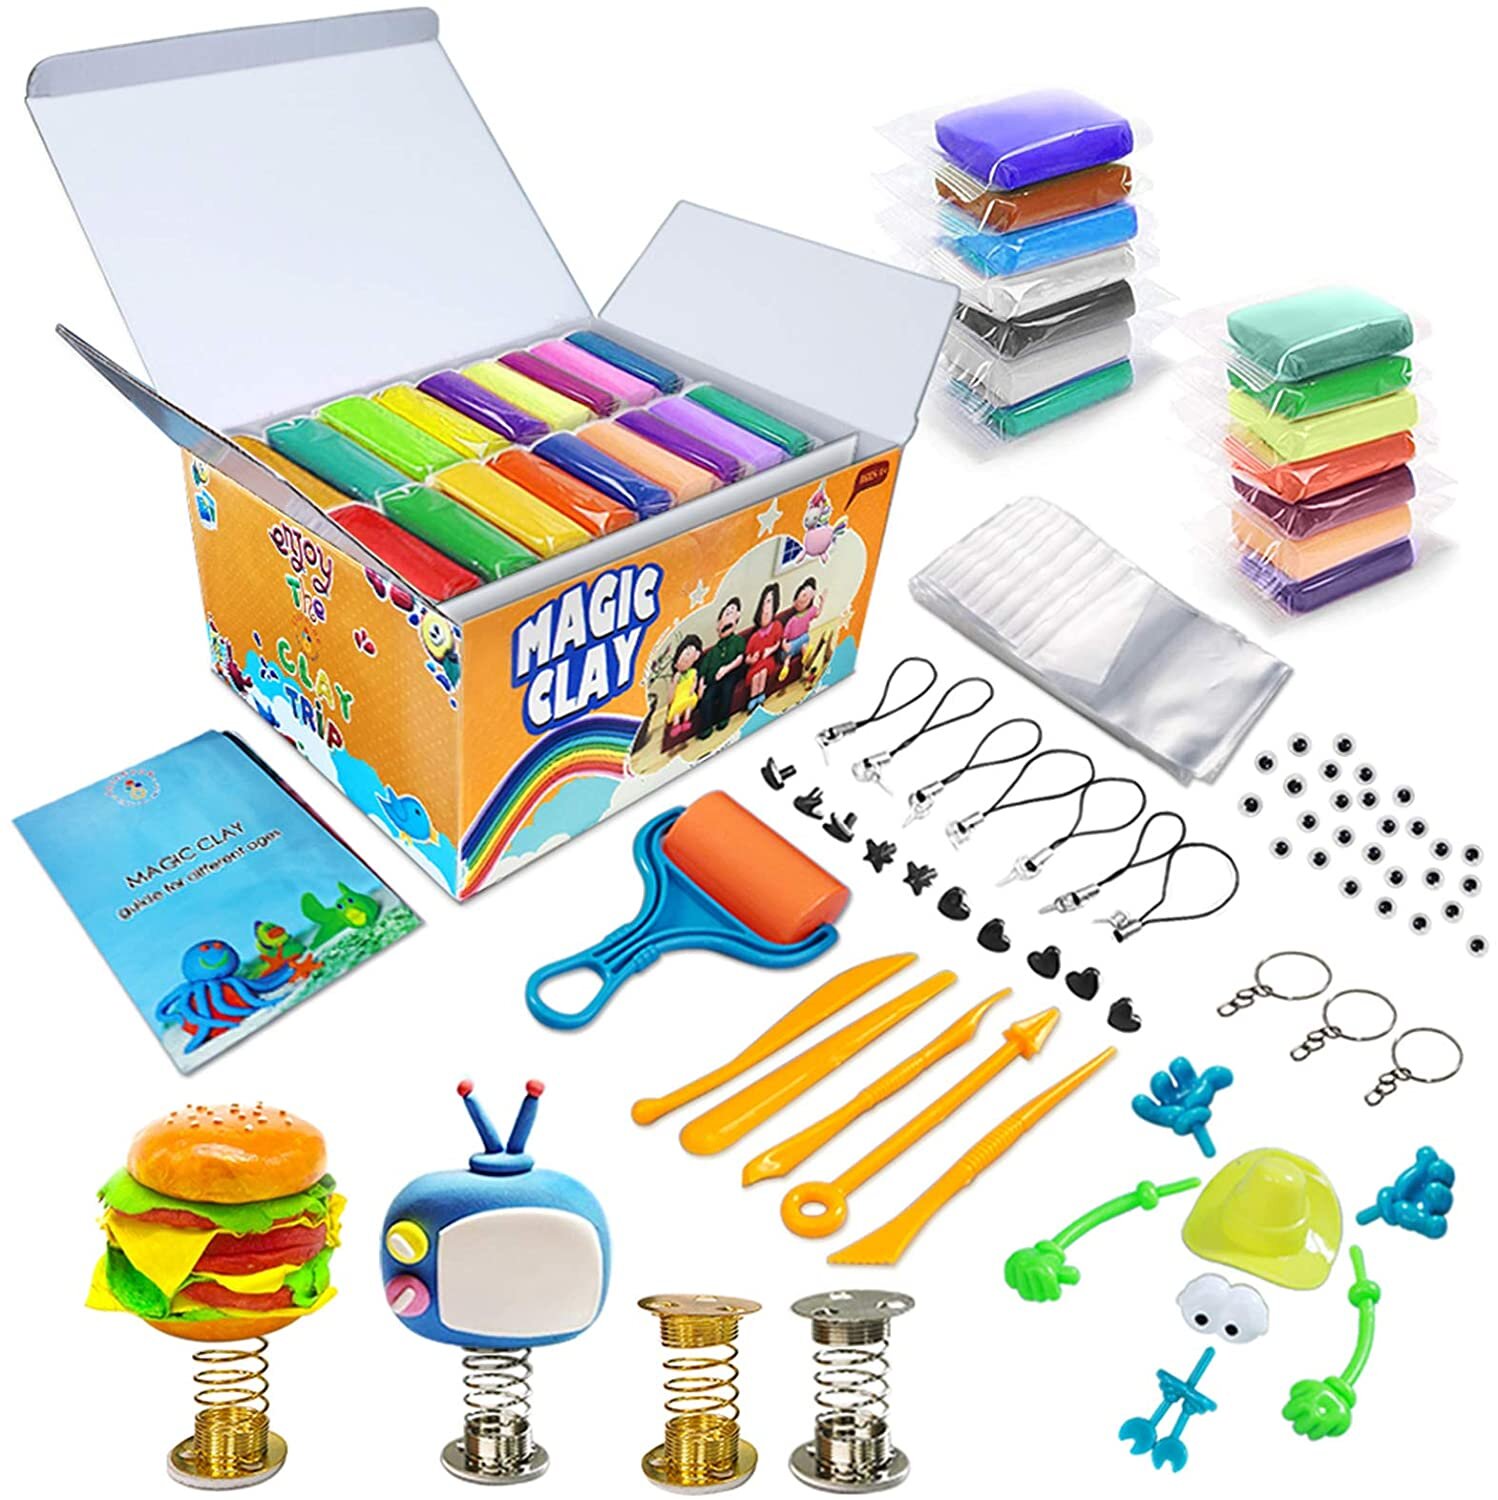
Magic Clay Kit

Magic Clay.jpg

This set of air-dry clay comes with 36 colors, 47 accessories including a few tools, and will generate hours of fun crafting and creating. The clay dries in about 24 hours and has mess-free clean up. There’s also a larger kit with 50 colors of clay. Recommended for ages 6 and up.


Spirograph.jpg

The Original Spirograph

No childhood is complete without this classic geometric drawing tool, first released in 1965. It’s equally fun for adults and allows you to explore patterns, math, and hand control. Create endless designs and try it with pens, pencils, and any sort of drawing media. The sets do come with fine point pens as well.

There are a variety of sets including a Spirograph Jr., scratch art, or a small travel version, but the Original Deluxe for around $24 is a great option.


Arnold Grummer Zig-Zag Books

Arnold Grummer Zig Zag Book.jpeg

These prefolded, acid-free, accordion-style zig zag booklets give kids a fun way to make their own books, stories, or extended drawing panels. Available in three different sizes, the packs come with 12 booklets. Pair these packs with colored pencils or markers for a gift that will provide hours of fun and creativity. The packs come with chipboard covers and insert pages too.

The Arnold Grummer Zig Zag book packs typically range from $16 to $23.


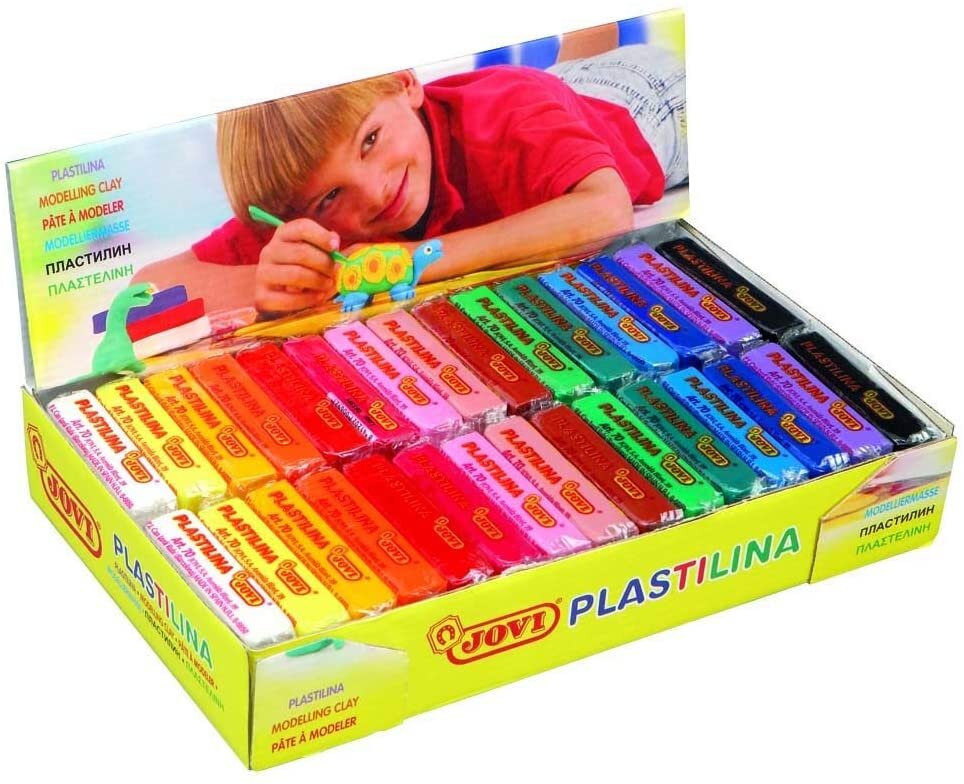
Jovi Plastilina

Jovi Plastilina 2.jpg

For sculptors of all ages, Jovi Plastilina is a non-hardening modeling clay that holds fine detail and can be reused over and over. It’s great for model making, small sculptures, or can be used to make stop-motion animation.

The colors will blend, if desired, or you can work to keep them separate. The clay is gluten free, is non-staining, and cleans up easily. The recommended pack costs around $29 and comes with 30 bars, 2 each of 15 colors, but there are a variety of pack sizes available that range in price from $9 to $75. This is a great, basic art supply that provides amazing, open-ended sculpting possibilities.


Dough Builders

colorations dough builders.jpg

These plastic body parts—essential generic Potato Head parts—pair well with Plastilina, Play-Do, or any sort of modeling dough. Make fun creatures, characters, monsters and animals.

Amazon sells a huge 260-piece tub for around $30, while Blick has a more modest sized set for around $6.50 with 25 assorted parts. The large tub has 26 styles of pieces with 10 of each, so a smaller set might be enough for most kids but the big tub is great for parties, classrooms, or larger gatherings.


Alphacolor Biggies Tempera Cakes

AlphacolorBiggies.jpg

These semi-moist cakes of non-toxic tempera paint respond immediately to a wet brush. These cakes will never spoil or dry out, making them a long-lasting addition to your craft drawer without dealing with a bunch of bottles of paint. These opaque colors will blend, and stay vibrant and velvety smooth when dry. Pair these with a pad of mixed media or watercolor paper, and your kid will have unlimited possibilities.

These are available as an 8 pack in a plastic tray, or as 12 individual cakes. There are some complaints about the tray (it can get messy) but consider putting the paints inside separate deli containers or styrofoam trays, or any sort of system that makes sense to you. For $20 for the 8 pack, they’re an awesome set of paints for young artists.


ArtBin Sketch Board and Storage Bin

ArtBin Sketchboard 1.jpg
ArtBin Sketchboard 2.jpg

The ArtBin Sketch Board is great for drawing or watercolor on the go, or to simply organize art supplies at home. ArtBin makes simple, functional storage bins and this takes their basic bin to the next level with pencil storage, pocket, and a clip inside and on the top to hold a pad or paper in place. Note that the plastic molding is not perfectly flat, so plan to use this with cardboard behind your paper such as a sketchpad or watercolor block.

The ArtBin Sketch Board typically retails for between $26 and $30. It measures 11.5” x 16” x 1.5” deep, and will easily hold a 9x12” sketchpad.


Canson XL Black Drawing Pad

Canson XL Black Paper.jpeg

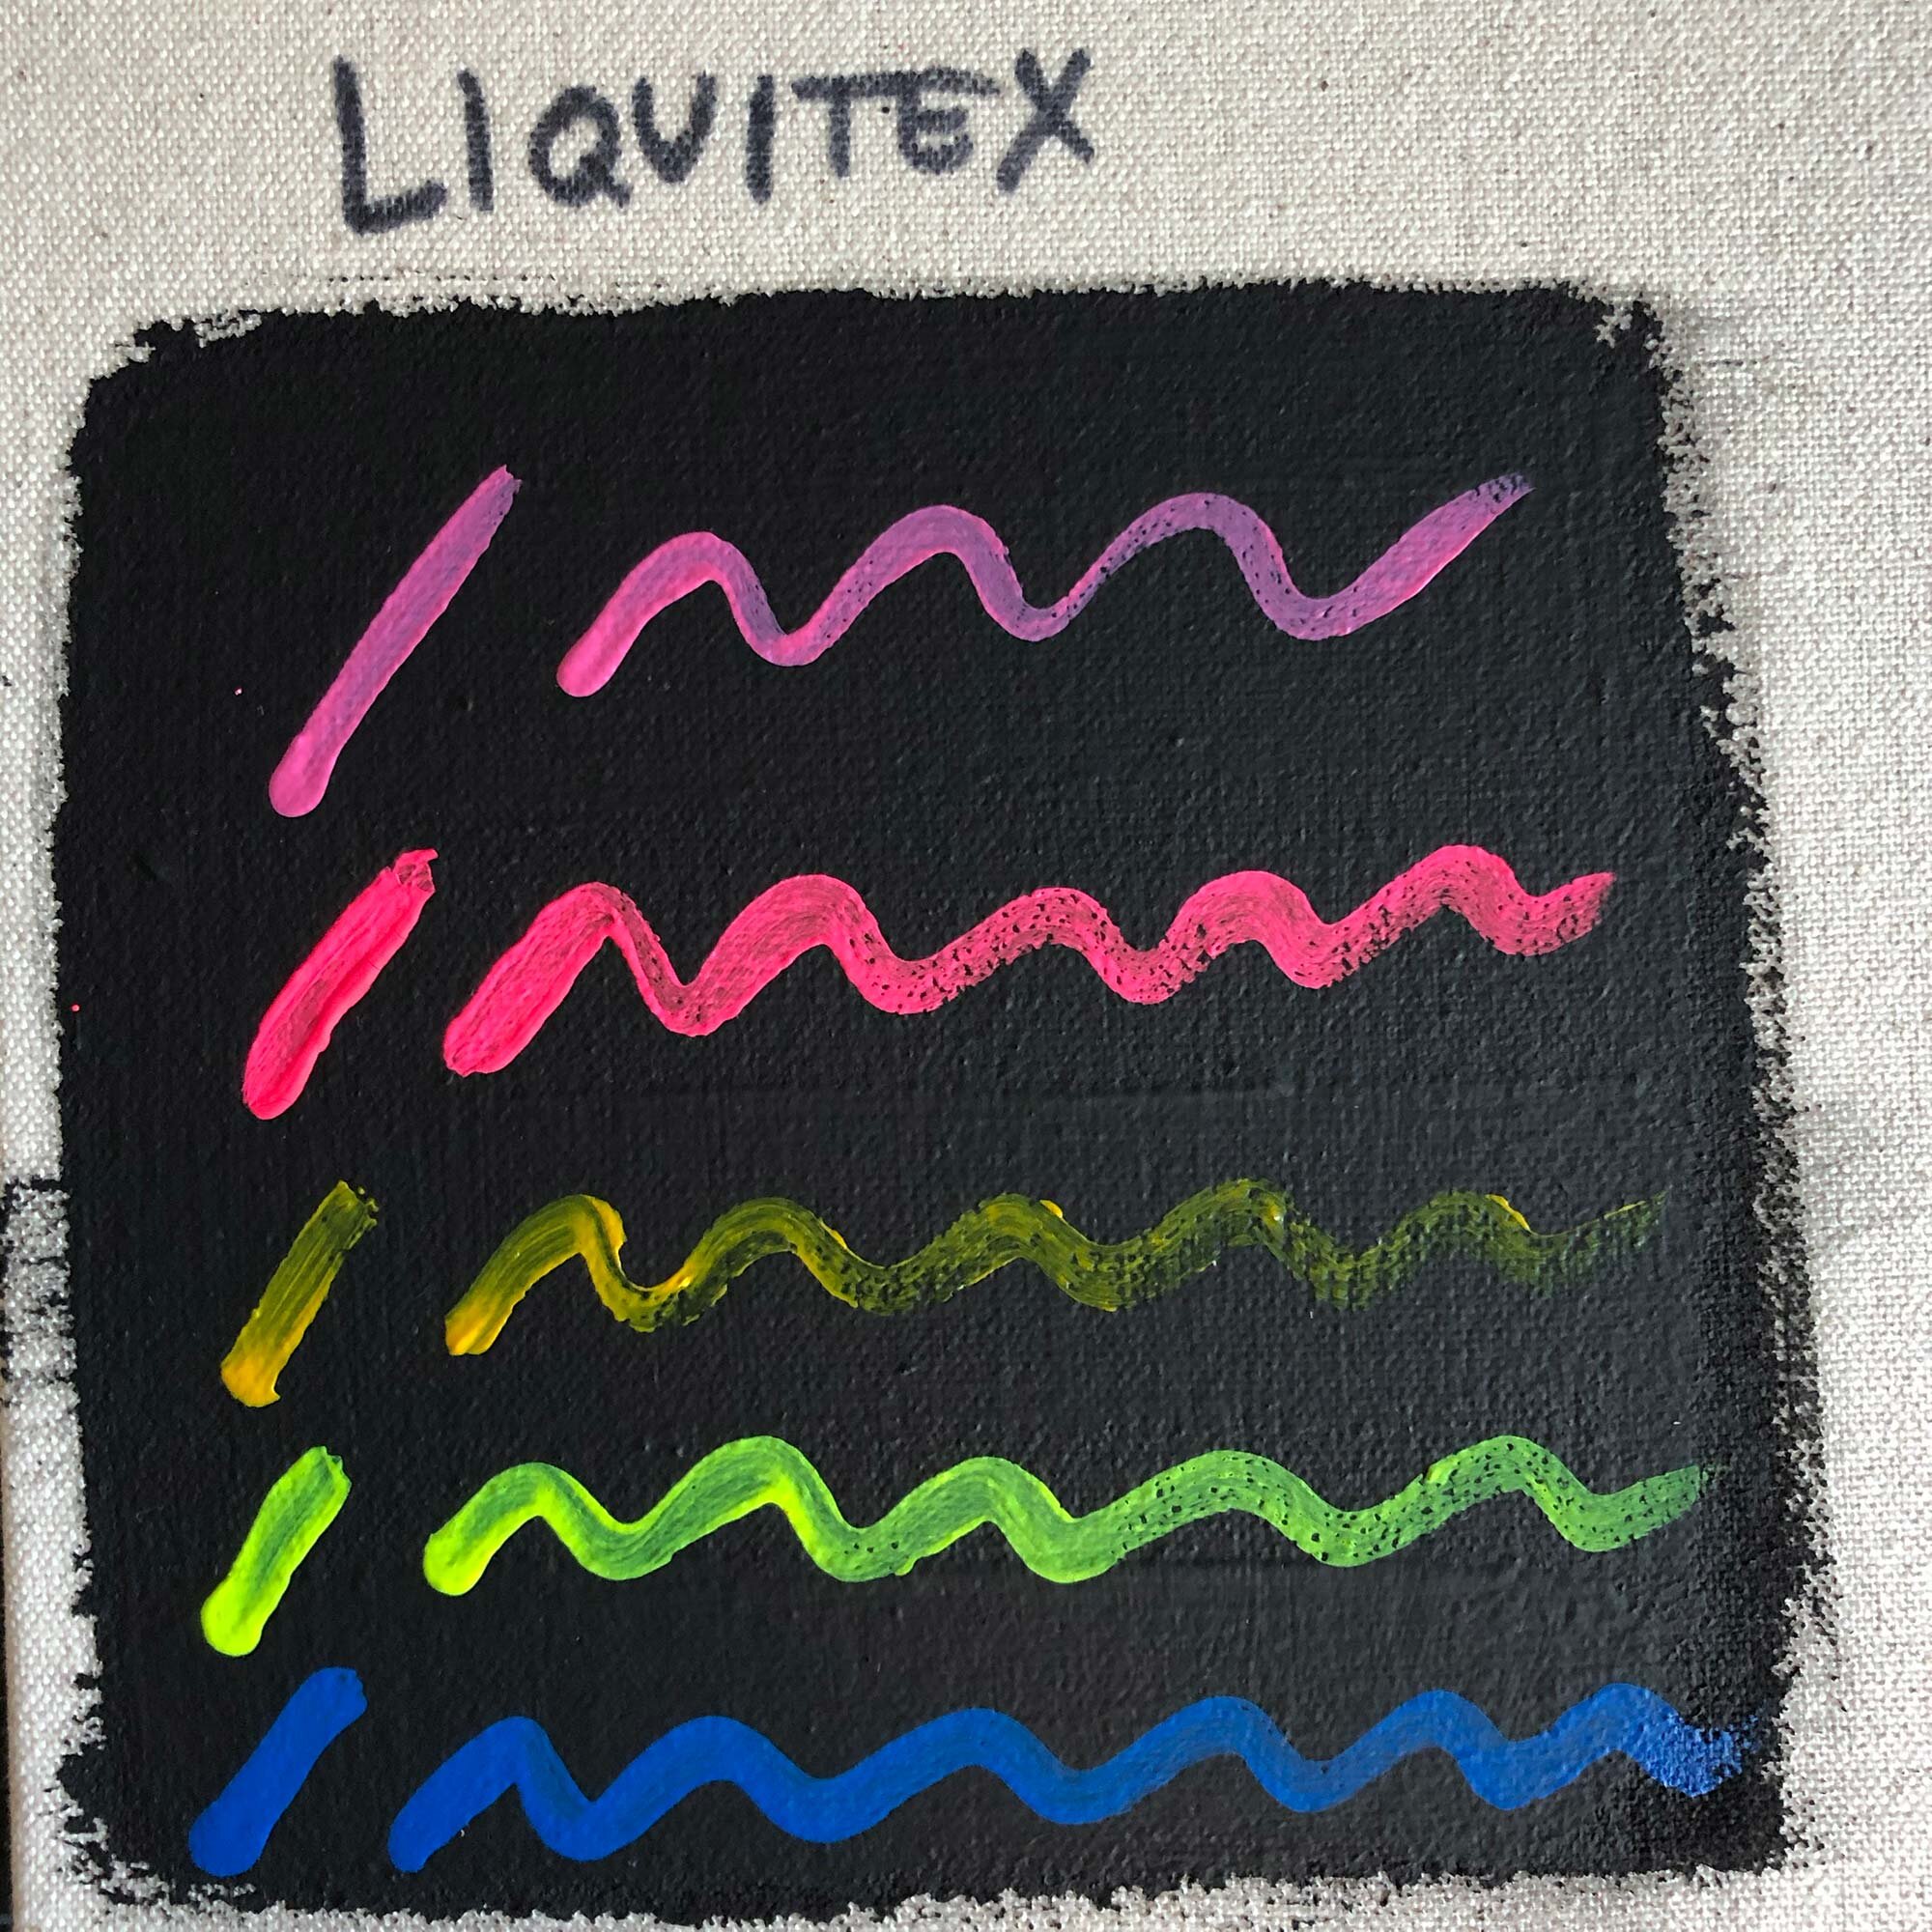
Black paper really makes colors pop and pairs well with colored pencils, pastels, and gel pens. It’s a fun a way to switch things up and the Canson XL Black Drawing Pads have great quality at an affordable price. Available in two sizes: 10x7” and 9x12”, they typically retail for $7 to $10.


Sakura Gelly Roll Pens

Sakura Gelly Roll Pens.jpeg

Gel pens look great on all sorts of media, including black paper or on top of other paints, and the Sakura Gelly Roll Pens are some of the best out there. These may not be best for younger kids, but older elementary school children and older should be able to use these without too much mess—just let the ink dry before touching. Available in a variety of sets, try the Classic set of 10 pens for a young artist for around $12 to $14. There are other sets available, including metallic pens or the complete line of 74 Gelly Roll pens retails for around $85.


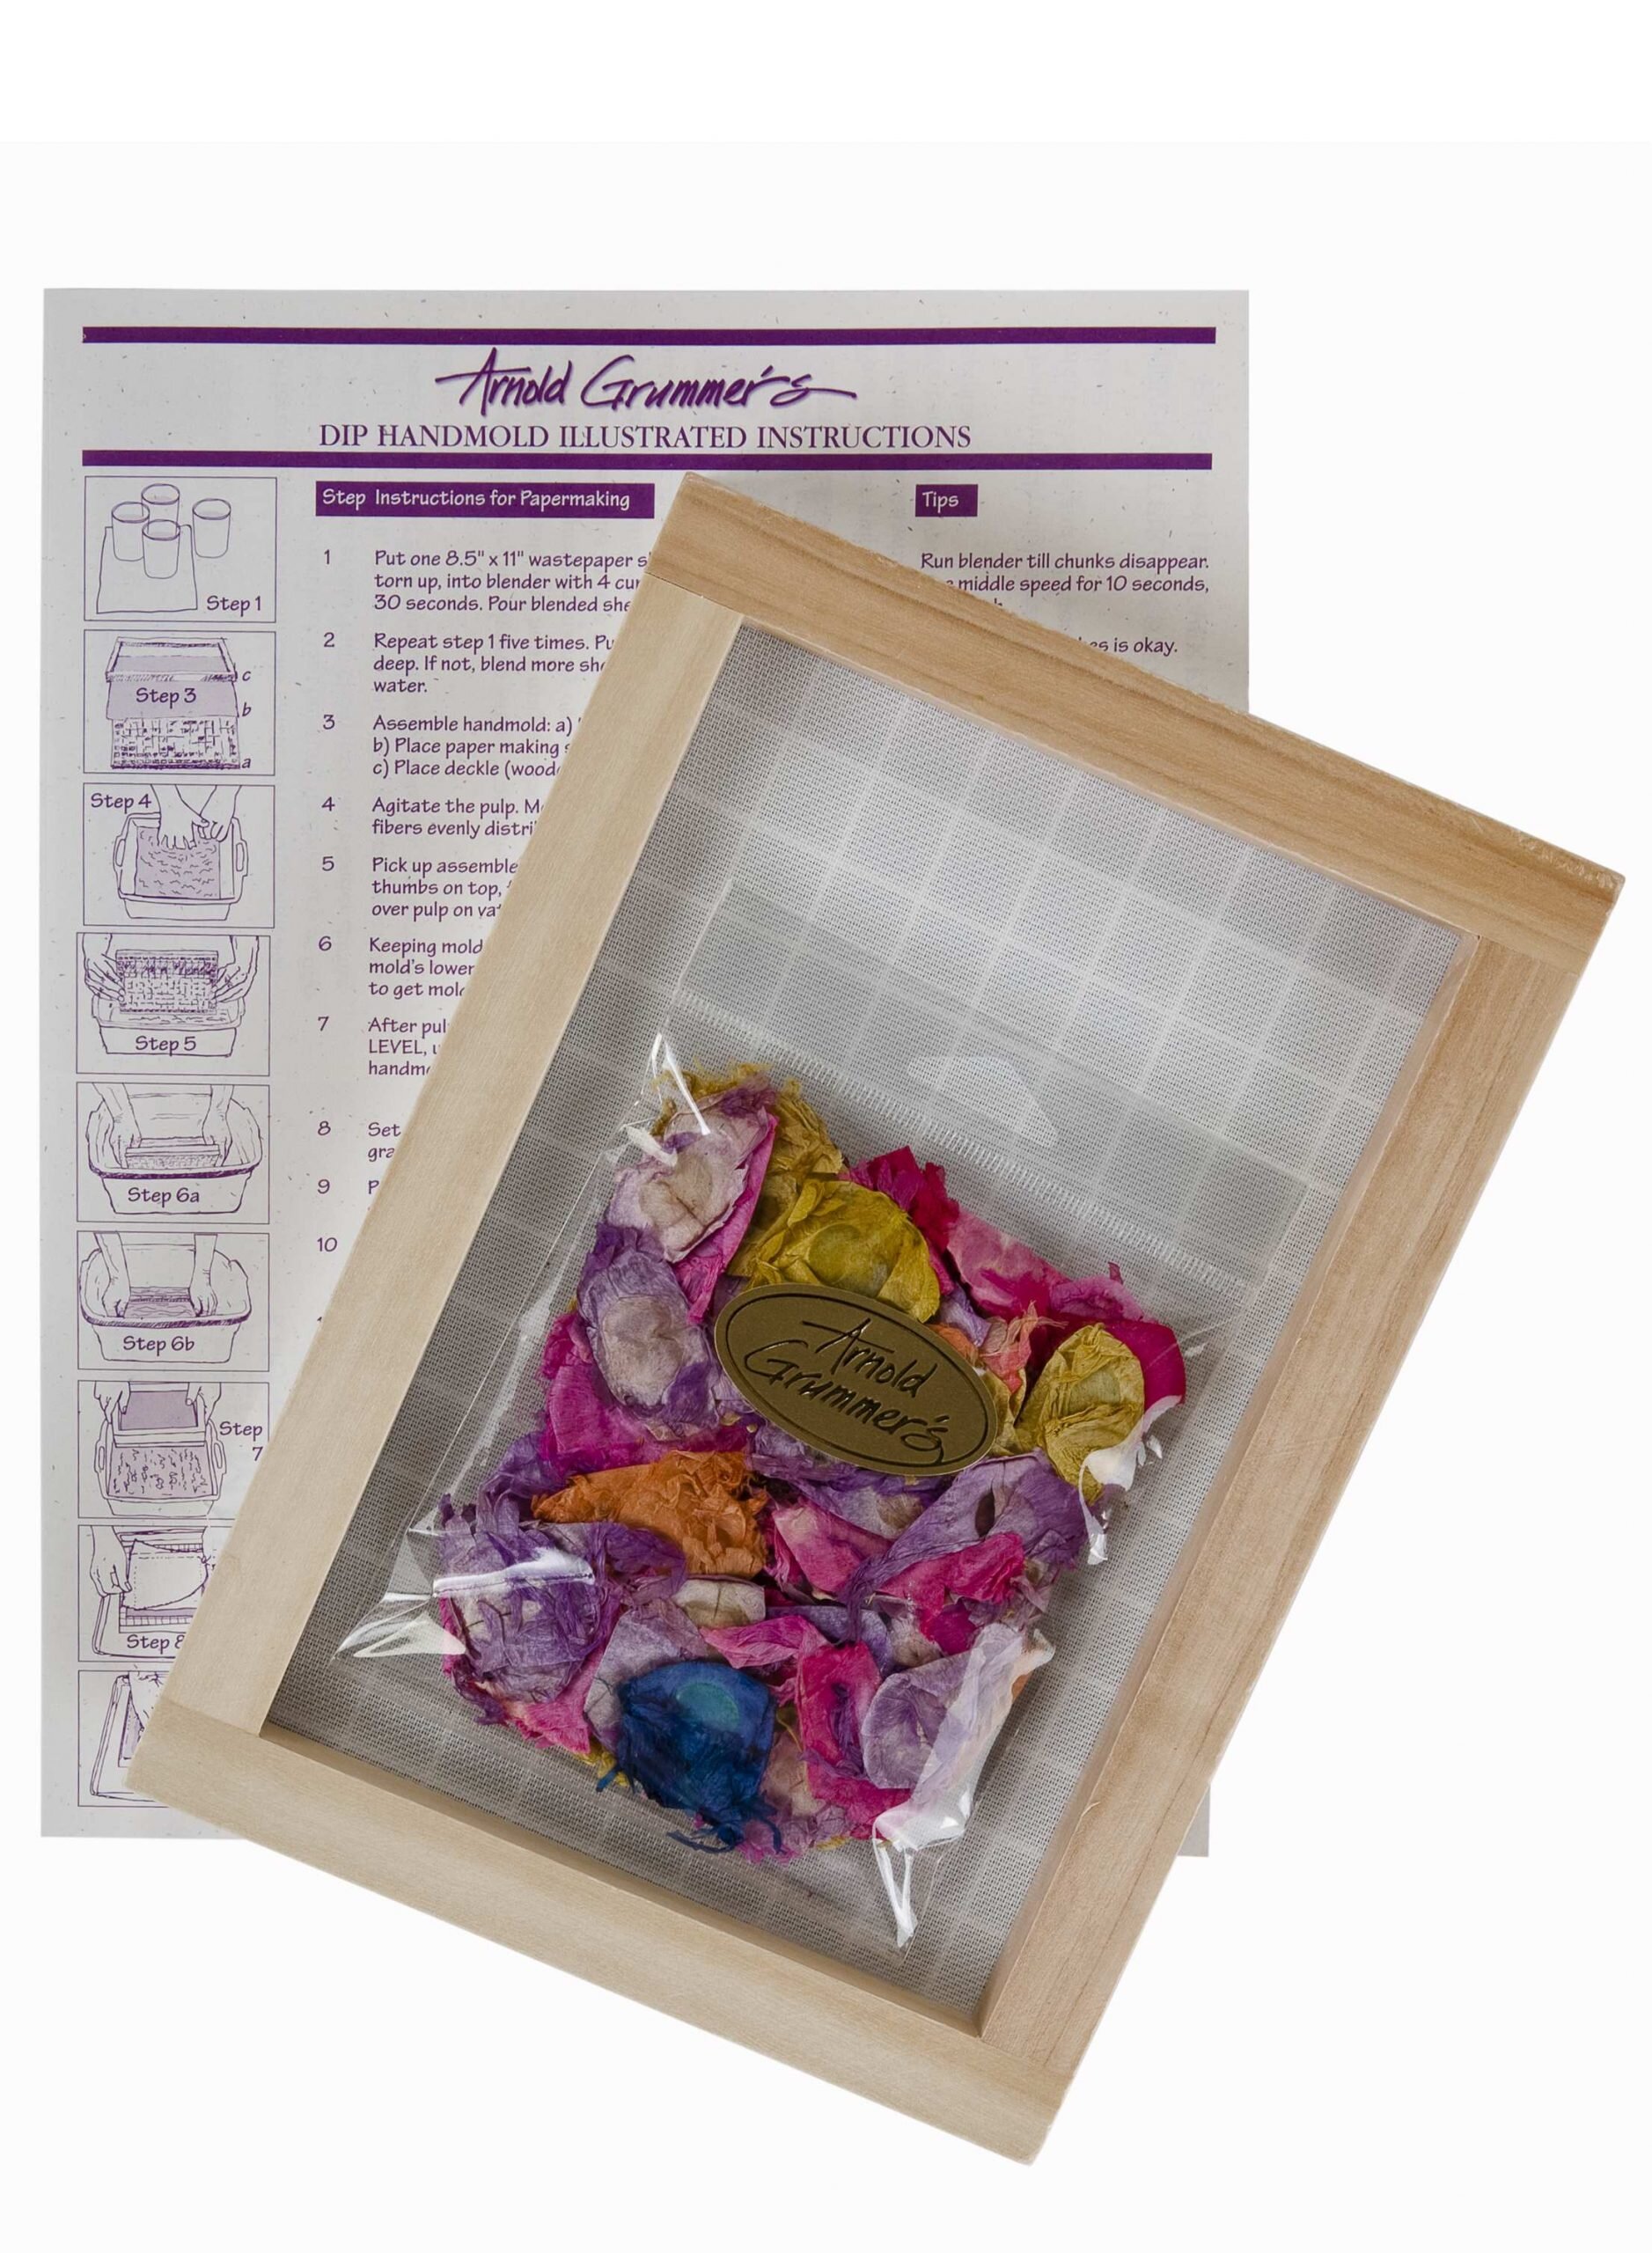
Arnold Grummer Dip Handmade Paper Kit

products-53_mediumdiphandmold_1-scaled.jpeg

Turn your scrap and waste paper into beautiful homemade paper with this 8 1/2” x 11” paper making screen. It’s super fun to explore this process, and you can use the results to make more projects! In addition to this screen, you’ll need a tub that can fit the screen (such as a plastic dish tub or deep cake pan), blender, and recycled paper or buy speciality paper fiber. The kit does come with some dried botanical pieces to get you started.

The 8 1/2 x 11” screen is a great size to start, but there’s a smaller screen available, as well as a deluxe kit that comes with a variety of templates. Kids will love making paper but you might find yourself experimenting with your own paper.


Jumbo Crayons and Pencils

Small hands will love extra big pencils and crayons, but even as an adult, these are some of my favorites. Here’s a few different quality options for jumbo-sized art supplies:

Stabilo Woody.jpg

Stabilo Woody

The Stabilo Woody is a “3 in 1” pencil that combines the features of a colored pencil, watercolor pencil, and a wax crayon. It can even be wiped off flat surfaces such as glass windows or tiles. It has an extra thick, 10mm thick core. Available in sets ranging from 6 to 18 pencils.

 
Faber-Castell Jumbo Pencils.jpeg

Faber-Castell 9000 Series Jumbo Pencils

The Faber-Castell 9000 Series pencils have been in production since 1905 and they are an artist-grade classic. But hands old and young will appreciate the Jumbo version (these are my favorite sketching pencils too) that comes in a set of 5 with hardnesses ranging from HB to 8B. Be sure to get a large pencil sharpener that will accommodate these pencils, such as a Faber-Castell sharpener.


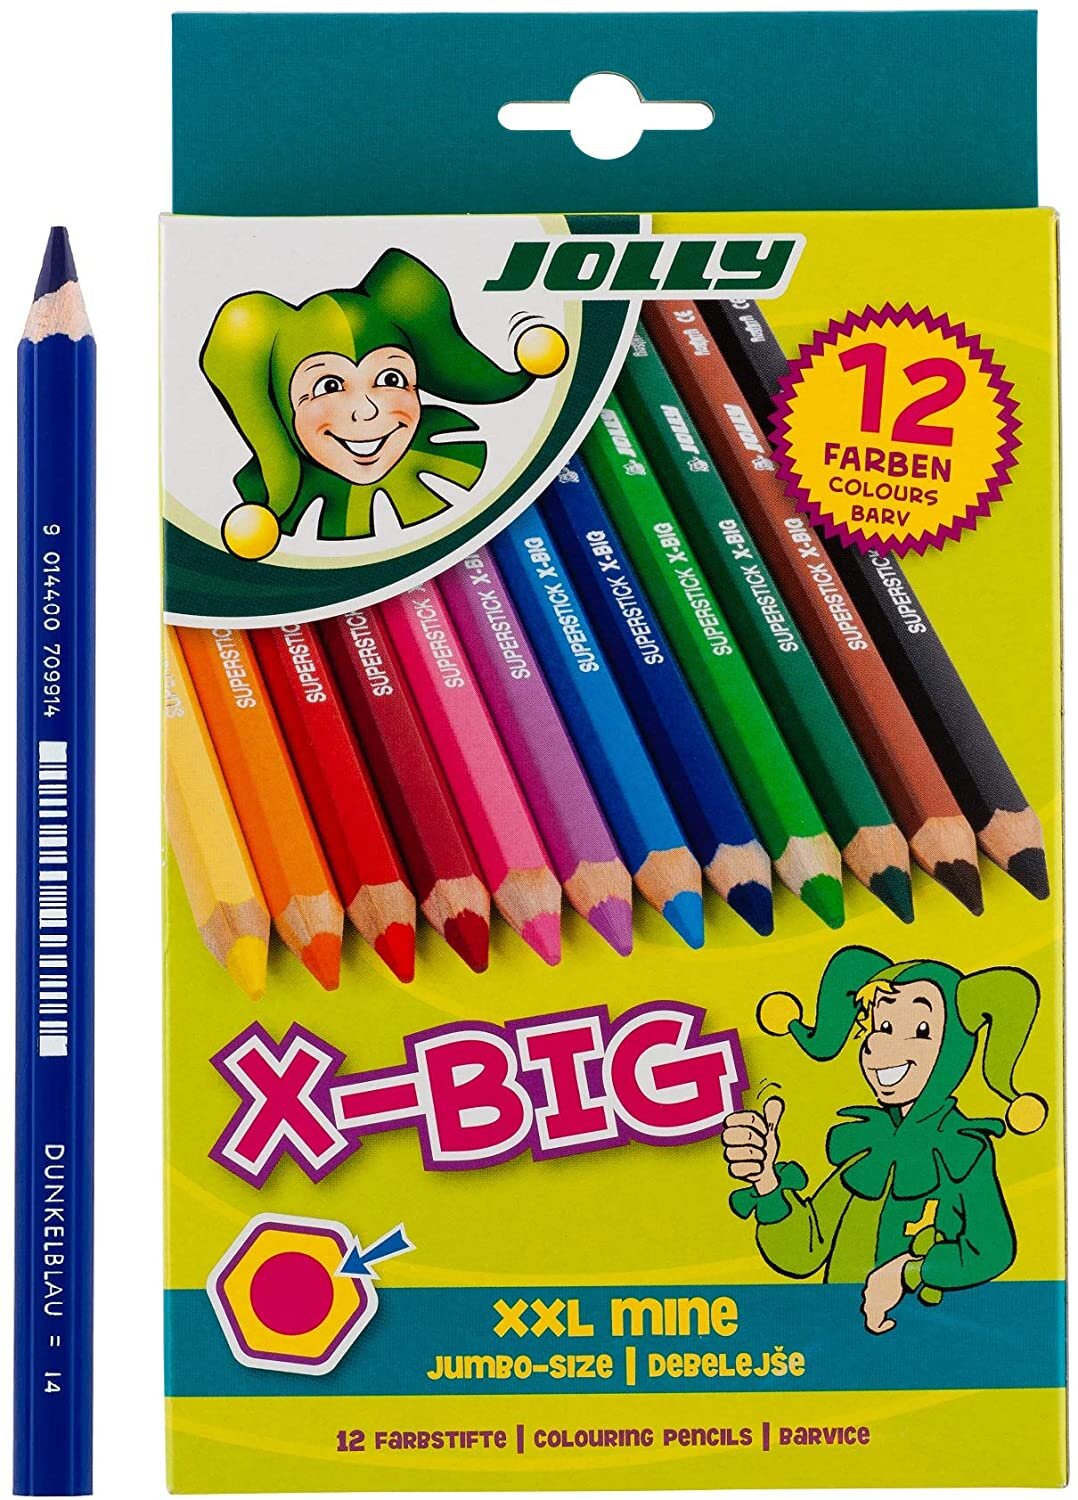
Jumbo Colored Pencils from Cretacolor, Jolly or Faber-Castell

There are a variety of jumbo colored pencils that are well made and will provide extra-thick, durable cores for hours of vibrant drawing. Some adults love these big pencils for coloring book work too!

For colored pencils, check out Cretacolor Megas or the Jolly X-Big options.

Jolly X Big Colored Pencils.jpg
Cretacolor Mega.jpg
 
F-C Magnus Watercolor Pencils.jpeg

Faber-Castell Albrecht Dürer Magnus

For oversized watercolor pencils, check out the Faber-Castell Albrecht Dürer Magnus pencils. These are professional, artist-grade pencils with 5.3mm cores that will be appreciated by any artist including kids. Use dry as a colored pencil, or blend with water and brush to activate the line. Available individually or in sets of 12, 18, or 24.


The Arts: A Visual Encyclopedia

DK Arts Encyclopedia.jpg

Recommended for ages 8 and up, this visual encyclopedia from DK covers the history of art including painting, sculpture, and photography. The 9x11” book has 304 pages that are full of images and info on art history classics. Available in paperback or hardcover, it’s a great deal at $18 to $22.


Elmer’s Slime Kits

Elmers Slime Kit.jpg

Make your own slime at home! These are so fun for kids and get their hands moving and imagination going. Just be prepared for some cleanup, but the good news, is it’s all washable.

Add metallic glitter, confetti, and other fun effects to customize your slime.


Make Ink: A Forager’s Guide to Natural Inkmaking by Jason Logan

Make Ink.jpg

Use this book as a guide to turn things you find inside or outside into ink. Beautifully illustrated and full of info and recipes, this book will show you and your kid how to make ink from flowers, plants, acorns, bark, copper, turmeric and more. Middle school and up will be fine with this book but elementary-age kids will need parent help.

The book is available in hardcover for around $26.


Marbling Kits and Supplies

The Boku-Undo marbling dye kit is sold at Blick and Amazon, and Amazon also carries an option (linked below) with brushes.

The Boku-Undo marbling dye kit is sold at Blick and Amazon, and Amazon also carries an option (linked below) with brushes.

Making marbled paper is fun for kids, teens, and adults. There are a variety of kits and supplies, some require mixing a thickener with water and waiting for everything to mix overnight. But the inks from Boku-Undo float on plain water and can be used right away. You will need some sort of tray or tub, inks, brushes, and paper such as watercolor paper. You will only be limited by the size of your tub and paper, and your imagination.


Alginate / Plaster Casting Kit

Luna Bean Casting Kit.jpg

The Luna Bean Hand Casting Kit is a foolproof way to make a mold in a bucket using skin-safe alginate, and then cast the mold with the provided gypsum plaster cement. But you don’t have to just make hands. Make a mold of a toy, a Playdoh sculpture, heck—make a mold of anything! Teenagers will be able to use this on their own (make sure they wear a dust mask) and you can work with younger children to introduce them to the casting process. It’s really fun, and if you’ve never made a mold, the resulting detail will astonish you. This $40 kit includes a bucket, alginate, and plaster. There are also larger and smaller kits.

If you are looking for your own skin-safe casting material without the bucket, try Smooth-On Alja Safe


Blick Studio Table Easel by Jullian

Blick Tabletop Easel.jpeg

This table top easel is stable, well made, and will hold canvases up to 24” tall. It also folds flat so it can be put away when not in use. It folds to 10 1/2” x 18” x 2” deep, making it small enough to take on the go too. For $18, this is a great option that will be equally useful to adults as kids. Inspire the painter in an artist of any age with this table top easel.


Blick Studio Canvas Panels

Canvas Panels.jpeg

Canvas panels are an economical way to introduce beginners to painting on canvas. Each panel is approximately 1/8” thick and features double-primed, 5oz canvas stretched over a stiff board. Lightweight, warp resistant, and acid free, these canvas panels are ready for acrylic, oil or any painting medium. Available in packs of 5 or larger classroom packs, young painters can make lots of work without taking up a ton of room with these. These panels are available in sizes ranging from 4” x 5” to 20” x 24”.


Sargent Art Acrylic Paint Pot Set

Sargent+Acrylic+Paint+Set.jpg

This set of acrylic paints includes 6 or 12 paint pots with screw on caps. The pots are not removeable, so the paints all stay together and are less likely to be tipped over. And the pots can be refilled with other acrylic paint as needed. This is a great set for elementary-age painters or any artist looking for a bit of organization in their studio. These cost around $5 for 6 colors, or $10 for 12 colors.


Klutz Friendship Bracelet Kit

Klutz Friendship Bracelet.jpg

Making friendship bracelets is a classic childhood activity and introduces ideas of pattern making, detail work, and craft skills. This book and kit includes everything a kid needs to make 12 bracelets. Recommended for ages 8 and up, the kit comes with 10 skeins of thread.


Wear’m Denim Apron

Wear'm Denim Apron.jpeg

This simple denim apron with a back tie and a front pocket comes in two sizes, the smaller is perfect for kids while the large will work for teens and adults. Easy to launder and long-lasting, just make sure to tie the string together before washing, or it may pull out. These are just about the cheapest aprons out there, and they work great. $6 for the small or $9 for the larger size.


Lomida Flip Book Kit

Lomida Flip Book kit.jpg

Young artists can create their own cartoons with this complete kit! It includes six 4.5” x 2.5” flip books with 90 pages each, a set of 12 pencils, sharpener, and pencil. This is sure to entertain and inspire, and gives kids insights about cartoons and stop-motion animation. The kit is $15.


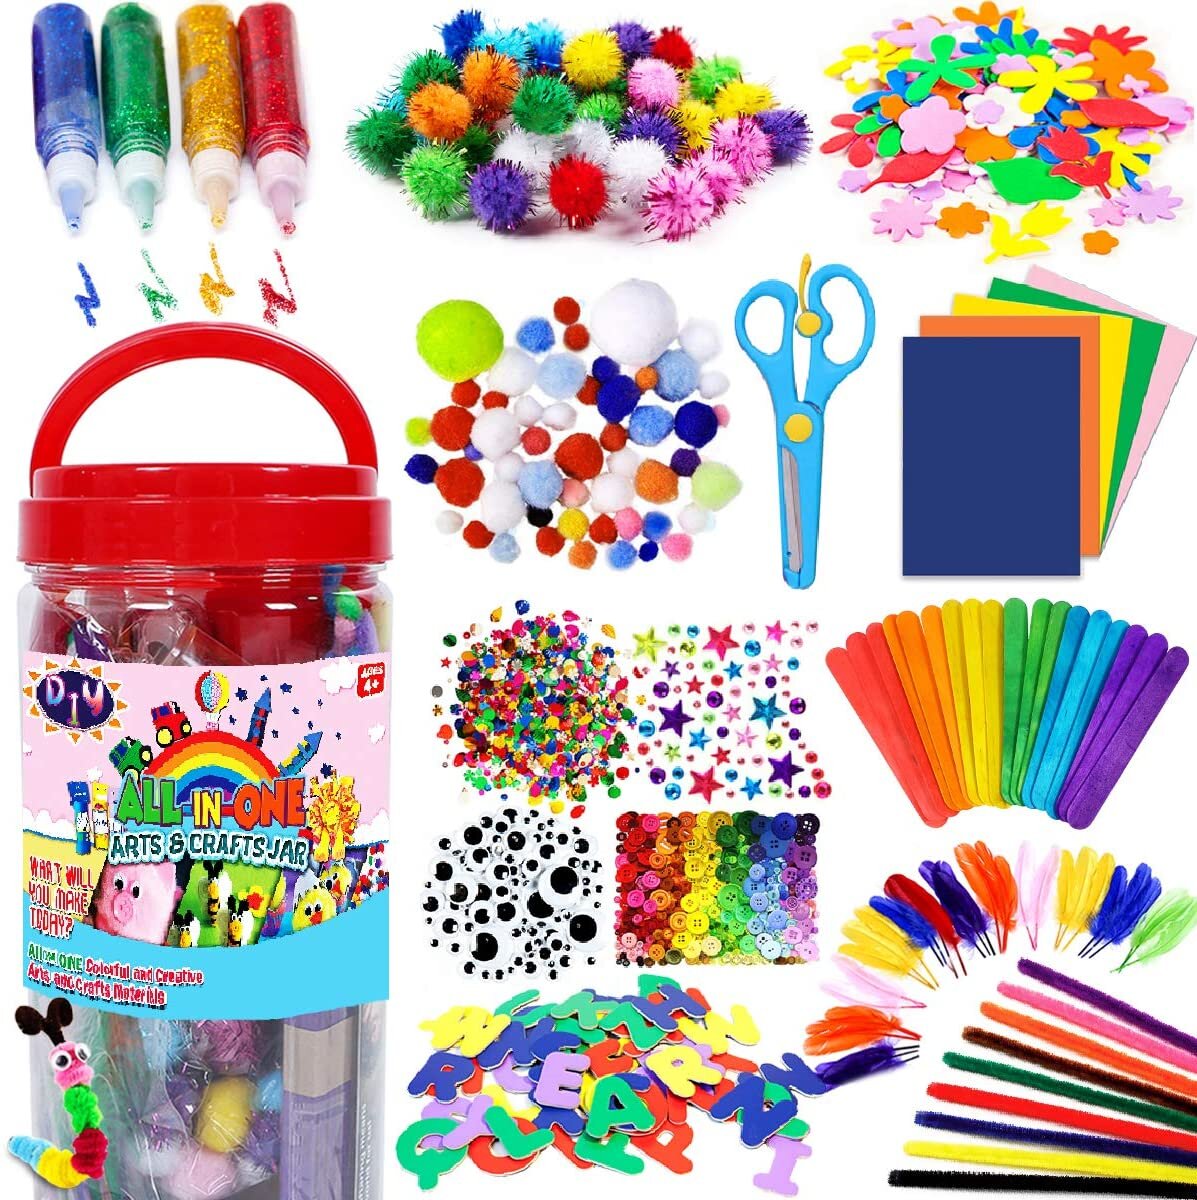
Craft Bin

Funzbo Craft Kit.jpg

A craft bin full of supplies is a sure way to entertain kids. With glue, scissors, pom poms, and tons of other pieces, they can go crazy making whatever they want. The Funzbo bin is a good option, with a regular and mega size, but there are a wide variety of craft bins to choose from, typically ranging from $12 to about $30. Recommended for ages 4 to 10.


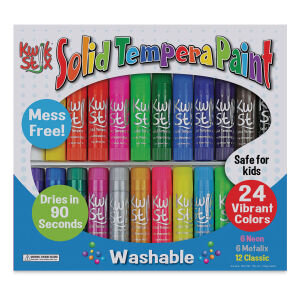
Tempera Paint Sticks

Kwik Stix.jpeg

Tempera paint sticks are sort of like markers, but with non-toxic, washable tempera paint. An easy way to paint with no need for water or brushes, these are great for when time is tight or clean up is a concern. Kwik Stix makes highly reviewed and recommended tempera paint sticks in a variety of colors and styles, including metallic, neon, and thinner sticks too.


How to Draw Books

How to Draw Comic Book and Manga.jpeg

Kids often appreciate a guidebook for learning how to draw and there are a lot of books out there on learning how to draw animals, faces, or they might appreciate a book on comic book and manga drawing styles.

For budding comic book artists, check out our guide to making a booklet with a long-reach stapler. Kids love having their own little booklet to draw in, or a simple sketchbook to carry around.


Scratch Art .jpeg

Scratch-Art Boards

Scratch art is a cool way to make colorful images. Typically black over a colorful base, the color is revealed by scratching through the black with a metal or wooden stylus, stick, toothpick, or anything that can pull off the top material. Kids really love this and the scratch art paper is typically available in packs of 5, 10, 30 or more sheets. I haven’t really encountered a “bad” brand so order what seems best to you but the links here are to Scratch-Art Brand.


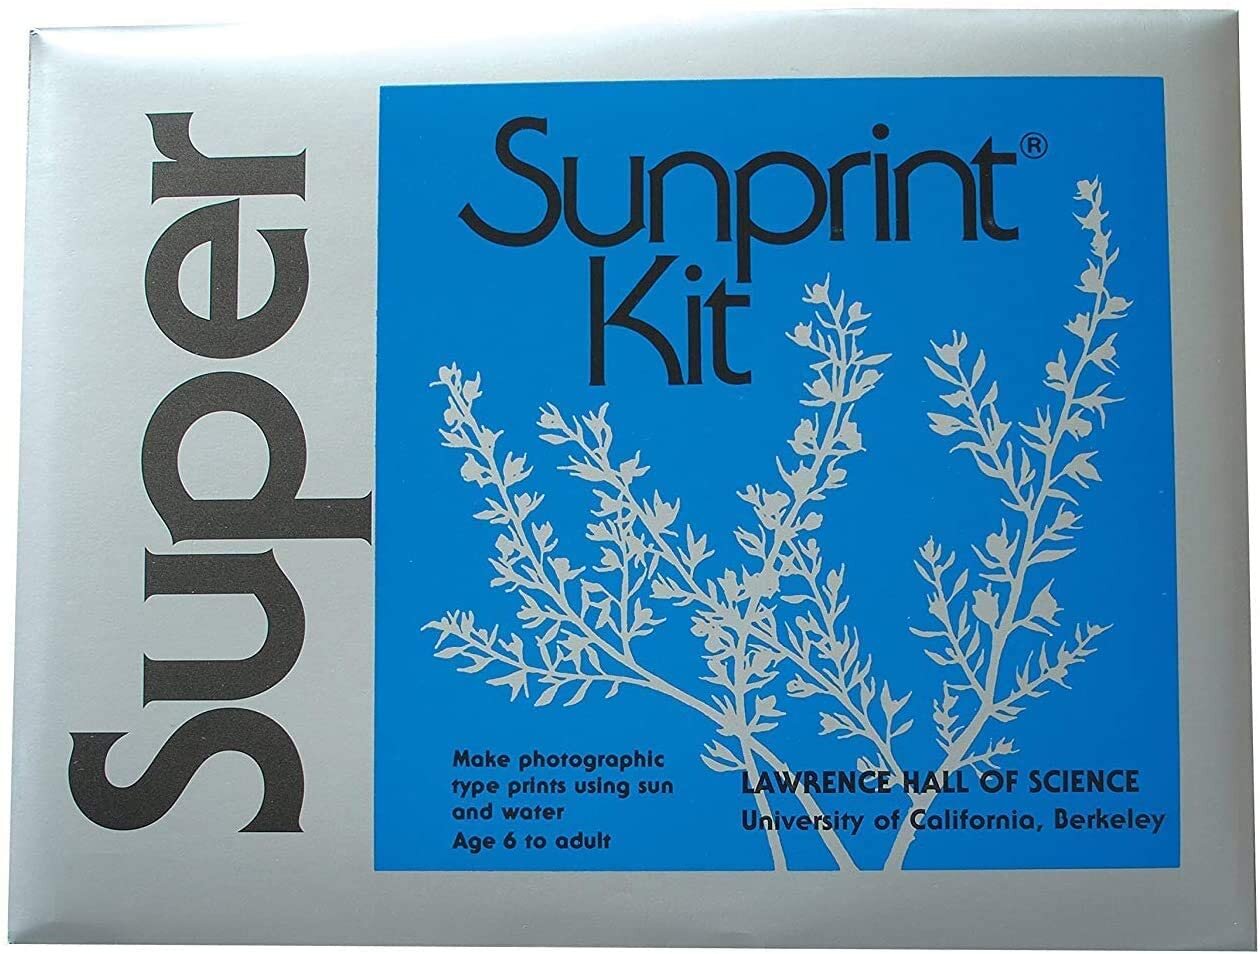
SunPrint Paper

Sunprint paper.jpg

Cyanotype is an early photographic process first discovered in 1842, and the SunPrint Paper is a great way to introduce this process to artists of all ages. To use, place flowers, objects, or anything on top of the paper and expose it to the sun where the exposed paper will turn blue. Then, rinse the paper in water to “fix” the image, although they may fade somewhat over time. A fun activity for all, this can get kids thinking about image making, materials, and the basic fundamentals of photography. Each pack comes with 15 sheets of 8.5 x 11” paper.

For larger sheets than SunPrint or raw materials to create your own cyanotype, shop Jacquard Cyanotype products at Blick.


Blick Studio Adjustable Activity Easel

Blick Studio Easel.jpeg

This easel is an affordable and flexible model that can be used on the floor or tabletop. It’s great for younger kids and it can be raised to a top height of 54”. The easel is 26 inches wide, and comes with a 25 foot roll of 18” paper. Typically priced around $90, this should provide years of use for painting and drawing.


The Year of Knots by Windy Chien

year of knots.jpg

Knots as art? Why not! (lol sorry). This book details Chien’s year long exploration of knots and while it is aimed at adults, older elementary school kids and up will appreciate it too. Beautiful illustrated with a ton of knots, plan to spend some money on rope to do these projects too. Knots and knot art touches on math, hand skills, macramé, craft, and so many other topics. It’s a fantastic jumping off point to explore more than just rope.


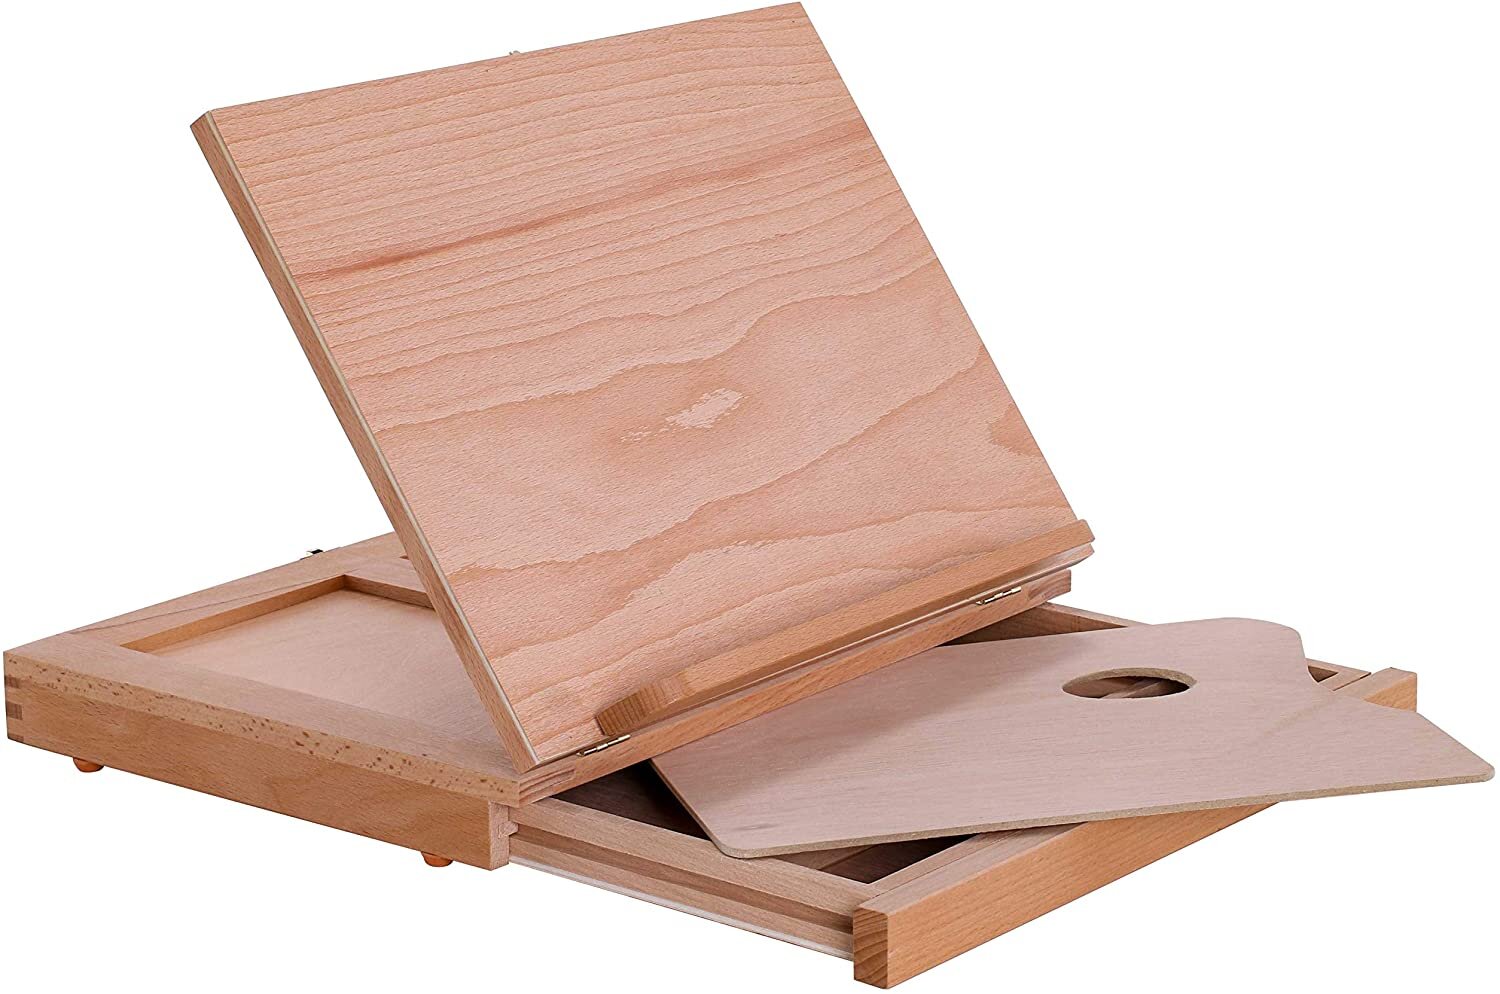
U.S. Art Supply Adjustable Portable Easel

US Art Supply Desktop Easel.jpg

This compact wooden easel has a drawer for supplies and can accommodate paper or canvas up to 11” x14”. It measures 13.25" wide, 10.25" deep, and 2" high, and includes a wooden painters palette. It also includes a handle for carrying. For $30, it’s a nice little unit that should see years of use if treated carefully. It’s also a great gift for a young painter—pair it with a watercolor or acrylic set and they are ready to get to work at home or outside.


Conclusion

Giving kids art supplies is a great idea as it sparks their creativity, introduces motor control skills, and gives them the freedom to make their decisions and follow their ideas. This gift guide has more than 35 recommendations of art supplies and kits. For the most part, these are supplies that can used in open-ended ways rather than a kit that can only do one thing.

What are your favorite ideas for kids art supplies? Let us know in the comments.


Best Ware Carts and Mobile Shelves for Pottery, Ceramics, and Sculpture Studios

Ware Carts can add a lot of storage space to your studio and are great for holding in-progress work. If you get a model on wheels, it will make your studio even more flexible and allow you to maximize space.

There are six ware carts made for ceramic studios, but you can also use wire shelving and even bakery carts. This post will cover every type of ware cart I’ve seen in ceramic studios, along with recommended picks. In truth, any of these will be quality additions to your studio. You’ll just need to select the cart that works for your space, and budget.

The Brent Ware Cart: our top pick for a ware cart / mobile shelving in a ceramic studio.

The Brent Ware Cart: our top pick for a ware cart / mobile shelving in a ceramic studio.

Top Pick: Brent Ware Cart

The Brent Ware Cart is my favorite ware cart for a few reasons. It has the typical Brent overbuilt / bombproof construction; it’s tall; and it’s made with round steel pipe. As ware carts are designed to move, the round sides are comfortable to grab and roll. It’s a small difference, but a detail that really makes this cart stand out. The center top bar is also less conspicuous, and I like the rounded look. Brent makes a few other carts, including a mobile shelf cart, if you want to go for a matching look too.

This cart ships flat and assembles by bolting together the cross bars and adding plywood shelves. It comes with 4” locking casters, and measures 35 inches wide, 24 inches deep, and 72 3/4” tall. The shelves are 24” x 32” and it can hold up to 9 full shelves, or you can use it with a combination of 12 x 32” half shelves.

The Brent Ware Cart typically retails for around $700 plus $150 for the shelves, or you can cut plywood yourself to make the 32” wide shelving.


Budget Pick: Wire Shelving on Wheels

Seville Classics 2’ x 4’ x 6’ tall heavy duty wheeled wire shelving.

Seville Classics 2’ x 4’ x 6’ tall heavy duty wheeled wire shelving.

Ceramic-specific ware carts retail for between $425 and $700 plus shelves, but for less than half that you can get heavy duty wire shelving on wheels. The wire shelving is not ideal for greenware that is too wet, but you can use boards to store wet pieces on it. And it is great for pieces that are leather hard, for drying tiles, or for any other sort of storage.

For wire shelving used as a ware cart, I’d go for 24” deep shelving such as the Seville Classics 24” x 48” x 72” tall unit with 3 inch casters. The whole unit is rated to hold 500 lbs. This is lower than the 750 to 1000 lbs that a ceramic ware cart will hold, but should be plenty for most studios.


amazon basics wire shelving on wheels.jpg

Ultra-Budget Pick: Amazon Basics Wire Shelving on Wheels

For a mobile wire shelving unit that is perfect for smaller studios, you can’t beat the $60 Amazon Basics mobile wire shelving. It’s got 5 shelves, measures 14” deep x 30” wide x 64.75” tall. It’s not as strong or big as a ceramic ware cart but it should hold up under individual / light duty use. Just don’t expect these to survive in an academic or community studio with heavy use.


Budget Pick: Bakery Carts

The Gridmann Bakery Cart with locking casters.

The Gridmann Bakery Cart with locking casters.

Bakery carts are another option for ceramic studios. They aren’t as sturdy or designed for the weight of clay or plaster, but can work for light-duty purposes. They are also cheaper and are often easy to find used. They tend to be smaller, built around the size of an 18” x 26” sheet pan. You’ll need to cut your own plywood shelves or with the narrow width, you can also make shelves with drywall.

Bakery carts are especially popular with tile makers as they really expand your storage area and they work with homemade, drywall shelves.

There are many option, but a solid one is the Gridmann Bakery Cart, which retails for around $150 plus the cost of shelves. In many ways, bakery work is pretty similar to ceramics so maybe these carts would be an ideal option for your studio.

These are just a few of the options for a studio. The post continues below with information on every ware cart on the market.

A Note on Plywood Shelves: Most ware carts have the option of adding precut shelves. You can also make your own with 3/4” interior-grade plywood. Cut it yourself with a plunge saw or table saw, or have a lumber yard cut it for you. You could use 1/2” plywood, but that will bend or warp over time. 3/4” plywood is a better investment as it is more likely to stay flat. It’s worth it to get the best grade of plywood you can afford, you’ll be happy you did years down the road.

If you get a narrow cart, such as a bakery cart, you can also make shelves out of drywall. Just be sure to cover the edges with duct tape or gummed paper packing tape, so that you won’t get drywall crumbs all over your studio.


Table of Contents

  • Top Pick: Brent Ware Cart

  • Budget Pick: Mobile Wire Shelving and Bakery Carts

  • Runner up: Bailey Ware Truck

  • North Star Ware Cart

  • Axner Ware Cart

  • Laguna Ware Cart

  • Debcor Ware Cart

  • Bakery Carts

  • Summary


Runner Up: Bailey Ware Cart

The Bailey Ware Cart, pictured here with the 13 shelf option.

The Bailey Ware Cart, pictured here with the 13 shelf option.

The Bailey Ware Cart is another great option that is about the same size as the Brent Ware Cart but has more shelves and is cheaper. Made of square steel bars and angle iron, it measures 24” deep x 34 1/2” wide x 74 1/4” tall. It has 6” casters and is available with 13 or 26 shelves. The 13 shelf unit retails for around $500 while the 26 shelf unit is around $650. The 26 shelf unit has a 2.5” spacing and is great for studios that do a lot of tile work, whereas the 5” spacing on the 13 shelf unit should work for most studios.

The Bailey Cart has a boxy shape, is easy to roll, and will be a piece of studio furniture that will last for decades. I have used these in a variety of studios and really like them, especially for tile work. When considering this unit, do note the top bars in the front and back. You will either have to use the top shelf for shorter ware, or as is more common, not use the top shelf or two.


Other Ware Cart options:

North Star Ware Truck

The North Star Ware Truck has easy-to-change shelf supports.

The North Star Ware Truck has easy-to-change shelf supports.

The North Star Ware Truck is characterized by it’s flexible shelf supports that hook in place without any tools. It’s a flexible, easy to use design. (You’ll have to gauge how often you need to change the set up of your ware cart to know if this makes sense to you.)

The entire unit is 39” wide, 24” deep and 67” tall and has 6” locking casters. It’s a bit shorter than most ware carts. It can hold up to 22 shelves, but it comes standard with 8 brackets, which gives you 4 shelves in addition to the bottom shelf. This package typically costs around $700.

This is a well thought out cart and is a great option if you want something shorter. Personally, I’d go with a taller cart like the Brent or the Bailey, but the North Star is one of the more flexible options.


Axner Ware Cart

The Axner Ware Cart is almost square, with shelves measure 32” x 36” inches.

The Axner Ware Cart is almost square, with shelves measure 32” x 36” inches.

The Axner Ware Cart is the biggest cart reviewed here. 36” wide, 32” deep, and 84” tall, this boxy behemoth will hold more ware than you’ll know what to do with. It has the potential for 11 shelves and is listed at a 1000 lb max load with 6” casters. Truthfully, this is the one ware cart I’ve never used in person. But it’s big! A deeper version of the Bailey ware cart in a way, that I’m sure is made with good quality from Axner / Laguna. At $500, it’s a good deal.

Halve shelves are listed at $10 each, it would be $220 for all 22. You could probably cut your own for cheaper.


Laguna Ware Cart

The Laguna Ware Cart in the distinctive Laguna teal paint job.

The Laguna Ware Cart in the distinctive Laguna teal paint job.

The Laguna Ware Cart has a center support column that can accommodate 18 half shelves. A distinctive design, it is easy to load even on the top shelf. The drawback is that it’s harder to grab and roll this cart, and you can occasionally catch yourself on the protruding shelf supports.

The cart measures 24” deep x 38” wide x 58” tall with 4” casters, with the shelves measure 12 x 36”. The cart retails for $425 and includes six shelves. It’s a good deal, but it is a shorter shelf and it’s just harder to grab and move this cart when you want to.


Debcor Ware Truck

The Debcor Ware Truck

The Debcor Ware Truck

The Debcor Ware Truck is the shortest option for ceramic ware carts, measuring 24” deep x 32” wide x 54” tall with 4” locking casters. The half shelves measure 12” x 28”, or 24” x 28” for full shelves. Like the Laguna Ware Cart, the Debcor Truck has a top cross bar that doesn’t interfere with loading ware. Although it’s shorter, this could potentially be a great option if you use the top layer for loading tall work.

This cart retails for $575 with 12 plywood half shelves. The cart can accommodate 8 full shelves or 16 half shelves, so you may want to cut a few extra.


Summary

Shelving on wheels just makes every studio better, and a quality ware cart is an investment that will last for decades while maximizing studio space. This post has covered every ceramic-specific option I’m aware of, along with wire shelving and bakery carts. The Brent Ware Cart is my favorite, followed closely by the Bailey Ware Cart, but truthfully, any ware cart is a better option that immobile shelving or no shelving at all.

What do you use for mobile shelving in your studio? Let us know in the comments.


Best Masks for Silica Dust in Pottery and Ceramic Studios

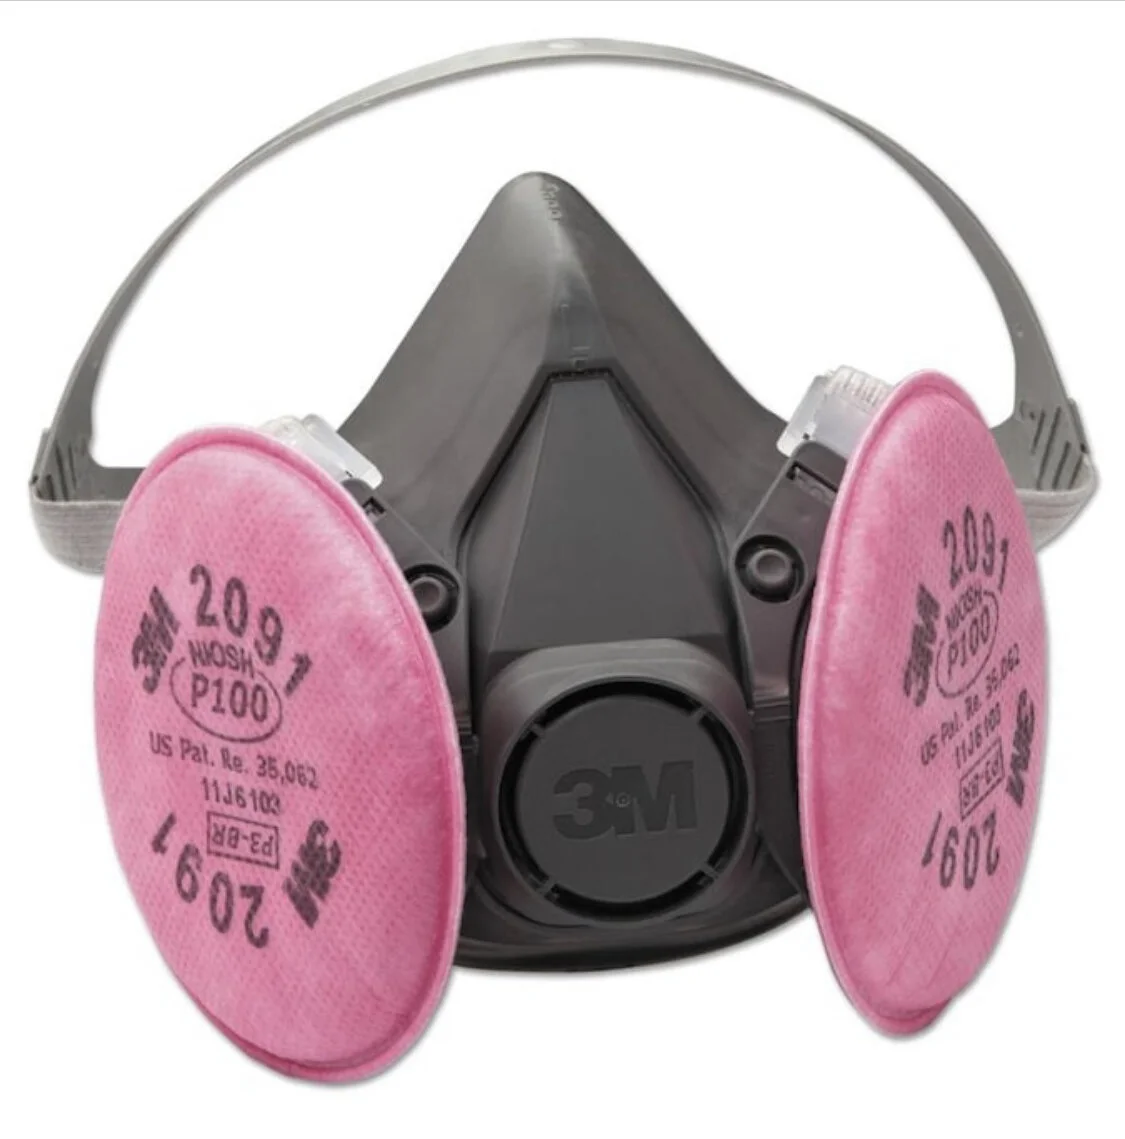
The 3M Half Mask with P100 particulate filters is the best mask option for ceramic studios.

The 3M Half Mask with P100 particulate filters is the best mask option for ceramic studios.

Editors note: Updated January 2022 to reflect the greater availability of N95s and other masks. The guidance on respirators remains the same.

Silica dust is a real hazard in ceramics studios and it’s important to have the right mask. Cloth masks or basic nuisance-grade dust mask will not offer enough protection against silica. The best options are N95/KN95 masks, or respirators with P95 or P100 filters. This is also the level of protection businesses are required by OSHA to provide to employees if silica dust is present.

Respirable silica is very fine with almost invisible particles that can stay airborne for some time, and repeated exposure can lead to silicosis or black lung. To protect against silica, it is important that masks fit correctly. If air can leak around the sides, it really defeats the whole purpose. This is especially of concern if you have facial hair, as that can cause the mask to not be properly sealed to the face. In that case, you may need a full face mask or to trim your beard. Overall, the best mask is going to be one that you reach for and wear during dust-generating tasks. Any protection is better than none. Personally, I use a respirator with P100 filtration whenever I am working with clay, plaster, wood, or other materials that create dust.

Also consider what is causing dust in your studio and seek to minimize that activity if possible. Keep an organized studio, use wet cleaning and sanding methods, and avoid creating dust. You may want to consider adding a dust collection system. For additional recommendations, visit our guides for cleaning tools and HEPA vacuums.

TOP PICK: 3M Half-Facepiece Respirator with P100 Filters

3M 6300 Half-Facepiece Mask without filters attached.

3M 6300 Half-Facepiece Mask without filters attached.

The 3M 6300 Half-Facepiece Respirator is a comfortable, reusable mask with filters that can be replaced as needed. This facepiece will take the round P95 or P100 particulate filters, or the cartridge style filters that are rated for particulates and some types of gases. Either will work, but you might find the round particulate filters to be more breathable. 3M also makes upgraded half masks (see below for more info) but this basic model is affordable, long-lasting, and will get the job done.

Note: this half-facepiece mask has unfiltered exhaust valves that are not appropriate for Covid safety in shared spaces.


The pink, round 3M 2097 P100 filters will fit the half facepiece mask.

The pink, round 3M 2097 P100 filters will fit the half facepiece mask.

P100 Filters and other options

The round, pink 3M 2097 Filters rated to P100 will offer the highest level of particulate protection. You could go with the slightly cheaper, white P95 filters but in my opinion, P100 filters are the way to go.

Another advantage of the Half Facepiece masks and filters is that they seem to be readily available during this time when disposable face masks are in high demand. When using these half masks, there can be some moisture buildup inside, but in general, I find them more comfortable than disposable masks.

All together, the 6300 half facepiece with P100 filters will typically cost around $25, and replacement filters are around $11-15 per set.


DISPOSABLE MASK TOP PICK: 3M 8210 N95 Masks

The 3M 8210 N95 mask has straps that go over the head.

The 3M 8210 N95 mask has straps that go over the head.

We’ve all learned a lot about masks during the Covid-19 pandemic, and if you’ve incorporated these into your Covid routine, you’re set for the studio too. N95 or KN-95 Masks are NIOSH rated to filter 95 percent of dust particles and are good for multiple uses if kept clean. N95 Masks have straps that go over your head, making them fit more snugly. KN-95 masks typically have ear bands and fit more loosely, however, they often seem to be constructed with a bit more breathing room around your mouth.

These days, it can be hard to find NIOSH-approved N95 / KN-95 masks but if it’s available, a solid option is the 3M 8210 N95 Mask. It typically comes in bulk packs where each mask costs $1.50 to $2.00 each.


ALTERNATE DISPOSABLE PICK: KN-95 Masks

Armbrust KN-95 mask in purple

Armbrust is an Austin, Texas-based mask manufacturer. Their KN-95 masks are available in a variety of colors. Shop at Armbrust

The disposable mask market is quickly changing these days, with a variety of manufacturers attempting to fulfill the demand during the Covid-19 pandemic. There also have been reports of fake name-brand masks and other problems. It can be very confusing to buy a “real” N95 or KN-95 mask, as detailed in this NY Times report.

KN-95 masks, which have ear bands as opposed to the over-the-head N95 style, have become quite common but the number and variety available are confusing. One place to start is by reviewing CDC-approved mask manufacturers as explained here or listed by the CDC here.

In late 2021, I placed an order with the Texas-based U.S. manufacturer Armbrust, and have been very happy with the quality of the surgical, KN-95, and kids KN-95 masks that I received. Not only are they NIOSH approved, but the masks are available in a variety of colors. It is great to have a readily available source of NIOSH-rated masks.


Tightest Fit: Pouch or “Duckbill” Style N95s

The Kimberly-Clark Pouch Style N95 has two soft straps that go over your head.

They may look sort of funny, but in my experience, the pouch or “duckbill-style” N95s have the tightest fit of any disposable masks. You can see the mask material move in and out as you are breathing, and it seems to provide excellent coverage for Covid and dust. These are what I favor for teaching and other times when a respirator is not feasible.

More mask reviews below:

Those are my top picks for studio dust masks that are appropriate to use for silica. Keep reading for a deeper look at various half-facepiece masks and other disposable mask options.


Table of Contents

  • Half Facepiece Masks (3M 6300, 3M 6500, 3M 7500)

  • Filters for Half Facepiece Masks

  • RZ Masks

  • Disposable Masks

  • Summary


Half Facepiece Masks: 3M Models

My top pick for a dust mask for a pottery or ceramic studio is a 3M 6300 Half Facepiece mask. It’s the basic model but will get the job done. The upgraded models are made with softer plastic and have a few different features with the straps and valves.

3M 6000 series Half Facepiece Mask

The 3M 6300 Half Facepiece Mask.

The 3M 6300 Half Facepiece Mask.

The 6000 series is the standard mask in the 3M line, and seems to be readily available in the 6300 model but you may occasionally see the 6200 or 6100. From what I can tell, these are all about the same. Made of “thermoplastic elastomer,” the masks will work with 3M filters or cartridge filters, and can be taken apart and cleaned. At around $13 each, these are a great deal.


3M 6500 Cool Flow Half Facepiece Mask

3M 6503QL Rugged Comfort Quick Latch model.

3M 6503QL Rugged Comfort Quick Latch model.

The 3M 6500 series is termed the “rugged comfort line” and features a softer silicone face seal, a low profile design, a “Cool-Flow” valve, and some models have a quick-latch drop down feature.

The most common and popular model in this series appears to be the 6503QL Rugged Comfort Quick Latch Model. In addition to the silicone lining, this mask features upgraded straps. It typically retails for $20 to $25 plus filters.


3M 7500 Half Facepiece Mask

The 3M 7502 Half Facepiece Mask.

The 3M 7502 Half Facepiece Mask.

The 7500 Half Facepiece line from 3M has the same features as the 6500 line, with the silicone lining and Cool Flow valve, but it has one main difference: the exhalation valve air is routed down to reduce fogging. If you wear glasses or googles, you should consider this mask.

This 7500 line typically retails for $25 to $30 plus filters.


3M Filter Options for Half Facepiece Masks

There are two styles of filters available for 3M masks: round particulate filters and cartridge filters, which work for particulates and gasses. For ceramics, particulate filters are adequate but if you stain wood, paint, or other activities with volatile gases, the cartridges will be a better option.

Particulate Filters

There are two options for round particulate filters: P95 and P100. The P100 offers a higher level of filtration. For a ceramic studio, the 2071 or 2091 filters are your best options. There are a few other filter options aimed at welders, smelting, and chemistry applications.

p100 filter.jpg
P95_2071_F_F.jpg

3M Cartridge Filters

3M Cartridges are almost all rated P100 and will filter particulates, gases, and vapors. There are a variety of options but the basic 60291 should cover most art studio applications. These are a bit overkill if you are just worried about silica / particulates, but are a good option if you are painting or working with anything that produces volatile fumes. The cartridges are generally about double the cost of particulate filters. At big box hardware stores, they typically only sell the cartridge filters or mask combos, as shown below.

60921_P.jpg
respirator with cartridge filters.jpg

For a complete overview of all the mask and filter options available from 3M, click here or here.


RZ Masks

The M2 mask from RZ.

The M2 mask from RZ.

RZ Reusable Face Masks are an interesting mix of a disposable mask with some features of a respirator. A newer product, you can now find these at a lot of hardware and home improvement stores, and online. The masks are not yet NIOSH rated, so I have some hesitancy in rating them higher, but when they do (most likely) receive a NIOSH rating, these would be a great workshop mask. (For technical info on RZ masks and the testing they have undergone, click here.)

The M2 Mask from RZ features a mesh fabric, hook and loop neck strap (i.e. similar to Velcro), and carbon filters that filter 99.9% of particles down to .1 micron. These masks were designed with unfiltered exhalation valves but the company now makes valve caps for use in shared environments where only filtered exhalation is recommended for the best Covid safety.

You will need to replace the carbon filters over time. Think of this mask as a more comfortable hybrid of a respirator and a disposable mask. They typically retail for $32 to $36 and come in a wide variety of colors. Replacement filters are available in a 3 pack for $9.


Other Disposable Masks

The 3M N95 and KN-95 masks listed at the top of this post are great options, but there are other disposable masks.

Moldex 2300

The Moldex 2300 Mask.

The Moldex 2300 Mask.

The Moldex 2300 is another N95 particulate respirator that also features an exhaust valve. This helps reduce moisture buildup, but it’s not recommended for Covid-level safety. The Moldex masks are also currently reserved for front-line organizations fighting Covid.


Honeywell Nuisance Masks

Honeywell Nuisance Masks

Honeywell Nuisance Masks

The Honeywell Nuisance Masks are cheap and easy to find, but they are not rated for hazardous dust or particulate use. Too often, I’ve seen these as the masks offered to students in ceramic classes. I guess they are better than no mask but there’s no reason to be casual about silica dust. These might be fine in a pinch, but they may give a false sense of security. For art studios, it’s best to use the proper N95 or higher masks.


Summary

This post has covered a variety of masks to deal with silica and other particulates in a ceramic studio. The first step should be to avoid making dust if possible. But to deal with silica, use a NIOSH approved half facemask respirator, or N95 rated disposable masks. Your long-term health is worth it, and investing in quality personal protective equipment is always a good idea.

What type of mask do you use to protect against silica and other particulates? Let us know in the comments.


Best Bats for the Pottery Wheel

March 20, 2022: Updated and edited

Throwing bats make things easier on the pottery wheel but with many options, it can be hard to pick the right one for your studio. Bats are available in various sizes and a variety of materials, including plaster, plastic, medex, MDF, and tempered hardboard such as Masonite. In addition to individual bats, there are also bat systems. This post will cover all the bats that I’m aware of on the market.

A 12” Speedball Plastic Bat on a 14” wheel head.

A 12” Speedball Plastic Bat on a 14” wheel head.

TOP PICK: Speedball Plastic Bats

My favorite bats are Speedball Plastic Bats. Available in 3 sizes and 5 different colors, they have a lip that makes picking up and removing from the wheel a breeze, they don’t warp, and they are long-lasting.

Injection molded, all the bats (even the square!) have universal 9” and 10” pin spacing. They are easy to clean and store, and a good value for the money.


The bottom of a 12.5” HydroBat, note the red rubber bat pin grommets.

The bottom of a 12.5” HydroBat, note the red rubber bat pin grommets.

UPGRADE PICK: Hydro-Bats

Hydro-Bats are made from Hydro-Stone, a gypsum compound that is harder than plaster, and feature rubber grommets cast into the bat. Most have 10” pin spacing but there are other sizes as well. The absorbent Hydro-Stone virtually eliminates the need to cut your works off with a wire, and it is more resistant to chipping and scraping than plaster. They are thicker than plastic bats, about 1/2” thick, but if you have the room, these are a joy to use.

About Bats:

Bats are useful for a variety of reasons: they provide a platform to pick up and move your work as it is drying, they protect the wheelhead, and they might even make clean-up easier. You can throw directly on the wheel head, but for wide or flat forms, you will definitely need a bat to successfully move it off the wheel.

Scroll down for a full review of a all types of bats.


Table of Contents:

  • Top Pick: Speedball Plastic Bats

  • Upgrade Pick: HydroBats

  • Amaco Plasti-Bats

  • Laguna Plaster Bats

  • Masonite Bats

  • Medex Bats

  • Bat Systems

  • Bat Accessories

  • Summary


The 7.5 inch square Speedball Plastic Bat

The 7.5 inch square Speedball Plastic Bat

Top Pick: Speedball Plastic Bats

The bottom of the Speedball Plastic Bat.

The bottom of the Speedball Plastic Bat.

Speedball Plastic Bats are injection molded and available in three sizes: 14 inch round, 12 inch round, and 7.5 inch square. All feature universal 9 and 10 inch pin spacing (yes, even the square!). They have a grid of support on the underside, are about 1/4” thick, and do not warp. They don’t chip, but they can be cut by sharp knives.

A side view of the lip on the Speedball Plastic Bat.

A side view of the lip on the Speedball Plastic Bat.

The best feature of these bats is the lip on the side. This makes them very easy to remove, as opposed to the Amaco Plasti-bats, which sit flush with the wheel head. The one drawback is with the pin opening on the bottom, you can find yourself hunting to match the bat up with pins.

These bats can be stored horizontally or vertically. The most interesting is the space-saving 7.5 inch square bat, which can really reduce storage space if you are making a variety of bowls or platters.

These bats should be available at your local ceramic supplier or check Amazon. They are available in 5 different colors, including brown, blue, green, orange, and red.

The 12 inch Speedball Plastic Bat on a 14” wheel head.

The 12 inch Speedball Plastic Bat on a 14” wheel head.

The 14 inch Speedball Plastic Bat.

The 14 inch Speedball Plastic Bat.


Upgrade Pick: Hydro-Bats

The bottom of a 12.5 inch diameter Hyrdo-Bat, with the red rubber grommets that fit on standard 3/8” bat pins.

The bottom of a 12.5 inch diameter Hyrdo-Bat, with the red rubber grommets that fit on standard 3/8” bat pins.

Hydro-Bats are a line of bats made from HydroStone, a U.S. Gypsum product that is harder and stronger than plaster but still absorbent. They are widely available, but are manufactured by the team at The Ceramic Shop in Philadelphia. In addition to the absorbent surface, the bats have a lip for easy removal, and rubber grommets that easily fit over bat pins.

The complete line has flat bats, hump bats, and a variety of plate and platter shapes. The flat bats have two sizes of pin spacing: the standard 10” pin spacing comes in diameters ranging from 12.5 to 28 inches, and the smaller 6” pin spacing has bats that are 8.5 and 10 inches in diameter. The 6 inch pins might fit tabletop wheels or there is also a 10” to 6” adapter available.

Hydro-Bats do take up more space, they are about 1/2 inch thick. And if they become saturated with water, they won’t be very useful until they dry out. But the absorbency of the HydroStone makes these a great option for throwing bigger forms, as you will have more even drying on all sides of the vessel. When the clay pulls away from the bat without sticking, your ware will be at the perfect dryness for trimming.

Hydrobats will chip or take cuts from very sharp knives, but from experience I can say that you can drop them without much risk of them breaking (you might get some chips though.) Overall, these are my favorite bats to use because they make trimming much easier, and they are stronger and easier to use than homemade plaster bats, or other absorbent bats without grommets. They do cost more, but it’s worth it.


Amaco Plasti-Bats

Amaco Plasti-Bats are available in 12” and 14” diamater.

Amaco Plasti-Bats are available in 12” and 14” diamater.

Amaco Plasti-Bats are 1/4” thick, hard plastic with holes for bat pins drilled through. Available in 14 and 12 inch diameter, and 9 inch square, the holes are a universal 10 inch spacing. It would be simple to drill new holes if needed for alternative pin spacing. Simple, easy, and effective, these are functional bats that will get the job done.

There is also a 9” square Amaco Plasti-Bat, which also has holes for 10” pin spacing.

There is also a 9” square Amaco Plasti-Bat, which also has holes for 10” pin spacing.

With no ribbing or lip, either side can be used and cleanup is very easy. As with all plastic bats, they are non-absorbent.

The drawback with these is that while they are easy to attach to the wheel head, the lack of a lip makes removal a bit hard. Some sort of tool or knife is needed to wedge one side of the bat up, so that your fingers can get underneath. Without the ribbing, these can warp if stored incorrectly. It’s best to store these horizontally, but they can be stored vertically as long as pressure is not applied.

These are not a big savings over the top pick, the Speedball Plastic Bats, but they are generally a bit cheaper.


Laguna Plaster Bats

Laguna Plaster Bats are 1” thick and available in 4 diamters.

Laguna Plaster Bats are 1” thick and available in 4 diamters.

Laguna / Axner makes a line of 1 inch thick plaster bats. These do not have grommets or pin holes, so they will need to be attached to the wheel head with clay. They are available in four round diameters: 7.5 inch, 9.5 inch, 11.5 inch and 13.5 inch.

Much more affordable than Hydro-Bats, plaster is not as strong as Hydro-Stone but it will still work. Just be careful to not drop or use sharp tools with these.

In general, it’s really nice to throw on absorbent bats so if you don’t want to commit to Hydro-Bats, try one of these and see if you like it. You can also make your own plaster bats by using forms such as pie tins, or round trash cans.


Masonite Bats

A 12” Masonite bat with universal 10” bat pins.

A 12” Masonite bat with universal 10” bat pins.

Masonite bats are made by a variety of manufacturers and are affordable, thin, and can be real workhorses if used correctly. Masonite is a 1/4” thick, tempered, water-resistant hardboard that is usable on both sides and is slightly absorbent, making it ideal for helping pots dry. Their affordability also makes these common in production pottery, but if they stay wet for a long time (such as long-term storage of wet ware) or are soaked, they will warp, break down, or get moldy. They will also scratch if metal tools are used too aggressively on the surface.

The best way to use masonite bats is to remove the pot when it is ready for trimming, then clean the bat with a minimum of water, and allow the bat to dry before using again. Also, never soak a Masonite bat or flex it when wet, and store them horizontally.

With care, Masonite bats can last a long time.


Medex Bats

medex-bats.jpg

Medex Bats are a made by a variety of manufacturers including Speedball. Medex is a 3/8” thick, engineered particle board that is made with no formaldehyde. It’s smooth, dense, and water resistant. Think of it as thicker Masonite. All the same issues reported above also apply here, i.e. no soaking or long-term ware storage. But if kept cycling through your studio, these bats should stay flat and are cost-effective. Some reviews online mention warping, but if used correctly, they will be fine.


Baltic Birch Plywood Bats

Plywood bats

Plywood bats

Bailey Ceramic Supply in New York makes 3/4” thick Baltic Birch Plywood Bats. Absorbent like plaster, these bats are lighter than plaster or Hydro Stone, and won’t break or chip if you drop them. They are also more rigid for larger forms—plastic gets floppy at larger diameters. You could make your own plywood bats but these are predrilled and ready to go.

Like Masonate / Medex / hardboard, plywood will warp and get moldy if clay and ware is stored on them for a few weeks. Clean up with a minimum of water, and remove your piece as soon as you are able. It’s also a good idea to let these dry out in between uses. If properly cared for, plywood bats are long lasting.


Bat Systems

Bat systems feature a large bat and smaller inserts that can be swapped out. The idea is to save space on the shelf, and not have to bother attaching bats over and over. It’s particularly ideal for smaller work such as mugs, and small cylinders and bowls. The downside is that you commit to one manufacturer if you need extra or replacement bats. Some potters make their own version of these using a drill and a jigsaw. Only commit to a bat system if you know it’s the right system for you, the size of work you make, and your studio. It can be a definite space saver.

Penguin Pottery Heavy Duty Bat System

Penguin Pottery Heavy Duty Bat System

The Penguin Pottery Heavy Duty Bat System is made from MDF.

This system features a 14” circular bat with 6 inch square inserts, all made of MDF. The pins on the large bat are set for a 10” bat pin spacing, and the system is made in the USA. The inner bats are easily removable via four finger holes.


Dirty Girl Bat Systems

The Dirty Girl round bat system.

The Dirty Girl round bat system.

Dirty Girl tools makes two bat system, a square and round set. The large bat is 12.5”, and the smaller bats are 6.5 inches.

It’s not listed on the site, but it appears the larger bat is Medex or pressboard, and the inserts are thinner Masonite or some kind of tempered hardboard.


Snap Bat Throwing System

The all plastic Snap Bat system.

The all plastic Snap Bat system.

The Snap Bat Throwing System is an all-plastic option developed by The Ceramic Shop in Philadelphia. The large bat is 1/2 thick, and the smaller bats 7 x 7 inches square and 1/4” thick.


SpaceSaver / WonderBat Square Bat System

The WonderBat Square Bat System.

The WonderBat Square Bat System.

SpaceSaver by StudioPro and The WonderBat Square Bat System are compatible bat systems. (It appears the WonderBat is being phased out) This system is slightly different in that the inserts and larger bats are the same thickness. Designed to fit a standard 10" bat pin spacing with rubber comments that allow for two-sided use, it’s made from a engineered hardboard (possibly exterior-grade MDF) that is similar to Medex / Masonite. A variety of reviews praise this system, while others found that it expanded when exposed to water, which made it hard to use.

StudioPro also makes interesting polygonal bats and other speciality items.


Bat Accessories

There are a variety of accessories and add-ons that can help with bats and the throwing process.

Xiem Studio Tools BatMate

Xiem Studio Tools BatMate.

Xiem Studio Tools BatMate.

The BatMate from Xiem Studio Tools is a 12-inch diameter piece of synthetic fabric that can be placed in between a bat and wheel head to virtually eliminate any wobble, improving the accuracy of throwing and trimming. Many potters, however, wet the fabric and place it directly on a wheel head to use when trimming pots. Pots will stay put just by tension, without adding little balls of clay wadding. This saves time and works just as well.

It’s probably not necessary if you get Speedball Plastic Bats or Hydro-Bats, but it may be helpful for masonite or other bats that might have a slight warp. And it’s also a great tool for trimming small pots. At around $15, this is a tool that gets used all the time once it’s in a potter’s kit. The BatMate is available in 12 and 14 inch diameters.


Xiem Tools Bat Lifter

XSTBL.jpg

If you have bats without a lip, the Xiem Tools Bat Lifter will save your fettling knife or nails, helping you easily pick up one side of the bat. If you have Amaco Plasti-Bats, you definitely want one of these!


WiziWig Tools Clay Shield

The WiziWig Tools Clay Shield.

The WiziWig Tools Clay Shield.

The WiziWig Tools Clay Shield is a set of 14 flexible panels that will guard your throwing area from trimming and throwing splatters. Each panel is 4 1/4” wide, 8 3/4” tall, and has a base that slides under your splash pan. When combined, the Clay Shield will cover a 20 inch diameter. Coverage varies depends on set up and your wheel, but overall, this is a simple tool that can make a big difference in cleanup. It does require some set up and can get in the way, but if you’re working in tight quarters it can really help.

If this doesn’t seem right for you, some people tape newspaper, cardboard, or even flexible cutting boards to achieve the same ends.


Foam Trimming Bat

Foam Trimming Bats by StudioPro.

Foam Trimming Bats by StudioPro.

StudioPro and others make foam trimming bats. These are foam glued to a bat. You can make your own, but StudioPro offers two options: one has 1/4 in foam for smaller pots, and another has 3/4” foam for heavier or uneven pots. Simple, easy and time saving, if you think a foam bat is going to help you, it probably will.


Brent Batmobile

Brent Batmobile.jpg

The Brent Batmobile is a mobile cart perfectly designed to hold scores of round bats. It can accommodate bats that are 12 to 14 inches tall, and has locking 4 inch rubber casters. It’s not cheap—you might try a DIY option—but Brent’s entire product line is built to withstand heavy use in a production or busy academic studio. It will last forever.


Grinding Discs

There are now a variety of grinding discs that fit right on your wheel head. A great solution—you’ve already got this spinning motor with a waterproof splash pan! Some grinding discs have sticker backs that can be used with a bat. If you’re interested in this, a good place to start is with our DIY grinding disc tutorial.


Summary

This post covered a variety of bats for use on the pottery wheel. There are bats available in plastic, HydroStone, plaster, Masonite and other hardboards, and even plywood. There’s also a variety of bat systems and other bat accessories. Overall, my favorite bat is the Speedball Plastic Bat for it’s easy to move lip and resistance to warping. Hydro-Bats are my favorite for absorbent bats.

What are your favorite bats?


Best Wet Polisher / Grinder for Ceramics and Sculpture

There are a variety of wet polishers/grinders on the market, but models from Flex, Makita, and Metabo are clear market leaders. These are long-lasting, professional-grade tools that will hold up under heavy use for all your grinding and polishing needs. There are other options, but the top three picks are clearly superior to various generics and off-brand models. These tools are mostly designed for polishing and routing marble and stone, but they work great with ceramic, glaze, concrete and other materials.

A complete review and guide to wet polishers is below, but first:

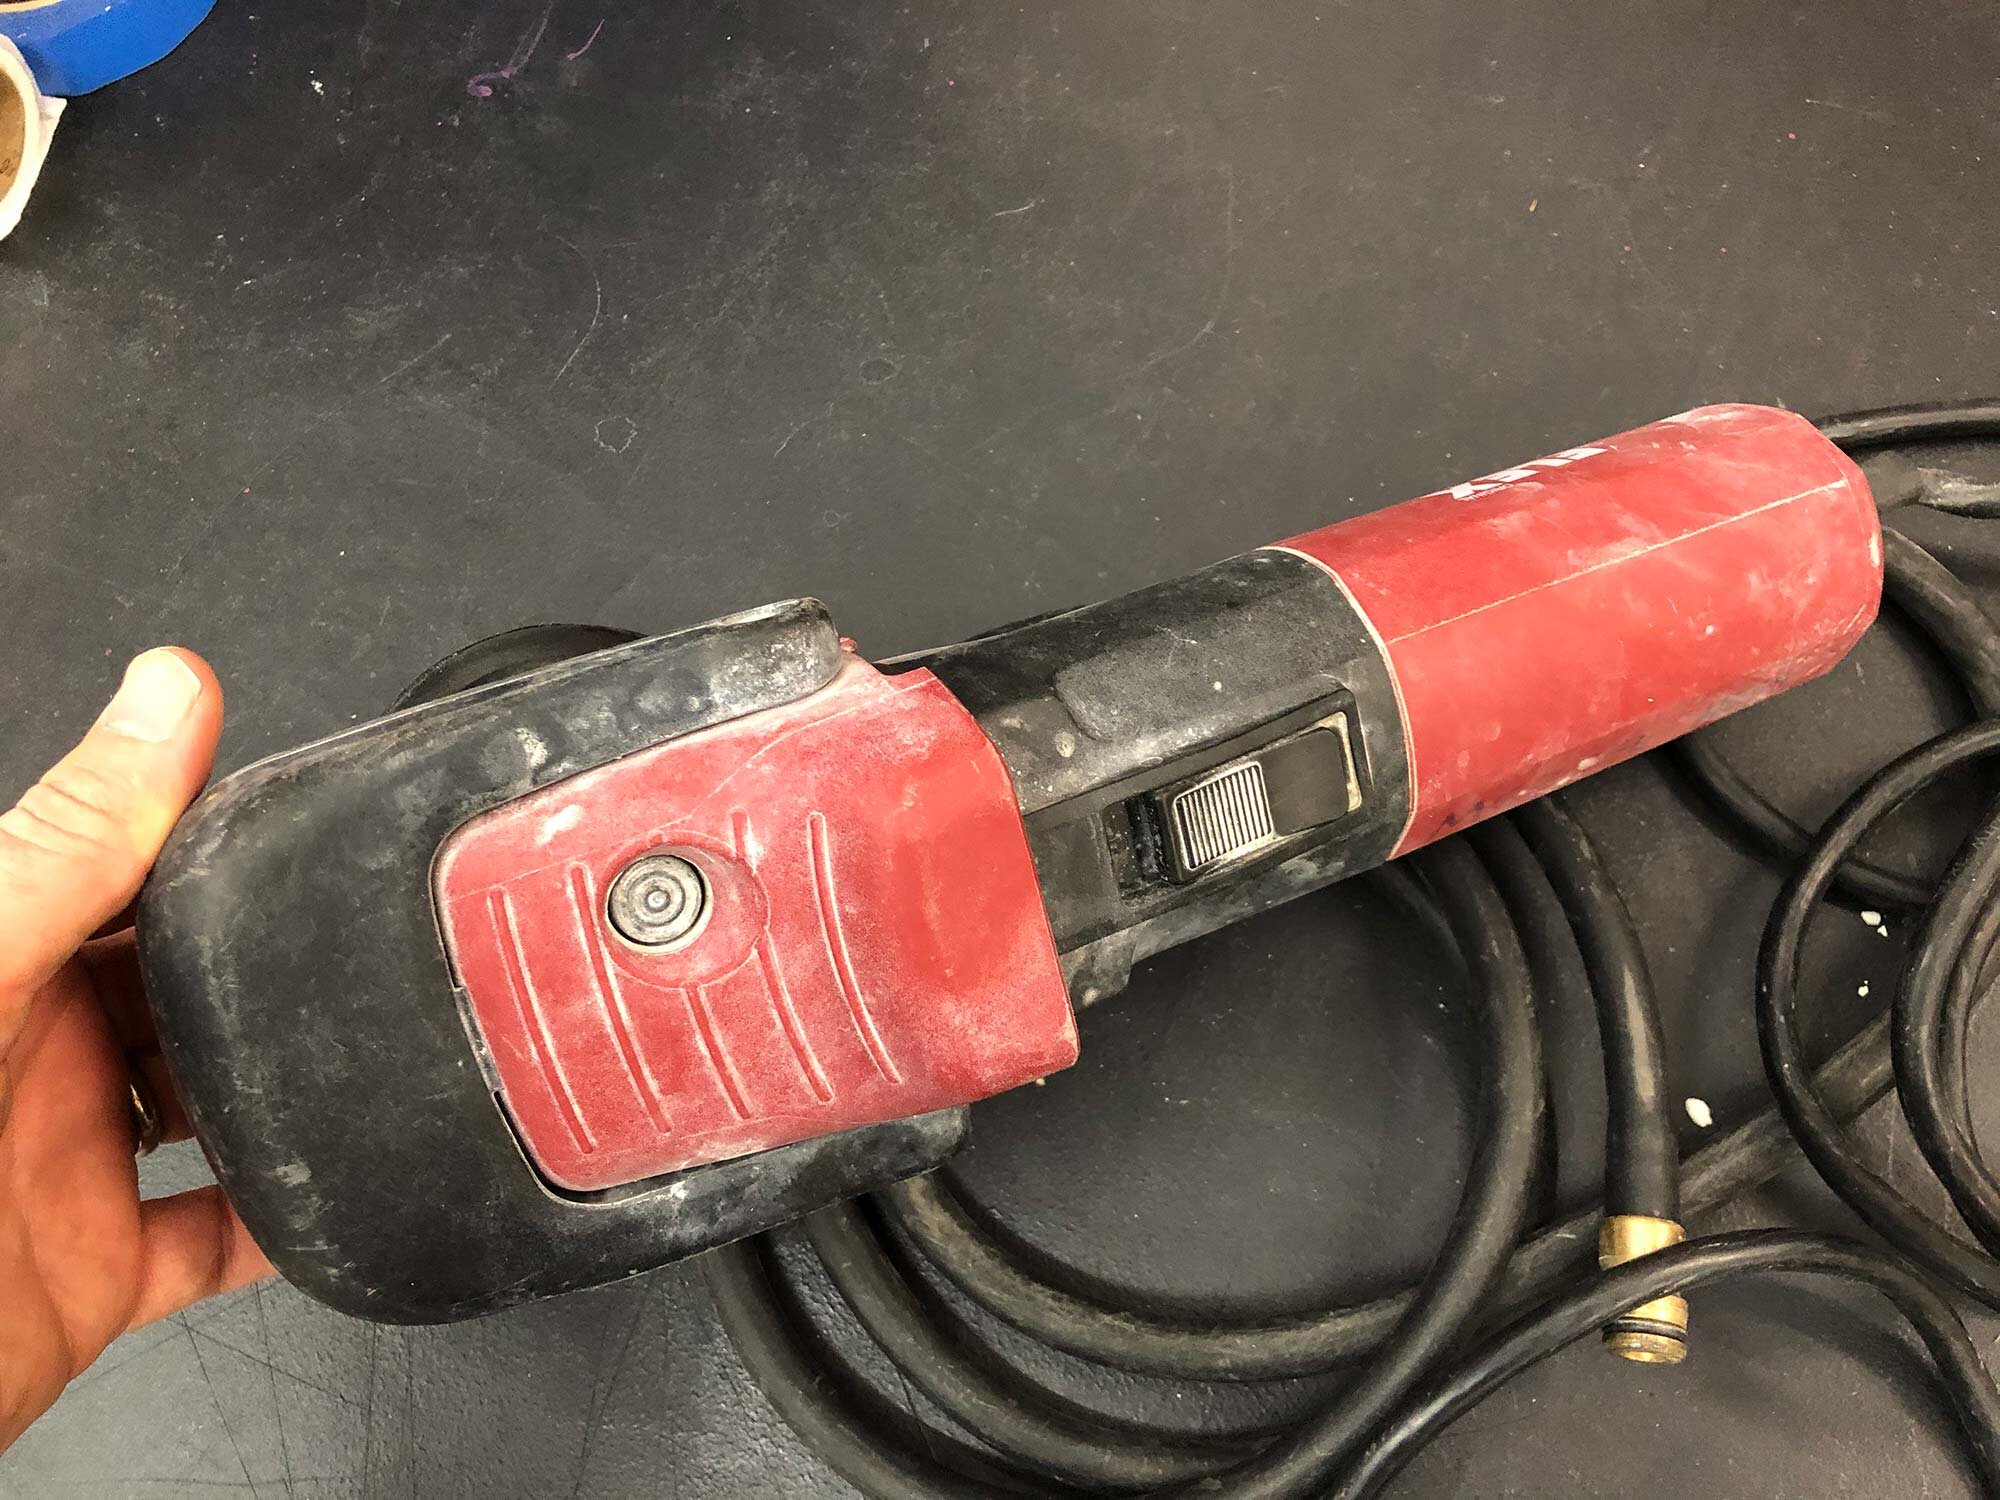
TOP PICK: Flex LE 12-3 100 Variable Speed Wet Polisher / Grinder

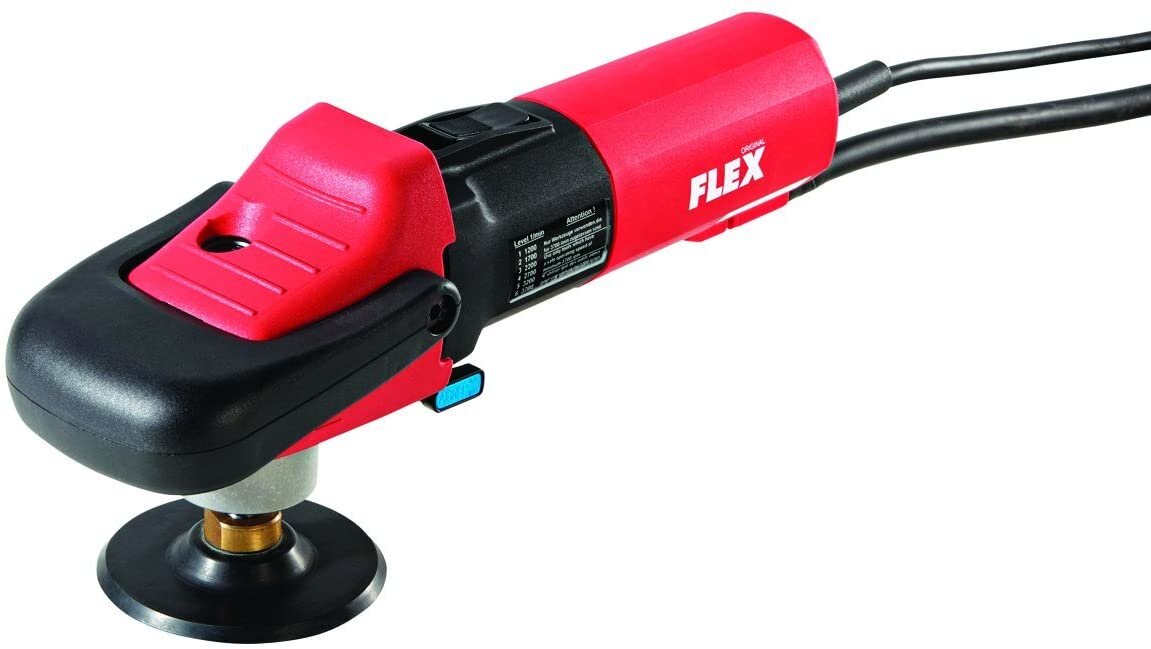
The Flex LE 12-3 100 Variable Speed Wet Polisher / Grinder.

The Flex LE 12-3 100 Variable Speed Wet Polisher / Grinder.

The top pick (and the model I use in the studio) is the Flex LE 12-3 100 Variable Speed Wet Polisher / Grinder.

The Flex polisher has a 9.3 amp motor with speeds ranging from 1200 to 3700 RPM, can accommodate up to 5 inch pads, weighs 5.5 lbs (2.4kg), and it is made with high-quality rubber hoses and cords that stand the test of time. One distributor reports that of all the wet grinder models, this gets returned the least, speaking to its quality. The Flex Variable Speed Wet Polisher typically retails for around $320-$340.

Like most power tools, you do have to pay for quality with wet polishers. The top three models from Flex, Makita and Metabo are among the most expensive models, generally costing between $300 and $350 plus extra for a pad and grinding discs. But for an electric tool used in such close proximity to water, you definitely want a tool that you can trust.

Is this a necessary tool for everyone? Most likely not. A wet polisher/grinder is a specialized piece of equipment. But once you have one, you’ll find lots of uses ranging from clean up and polishing, to opening up new decorative possibilities with ceramic glazes. And it’s always great to have a water-based sanding operation to keep dust down in your studio.

SAFETY NOTE

Wet polishers / grinders have electrical motors and a water feed. Use proper safety equipment including eye protection, rubber gloves, and possibly a rubber apron. These machines will cast water in many directions, so create a protected area and endeavor to keep water away from the motor and electrical cords. If you feel a “tingle” of electricity, cease use and assess what is causing the problem. All of these tools come with a built-in Ground Fault Circuit Interrupter (GFCI) and if possible, you should plug them into an outlet that also has a GFCI. If the on-unit GFCI is not working, do not use the tool.


Table of Contents

  1. Top Pick: Flex LE 12-3 100 Variable Speed Wet Polisher / Grinder

  2. 2nd Top Pick: Metabo PWE 11-100 Variable Wet Polisher / Grinder

  3. 3rd Top Pick: Makita PW5001C Variable Speed Stone Polisher

  4. Runner Up: Stadea SWP 101K Wet Polisher

  5. Other options

  6. Comparison Chart / Buyer’s Guide

  7. How To Use A Wet Polisher

  8. Summary


Top Pick: Flex LE 12-3 100 Variable Speed Wet Polisher and Grinder

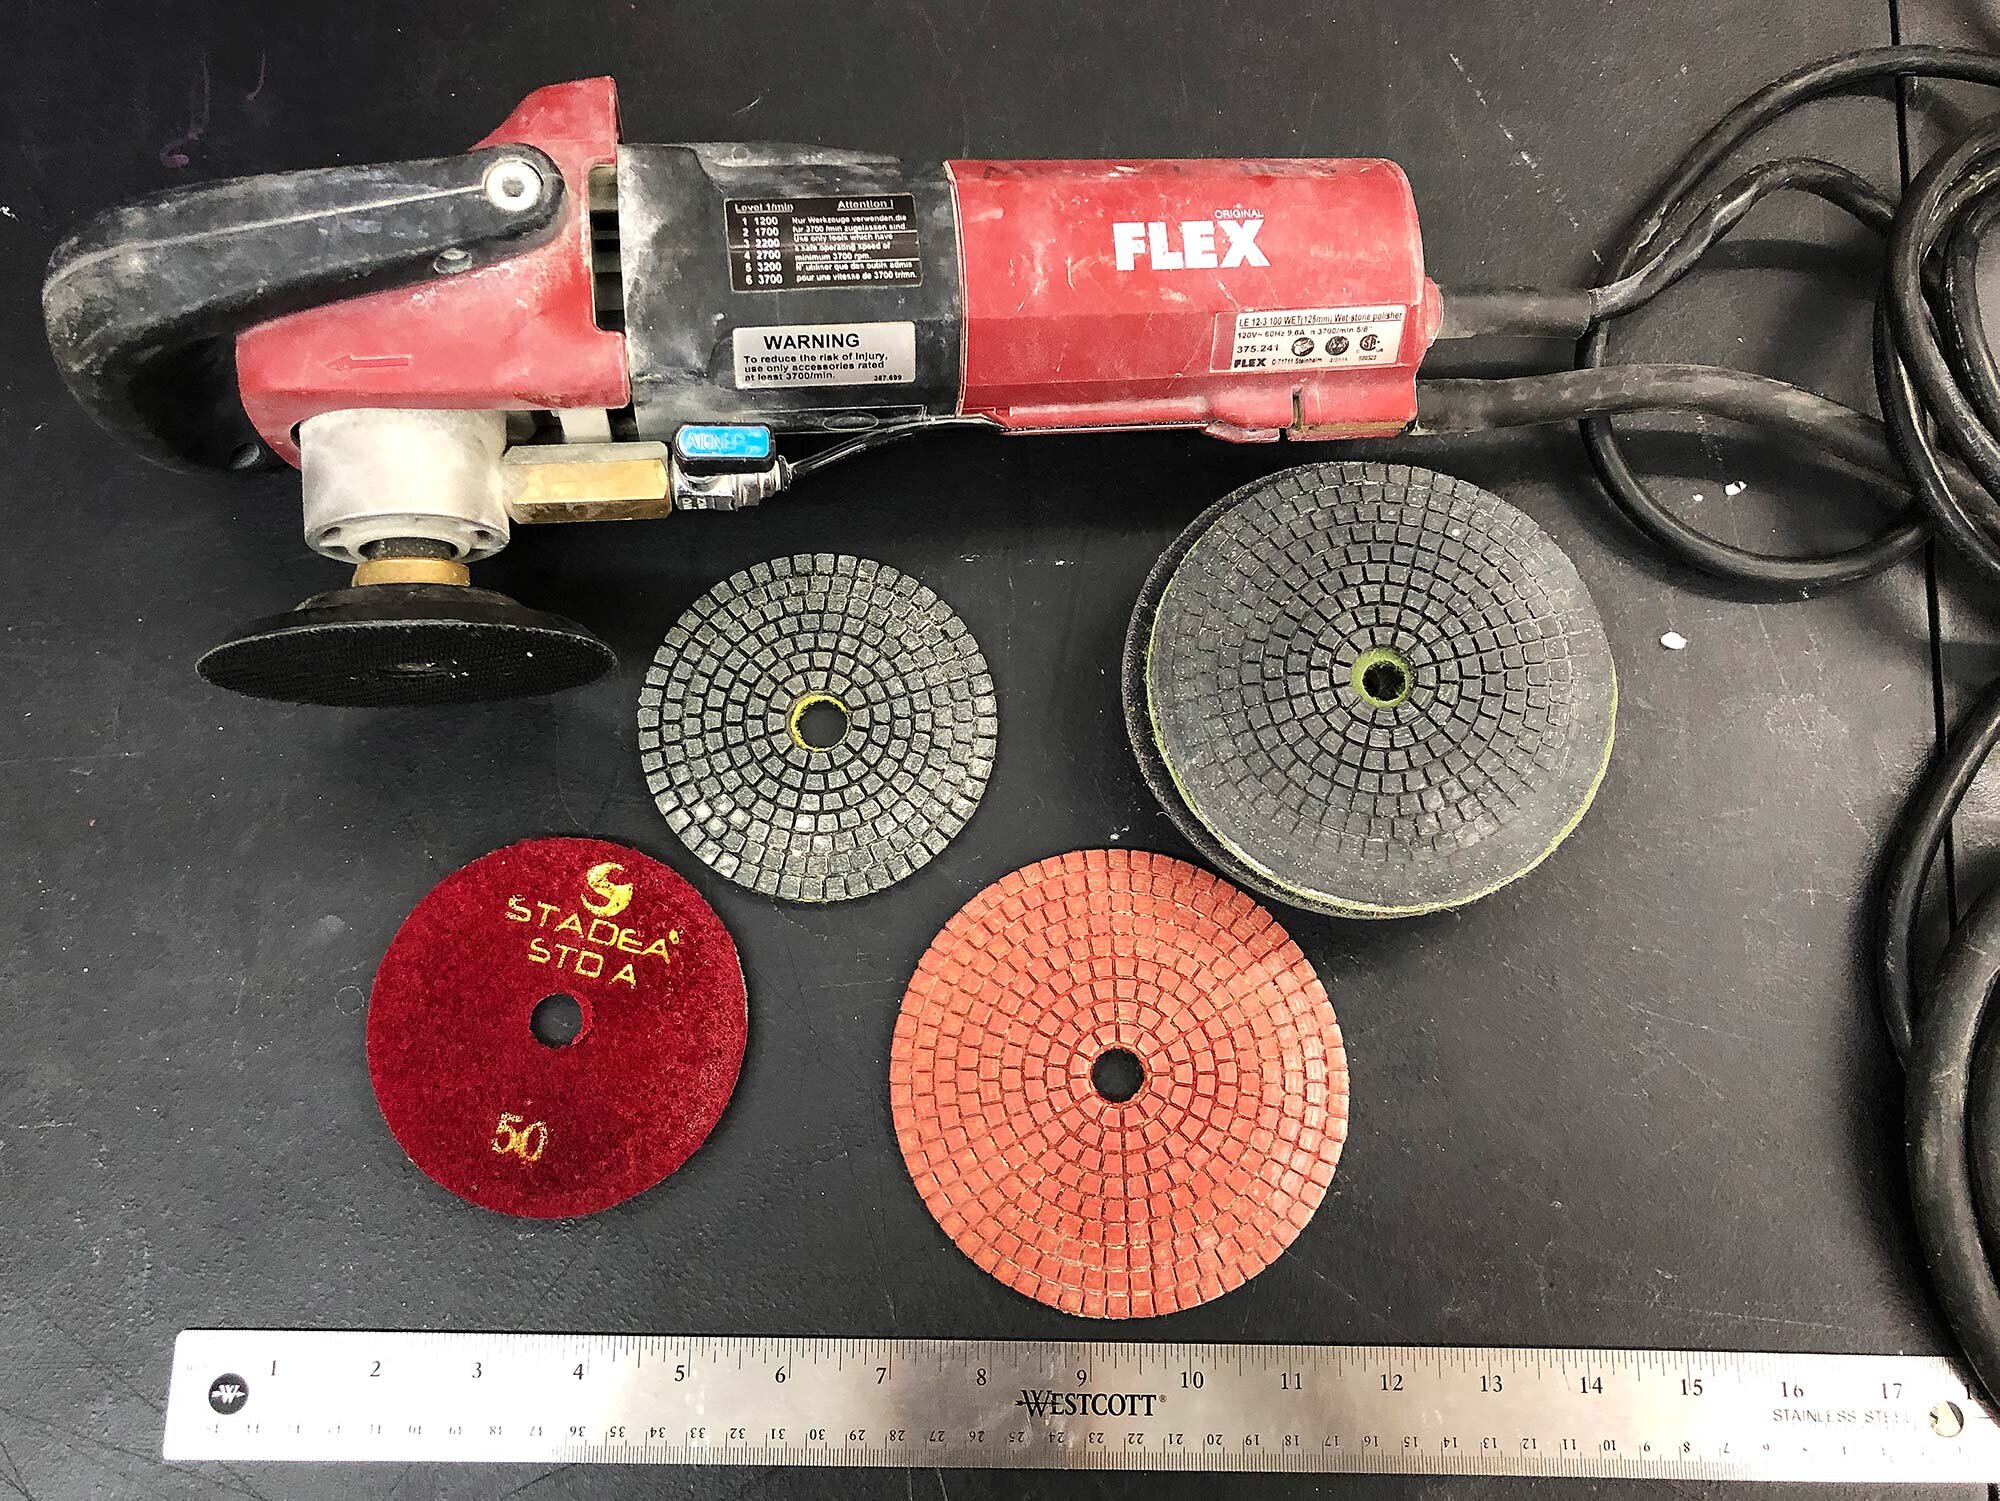
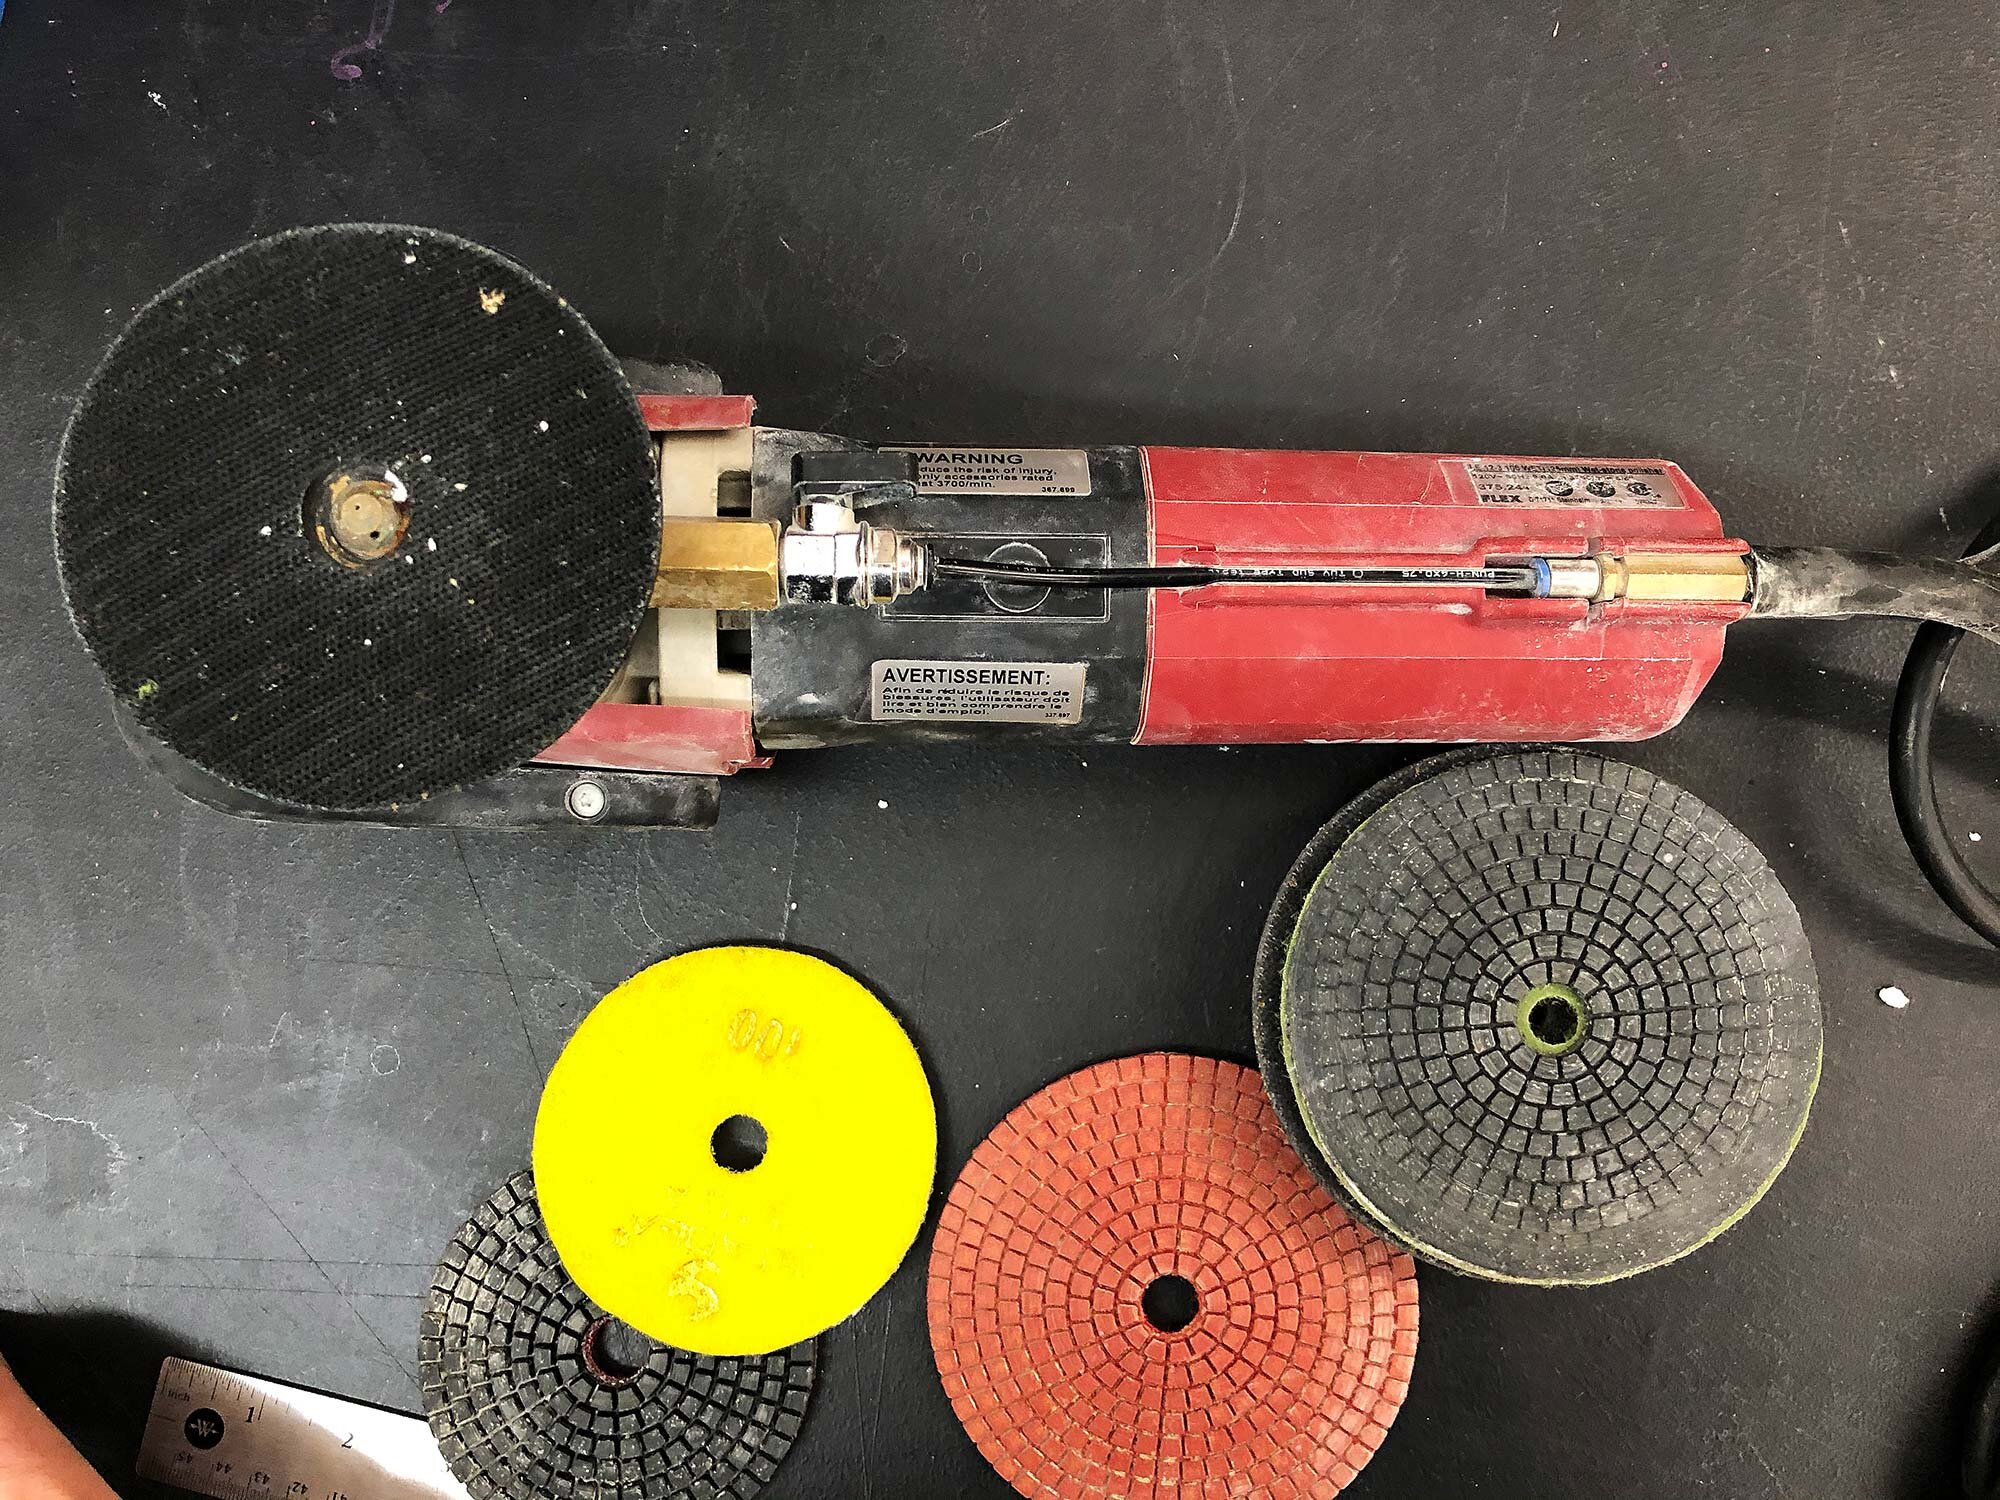
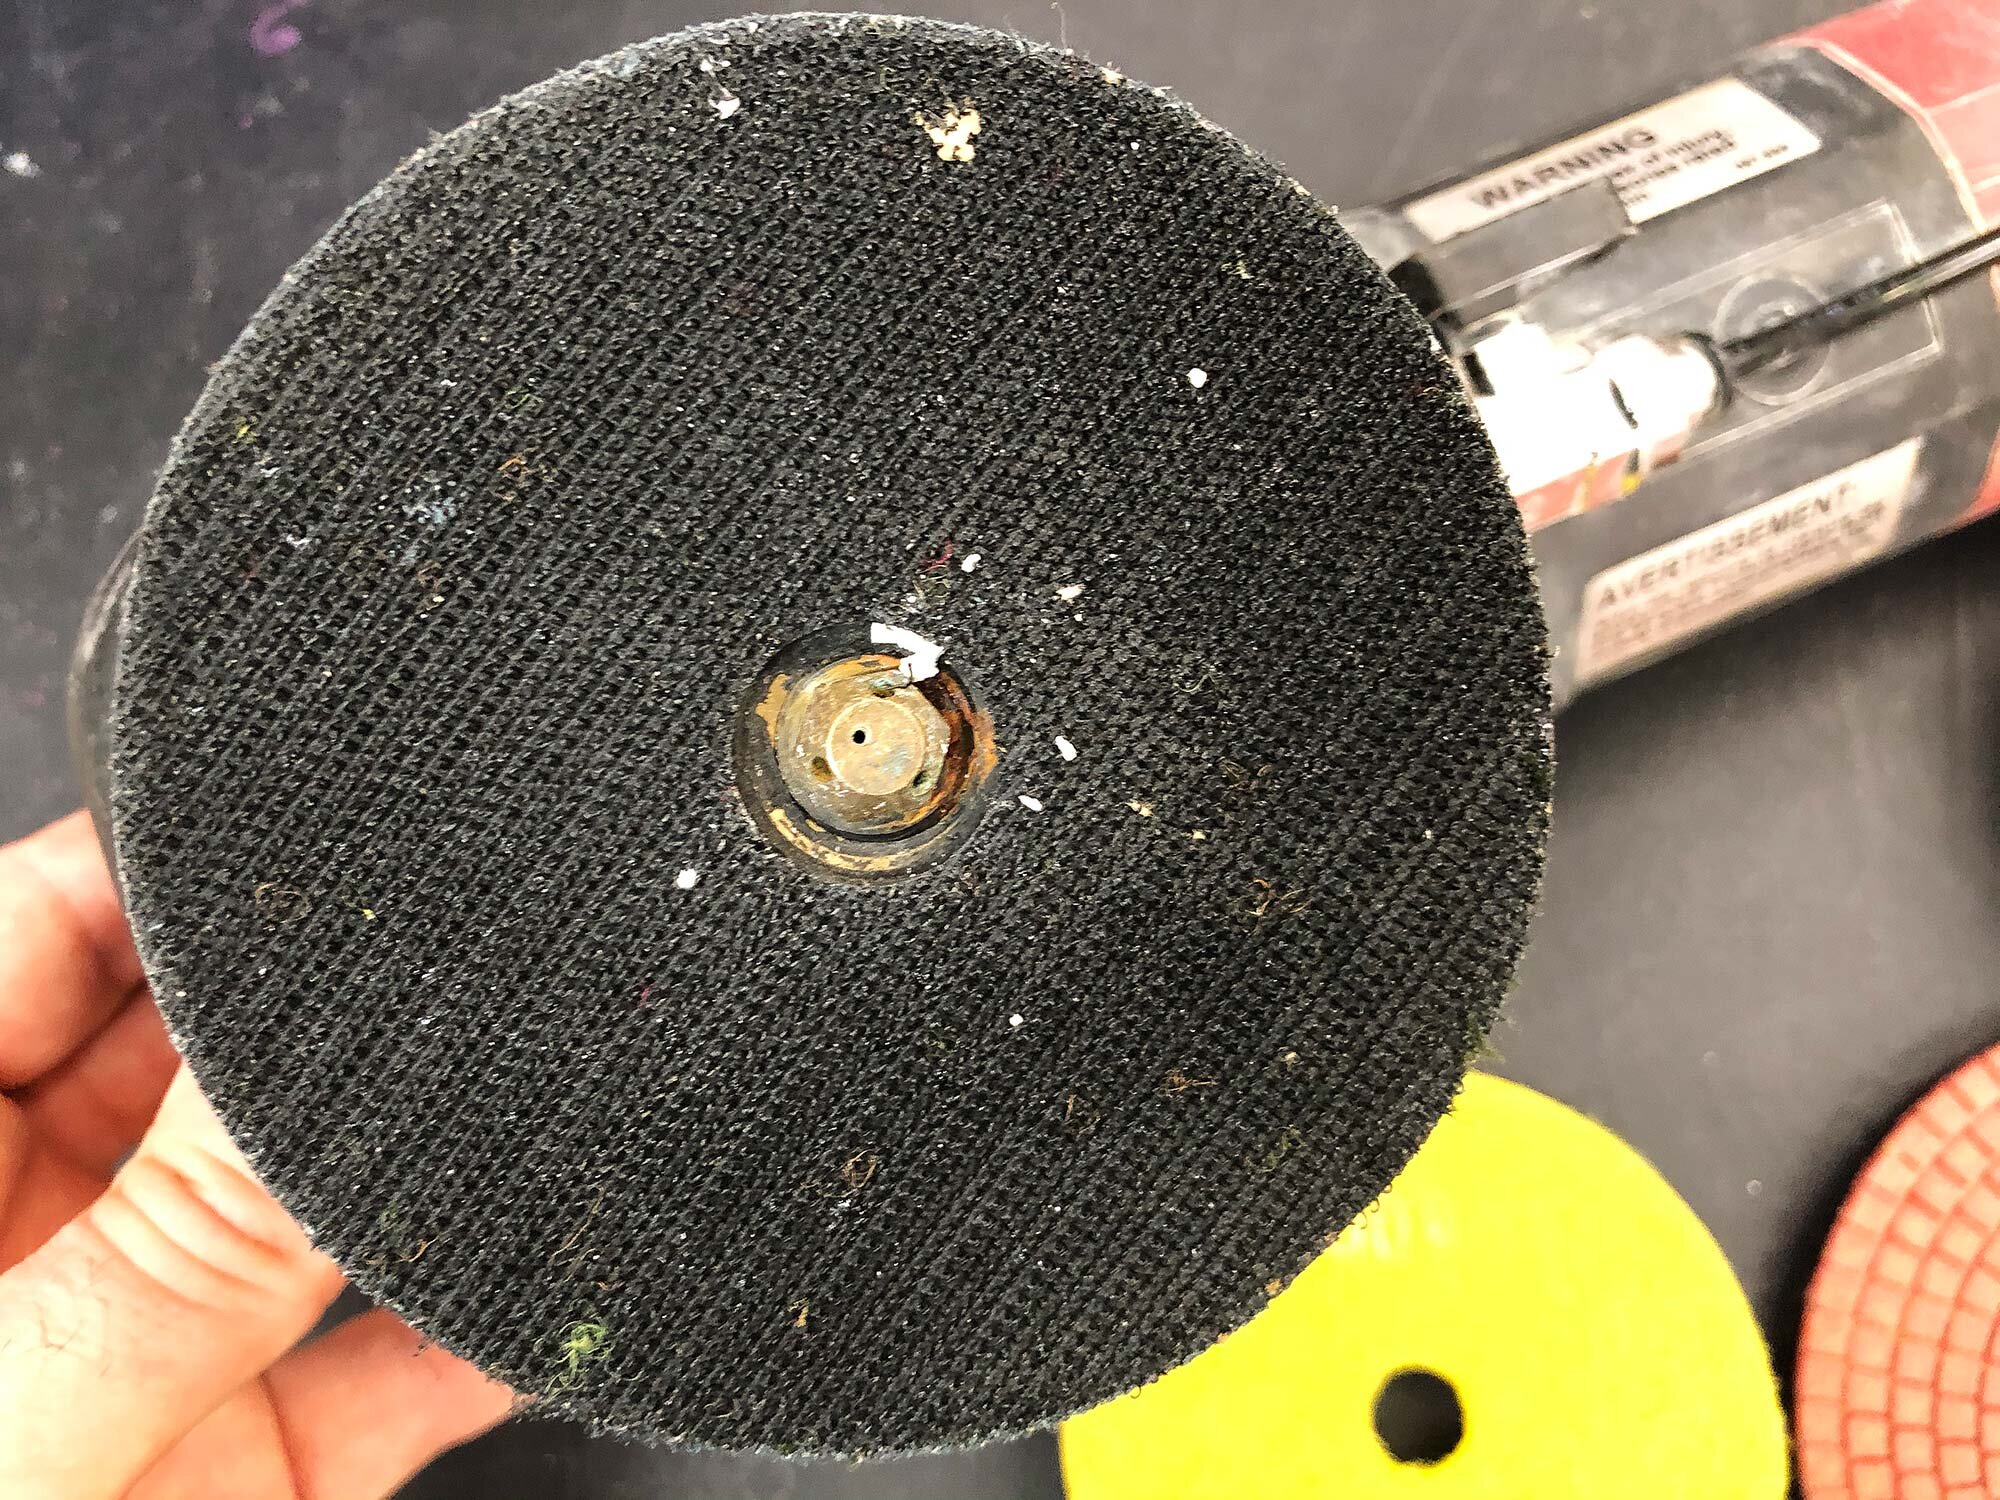
The Flex Wet Polisher / Grinder with a 4 inch pad attached, and showing 4 and 5 inch Stadea brand diamond grinding pads.

The Flex Wet Polisher / Grinder with a 4 inch pad attached, and showing 4 and 5 inch Stadea brand diamond grinding pads.

The Flex LE 12-3 100 is the top pick because of its many high-quality features including variable speed, ability to accommodate up to 5” pads, quality of construction including a rubber hose that won’t get kinks, and durability. It’s a close race with the Makita and Metabo models, but this German-made machine stands out for it’s overall quality and ease of use. I’m happy to report that this is the machine I have been using in my studio and it has held up under 6 years of frequent use. If I was shopping today, I would look most closely at this model and the Metabo.

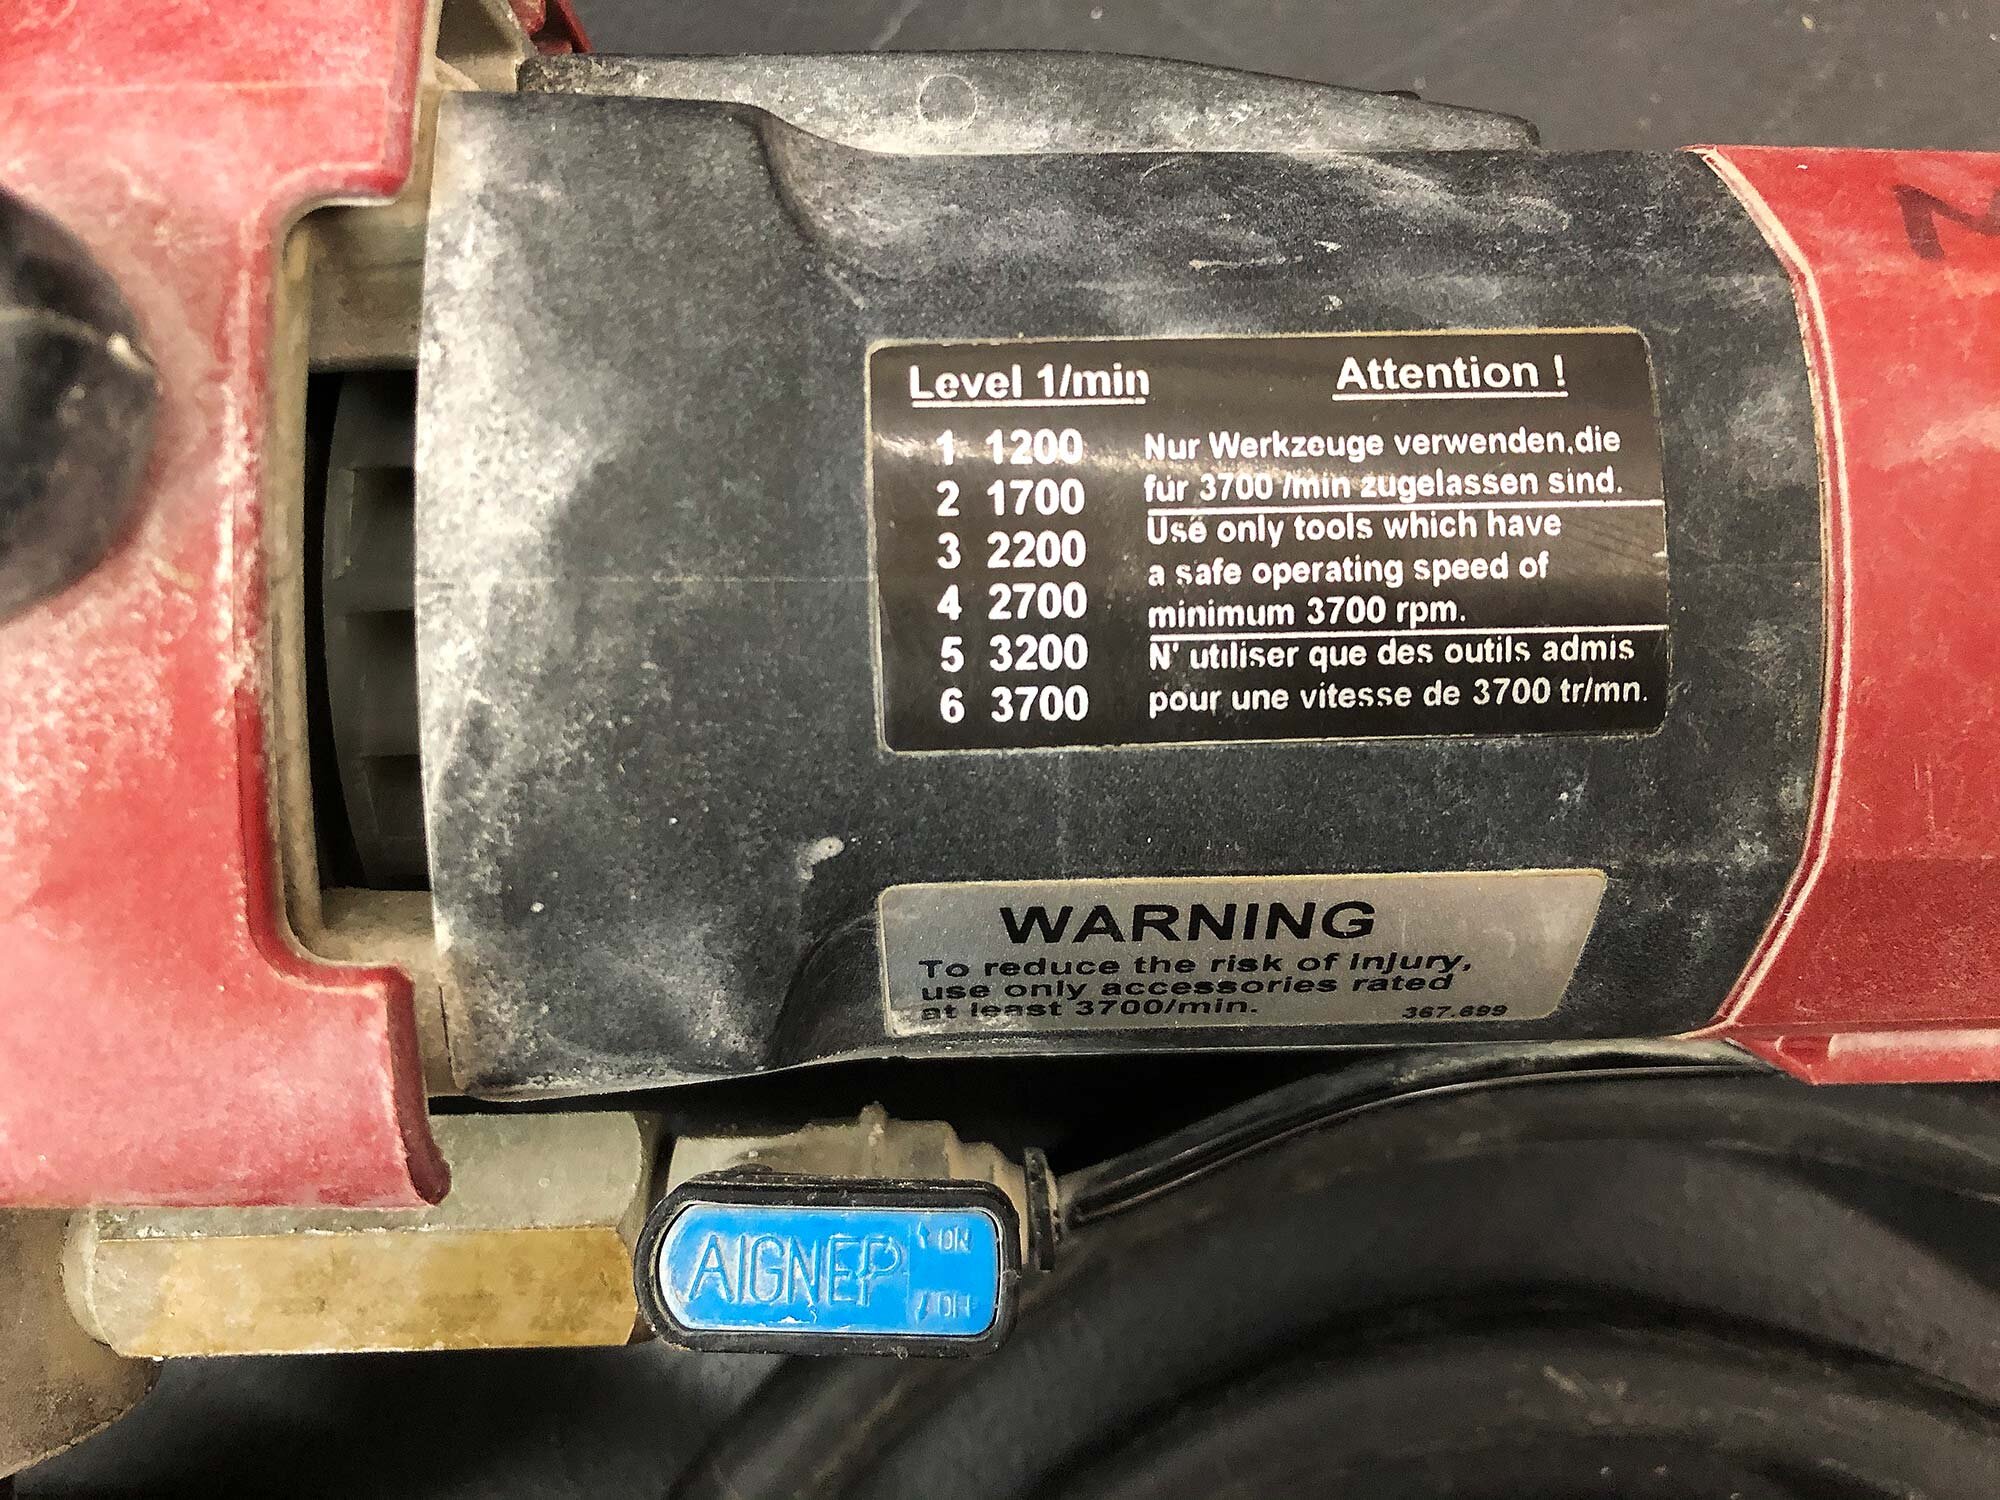
The Flex comes with a 1 year warranty, and has a 9.3 amp motor with speeds ranging from 1200 to 3700 RPM. It does not come with an adapter for the quick-release hose, so you will have to find something that works for your studio. I use a simple garden hose to quick-release connector and I’ve also found attachments to get the hose connector fitted on a faucet.

Flex also makes a single speed model that costs about $20 less, but I think a variable speed wet polisher is the way to go. I typically use speeds ranging from 2 to 4 on this, or 1700 to 2400 RPMs. The speed adjuster is a dial on the back of the tool (see pictures below).

If you read online reviews, the only drawbacks that users report is difficulty finding the right hose connector (I found it easy to find however) and some report GFCI issues. I am very careful when using a wet polisher, and can say I’ve never felt one tingle or shock from this machine.

Slideshow of more images of the Flex LE 12-3 100 Wet Polisher.


2nd Top Pick: Metabo PWE 11-100 Wet Polisher / Grinder

The Metabo PWE 11-100 Wet Polisher, pictured here with a 4 inch pad.

The Metabo PWE 11-100 Wet Polisher, pictured here with a 4 inch pad.

The Metabo PWE 11-100 another variable speed, German-made wet polisher / grinder that has a lot of great features and is one of 3 professional-grade wet polishers that are best for ceramic and sculpture studios. It has a 9.6 amp motor with speeds ranging from 1700 to 6100 RPM, can accommodate up to a 5 inch pad. It also has an adjustable handle and a standard 1 year warranty with can be extended to 3 years with online registration.

Note the conveniently placed water switch near the rear hand grip on the Metabo.

Note the conveniently placed water switch near the rear hand grip on the Metabo.

This is the most recent wet polisher to the market, and Metabo has looked hard at the Flex and Makita models to try to find innovative touches, namely the extra speed, adjustable handle, and best of all, placing the water switch near the rear grip so you can cut the water with a push of your finger.

Some online users report issues with finding a quick connect adapter that works, but I think if you just take your grinder to the hardware store, you should be able to find something that works. All in all, this is a great model that goes head to head with the Flex. I’m really happy with my Flex Wet Polisher but I’d look really close at this model if I was buying a new machine today.


3rd Top Pick: Makita PW5001C 4” Wet Polisher / Grinder

The Makita PW5001C Wet Polisher

The Makita PW5001C Wet Polisher

The Makita PW5001C Wet Polisher is one of the most popular wet grinders on the market and you will find extensive reviews and feedback, which speaks to its overall quality and professional-grade durability. It has a 7.9 amp motor with speeds ranging from 2000 to 4000 RPM, and can accommodate up to a 4” pad.

This model was the first to feature a water feed on the bottom of the machine, which was an innovation soon copied by Flex and Metabo. It has a 1 year warranty. It also has a traditional side grip front handle, similar to what you see on angle grinders.

Some reviews once again found issues with getting the correct attachments for the quick-release hose, but I’m sure a well-stocked hardware store will have something that will get this machine working in your studio.

Overall, it’s a great tool but has a few drawbacks in comparison to the Flex and Metabo including a weaker motor, smaller speed range, and is only recommended up to a 4 inch pad. In general, I mostly use 4 inch pads but I like to have the option for a bigger pad for polishing flat surfaces. But if the Makita seems right for you, don’t let the pad size be the deciding factor. This is the best-selling wet polisher for a reason and Makita is trusted by many professionals in the stone polishing business.


Runner Up: Stadea SWP101K Wet Polisher

The Stadea 101K Wet Polisher / Grinder.

The Stadea 101K Wet Polisher / Grinder.

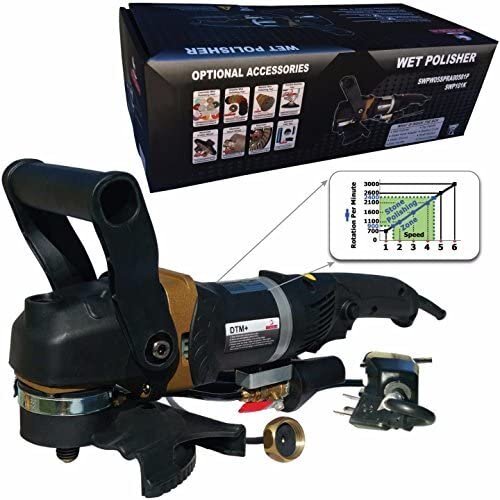
Outside of the top three professional-grade wet polishers, the Stadea 101K is the best of the budget models. It has a variable speed motor with a range of 700 to 3000 RPM, a splash guard, and can accommodate up to a 5 inch pad. At 9 pounds, it does weigh significantly more than top 3 models, which all weigh about 5 to 5.5 lbs.

The Stadea wet polisher comes with a 6 month warranty and is available as a standalone tool for $200 or can be purchased in packages that include a pad and grinding discs for around $300. Stadea pads are a great option for diamond polishing pads and what I use in the studio, so that package might be an attractive purchase.

Stadea also sells packages, such as this kit with a 4 inch pad, 7 diamond grinding discs, and a buffing pad.

Stadea also sells packages, such as this kit with a 4 inch pad, 7 diamond grinding discs, and a buffing pad.

Users report a variety of problems with this model (and every other budget model) including water leaks and issues with feeling a tingle of electricity while using. It seems that some of these problems may stem from improper use or setting up a workspace incorrectly, so just be careful and you should be fine. But the issue with cheap washers or improper fit of the built-in garden hose connector are annoying and speak to the drawbacks of shopping budget-grade models. If they shortchange the hose connector, what else might be a problem?


Other Models and Options

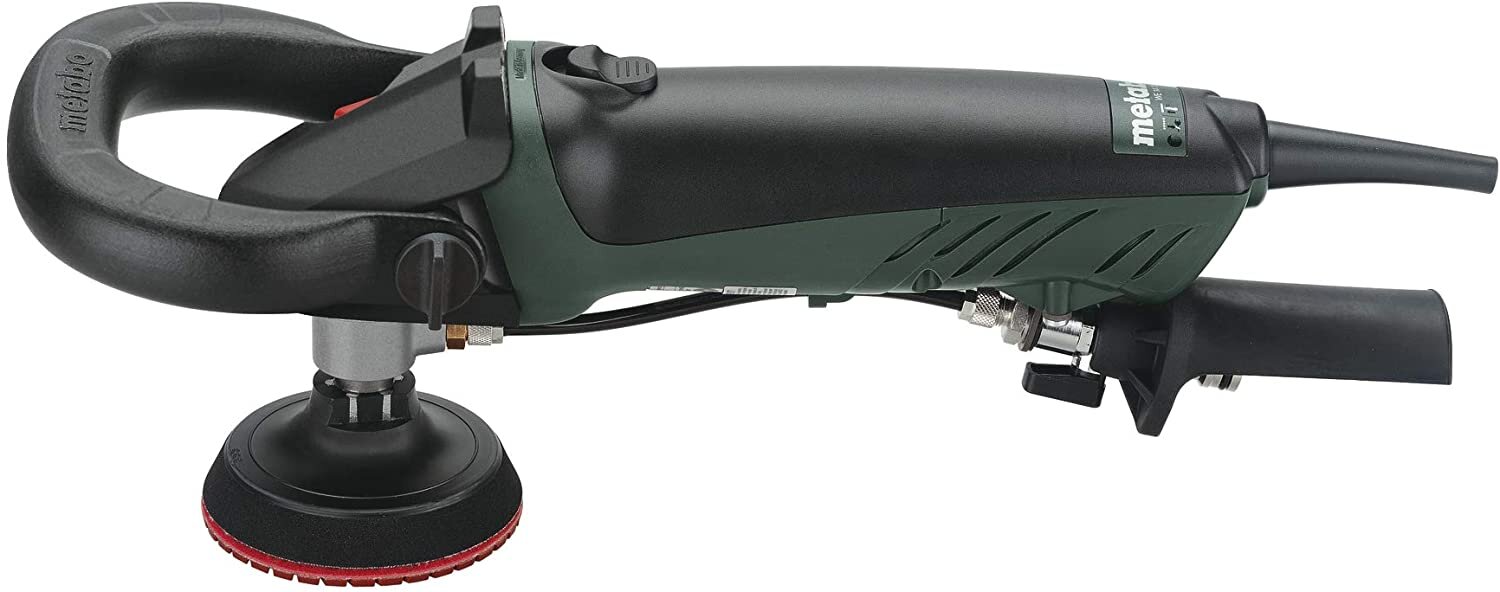
The six models described below are very affordable but have lots of mixed reviews online. Some users report that these worked great for them, others point to issues with build-quality, overheating, motors dying, and other issues. They also have short warranties or none at all, so shop at your own risk! Many of these models have very similar looking parts, such as the switch on the water valve, and the brass garden hose attachment.

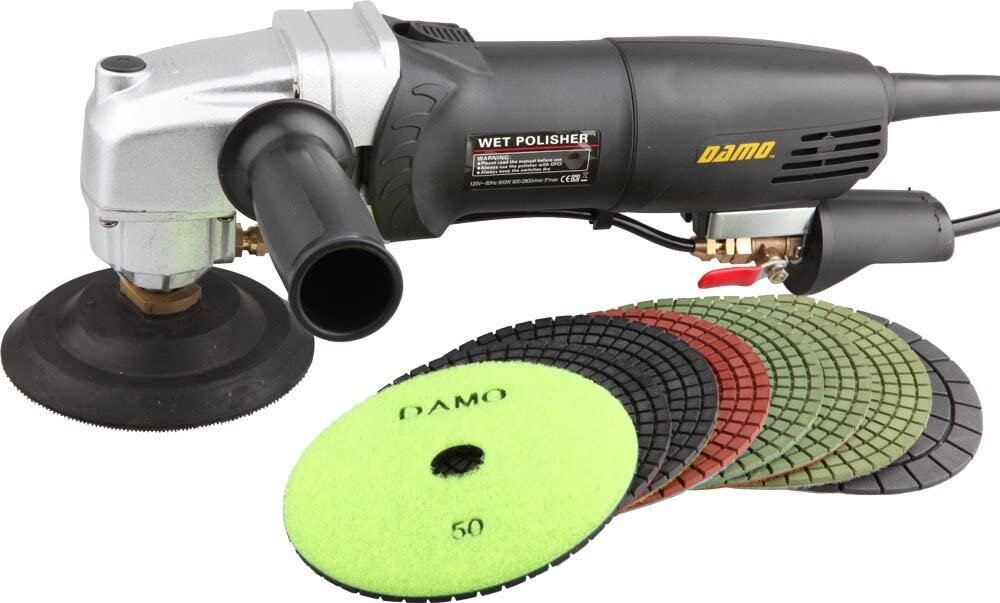
The Damo 4” Wet Polisher Kit

The Damo 4” Wet Polisher Kit

Damo Variable Speed Wet Polisher

The Damo variable speed wet polisher has a 7 amp motor with speeds ranging from 700 to 3000 RPM and is available as a polisher for $180 or as a kit for around $220 to $240. It has a side handle, a bottom water feed with a switch near the rear of the tool, and can accommodate up to 5 inch pads. Overall, many online reviewers were happy with this tool although it’s weight (6.5 lbs) was reported as a drawback. A decent number of reviewers also mentioned that the tool stopped working or had broken parts after a month or two of use. If you’ll occasionally need a wet polisher, this might work, but it’s most likely not going to hold up for months or years under heavy use.

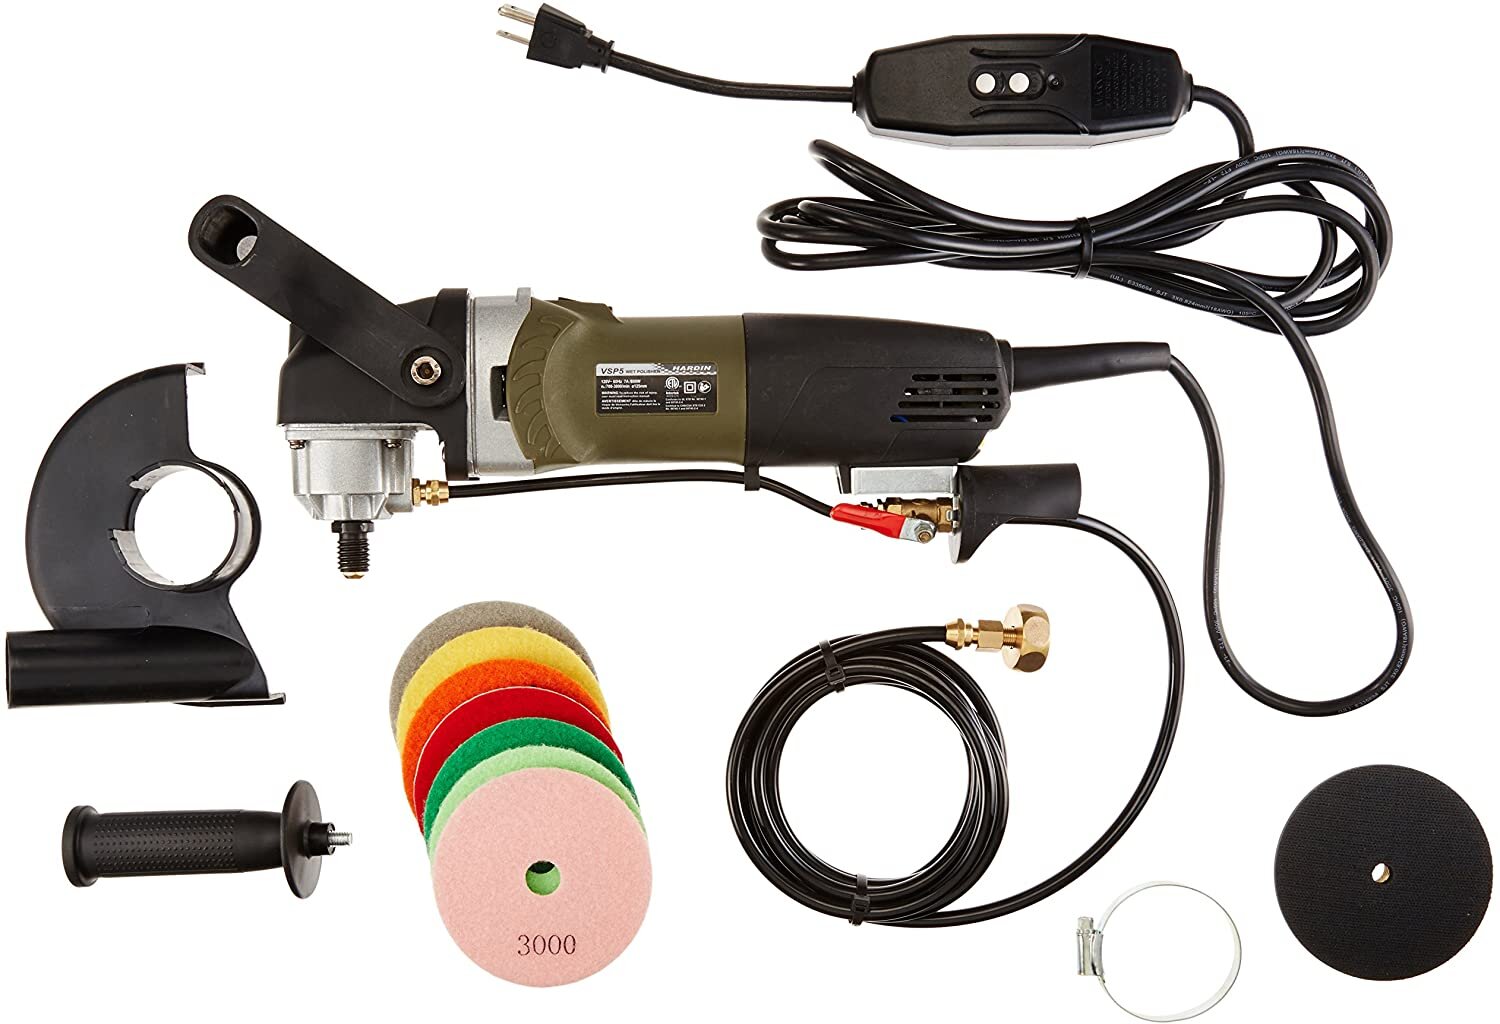
The Hardin WV 4” Wet Polisher Kit

The Hardin WV 4” Wet Polisher Kit

Hardin WV Polisher

The Hardin WV Polisher features an 8 amp motor with speeds ranging from 1000 to 4000 RPM and comes in a kit with a 4 inch backer and set of diamond polishing pads. It has a top water feed with a shutoff valve by the front handle, and comes with a hose and garden-hose attachment.

It has a 90 day warranty and extremely mixed reviews, including a few that mentioned the onboard GFCI didn’t trip even when exposed to water. Yikes! It’s available for the ultra-budget price of $107.

Hardin HWV Wet Polisher

The Hardin HWV Wet Polisher has an 800 watt motor with speeds ranging from 700 to 3000 RPM, and is designed to use with 4” pads. I wasn’t able to locate warranty or weight information, but I assume it’s around the same as the Hardin unit listed above. This polisher comes with a backer pad, diamond discs, and a hose attachment that will fit a standard garden hose. It was a bottom water feed, a splash guard, and two handles options.

Like all the budget models, it has extremely mixed reviews with some users saying they loved it while others reported that motor ran extremely hot, and that they had problems with the GFCI. One user reported that extra plastic flashing from the manufacturing process were blocking air vents to the motor, and that cutting those helped reduce the motor overheating issue. Overall, this is a very budget option that costs $140 for the bare tool or around $165 for a kit.

The Hardin HWV Wet Polisher Kit.

The Hardin HWV Wet Polisher Kit.

The Kawaii WEP 250 Wet Polisher

The Kawaii WEP 250 Wet Polisher

Kawaii WEP 250

The Kawaii WEP 250 Wet Polisher has variable speeds ranging from 900 to 2800, can accommodate up to 5 inch pads, and has a 90 day warranty. This is a model that is carried at Home Depot so you might be able to see it in person in store. It weighs 6 lbs and has many similar parts to other models here, including the water valve switch and garden hose connector. It doesn’t have a lot of reviews online so it’s hard to get much info, but it seems like a pretty straightforward option. One reviewer compared it to the Metabo and described this as a great budget option but did report feeling a few tingles while using, and that the hose connector had to be taped to reduce leakage. It retails for around $145

QuickT Wet Polisher.jpg

QuickT SPW702A Wet Polisher

The QuickT SPW702A Wet Polisher is one of a few models with the “old school” top water line feed, and it has variable speeds ranging from 1000–3000 RPM. It comes with a splash guard, brass hose fitting on the water line, and retails for the budget price of around $150 in a kit that includes pads.

It has a lot of great reviews online, and some who had a few problems. To my eye, it looks very similar to the Hardin WV model with the top water feed. As with many of these budget models, warranty info is not mentioned. It may work for a project or two, or longer if you take care, but it doesn’t come with any sort of manufacturer standing behind it.

ZFE 800 W variable speed polisher grinder.jpg

ZFE 4” Wet Polisher

The ZFE 4” Wet Polisher is another model with the water feed at the top, a splash guard, and a weight listed at between 8.5 and 9 lbs. To my eye, it looks very similar to the QuickT and Hardin WV models, and it retails for around the same price, $170 with a backer pad and polishing pads. It has a variable speed ranging from 500 to 3000 RPM, and doesn’t have warranty info listed online. It has varied reviews with some reporting great success, and others mentioning problems with the O rings on the water line.


Wet Polisher / Grinder Comparison Chart

This chart is with the top picks first, then other models are listed alphabetically.
Note: All models have built in GFCI and 5/8" arbor for backer pad attachments. Some manufacturers list motor by amp, watts, or both and every effort has been made to locate that info.

Top Picks Typical Price Motor Max Pad RPM Range Weight Water Feed Warranty
Flex LE 12-3 100 $320-$340 7.9 amp, 1150 watt 5" 1200-3700 5.3 lbs Bottom 1 year
Metabo PWE 11-100 $310-$330 9.6 amp, 1100 watt 5" 1700-6100 4.9 lbs Bottom 1 to 3 years
Makita PW5001C $300-$320 7.9 amp 4" 2000-4000 5.1 lbs Bottom 1 Year
Stadea SWP101K $198 800 watt 5" 700-3000 9 lbs Bottom 6 months
Other Models
Damo $180 7 amp, 800 watt 4" 700-3000 6.5 lbs Bottom ?
Hardin WV $108 800 watt 5" 1000-4000 8.8 lbs Top 90 days
Hardin HWV $165 800 watt 5" 700-3000 ? Bottom ?
Kawaii WEP 250 $145 7 amp, 900 watt 5" 900-2800 6 lbs Bottom 90 days
QuickT SPW702A $151 800 watt 5" 1000-3500 9 lbs Top ?
ZFE $170 800 watt 5" 500-3000 8.7 lbs Top ?

How to Use a Wet Grinder and a Few Tips

Wet Polisher / Grinders are a specialized tool that can really make short work of your polishing jobs. But with that speed comes potential mess if you don’t have the proper set up. A few tips:

  • Use in a large slop sink or something with walls if possible. This will keep water splashing down.

  • Be aware of where the polisher might spray water, keep electrical outlets protected

  • Wear rubber gloves and rubber apron

  • Use the least amount of water you need.

  • Clean your tool after use, the sprayed water will contain a lot of grit which can cause problems with switches, dials and other moving parts of your tool.

  • For ceramic glaze or kiln shelf clean up, I use 50 grit pads first, then 100, 200 and 400. I don’t usually go higher than 400. Rather than get the traditional 50-3000 grit pad set, you may just need 4 pads. I use Stadea pads. Click here to purchase individual pads.

  • If needed, get multiple backer pads so you can use different size pads. My favorite size is 4” but I do have 5” too.

For a really cool use of this tool, check out what the artist Brad Miller does with his wet polisher. He makes textured forms and then layers multiple colors of pigmented slip and glaze. After the final glaze fire, he will polish back through, revealing the stratified layers.


Summary

Wet Polishers are great tools if you are looking for a dust-free way to grind ceramic, glaze, stone, concrete or other hard surfaces. They will quickly dispense with the biggest glaze drips, getting your piece ready for display. They are also great for cleaning up kiln shelves. There are a variety of models on the market but 3 professional grade models from Flex, Metabo, and Makita really stand out. Not only are these models backed by good warranties, the tools are built to last and survive the test of time. There are also budget options available if you are looking for a tool that will be used just occasionally. The tradeoffs between the professional grade and budget models are clear: fewer hassles, better parts, and tools that will just keep working. The goal of this post was to share my own experience with wet polishers and to give an overview of what is available to buy.


Wall Mounted Clay Extruder Buyer's Guide

Clay extruders are an efficient way to make hollow forms, coils, and other shapes. They are basically tubes with a die attachment and a lever, and there are just enough models on the market to make it a bit confusing to choose. This guide will cover recommended models, and includes a comparison chart of all the models on the market so that you can pick the best extruder for your studio.

The models covered here will make hollow forms ranging from about 2 inches wide to 8 inches wide, although most models will extrude forms around 3 inches wide. They will also make solid coils and other shapes, and all models have blank dies that you can customize to suit your needs or some manufacturers will make custom dies. The smaller sized barrels, such as the Bailey 4” wide extruder, will be the best choice for most studios. But there are larger models and upgrade picks to consider too.

When choosing a model, consider how you will be using it. If you will mostly make solid coil, handle, or other shapes, stick with a 4” wide model as that will be easiest to manage. If you will be making mostly hollow forms, any size model will be relatively easy to extrude; just choose a model that will be big enough for your needs. Other options to consider are the lever style, die options, and ease of cleanup.

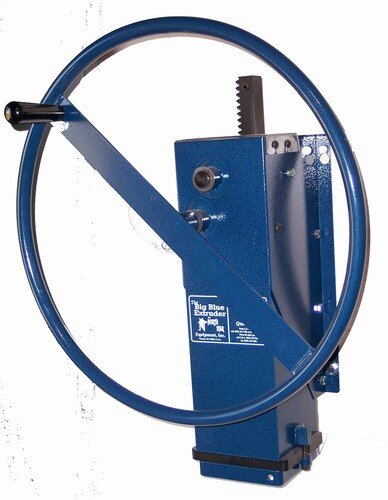
The North Star Big Blue Extruder, the only extruder on the market with a round “wagon wheel” handle. It’s wall mounted with a variety of dies.

The North Star Big Blue Extruder, the only extruder on the market with a round “wagon wheel” handle. It’s wall mounted with a variety of dies.

TOP PICK

The top pick and I believe most innovative extruder on the market is the North Star Big Blue Extruder. Featuring a wagon wheel handle, it is easy to use, has a large capacity barrel, and is durable and long lasting. It’s one of the more expensive extruders (aside from powered extruders) but the size, versatility and easy of use more than compensate for the high price point. The gear system allows you to turn the handle and extrude with ease, and the barrel can hold up to 25 lbs of clay. The Big Blue extruders typically retail from around $900 to $1090.

The Bailey 4 inch extruder features a wall mount, lever handle, and interchangeable dies.

The Bailey 4 inch extruder features a wall mount, lever handle, and interchangeable dies.

BEST FOR MOST STUDIOS

For most studios, a basic Bailey 4” extruder is a great option. The 4 inch square barrel allows you to make hollow forms up to 3 inches in diameter, but it’s not so large that it’s hard to extrude the clay. This extruder typically costs around $400 and the die kit is an additional $130. It’s one of the better options when you consider price and the die options, but drawbacks include installing the dies and that the barrel is welded to the wall mount, making clean up harder.


If you are looking for a handheld, mini extruder, or “clay gun,” check out our Handheld Extruder Guide here.

A complete review of wall mounted clay extruders follows.


Table of Contents

  1. Top Pick: North Star Big Blue Extruder

  2. Runner Up: Bailey 4, 5 or 9 inch extruders

  3. North Star 4 inch extruder

  4. Scott Creek 4 or 5 inch extruder

  5. Brent Extruders

  6. Other Wall Mounted Extruders

  7. Powered Extruders

  8. Extruder Tips

  9. Extruder Comparison Chart

  10. Summary


Top Pick: North Star Big Blue Extruder

The North Star Big Blue Extruder.

The North Star Big Blue Extruder.

The North Start Big Blue Extruder combines a big barrel capacity with an easy-to-turn wagon wheel handle and a wide selection of dies. It does cost a premium, typically $900 to $1090, but the size and versatility makes it a wonderful addition to any studio.

The Big Blue has a 6 x 6 x 12 inch tall aluminum barrel that will hold up to a full 25 lb bag of clay. The dies can extrude up to a 4.5 x 4.5 inch wide hollow form, and the dies are a sturdy, hard plastic.

To use the extruder, the die and bottom brace are attached to the barrel with two hex screws. The dies have helpful channels to lock into place. Then, the barrel is filled with clay, and this whole unit is slid up and in and attached to the machine. On one hand, this is an advantage as the dies and clay can be added at a workbench, but the drawback is that you have to move up to about 30 lbs in to place and secure it on the ledge “lip” that will hold the barrel securely. Overall, I find it easy to use, but you want to make sure that you don’t drop a clay-filled barrel on your feet so a shelf or stool underneath can help.

The wagon wheel handle and rack and pinion gears are the real selling point for me, as it makes it much easier to extrude large amounts of clay for extra long tubes and coils. Every other extruder on the market uses some form of a lever handle, which can be dangerous if left sticking out into your space, and they can be hard to pull down. The wagon wheel handle is also relatively compact, or at least it doesn’t stick out into your space.

The Big Blue Extruder is not cheap, typically priced anywhere from $900 to $1090, and the dies cost about $40 each. But, it’s an amazing machine that if properly cared for, will work for decades. I simply keep it clean and add some grease to the gears from time to time.


Runner Up / Best for Most Studios: Bailey 4”, 5” or 9” Extruders

The Bailey 4 wall mounted extruded with a 4” barrel.

The Bailey 4 wall mounted extruded with a 4” barrel.

Bailey makes a great line of clay extruders that are well built and available at a lower price point than the North Star Big Blue. The Bailey models feature a barrel welded to the wall mount, dies that attach with a brace, and a plunger with a lever that slides up and down the pole.

The models include a 4” barrel, a 5” barrel, and a much larger 9” barrel. The 4” and 5” models are available in mild steel or stainless steel—you’ll want to go with stainless if you are using porcelain and are worried about rust. Bailey also makes two sizes of die kits, one kit fits both the 4 and 5 inch barrels, while there’s a larger kit for the 9” extruder. There’s also an extension kit that adapts the small dies to the bigger barrel. If you want, there’s also an upgraded powered version with a variety of stands and other tools suitable for a production studio. When considering the Bailey models, keep in mind the cost of the die kit because the models only come with one coil die and two blank plates, so you’ll definitely have to buy dies.

Overall, it’s a flexible system that is well engineered and is suitable for a wide variety of studios. On the 4 and 5 inch models, the die is attached to the bottom of the barrel via a brace with swinging arms, which are then screwed tight with wing nuts. Then, clay is added to the barrel, the plunger is inserted and you pull the lever to extrude the clay. The 9” model only differs in that the die is held on with C clamps. On all models, hollow form dies are held in place with a cross bar—it screws on to the dies so if you are frequently using multiple hollow forms, plan to buy extra cross bars to save time.

The Bailey 9” extruder can make hollow forms up to 8” in diameter.

The Bailey 9” extruder can make hollow forms up to 8” in diameter.

It’s a bit cumbersome to attach the dies but once in place, these are easy to use. One drawback is the Baileys are harder to clean as the barrel is mounted to the wall. If you have time, let any clay inside dry completely, scrape it out, and then wipe clean with a large sponge. It’s helpful to oil moving parts and the dies as needed, to prevent rusting. It’s also easy to lose the wing nuts with the Bailey models, so keep track of those! If you are doing a serious amount of extruding, you’ll also want to research the various expansion boxes and powered models that Bailey makes.

Understanding the models

The 4” models will hold 11 lbs of clay. The 5” will hold 17 lbs of clay. The die kit is the same for both of these models, ranging from 2 to 3” diameter for hollow forms. The 5” models allow you to extrude longer or more forms, but it may be harder to pull the lever with the increased volume of clay.

Standard 4” typically costs between $310 and $390, while the Stainless 4” ranges from $345 to $435, and the die kit costs about $130. The Standard 5 typically retails for $340 to $425. There is also a Stainless 5 option, but it’s only available with a custom build.

The 9” model will hold up to 29 lbs of clay andtypically retails for between $520 and $650, and the die kit for this model costs around $150.

Overall, for most studios I would recommend the 4” model as that will be the easiest to extrude and 11 lbs of clay will result in a decent amount of extruded forms.


North Star 4” Stainless Extruder

The North Star 4” Stainless extruder comes with the 3 dies picture and the lockout plate.

The North Star 4” Stainless extruder comes with the 3 dies picture and the lockout plate.

In addition to the Big Blue Extruder, North Star makes a lever-style extruder with a 4” wide steel or upgraded stainless barrel. The lever is fixed, as opposed to the sliding style of the Bailey, making it a safer to operate. (There’s a chance of pinched fingers with the Bailey if you’re not careful). There’s also a lever extension that will help make extruding easier. The trade off with the fixed lever is the barrel is smaller, holding just 8 to 9 pounds of clay. But, this should still extrude hollow forms that are 15 to 18 inches tall or more, you’ll just have to reload the barrel a bit more frequently.

The North Star 4” Standard Extruder is made with mild steel.

The North Star 4” Standard Extruder is made with mild steel.

The compact size, fixed lever, simplicity of use, and optional stainless upgrade make this a great extruder for most studios. The steel barrel typically retails for around $370, while I’ve seen this stainless anywhere from $409 to $519, and the extruder does come with 4 coil dies. You will need to purchase the hollow die set separately.

Another consideration with either of these models is that there is a 6” expansion box that allows you to use the same dies as used in the Big Blue Extruder. If you wanted to keep open an upgrade possibility, this is the model for you.

The Stainless option exists for those who work in porcelain and want the smallest possibility of rust possible. But if you keep your extruder clean and maintained, it should stay rust free.

This extruder is available at many clay suppliers or direct from North Star.


Scott Creek 4” and 5” Extruders

The Scott Creek 4” Extruder

The Scott Creek 4” Extruder

Scott Creek makes a 4” round barrel and 5” square barrel extruder with an interesting twist: a stair-step lever crank that you move up and down as needed. These extruders also have a great feature: a quick-release die cap to make installing and switching dies a breeze.

Both models feature an aluminum barrel, which will never rust and can be used with porcelain. The barrels also can be removed from the wall mount for easy cleaning, which is a noteworthy feature for an extruder!

All in all this is a great system. You pay extra up front for features such as the aluminum barrel and quick-release end cap, but the ease of use will more than make up that cost over traditional steel extruders.

Scott Creek 5 inch extruder.gif

The 4” round barrel typically costs around $400 and the dies range from $52 to $140, and the 5” square barrel costs around $440 plus the dies. There are also expansion boxes for each model and associated dies, and Scott Creek makes table mounts and and a free-standing extruder stand.

With all this great stuff (especially that quick-release cap) I still would favor the Bailey system over these because of the flexibility of using the same die sets in different Bailey models. With the Scott Creek, you are locked in to that size die, or the specific expansion box that goes with that model. But if you take a look and find that the die sets and sizes work for your needs, then by all means, get one of these extruders. It will be a workhorse and there are many positive reviews of these models.

These extruders are available at speciality ceramic suppliers or directly from Scott Creek.


Brent Extruders

The Brent HD Extruder features a removeable barrel and quick-release end cap.

The Brent HD Extruder features a removeable barrel and quick-release end cap.

Amoco Brent makes two extruders, the STD and HD, that combine a lot of the best features of other manufactures in a typical overbuilt Brent style, allowing it to take all kinds of use (and abuse) such as what you might find in an academic studio. But you will pay extra, with each model clocking in around $650 to $700. This review will focus on the HD as it has some upgrade features and can often be found for a bit less than the STD, around $650.

The Brent HD extruder has a 4” round steel barrel that will hold up to 10 pounds of clay. The barrel attaches to the wall bracket with 2 quick-release pins, making it easy to remove and clean. It also has a twist-and-turn end cap to hold dies, making it way less fussy than the Bailey extruders. Another thoughtful feature is a built-in hook to hang the end cap when not in use. Finally, it has a “clutch” lever to facilitate either raising or lowering the plunger and lever.

In addition to the wall mount, Brent makes a table mount and a mount designed to fit on a Brent slab roller. Like Brent slab rollers, this is an overbuilt workhorse that does come at a premium price. A drawback is a relatively limited selection of hollow dies. In general, all round barrel extruders just don’t have as much space and die options as a similar-sized square barrel.

If you have a Brent slab roller or love Brent products, then go with this extruder. It’s well built and has a lot of features, but for the main thing that you want an extruder to do—extrude shapes, especially hollow forms!—this extruder has limitations. But custom dies might solve your problems. For more info on this model and dies, the Brent website has the best info but you might find it for sale for less at online retailers or ceramic suppliers..


Other Wall Mounted Clay Extruders

There are a few more extruders that are on the market. But with limited availability, I’m reluctant to recommend these until they are sold at more locations and it’s clear there will be long-lasting product support from the manufacturers. But if you see features and prices that work for you, go ahead and order a whole set up.

Crackpots Extruder

The Crackpots Clay Extruder

The Crackpots Clay Extruder

The Crackpots Extruder is a straight forward, fixed lever, round barrel extruder with a variety of interesting die options, especially from aftermarket die vendors on eBay. It typically retails for $199 or less, making it one of the most affordable wall-mounted extruders.

Find it at oldsashartisans.com.


Clay Master 4” Extruder

The Clay Master extruder is available at a few ceramic suppliers. It’s unclear who manufacturers this device and the die options are limited. But, other square 4 inch dies will most likely work with this extruder. It has a fixed or “anchored” handle and will hold about 8 pounds of clay. Find it at clay-king.com or other ceramic suppliers.

EX-115 4” Extruder

Another extruder with limited availability is the EX-115 4” Extruder. This model features a fixed lever, a round barrel, and square dies. Bailey or North Star dies will most likely work with this model. Find out more at clay-king.com.


Powered Extruders

If you have a production studio or just want an easier way to extrude, powered extruders are available. They are not the main focus of this article, but for more info check out these websites:

Bailey System 3 Power Drive, starts at $946 but you’ll need to order barrel, dies and other parts. See more at baileypottery.com

MudTools Push Extruder, $1,400. See more at mudtools.com.

Peter Pugger Hydraulic Extruder, $4999. See more at clay-king.com.


Extruder Tips

A few tips for getting the most out of your extruder.

  1. Keep it clean! A clean extruder stays rust free and functional. You can put a light oil on moving parts to keep things functional.

  2. For cleaning, get big blocks of clay out and if you have time, you can let other clay bits dry. Then knock them out and proceed with cleaning. It’s always easiest to clean completely dried clay.

  3. Use the most moist clay you can as this will be easier to extrude. But, if you are working with bigger forms, stiffer clay can hold more structure right away.

  4. Some people recommend spraying cooking oil inside extruders. I never do this for two reasons. 1) cooking oil can “gum up” if left sitting places and 2) while I do oil moving parts and hinges on extruders, there’s no need to mix any sort of oil with clay. Keep the barrel clean and use clay that is the right consistency, and it should be easy to extrude.

  5. Let forms “hang” for a bit before cutting off. This will allow them to stiffen up and stay true to form, which is especially important as you move into hollow shapes that are 4 inches in diameter or more.

  6. Protect your dies from being bent. Don’t over-push the lever or wheel as you can bend or ruin dies. If the machine won’t go any further, don’t push it.

  7. For project ideas, check out the books Extruded Ceramics or The Extruder Book.


Wall Mounted Clay Extruder Comparison Chart

This chart is organized first by barrel size and then alphabetically by manufacturer.

Model Typical Price Barrel
Shape
Barrel
Diameter
Barrel
Material
Capacity Lever Detachable
Barrel
Warranty
Bailey Standard 4 $309-$387 Square 4" Mild Steel 11 lbs Slide No 2 Years
Bailey Stainless 4 $346-$433 Square 4" Stainelss 11 lbs Slide No 2 Years
Brent STD $574-$675 Round 4" Mild Steel 10 lbs Slide No 1 Year
Brent HD $548-$685 Round 4" Mild Steel 10 lbs Slide Yes 1 Year
Clay Master $350-$420 Square 4" Stainless 8 lbs Fixed No ?
Crackpots $199 Round 4" Mild Steel 7 lbs Fixed No ?
EX-115 $350-$400 Round 4.5" Stainless 7 lbs Fixed No ?
North Star 4" Standard $370 Square 4" Mild Steel 8-9 lbs Fixed No Lifetime
North Star 4" Stainless $440 Square 4" Stainless 8-9 lbs Fixed No Lifetime
Scott Creek 4" $399 Round 4" Aluminum 8-9 lbs Stepped Yes 2 Years
Scott Creek 5" $460 Square 5" Aluminum 12 lbs Stepped Yes 2 Years
Bailey Standard 5" $340-$426 Square 5" Mild Steel 17 lbs Slide No 2 Years
North Star Big Blue $950-$1090 Square 6" Mild Steel 25 lbs Wagon Wheel Yes 2 Years
Bailey Standard 9 $517-$647 Square 9" Mild Steel 29 lbs Slide No 2 Years

Summary

Wall mounted clay extruders are a great tool in the studio. The are the best way to make hollow forms, such as tubes, squares, hexagonal or custom shapes. Most models also include a test tile form, which can speed up that process. Overall, all the extruders above will be long-lasting and durable. They differ on size, die options, lever options, and material. Overall, my favorite is the North Star Big Blue Extruder as I find it the easiest and most practical to use. But a simple lever option, such as the Scott Creek, North Star, or Bailey, are also affordable and durable.

What is your favorite extruder? Let us know in the comments.


Handheld Clay Extruder Buyer's Guide

The Shimpo Nidec Handheld Extruder comes with 5 aluminum dies and one blank.

The Shimpo Nidec Handheld Extruder comes with 5 aluminum dies and one blank.

Handheld extruders or “clay guns” are useful tools for making small runs of handles, coils, and small hollow forms. If you are looking to make a repeatable shape in a quick, efficient way, then a handheld extruder is what you need.

These extruders work like a caulk gun: you fill the barrel with clay, screw the cap over the die form, and repeatedly squeeze the trigger to push clay through the die. It can be a bit of a wrist workout, so definitely use soft clay with these.

There are four options when choosing a handheld extruder: 2 sizes from Scott Creek, and one each from Shimpo and Kemper. There are also two miniature clay extruders such as the Kemper Klay Gun, for making extremely small shapes, which I’ll cover at the end of the post.

It’s really a coin toss as all four handheld extruders are well made, but for most studios and hand sizes, I would recommend the Shimpo Handheld Extruder. For about the same price, the Shimpo Handheld Extruder comes with a few more dies than the Scott Creek, and I prefer the circular handle at the back as opposed to the bar handle on the Scott Creek models. And as this is a handheld extruder, I prefer the shorter and wider barrel of the Shimpo because it is easier to squeeze out the clay.

A full review of handheld extruders follows, including the three options from Shimpo or Scott Creek, and two options for smaller decorative clay extruders. For larger extruders, check out our guide to wall-mounted extruders here.


Table of Contents

  1. Shimpo Handheld Extruder

  2. Scott Creek Super Duper Clay Gun and Clay Gun XL

  3. Kemper IKEG Klay Extruder

  4. Small Extruders: Kemper Klay Gun and Bailey Clay Gun

  5. Summary


Top Pick: Shimpo Handheld Extruder

The Shimpo Handheld Extruder comes with 5 dies and one blank die.

The Shimpo Handheld Extruder comes with 5 dies and one blank die.

The Shimpo Hollow Die Kit has 8 shapes. The middle of each shape is screwed on to the larger piece at the bottom.

The Shimpo Hollow Die Kit has 8 shapes. The middle of each shape is screwed on to the larger piece at the bottom.

The Shimpo Handheld Extruder is a quality tool that lets you easily make shaped coils, small hollow forms, or handles. It’s basically a caulk gun with an aluminum barrel and dies. The threaded barrel is 2 1/4” wide and about 10 inches long. The entire model measures about 13 x 9 x 3 inches, weighs just a few pounds, and can easily be stored in a drawer. It can be entirely submerged in water for cleanup, but you may want to oil the hinges and moving metal parts as needed.

Shimpo 4-in-1 Die Kit has 8 shapes of varying sizes and an isolator die.

Shimpo 4-in-1 Die Kit has 8 shapes of varying sizes and an isolator die.

The Shimpo Extruder is the top pick because the kit comes with five dies and one blank, and I prefer the circular handle. I also find the the shorter barrel makes it easier to squeeze out the clay, even though that means more frequent refilling. But it’s really a coin toss if this is better than the Scott Creek Clay Gun and the choice really comes down to personal preference. In my studio, I use a Shimpo Handheld Extruder along with a mixture of dies from Shimpo and Scott Creek.

Shimpo has two die kits: one with a selection of eight hollow forms and another with eight “4-in-1” shapes of varying sizes. You can extrude all four sizes at once, or use the isolation die to select just one. The hollow forms are what most people go for, as those shapes would be extremely hard to make without a die, but both kits would really expand the options in your studio.

The Shimpo Handheld Extruder generally retails for around $60 and the die kits are about $40 each. You can find this tool at ceramic supply stores or online at Blick.


Scott Creek Super Duper Clay Extruder and Clay Extruder XL

The Scott Creek Super Duper Clay Gun.

The Scott Creek Super Duper Clay Gun.

The Scott Creek XL Clay Gun has a 15” barrel.

The Scott Creek XL Clay Gun has a 15” barrel.

Scott Creek makes two handheld extruders and five die kits. The Super Duper Clay Gun has a 10 inch barrel while the XL has a 15 inch barrel. Both feature a bar handle at the rear as opposed to the circular handle on the Shimpo. The barrel is 2 inches wide, which is 1/4” smaller than the Shimpo. Note that the Scott Creek die kits will definitely fit the Shimpo Extruder, but the Shimpo dies may not work with the Scott Creek guns. Both Scott Creek extruders come with one coil die and two blank aluminum dies.

The Scott Creek Handle Die Kit features 8 shapes cut out of clear acrylic. The Scott Creek Dies are compatible with the Shimpo Extruder.

The Scott Creek Handle Die Kit features 8 shapes cut out of clear acrylic. The Scott Creek Dies are compatible with the Shimpo Extruder.

Scott Creek extruders are rugged, well built, and will get the job done. They are a bit harder to find in stores, but are readily available direct from the manufacturer. Scott Creek also makes a hollow aluminum die kit with the same shapes as Shimpo, along with an aluminum die kit of small forms. There are also three die sets made out of clear acrylic including a “shape and coil” kit, tile trim kit, and handle kit. The handle kit is my most used die kit and I would recommend that kit regardless of which extruder you purchase.

Although it might seem attractive to use the larger XL Extruder, keep in mind that the longer barrel may be harder to clean and store, and it is that much harder to squeeze clay out. (Any handheld extruder really relies on wrist strength.)

The Scott Creek Super Duper Clay Extruder usually retails for around $55-60, and the XL goes for around $70, and the die kits generally cost about $40 each.


Kemper IKEG Klay Extruder

The Kemper IKEG Klay Extruder

The Kemper IKEG Klay Extruder

The Kemper IKEG Klay Extruder is an interesting offering from the venerable clay tool manufacturer. It’s even longer than the Scott Creek XL, with a barrel measuring 20 inches in length by 2 inches wide. It comes with 3 aluminum coil dies, 1 blank die, and 2 plastic spouts.

As stated above, I feel that a shorter barrel is easier to use but if you decide to go with this option, you can always just fill the barrel with less clay to make it easier to use. Aside from that, the trigger of this gun is virtually identical to the Shimpo with a circular handle. Kemper has a limited offering of dies, but Scott Creek dies will work with this extruder.

The Kemper IKEG Klay Extruder typically retails for around $60 and can be found at ceramic suppliers such as Bailey.


Mini Extruders: Kemper K45 Klay Gun and Bailey Clay Gun

These miniature clay extruders are useful for making texture or super small coils, such as for hair. They also work with polymer clay, so if you are working in miniatures, this is the clay extruder for you. For typical clay studios, these mini guns often sit unused in studio drawers but if you need a really specific shape, they may work for you. They are virtually identical but the Bailey set also comes with a handy plastic carrying case.

The Bailey Clay Gun is a miniature extruder.

The Bailey Clay Gun is a miniature extruder.

Bailey Clay Gun

The Bailey Clay Gun has 19 dies and a carrying case. It typically costs around $13. Make sure that whatever you put in the barrel is very soft.

Shop at Bailey

 
kemper-k45-klay-gun.jpg

Kemper Klay Gun

The Kemper Klay Gun also has 19 dies and typically costs around $13. It may be exactly the same thing as the Bailey Clay Gun, but it doesn’t have a case.

Shop at Blick


Summary

Handheld extruders are a great way to make small batches of similar shapes, such as handles or hollow shapes. For a long time, I thought of them as an extraneous tool but once I started using them, I found that I really liked the look of extruded handles. Definitely don’t get one of these if it will simply sit unused in a drawer.

With only four models on the market, all are basically the same with just a few minor differences, so you can’t go wrong. For me, I prefer the slightly wider and shorter Shimpo barrel but my favorite dies are the handle kit from Scott Creek. You will find your own combination that works for you.


The Best Black Acrylic Gesso for Preparing Canvas

Utrecht Black Artists’ Acrylic Gesso is our top pick for its ultra-matte quality and affordable price.

Utrecht Black Artists’ Acrylic Gesso is our top pick for its ultra-matte quality and affordable price.

The four black gessos tested: Blick, Golden, Liquitex, and Utrecht.

The four black gessos tested: Blick, Golden, Liquitex, and Utrecht.

Black acrylic gesso provides a stable, flexible painting surface that is a complete contrast to a white gesso ground. Black gesso is also very opaque, allowing you to use it as a primer to cover up just about anything, and it will stick to a variety of surfaces including canvas, paper, wood, and more. Certain colors will change when painted on top of black gesso, especially transparent colors, but it also makes other colors really pop.

For this post, four black gessoes were tested and analyzed for ease of application, the matte or satin quality, and cost. All the gessoes were quite black, no questions there, but based on its ultra-matte quality and affordable price point, Utrecht Black Artists’ Acrylic Gesso was the top pick. This gesso was the most matte of the gessoes tested, which is a real plus.

The only drawback for the Utrecht Gesso was its gel-like nature (which can be fixed with a bit of water) but other gessoes each had their own features and attributes. A complete analysis and sample pictures follows, to help you choose the right black gesso for your studio.


Table of Contents

  • Top Pick: Utrecht Black Artists’ Acrylic Gesso

  • Golden Black Gesso

  • Liquitex Black Acylic Gesso

  • Blick Artists’ Acrylic Gesso

  • Testing Methodology and Images

  • Tips for Applying and Working With Black Gesso

  • Summary


Utrecht Black Artists’ Acrylic Gesso

Utrecht Black Gesso is available in 16 and 32 oz sizes.

Utrecht Black Gesso is available in 16 and 32 oz sizes.

Utrecht Black Gesso is our top pick for a black acrylic gesso because of its ultra-matte quality and affordable price point. Of the gessoes tested, it was the most matte with a deep, flat-black surface that stayed completely matte even with 5 or 6 coats of gesso. And though this test did not include sanding in between coats, the gesso developed a relatively flat surface as layers built up.

Available in 16 or 32 oz jars, the gesso usually costs between $0.70 to $0.85 per ounce, making this the second cheapest black gesso tested. It’s a great deal for a top quality product.

There are two tradeoffs with this gesso: it’s gel-like quality and the limited availability of jar sizes. In multiple jars of this, I’ve always found it to have a gel-like quality right out of the jar that is a bit harder to use. Simply mix in a bit of water and you should be fine though. Regarding the jar size, the tall 32 oz jar is easy to store but it can be hard to get all the gesso out of the bottom. It would also be nice if it came in gallon buckets. But in reality, these are minor complaints because the ultra-matte results are what I’m looking for in a black gesso, and this is my go-to favorite.

About Utrecht: Founded in 1949 in Brooklyn, New York, Utrecht was one of the first manufacturers to develop acrylic gesso. Acquired by Blick in 2013, the products are still made in Brooklyn and are available online and at Blick stores in the U.S. They are not marketed this way, but I think of Utrecht as the premium “house brand” at Blick stores.

Utrecht Black Artists’ Acrylic Gesso sizes, typical price, and price per ounce:

  • 16 oz, $13.34, $0.83 per ounce

  • 32 oz, $22.06, $0.69 per ounce

Test images for Utrecht Black Acrylic Gesso:

In a simple test, Utrecht Black Gesso gave a ultra-matte, flat surface.

In a simple test, Utrecht Black Gesso gave a ultra-matte, flat surface.

Stripe test from top: 1 coat, 2 coats, 3 coats. Utrecht Black Gesso stayed matte.

Stripe test from top: 1 coat, 2 coats, 3 coats. Utrecht Black Gesso stayed matte.

Angle view of the flat test.

Angle view of the flat test.

Various acrylic paints on top of Utrecht Black Gesso.

Various acrylic paints on top of Utrecht Black Gesso.


Golden Black Gesso

Golden Black Gesso is available in jars ranging from 8 to 128 ounces.

Golden Black Gesso is available in jars ranging from 8 to 128 ounces.

Golden Black Gesso was the second favorite gesso in the test. Available in jars ranging from 8 oz to 1 gallon, it’s a premium gesso that is easy to apply directly out of the jar and creates a slightly satin, deep-black surface. Although it is the most expensive option tested, Golden Black Gesso can be ordered in 1 gallon (128 oz) buckets that make it essentially the same price per ounce as the top pick.

The tradeoff with this gesso is that it is slightly satin. In testing, I found that both the Liquitex and Utrecht gessos were more matte than this gesso, especially the Utrecht. Some may find the slightly satin quality to be a drawback, but if you are planning to cover most or all of the gesso with paint, it won’t really matter much.

Available in 8 oz, 16 oz, 32 oz, and 128 oz (1 gallon), Golden Black Gesso ranges from $0.70 to $1.55 per ounce. The wide mouth jars are easy to use directly from the jar, or it can be poured out.

About Golden: Founded in 1980 but with a paint-making history that stretches back many more decades, Golden is known as one of the premier manufacturers of acrylic paint in the United States. Manufactured in upstate New York, the paints are widely available but for larger sizes you may need to order online.

Golden Black Gesso sizes, typical price, and price per ounce:

  • 8 oz, $12.38, $1.55 per ounce

  • 16 oz, $20.85, $1.30 per ounce

  • 32 oz, $31.98, $1.00 per ounce

  • 128 oz (1 Gallon), $90.01, $0.70 per ounce

Shop Golden Black Gesso at Amazon

Test images for Golden Black Gesso

In a simple test, Golden Black Gesso resulted in a slightly satin surface.

In a simple test, Golden Black Gesso resulted in a slightly satin surface.

Stripe test from top: 1 coat, 2 coats, 3 coats of gesso.

Stripe test from top: 1 coat, 2 coats, 3 coats of gesso.

Angle view of stripe test

Angle view of stripe test

Various acrylic paints over Golden Black Gesso.

Various acrylic paints over Golden Black Gesso.


Liquitex Black Gesso

Liquitex Black Gesso in an 8 oz bottle.

Liquitex Black Gesso in an 8 oz bottle.

Liquitex Black Gesso is a smooth flowing, easy-to-apply gesso that in testing came out the second most matte. Of the gessoes tested, it was also the most likely to build up some texture. Be sure to apply it evenly or sand between coats. For a black gesso, I’m looking for a matte surface so this was almost the second pick after the Utrecht, but the lack of sizes available and relatively high price are drawbacks for using this product.

This gesso is only available in 8 oz bottles with a squeeze dispenser. It’s not designed for using straight out of the jar but the squeeze function makes it easy to dispense, which may be helpful if you apply gesso with a foam roller. If you squeeze out too much, unscrew the top and use a palette knife to add it back to the jar.

About Liquitex: Founded in the U.S. in 1955, Liquitex was one of the earliest manufacturers of acrylic paints and continues to be an industry leader. Now owned by London, UK-based art supplier conglomerate Colart, Liquitex is manufactured in the UK, France and China. The bottle of black gesso I used indicated it was made in France. Liquitex also makes clear and neutral gray gesso.

Liquitex Black Gesso sizes, typical price, and price per ounce:

  • 8 oz, $11.57, $1.45 per ounce

Shop Liquitex Black Gesso at Amazon

Test images for Liquitex Black Gesso

In a simple test, Liquitex Black Gesso resulted in a matte black surface.

In a simple test, Liquitex Black Gesso resulted in a matte black surface.

Stripe test from top: 1 coat, 2 coats, 3 coats

Stripe test from top: 1 coat, 2 coats, 3 coats

Stripe test angle view

Stripe test angle view

Various acrylic paints over Liquitex black gesso.

Various acrylic paints over Liquitex black gesso.


Blick Artists’ Black Gesso

Blick Artists’ Black Gesso is available in 32oz widemouth jars.

Blick Artists’ Black Gesso is available in 32oz widemouth jars.

Blick Artists’ Black Gesso is a solid, dependable black gesso that is very economical and resulted in a satin surface. Although I prefer the ultra-matte surface of the Utrecht Black Gesso, especially where the gesso will be exposed, the Blick gesso is a good option too.

As can be expected from a house brand, it has a few tradeoffs: It is not as smooth and flowing as the Golden or Liquitex Gessos. You may find that you’ll need to add water to get this to brush or roll on. And as mentioned, it is more satin than the matte Utrecht gesso. This gesso is also available in just one size, an economical 32 oz wide-mouth jar that typically costs about $0.60 per ounce, making this the most affordable gesso tested.

I’ve used this gesso and to be honest, I don’t mind the satin quality for certain paintings but my taste is usually to go with the most matte gesso I can find. It’s hard to see in the pictures below and I hope this makes sense: but it’s on the less satin side of things. It’s still completely opaque and one coat will usually cover up anything below it.

About Blick: Founded in 1911, Blick is one of the largest art suppliers in the country. The house brand paints and materials are often of a high quality, although they have a bit of a confusing array of different levels of house brands. This is the only black gesso they make, however, and it is manufactured in the U.S.

Blick Artists’ Acrylic Black Gesso sizes, typical price, and price per ounce:

  • 32 oz, $19.14, $0.60 per ounce

Test Images for Blick Artists’ Black Gesso

In a simple test, the Blick Artists’ Black Gesso resulted in the most satin surface of gesso tested.

In a simple test, the Blick Artists’ Black Gesso resulted in the most satin surface of gesso tested.

Stripe test from top: 1 coat, 2 coats, 3 coats

Stripe test from top: 1 coat, 2 coats, 3 coats

Angle view of stripe test

Angle view of stripe test

Various acrylic colors painted over the Blick Artists’ Black Gesso

Various acrylic colors painted over the Blick Artists’ Black Gesso


Testing Methodology and Images

1. Stripe / Coat Test

The first test involved painting one, two, and three coats of gesso on to stretched, unprimed, 12 oz cotton duck canvas. The gesso was used directly from the jar without mixing with water, and the coats were allowed to dry completely before another coat was applied. It may be more easy to see in the angled images, but Utrecht was the most matte, the Blick was the most satin, and Golden and Liquitex were in the middle of that range.

Click any image below to see larger images. The top line is a single coat of gesso, middle is two coats, and the bottom has three coats. Images are in alphabetical order by manufacturer

Stripe / coat test angle view. This may better show the differences in satin or matte qualities of the various gessos. Click to enlarge.

2. Flat Square Test

After the coat test, an additional three coats of gesso were applied to the same area of canvas. In between the previous stripes you will see areas of 3 coats, while the other areas now had 4, 5 or 6 coats of gesso. This is probably an extreme amount of gesso, but it was a further indicator of how the satin or matte qualities of the gesso would develop with more coats.

The most notable thing in this test was that the Liquitex stripes had built up a bit of texture where a bead built up from painting and it dried upraised, which was only exacerbated by more coats. While no sanding was used in this testing, a simple light sanding can fix any problems with texture, especially if you want an ultra-smooth surface. (My preference is for a flat surface with a bit of tooth, so I usually try to avoid having to sand.)

Click to enlarge:

3. Color Test

Finally, various acrylic paints were tested on top of each black gesso. There was not a big variation in the results here, although the Golden and Utrecht gessoes seemed to provide a more smooth surface for painting. But it was just a very slight difference.

From top to bottom, the tested paints included: NovaColor Hot Pink; Liquitex Neon Pink Acrylic Gouache, Utrecht Studio Series Medium Yellow, Blickrylic Neon Yellow, and Blick Matte Acrylic Dark Blue Light.

Click to enlarge.


Tips for Applying and Working with Black Gesso

Gesso is a primer or ground that both protects your painting substrate and creates a suitable painting surface. It must be used if you are working with oil paints, as those will eventually eat through and destroy unprimed canvas. If you are working with acrylics, you can paint directly on to canvas or other surfaces, but you may find that a gesso provides a matte, even surface that makes it easier to apply other layers. Here’s a few tips:

Water down your gesso

Although the test above did not employ this, it’s often a good idea to thin your first layer of gesso with water. This helps the gesso get into every nook and cranny of canvas and really begin to get a good seal. The second and third layers of gesso (and fourth if desired) will result in an even surface.

Brush or Roll — your choice

Some apply gesso with a foam roller, while other brush. It’s really up to you. Either way has its advantages and disadvantages. If you are worried about any texture building up, use a sanding block and medium grit sandpaper (around 150 or so) to sand each layer after it dries. If you want a really smooth surface, you can keep sanding and applying layers, and move towards using finer and finer sandpapers.

Cover up other paintings

Black gesso is especially effective at covering up anything below it, often with just one coat. Use it to cover other acrylic paintings so you can start fresh. But keep in mind, acrylic should not be used on top of oil paint as that will cause problems and degradation down the road.

Make colors pop

Certain paints, such as neons, yellows, and bright blues, can really pop when you put them on a black ground. Other colors, such as transparent colors, can really sink in and be hard to see. It’s best to test things out and see how your favorite colors change or not.


Summary

This post included a test of four different black gessoes, including Blick, Golden, Liquitex, and Utrecht. All the gessoes resulted in a deep black ground, and they are very opaque. The Golden and Liquitex gessoes were the most fluid and easy to apply; the Blick was the most economical and also the most satin; and the Utrecht was the top pick because of its ultra-matte, even surface and relatively affordable price.

Black gesso is an interesting option that can really mix things up in your studio. Do you have a favorite black gesso? Let us know in the comments.
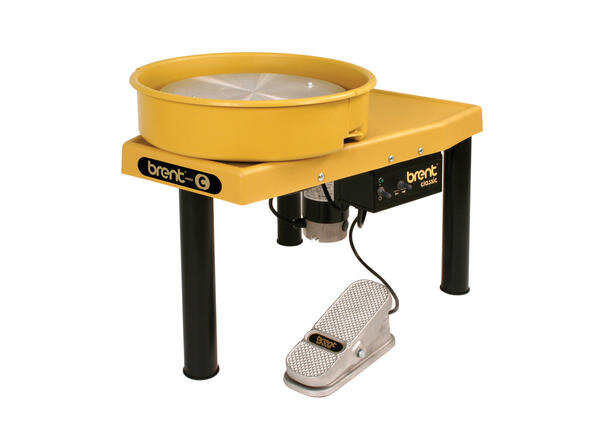


The Best Sandpaper, Grinding Blocks, and Abrasives for Pottery and Ceramics

3M Pro Grade Sandpaper is a plastic-backed, long-lasting sandpaper that can be used wet for safe sanding.

3M Pro Grade Sandpaper is a plastic-backed, long-lasting sandpaper that can be used wet for safe sanding.

In ceramics, there’s always a need to sand something. Whether it is cleaning the foot of a pot or dealing with a massive glaze run on a kiln shelf, there are a few different tools that will really take care of these problems in effective, safe, and economical ways. This post will cover the best abrasives, sandpaper, and grinding blocks, as well as how to use them. You probably won’t need every single one of these tools, but they’re covered here so that you can find what will work best in your studio.

Safety note: Keep in mind that any sort of sanding or grinding can produce dust. Wear a dust mask or respirator, or when possible, sand wet.

Most Used / Top Pick: The thing I reach for the most is the plastic-backed, purple, pro-grade sandpaper made by 3M. (Pictured at top) It is economical, long lasting, and can be used wet. It’s a simple, versatile tool that has a place in any studio.


Table of Contents

  • Sandpaper

  • Grinding Blocks and Whetstones

  • Diamond Hand Pads

  • Silicon Carbide Stones for Power Tools

  • Wet Grinders

  • Sanding Tips and Tricks

  • Summary


Sandpaper

There are two sandpapers that I use in the studio: 3M Pro Grade Sandpaper and Emory Cloth. Other sandpapers, such as those designed for wood, don’t hold up under the heavy use needed with ceramics and clay. One advantage of sandpaper, as opposed to solid blocks, is that it is flexible and can be bent, creased, or cut into a variety of shapes if you need to sand hard-to-reach spots.

Detail shot of the front and back of the 3M Pro Grade No Slip Sandpaper.

Detail shot of the front and back of the 3M Pro Grade No Slip Sandpaper.

3M Pro Grade Sandpaper

The purple, plastic-backed 3M Pro Grade Sandpaper is the main tool in my sanding arsenal. It lasts longer than other sandpapers and can be used wet or dry. The plastic backing is advertised as “no-slip grip” and it is easy to hold and control, even when wet.

The paper measures 9 x 11 inches and is available in a variety of grits. I generally stock 80 and 150 grit, but a range of 4 grits from 60 to 220 would probably cover most needs.

The sandpaper can be found in smaller packs ranging from 3 to 6 sheets, or bulk packs with 20 or 100 sheets. 20 sheets will last a long time for individual use, or around 6 months for a busy academic or community studio.


A roll of Emory Cloth Sandpaper can be economical and functional.

A roll of Emory Cloth Sandpaper can be economical and functional.

Emory Cloth Sandpaper

Emory Cloth is a cloth-backed sandpaper that can also be used wet or dry, and the cloth backing makes it long-lasting and economical. Emory cloth can be found in sheets or in rolls. It is especially ideal for sanding the bottom of pots when they come out of the glaze firing, to clean up any small burrs or imperfections, or to remove kiln wash.

For emory cloth, I like to buy rolls so that I can cut or rip off just what is needed.


Grinding Blocks

There are a variety of grinding blocks that are useful in the ceramic studio. A block might be used in place of sandpaper, but I usually stock both sandpaper and blocks. The bigger blocks are especially useful for dealing with glaze drips and cleaning kiln shelves while a whetstone can be used to sharpen tools and clean up pots.

A silicon carbide rubbing block with a handle.

A silicon carbide rubbing block with a handle.

Silicon Carbide Rubbing Block

A silicon carbide rubbing block (or grinding block or brick) is one of the most effective ways to deal with glaze drips and to clean up kiln shelves and kiln posts. The blocks come in a variety of sizes, with or without handles, and some have fluting. The fluting is especially useful for grinding rough kiln shelves flat again. A flat-sided block is better for cleaning up the foot of pots or the bottoms of sculptures.

Detail of the fluted bottom of a typical silicon carbide rubbing block.

Detail of the fluted bottom of a typical silicon carbide rubbing block.

A longer, thinner, fluted silicon carbide rubbing block without a handle.

A longer, thinner, fluted silicon carbide rubbing block without a handle.

Silicon carbide blocks can be used wet, which is a plus for me because I’m always looking for ways to minimize dust in a studio.

A downside of these rubbing blocks is they are prone to cracking if dropped. This is especially a problem if you crack one with a handle. But don’t despair, the pieces are good until they are ground down to the last bit.

Another downside is they are typically on the rough side, around 20 to 60 grit. This is fine for kiln shelves, but you’ll want to follow up with something a bit finer, such as sandpaper or emory cloth, if you’re sanding the bottom of a pot.

The block with handles are typically 6” x 3” x 1”, but these sizes vary by manufacturer.

Aloxite Blocks and Whetstones

An aloxite sanding block.

An aloxite sanding block.

Available at ceramic suppliers, aloxite (aluminum oxide) blocks are smooth, hard, and extremely durable blocks. They are very long lasting, they don’t “shed” a lot of material when used, and they are especially great for sanding the bottom of pots.

Silicon carbide whetstone, with two grits — 120 and 240.

Silicon carbide whetstone, with two grits — 120 and 240.

Alternately, and easier to find, you can use whetstones designed for sharpening knives. Generally not as hard as aloxite, whetstones are another great option for cleaning small glaze runs, burrs, or rough patches on fired ceramic. They can also be used to sharpen studio tools, such as scissors or fettling knives.

Neither of these smaller blocks are particularly good for cleaning large areas of kiln shelves, but they’re great to use on pots.

Both aloxite stones and whetstones can be used wet, which keeps dust out of the air.


Diamond Hand Pads

Semi-hard foam-backed diamond hand pads from Stadea.

Semi-hard foam-backed diamond hand pads from Stadea.

Diamond hand pads are the perfect way to sand away burrs, small glaze drips, and rough patches on pots, sculptures, or kiln shelves and posts. Made of industrial-grade diamonds embedded in plastic, these are available from a variety of manufacturers as either soft, flexible pads or semi-hard, foam-backed pads. The foam-backed pads are my favorite because they provide structure and support your hand, but the flexible pads are useful for sanding more complicated shapes. Available as sets or individual pads, my recommendation is to get four individual pads in the range of 50 grit, 100 grit, 200 grit, and maybe 400 grit.

Semi-flexible diamond pads from Diamond Core Tools.

Semi-flexible diamond pads from Diamond Core Tools.

The soft pads are available from Diamond Core Tools, while foam backed pads are available from Diamond Core and other manufacturers such as Stadea or various generic names on Amazon. Expect to spend $15 to $30 per pad, but if used just when needed (use sandpaper for more everyday tasks), they should last for some time, maybe even years.

Like many other tools listed here, these can be used wet, which keeps sanding dust out of the air.

Shop semi-flexible pads at Diamond Core.


Silicon Carbide Grinding Wheels and Cups for Power Tools

A green silicon carbide bench grinder wheel.

A green silicon carbide bench grinder wheel.

If you have a bench grinder or angle grinder, you should get silicon carbide stones that fit these tools. Silicon carbide will grind through material such as glaze and ceramic without producing excess heat, and it’s the appropriate material to use with non-metallic materials including ceramic, stone, and concrete.

This especially comes in to play with using a bench grinder to clean up glaze drips. If it are not using silicon carbide, the wheel and glaze may get too hot, resulting in potentially dangerous melted bits of glaze. Stick with silicon carbide wheels that are properly dressed and kept in shape. (If you don’t have a dressing tool to keep your wheel even, definitely get one of those too.)

Silicon carbide grinding cups for use with angle grinders.

Silicon carbide grinding cups for use with angle grinders.

For angle grinders, there are also silicon carbide cups that can quickly clean kiln shelves. These are especially useful if you need to take off all the kiln wash and start with a fresh coat. Keep in mind that angle grinders produce a lot of dust, so do use this tool with caution. Or see the recommendation below about switching to a wet grinder for these types of uses.

Shop Silicon Carbide Grinding Cups at Amazon


Wet Grinders

Makita variable speed wet grinder.

Makita variable speed wet grinder.

Rather than an angle grinder, which definitely make a lot of dust, consider a wet grinder for quickly dealing with bad glaze runs or cleaning kiln shelves. A wet grinder has a water feed that keeps a stream of water flowing out of the center arbor hole on the grinder. They can spray water and sanded bits all over,, but if you have a tub or large sink to catch the water, it is not that bad.

It’s best to go with a quality wet grinder, such as a Makita or Flex. (I’ve personally been using a Flex brand grinder for about 7 years). If you carefully read reviews, the cheaper wet grinders can give small electric shocks or stop working after some use. For an electric tool that uses water, you definitely want a quality machine that won’t shock you! And while using, be sure to follow every safety protocol. Personally, in my years of using a Flex variable speed grinder, I’ve never felt one tiny shock.

A variable speed wet grinder is the way to go, as that allows you to control the speed. Slower speeds don’t whip as much water around. Wet grinders are generally used with diamond pads. As with hand pads, in my experience a range of grits from 40 or 60 to around 400 get the job done. I’ve had good luck with Stadea pads (shop at Amazon), both the 4 and 5 inch sizes. The lower grits can wear out quickly, depending on use, so you may want to order a few of those. I originally purchased an entire set that goes all the way up to 3000 and buff, but for cleaning up glaze drips, 400 suits me, so I prefer to purchase individual pads to use with the wet grinder.

One drawback with wet grinders is figuring out the right hose connection. Expect to make a few trips to the hardware store to find the right fittings to connect your wet grinder to a hose or faucet.


Sanding Tips and Tricks

A few ideas to put into practice in your studio:

  • Broken pieces of kiln shelves, especially silicon carbide shelves, make excellent sanding blocks and stones.

  • Rub the bottom of two pots together for a quick post-firing sanding / cleanup. This can be done wet under running water or dip quickly into a bowl of water.

  • A set of sharp chisels and a rubber mallet can help in removing glaze drips from kiln shelves, then follow up with sanding tools.

  • Check out our tutorial for a DIY Interchangeable Grinding Disc

  • Whenever possible, sand wet! It’s the safest way to keep dust out of the air.

Safety Note

Any type of sanding, grinding, or rubbing will create dust. Take appropriate precautions with wearing dust masks or respirators, and eye protection too, when sanding or using power tools.


Summary

This post has covered and reviewed a variety of sanding and grinding tools and abrasives for use with ceramics and pottery.

My most-used tools are sandpaper and a silicon carbide rubbing block, but I also have a wet grinder with diamond pads and hand pads. I also keep broken pieces of kiln shelves to use as grinding tools. All of this is done wet, when possible, or I use proper safety protection such as a dust mask and safety glasses when sanding. Sanding, grinding, and cleanup are an inevitable part of working with fired ceramic and the best tools will get the job done for you in a safe, effective, and long-lasting way.

What sanding or grinding tools do you use in the studio? Let us know in the comments.


Best Wheelthrowing and Pottery Sponges

Tack Sponges are economical, long-lasting synthetic sponges that are great for wheelthrowing and ceramic studios.

Tack Sponges are economical, long-lasting synthetic sponges that are great for wheelthrowing and ceramic studios.

For pottery and wheelthrowing, it is important to have a long-lasting sponge that doesn’t shred and fall apart after a few sessions. There are quite a few high-quality options these days, and also a lot of cheap generics that fall apart almost right away.

My favorite pottery sponge is a basic synthetic round yellow tack sponge. Designed for cleaning horses or polishing leather, these are also great for use in a ceramic studio. Tack sponges are more dense and long-lasting than other synthetic sponges, are comfortable, and get the job done.

There are a variety of tack sponges available for sale online, typically in 12 packs. Look for a a quality brand, such as Decker (and avoid Creative Hobbies “tack” sponges, which I believe are mis-labeled).

In addition to tack sponges, natural sponges and speciality pottery sponges are good options. You can also cut your own sponges from larger yellow sponges or upholstery foam. Our full review of pottery sponges is below, along with some ideas of the best ways to utilize sponges when throwing.

For a full review of heavy duty, rectangular yellow clean up sponges, click here.


Table of Contents

  1. Best Pottery Sponge: Tack Sponges

  2. MudTools Sponges

  3. Xiem Sponges

  4. Natural Sponges

  5. Other Sponge Options and Sponge Holders

  6. How to Cut Your Own Sponges

  7. Ways to Utilize Sponges in Wheelthrowing

  8. Summary


Best Pottery and Wheelthrowing Sponge: Tack Sponges

Decker Tack Sponges.jpg

Tack sponges are the best option for a pottery and wheelthrowing sponge. Soft but long-lasting, these synthetic sponges are also economical. Designed for cleaning horses, tack sponges have a fine-celled structure that is perfect for wheelthrowing and other uses in a ceramic studio.

To be honest, it can be hard to distinguish between synthetic yellow sponges, especially when shopping online. But through experience, I’ve learned to avoid sponges such as the “Creative Hobbies 25 pack” and other generics. These generics lose their loft and fall apart within a few weeks and while they may be fine for sponge painting or light-duty uses, they are generally not suited for intensive tasks such as wheelthrowing. That’s why it’s best to pay a bit extra and get tack sponges.

On Amazon, Decker is a brand you can trust (click the button below to shop). And if you have the chance to visit a ceramics store in person, you may find Kemper yellow sponges or other high-quality, round, yellow synthetic sponges.

Decker Tack Sponges are 3 inches in diameter by 1 inch high, and are available in a 12 pack that typically works out to a cost of about $1 per sponge.


MudTools MudSponge

The MudTools blue, orange, and white sponge.

The MudTools blue, orange, and white sponge.

The MudTools sponges are rib-shaped, and measure 2.63 x 3.75 inches.

The MudTools sponges are rib-shaped, and measure 2.63 x 3.75 inches.

MudTools makes three speciality sponges designed for use in ceramics. Shaped like a traditional pottery rib, they are available individually or in a 3 pack. The sponges range from a typical open-cell sponge structure to a fine-pored, denser sponge. MudTools calls these:

  • Workhorse, blue, (corse porosity)

  • Absorbant, orange, (medium porosity

  • Finishing sponge, white (fine porosity)

The blue “workhorse” sponge is the most similar to a typical yellow round tack sponge, so if you want something fine, go with the orange or white. Many prefer the densest white sponge for use as a wheelthrowing sponge, but all three will work on the wheel or for handbuilding.

The MudSponges do cost more, usually around $5 to $8 each, but are long lasting and the range of sponge density does give you options.


Xiem Studio Pro Sponges

Xiem Studio Pro Sponges

Xiem Studio Pro Sponges

Xiem Tools makes two Pro Sponges which are circular and have tapered edges. Available in corse, medium, and fine porosity, these are great sponges to add into the mix with a yellow tack sponge. They are modestly priced, typically around $4 each, are long-lasting, and do the job.

They are great sponges but there seems to be some supply chain difficulties, as they appear to be sold out everywhere online. You may see them in stores, and if so, they’re worth considering for your next throwing sponge.


Natural Sponges

Natural Sponges are a great option for pottery, and many potters use these exclusively.

Elephant Ear Sponges

Elephant Ear Sponges

Elephant ear sponges are dense, tough, thin, and are great for wheelthrowing. They are long lasting and do hold up to intensive use. While they are a favorite for many potters, I find them a bit too thin to hold comfortably while throwing, but I do use them for finishing and smoothing. It really comes down to how you hold a sponge and what you need them for. The sponges are available in different sizes, look for something around 3” wide or bigger. You can always cut sponges smaller if needed.

Value Sponge set wt wool, silk, and yellow sponges.

Value Sponge set wt wool, silk, and yellow sponges.

Other types of natural sponges, such as Wool, Silk, or Yellow sponges are great for decorative effects, such as sponge painting with underglaze, but I find them to be either too open or too prone to falling apart to be used for wheelthrowing. Your experience may differ.


Other Sponge Options and Sponge Holders

Creative Hobbies has a 25 pack of 2 1/2” round sponges

Creative Hobbies has a 25 pack of 2 1/2” round sponges

Generic round yellow sponges are available in bulk under a variety of names (sometimes mislabeled as tack sponges) such as Creative Hobbies. These may seem like a great deal, and they are good for sponge painting or other light-duty uses. But these sponges will not stand up to the intense use needed for wheelthrowing. Expect them to lose their loft and fall apart within a few weeks. I’ve order packs from Creative Hobbies a few times, but never again! Learn from my mistakes and stick to tack sponges, as detailed above.


Round Sponge Set.jpg

Round Sponges or Stipplers (sometimes labeled “Spouncers”) are one of my favorite sponge tools to use for glazing and other decorative effects, such as adding polka dots with glaze or underglaze. Available in sizes ranges from about 1/4” to 1” in diameter, these are a great addition to your decorative arsenal. There are not really any brand names, so go for a set that looks good to you. I’ve used both the blue foam and yellow foam; my instinct is that the blue foam is a bit finer and more long lasting, but both will work ok. They do break down over time.


Sponge Holders are a helpful tool for wheelthrowing and are most handy when you need to get water or slip out of the inside of a vessel. (If you leave water inside a pot you’ve just thrown it can cause cracking, uneven drying, and other problems). There are two main options for this: The Kemper Sponge Holder and the Xiem Tools X-Sponge Telescoping Sponge Holder. Is a tool like this really necessary? It may be, if you throw a lot of jars or vases with a narrow mouth. They can really help collect extra water or be used to smooth the inside of a vessel.

DIY TIP: If you don’t want to buy one of these speciality tools, you can take almost any stick (such as a drumstick) and attach a sponge to the end with a rubber band.

The Kemper Sponge Holder.

The Kemper Sponge Holder.

The Kemper Sponge Holder is a 13 inch long hardwood handle with a screw and small cup washer at one end. It comes with a sponge, and if that wears out, you can easily replace it with another sponge. Simple, effective, and durable, this is a great addition to your tool kit.


Xiem Telescoping sponge.jpg

The Xiem Studio X-Sponge 2 is a telescoping sponge holder that can extend from 8.5 to 26 inches, so it can really be deployed on some large pots if necessary. The sponge is a dense, long lasting, white foam sponge and there are proprietary replacement sponge heads available too. The sponge is very fine porosity, similar to the finest Xiem round sponge or the MudTools white MudSponge. The telescoping sponge holder is a real innovation and like all Xiem Studio Tools, is thoughtfully designed and well made. The dense, rounded sponge does give you more control than the yellow sponge attached to the Kemper stick.


How to Cut Your Own Sponges

ProPlus Grouting.jpg

One of the most economical sponge options is to take a large yellow clean-up sponge, and cut it into 8 or 12 pieces. My favorite sponge is the Armaly ProPlus Grouting and Concrete sponge, which is the best heavy duty clean up sponge I’ve found. (See a full review here).

To do this, you can draw lines on the sponge with a sharpie and then using a sharp chef’s knife or scissors, cut into pieces. The best way is to plan for 12 sponges—which is a pretty good value when you start with one large sponge.

It’s also great to cut big yellow sponges into pieces as they start to fall apart. These can be repurposed for clean-up sponges or use a rubber band to attach them to a stick for a DIY sponge holder.


How to Utilize a Sponge for Wheelthrowing

I prefer to throw with one sponge in my right hand. The sponge doesn’t necessarily touch the clay, but it is helpful for organizing my hand in a comfortable way, and as a small water reservoir. But there are as many ways to use a sponge as there are potters.

A few quick tips on sponges and throwing:

> When throwing, try holding no sponge, 1 sponge in your throwing hand, or 2 sponges (one in each hand). You will quickly find the method that works for you. Two sponges may be a great way for beginners to get the feel of clay and help focus the pressure.

> Keep in mind that you should have one point of pressure on the inside, and one on the outside. This could be a fingertip, a knuckle, or use a sponge to make that single point of contact.

> The best sponge is the one that is most comfortable for you. Check out the advice above, and try out a few sponges. Experience is the only way to figure out what works for you.

> Set up a large yellow sponge for easy clean up of your wheelhead or any spills / splashes. They are also great for wiping your hands. I wipe and clean my hands often when throwing, especially if I am going to touch a switch on the wheel, or switch to a shaping tool such as a rib. Large yellow sponges are the best way to quickly clean your hands.


Summary

This post has reviewed small sponges for use while throwing on the wheel, and given advice on other sponge tools along with a few DIY tips and ideas of how to use a sponge. The top recommended sponge is a synthetic round yellow tack sponge, but there are a lot of options.

What sponges do you use? Any tips for sponges and wheel throwing? Let us know in the comments.
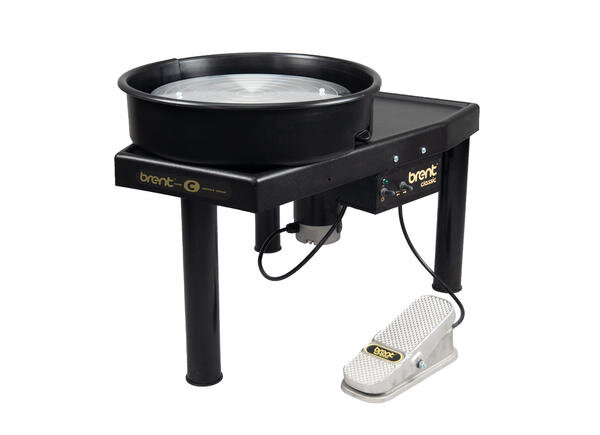


Best Pottery Wheel Stools

Shimpo Pottery Stool.jpg

If you sit at the pottery wheel, you need a comfortable, functional stool that will stand the test of time and can be cleaned. There are a few pottery-specific stools that really are best for throwing, but a basic stool will also get the job done and can double as a step-stool in the studio.

TOP PICK:

Our top pick is the Shimpo Potter’s Stool. It has 4 adjustable legs, a padded seat, and a rugged design that will last forever. It is also the only stool that can be set at an angle with two longer legs (see picture) if that is more comfortable for you. It’s in the middle price range of stools reviewed here, generally around $80-90 plus shipping.

The Shimpo Potter’s Stool is a great option but there are other pottery stools too. The full review is below.

For a full pottery wheel buyer’s guide, click here.


Table of Contents

  1. Top Pick: Shimpo Potter’s Stool

  2. Speedball ST-4 Adjustable Potter’s Stool

  3. National Public Seating 18” stool

  4. Other Options

  5. How to Find the Beast Seat Height for Throwing

  6. Wrap Up


Top Pick: Shimpo Potter’s Stool

The Shimpo Pottery Stool.

The Shimpo Pottery Stool.

The Shimpo Potter’s Stool is the most versatile, comfortable, and functional pottery stool on the market. It has four adjustable legs with nine adjustable slots on each leg, with a range of 19 to 26 inches high. The legs are adjusted by pushing a pin in and moving the leg to the desired slot and letting the pin snap back in to place. The legs also can be adjusted independently, allowing for the stool to be set at an angle if desired. (Most pictures show this stool set up at a precipitous angle but even a slight angle or flat will work for throwing) It also has a comfortable, padded seat, but that does make it hard to stand on top of the stool if you want to use it to reach something high.

The stool can be turned upside down on a wheelhead when not in use, and with a 16 x 16 inch footprint, it is compact and won’t get in the way. Ongoing upkeep is simple: a bit of oil on the adjustable legs when needed.

The only drawback is the adjustable pins can be a bit unwieldy to press in to change, but most potters probably don’t need to adjust their stool too often. Another drawback is that the blue seat cover can be cut or pierced. But these are relatively minor concerns. Overall, it’s compact, functional, and comfortable stool.


Speedball St-4 Adjustable Pottery Stool

Speedball ST 4.jpg

The Speedball ST-4 Adjustable Pottery Stool has a molded plastic cushioned seat with a low back, a hydraulic adjustment that ranges from 16 to 23 inches high, and a wide, sturdy, 5-pointed base. The cushioned seat is comfortable for long sessions, is made of some kind of semi-hard foam, and is easy to clean. There’s also a right-side lever to adjust the heigh. This lever also can be cleaned, but it’s best to keep this and the inner adjustable column free of clay.

This stool could be the top pick, but some may find that the wide base gets in the way and might be a tripping hazard in a tight studio. Another drawback is that if clay gets on the adjustable column, it can damage the mechanism. Over time, if not kept clean, the stool ceases to be adjustable. So it may not be a lifetime sort of purchase, such as the Shimpo stool, but it is very comfortable and if kept clean, will last for years.

The Speedball ST-4 Pottery Stool costs around $150 and is available at speciality ceramic suppliers. Click here to visit the Speedball website.


National Public Seating 18” Stool and 18” Adjustable Stool

18” Stool from National Public Seating in grey.

18” Stool from National Public Seating in grey.

National Public Seating 18” Stool in black.

National Public Seating 18” Stool in black.

National Public Seating’s stools are the utilitarian workhorses of studios. Sturdy, stackable, and virtually indestructible, they will last for years and years of heavy use, and the shorter 18” stool can easily double as a tall step stool or low pedestal for use with your favorite banding wheel. The 18” fixed height stool is a fairly good option for the pottery wheel but some may find it a little short. There is also an option for just a bit more that can adjust from 18 to 27 inches however, this is a screwed-in adjustment that needs a hex wrench to change. You won’t be making quick adjustments like with the Shimpo stool.

18” Stool in grey with padded vinyl seat from National Public Seating.

18” Stool in grey with padded vinyl seat from National Public Seating.

Another plus to these stools is they are available in a few colors: a basic gray, black, and a grey with a padded vinyl cushion. These stools are very common and widely carried, so it can be good to shop around and see if there’s a sale. Typically they are around $35-$40 and a bit more for the padded or adjustable models, but I’ve seen them on sale for as little as $25. They aren’t as versatile as the easily adjustable Shimpo and Speedball stools, but there’s a lot to be said for having a simple stool around.

You can also find these stools with a backrest option—I’m not sure that is necessary on an 18” wheel, but it is nice for the taller chairs for other studio uses. My preference is to turn chairs like this upside down on the wheelhead when not in use.

In the U.S., Blick carries a lot of options for this stool.

Shop 18” National Public Seating Stool at Blick

Amazon also has a variety of options of this stool:

Shop grey 18” stool at Amazon

Shop black 18” stool at Amazon

Shop padded grey 18” stool at Amazon

Shop padded black 18” stool at Amazon

Shop adjustable 18"-27” stool at Amazon


Other Options for Pottery Stools

Speedball ST-1 Professional Pottery Stool.

Speedball ST-1 Professional Pottery Stool.

Speedball makes a few other pottery-specific stools. The white Speedball ST-1 Professional Pottery Stool has a similar base and adjusting mechanism to the ST-4, but it has a more cushioned and contoured seat with an office-chair type back. It is designed to easily allow your legs to spay open around the splash pan of a wheel. Some swear by this chair but for me, it’s kind of an awkward design. Given the option I go for the ST-4 or Shimpo stool first. The ST-1 is adjustable from 18 to 23 inches high.

Speedball makes two other pottery stools, the ST-5 and ST-10. The ST-5 has the same mechanism and base as the other adjustable Speedball chairs, but with a flat seat. And the ST-10 is a fixed-height, 18” stool with a wooden seat. It is very similar in design to the National Public Seating stools, but with a wooden top. Aesthetically, it’s more pleasing but it is also much more expensive.

Speedball ST-5 Adjustable Height Stool.

Speedball ST-5 Adjustable Height Stool.

The Speedball Stools are available at ceramic suppliers or click here to visit the Speedball website.

 
National Public Seating Adjustable Swivel Stool

National Public Seating Adjustable Swivel Stool

A final option is the National Public Seating Adjustable Swivel Stool. Rather than a hydraulic column that can break down over time, this seat is adjustable by turning the seat and moving what is essentially a big screw up or down. The adjusting mechanism is housed in a steel center sleeve but the “teeth” of the swivel are exposed as you raise the seat. As long as this is kept clean, the stool should last for a long time. It’s great for academic studios, anywhere you need an adjustable stool, but it is heavier and harder to stack. The stool is available in a variety of styles including wood and hardboard seats, and can adjust from 17 3/4” to 24 1/4” high. Modestly priced, like most of the company’s products, it’s usually available for around $80.

Shop Swivel Stool at Amazon


How to Find the Best Height for Throwing

Seated throwing at the pottery wheel can be very comfortable if you get your body positioned in the right way. I prefer to sit at least equal or higher to the wheelhead. This allows my upper body and torso to be involved in the throwing. The lower you set your seat in relation to the wheelhead, the more you will only rely on your shoulders and upper back for power, which can lead to strains and problems. You definitely want your abdomen, torso, and even your thighs to be involved in throwing.

Here’s how I suggest you find the position that is right for you. Keep in mind that every body is shaped differently. Different lengths of torsos and arms are really what come in to play with wheelthrowing:

  1. Set your chair or stool to be approximately 1 inch higher than your wheelhead. Keep in mind that bats may change the height of the wheelhead. I always sit higher than the wheelhead and instruct my students to start the same way. This allows you to “lean” in and really get a lot of power simply from the weight of your torso.

  2. If this is not comfortable, adjust your seat higher in lower in approximately 1/2” intervals until you find a comfortable position.

  3. Feel free to move your foot pedal from left to right if possible. You can also raise the footpedal on bricks or boards.

  4. Add a brick or upside down bucket underneath your non-pedal foot. Raising your leg allows your thigh to get a bit involved with adding power to your arms.

  5. While throwing, try to keep a curve in your lower back by keeping your chest up. This is hard to do.

  6. Take frequent breaks to stand up, stretch your arm, or move a bit so your body doesn’t get locked into a static position.

If you have aches and pains, you may need to consider switching your throwing position. It also doesn’t hurt to have a regular stretching routine, either before or after throwing. And adding core / ab exercises to your week will only improve your comfort and ability on the wheel.

If seated throwing is not working for you, keep in mind that many manufacturers make legs for wheels, or you can place a wheel on a table top or elevate it with cinder blocks. (Click here for a guide to table top wheels.) Many people find that a standing wheel is more comfortable and this is what you will find at many factories that work with jigs and molds on wheels. Keep in mind that if you are new to pottery, you may just need to develop new muscles, so start with 30 to 60 minute throwing sessions and grow from there over time.


Wrap Up

This post has reviewed the best stools for use at at pottery wheel and covered some ideas on how to find the most comfortable position for throwing. Our top pick is the economical, sturdy, and functional adjustable Shimpo Pottery Stool. But there are other options so that everyone can find the best stool for their studio.

What stool do you use at the wheel? Let us know in the comments.


Plato on the Role of Potters

Plato%27s+Republic.jpg

In Chapter 5 of Plato’s Republic, ‘The Guardians’ Life and Duties,’ the philosopher outlines the roles of three classes in society: guardians, auxiliaries, and workers. The workers are divided into castes and Plato believes there is little room for change in the castes. The goal, as Plato puts it, was to form “a community which is happy as a whole” without making just a few members of the community happy. Thus, everyone had a role to play but they had to stay in their role and place in society.

Here’s what he had to say about potters, from Robin Waterfield’s 1993 translation (419d-e, 421a). Bold text my own:


‘Suppose we were painting a statue and someone came up and criticized us for not using the most beautiful paint for the creature’s most beautiful features, because the eyes are the most beautiful part and they hadn’t been painted purple but black. It would be perfectly reasonable, in our opinion, for us to reply to this critic by saying, “My dear chap, you can’t expect us to paint beautiful eyes in a way which stops them looking like eyes, or to do that to the other parts of the body either. Don’t you think that if we treat every single part in an appropriate fashion we’re making the creature as a whole beautiful?

Likewise, in the present case, please don’t force us to graft the sort of happiness on to the guardians which will make them anything but guardians. You see, we know we could dress our farmers in soft clothes and golden jewelry and tell them to work the land only when they have a mind to, and we know we could have our potters lie basking in their kiln-fire’s warmth on a formal arrangement of couches, drinking and feasting with their wheel beside them as a table, and doing pottery only as much as they feel like, and we know we could make everyone else happy in this sort of way, and so have a community which was happy overall; but please don’t advise us to do so, because if we follow your recommendation, then our farmers won’t be farmers and our potters won’t be potters and no one else will retain that aspect of himself which is a constituent of a community.

Now, this isn’t so important where the rest of the community is concerned. I mean, if cobblers go to the bad and degenerate and pretend to be other than what they are, it’s not catastrophic for a community; but if the people who guard a community and its laws ignore their essence and start to pose, then obviously they’re utterly destroying the community, despite the fact that its good management and happiness are crucially in their hands and their hands alone.”

‘Now, if we’re creating genuine guardians, who can hardly harm their community, and the originator of that other idea is talking about a certain kind of farmer and people who are, as it were, happy to fill their stomachs on holiday, but aren’t members of a community, then he’s not talking about a community, but something else. What we have to consider is whether our intention in putting the guardians in place is to maximize their happiness, or whether we ought to make the happiness of the community as a whole our goal and should, by fair means and foul, convince these auxiliaries and guardians that their task is to ensure that they, and everyone else as well, are the best at their own jobs. Then, when the community as a whole is flourishing and rests on a fine foundation, we can take it for granted that every group within it will find happiness according to its nature.”

Hmmm, I would have to say that lounging on couches by the warmth of the kiln sounds pretty nice! But it doesn’t exactly match up with the role that Plato envisions for potters and other workers.

What do you think?

Republic by Plato, translation by Robin Waterfield, 1993

Click here to read more about books, podcasts, videos and other sources of inspiration in the studio.


Vintage films from the Mingei Film Archive

I love vintage pottery films so it was a pleasure to discover some newly digitized films that have been put online recently. These show famous Mingei potters Shoji Hamada and Bernard Leach at work.

The Art of the Potter is a 51 minute film from 1970. It was filmed by Sydney Reichman, produced by David Outerbridge, and was posted by Marty Gross on Vimeo.

A Visit to the Leach Pottery, 1973 is a recently digitized film that was shot by Kim Schuefftan and Toshio Sekiji, and includes John Bedding in Conversation with Marty Gross. It was posted by Marty Gross on Vimeo.

View more videos like this by clicking on Marty Gross’s Vimeo page here. Learn more about the Mingei Film Archive Project by clicking here.

If you’d like to learn more about the Japanese folk art movement known as Mingei , there are quite a few museum and exhibition catalogs, but a great place to start is with The Unknown Craftsman by Soetsu Yanagi with a forward by Bernard Leach. First translated into English in 1972, it is an enduring text on the handmade, the meaning of craft arts, and the power of beauty.

Shop The Unknown Craftsman at Amazon

Click here to see more posts in the Inspiration category.

Gift Guide For Potters and Ceramic Artists

UPDATE: Click here for our new 2023-24 Gift Guide!

Looking for a gift for a potter? Or perhaps ideas of how you can treat yourself? This post includes gift ideas for someone who works with clay and has sections for gifts under $25, $50, $100, and concludes with other ideas.

When shopping, keep in mind that most potters probably already have a basic tool kit and a few others tools. In a separate post, we’ve also got a handy guide to the best tools for pottery beginners, and there are many other posts on this site with reviews of tools we love.

Note: This site uses affiliate links for sites such as Amazon and Blick. If you click the links and complete a purchase, we may receive a percentage at no extra cost to you.


Gifts Under $25

Kemper Clay Drill

The Kemper Clay Drill

The Kemper Clay Drill

This single tool is a workhorse and replaces an entire set of hollow hole punches, many of which are more difficult to use and clean. The Kemper Clay Drill is easy to use, a breeze to clean, and is the best way to make holes in greenware for teapots, flower pots, lamp cords, or wherever you need a hole. This quality steel tool can drill a hole as small as 1/16” of an inch or as big as 3/4”. Simple insert and twist, and keep drilling to your desired diameter. The beveled edge results in a clean, even hole. It’s one of my favorite tools and usually costs around $4 to $5, making it a perfect stocking stuffer.


Xiem Studio Tools BatMate

The Xiem Studio Tools Bat Mate

The Xiem Studio Tools Bat Mate

The BatMate from Xiem Studio Tools is a 12-inch diameter piece of synthetic fabric that can be placed in between a bat and wheel head to virtually eliminate any wobble, improving the accuracy of throwing and trimming. Many potters, however, wet the fabric and place it directly on a wheel head to use when trimming pots. Pots will stay put just by tension, without adding little balls of clay wadding. This saves time and works just as well. At around $15, this is a tool that gets used all the time once it’s in a potter’s kit.


Hand Cream

Weleda Skin Food

Weleda Skin Food

Pottery and clay can be hard on hands, especially in the colder months and any potter will appreciate some nice lotion. Our favorite everyday cream is O’Keeffe’s Working Hands Cream (shop at Amazon), but if you wanted something more fancy, the Weleda Skin Food is a rich, luxurious cream that will help protect hands during a long studio session or at home.

Another favorite of many is Potter’s Skin Butter from Cara Mae Skincare. (For a complete look at hand creams, check out our studio hand cream review here. )

There are many great lotions, but I love Skin Food because it is extra thick, smells great, melds into your skin quickly, and the squeeze tube makes it easy to use at home or studio. It usually costs around $19 for a 2.5 oz tube.


Mini Ribbon Tool Set

Mini Ribbon Tool Set

Mini Ribbon Tool Set

This set of 6 tools is great for detail work, decorating, and finishing a piece of pottery or a sculpture. At 5 1/2” each, the metal tools don’t take up much room but they can do a lot. I don’t like to have dozens and dozens of tools, but I always have a set of these nearby, especially for detail work or scraffito. For around $13, it’s a great addition to a potter’s tool kit.


Xiem Studio Tools Precision Applicator

The 3 oz Precision Applicator from Xiem Studio Tools.

The 3 oz Precision Applicator from Xiem Studio Tools.

Another awesome tool from Xiem is the precision applicator, available in 1 and 3 oz sizes. The applicators have a soft, flexible rubber bulb with a variety of screw-on metal tips. Mostly used for slip trailing and slip decoration techniques, these bulbs can be used to apply just about any type of thicker, viscous liquid. The larger 3 oz size will be the best option for most. There are cheaper slip-trailing options that are a plastic bottle with similar metal tips, but the rubber bulb in the Xiem applicator provides steady, even pressure that is just easier to use. For around $20, this is a quality tool.


Green Split Leg Apron

revcoapron.jpg

This green split-leg apron is popular with many of my students and has a few features that make it a nice upgrade from a standard kitchen apron. Made from cotton, it has an adjustable, clip-on neck strap and it also has clips to attach the split legs to either leg. Some may prefer a longer apron (such as the Claypron) but this apron covers the thighs and the split-leg design makes it perfect for sitting at the pottery wheel. Usually available for $20 to $25, the Revco green apron is available in 36”, 42” and 48” lengths.

For our complete guide to aprons, click here.


Harbor Freight Canvas Rigger’s Bag

The Harbor Freight Canvas Riggers Tool Bag.

The Harbor Freight Canvas Riggers Tool Bag.

This canvas tool bag has plenty of pockets and space to keep things organized, which is especially important if you work in a shared studio. As many pottery tools are quite small, it is helpful to keep everything together. And as this is open and made from cloth, you can put tools in immediately after cleaning and they will dry out and stay rust free. Usually available for around $25, this canvas tool bag will last for years of heavy studio use.


Neiko Diamond-Coated Drill Bits

5 piece diamond coated drill bit set from Neiko.

5 piece diamond coated drill bit set from Neiko.

Diamond-coated drill bits are the best way to drill holes in bisque or glaze-fired ceramics. (Do this with plenty of water and eye protection, and you’ll also need a cordless drill) While there are numerous name-brand and generic drill bits for cutting accurate holes, this set from Neiko is a great way to get started with diamond bits. Ranging from 5/32” to 1/2”, the Neiko bits are a good size for tasks such as drilling cord holes in ceramic lamps or adding drainage holes for planters. At $10 or less, the Neiko bits are a cost-effective addition to any ceramic studio.


Fun T-Shirts at Society6

Retro 70s Pottery T Shirt

Retro 70s Pottery T Shirt (Shop at Society6)

The website Society6 has a lot of fun and interesting t-shirts and other merchandise with pottery and kiln themes. If you see a pattern or design you like, make sure to click around — designs are usually available on multiple products so you can find the right gift.

Society6 is a print-on-demand site where artists and designers can upload their own designs and they make a percentage of the sale price, so not only are you getting a cool gift, but you’re supporting other artists and designers too.

Evolution of Pottery T Shirt

Evolution of Pottery T Shirt (Shop at Society6)

Kintsugi heart pottery t shirt

Kintsugi Heart T Shirt (Shop at Society6)


Gifts Under $50


Mastering the Potter’s Wheel by Ben Carter

Mastering the Potter's Wheel.jpg

This approachable book is great for beginners and intermediate pottery students. The thorough, straightforward advice covers a variety of throwing techniques and how to alter and modify those thrown forms. The book even includes a section on stretches and ways to avoid a sore lower back. Published in 2016, it’s a great addition to any potter’s book shelf.

Mastering the Potter’s Wheel, 208 pages, 8 x 10”, 2016, $30

Shop at Bookshop.org

Shop at Dick Blick

Shop at Amazon


Zebrawood Carving Tool

The P1 Zebrawood Carver from Diamond Core Tools.

The P1 Zebrawood Carver from Diamond Core Tools.

The Zebrawood Carvers from Diamond Core Tools are functional, long-lasting (replaceable blades!), and beautiful. At 5.5 inches long, they feel like a pencil and can be used for sharp, even cutting tasks such as scraffitto and other forms of decoration. Diamond Core makes these with a wide variety of cutting blades—the P1 is a great carver to start with. At $37 each, these are on the expensive side for a ceramic tool but the adjustable blade and beautiful wood makes this a great gift for any potter.


Magna Cart

The Magna Cart.

The Magna Cart.

If you work with clay, you need to move stuff all the time. Whether it is boxes of clay, packaged ware for shipping, or large sculptures, the Magna Cart is an invaluable tool that folds up for efficient storage when not in use. Store it in a closet or the trunk of a car, it’s a handy tool that will get used all the time. The cart can hold 150 lbs (I’ve pushed it to 200 and that can be too much), has 5” rubber wheels, a 15” wide base and the handle can extend to 39” tall. There are a lot of folding carts on the market now in all shapes and sizes, but the classic Magna Cart is still the best option.


10,000 Years of Pottery by Emmanuel Cooper

10000 Years of Pottery.jpg

This lavishly illustrated book is a great addition to any potter’s bookshelf. Tracing the history of ceramics from the Ancient Near East through contemporary times, the book covers all parts of the globe along with the arts and crafts movement, ceramics and industry, studio ceramics, and more. Originally published in 1972, the book has been updated continuously since. The most recent 4th edition is available as a paperback for $30. My favorite thing is to just flip through this book for ideas and inspiration—it’s 360 pages long there are full-color pictures on almost every page.


Diamond Hand Pads

Stadea semi-hard foam-backed diamond hand pads.

Stadea semi-hard foam-backed diamond hand pads.

Semi-flexible diamond hand pads from Diamond Core Tools.

Semi-flexible diamond hand pads from Diamond Core Tools.

Diamond hand pads are the perfect way to sand away burrs, small glaze drips, and rough patches on pots, sculptures, or kiln shelves and posts. Made of industrial-grade diamonds embedded in plastic, these are available from a variety of manufacturers as either soft, flexible pads or semi-hard foam-backed pads. The foam backed are my favorite because they provide structure and support your hand, but the flexible pads are useful for sanding more complicated shapes. Available as sets or individual pads, my recommendation is to get four individual pads in the range of 50 grit, 100 grit, 200 grit, and maybe 400 grit.

The soft pads are available from Diamond Core Tools. The foam backed pads are available from Diamond Core and other companies such as Stadea. Expect to spend $15 to $30 each for one pad, but if used just when needed (use sandpaper for more everyday tasks), they should last for some time, maybe even years.

Shop diamond sanding pads at Diamond Core Tools

Shop Stadea diamond sanding pads at Amazon


Gifts Under $100

Banding Wheel

Shimpo Banding Wheels are heavy duty and come in five different sizes.

Shimpo Banding Wheels are heavy duty and come in five different sizes.

Banding wheels are very useful studio tools for coil building, sculpting, and decorating. And a high-quality design such as Shimpo banding wheels will last for decades or longer. Made of cast iron with sealed bearings, the Shimpo banding wheels are the best on the market. They are on the heavy side, but this added weight gives the wheels a smooth, even spin. Shimpo banding wheels come in five different sizes ranging from $60 to about $120. For more info, read our complete review of banding wheels, but of the options on the market, there is no doubt that these are the best.


Handheld Extruder

The Nidec Shimpo Handheld Extruder

The Nidec Shimpo Handheld Extruder

A handheld extruder is one of the best ways to make handles or other shapes in a quick, efficient way. Basically a specialized version of a caulking gun, soft clay is inserted in the 2” wide barrel, a die is placed at the end, the cap screwed on, and you can pull the trigger and the plunger begins pushing clay through the die. You can also use hollow dies to make small forms that would be almost impossible to make by hand. Until I used one, I was skeptical that this was a useful tool but now I’m a convert—It’s my favorite way to make handles that are uniform and easy to use. For clean up, the whole tool can be plunged under water if necessary.

There are a variety of handheld extruders, which are all about the same, but the Nidec Shimpo Handheld Extruder is compact and well built. The key is getting dies that work for. In addition to the basic dies, my favorite add on is the Scott Creek Handle Die kit, which should match up with any small handheld extruder. The Shimpo Handheld Extruder is usually around $60 and extra die kits generally cost around $40.


MudTools Essentials Kit

The MudTools 9-piece Essentials Starter Kit

The MudTools 9-piece Essentials Starter Kit

MudTools makes innovative tools such as their beloved flexible plastic ribs, and this Essential Starter Kit includes nine of their most popular tools in one kit. A great gift for pottery beginners, experienced potters will also appreciate this kit. Included are three flexible polymer ribs, the Mudshark cutting tool, a cut-off wire with polymer handles, a long plastic scraper/rib, a sponge, the MudTools all-in-one trimming tool, and the MudTools shredder. At around $70, this is a great gift option for every potter. For more info, read our guide here on beginner pottery tools here.

Note: Some marketing describes this as a 10-piece kit, but I would classify the plastic holder as a “tool.”


Other Gift Ideas

Pottery Wheels

Thinking of getting a new wheel as a gift? Check out our guide to table top wheels here, and our guide to full-size wheels here.

Cordless Drill

A drill is a functional, useful tool and a new one can make a great gift. Check out our buyer’s guide to cordless drills or corded drills.

We’ve got a lot of ideas in our various tool guides. Other ideas for gifts include scales for glaze mixing, accessories for glaze mixing, or maybe even tools that can be used in the kitchen or the studio.

Other Gift Ideas:

Classes: A set of classes at your local ceramics studio can be a great gift. If you can’t find a studio, ask a local clay supplier if they can recommend local studios.

Magazine Subscriptions: Magazines are great sources of ideas and inspiration. Check out Pottery Making Illustrated or Ceramics Monthly.

Tours, Trips, or Conferences: Look for pottery-specific travel tours, retreats, or conferences.

What ideas do you have for pottery gifts? Let us know in the comments.

Gift Guides

Check out these posts:

2022 Gift Guide for Potters and Ceramic Artist

Gift Guide for Young Artist and Creative Kids

Gift Guide for Artists Who Paint and Draw