Table Top Pottery Wheel Buyer's Guide

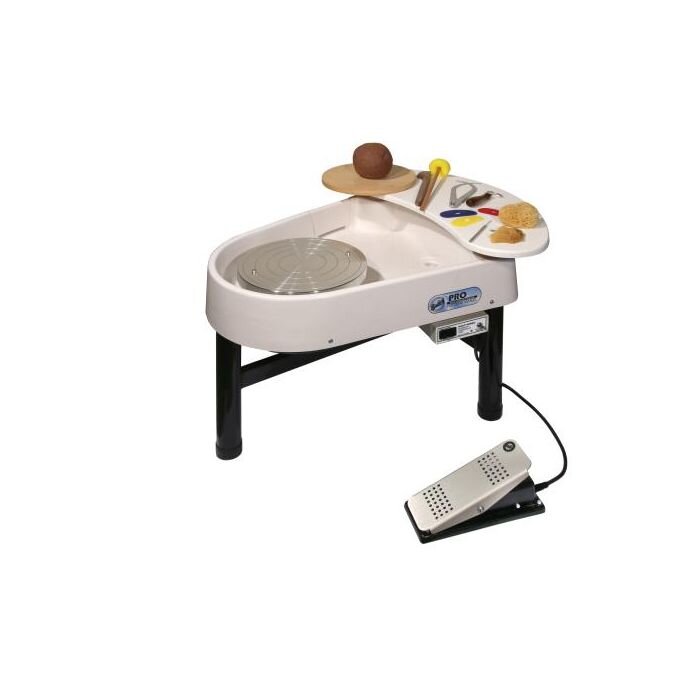
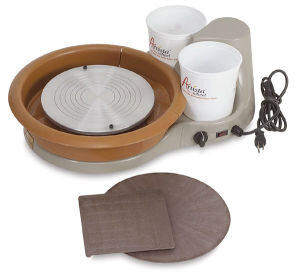
The Speedball Artista table top wheel.

The Speedball Artista table top wheel.

The Shimpo Aspire table top wheel.

The Shimpo Aspire table top wheel.

NOTE: For an updated version of this guide, click here.

If you need a lightweight, compact pottery wheel your best option is a table top or portable wheel. These are especially popular for classrooms, at-home use, or if you need to put your wheel away on a shelf or closet. You can still get great results with table top wheels, but there are trade offs in power and other options found in full-size wheels. If portability isn’t your biggest concern, there are also larger wheels that can be used on table tops.

For portable wheels, there are basically two options:

Speedball Artista: A lightweight wheel with an 11” wheelhead and 1/3 HP motor (Shop Artista at Blick)

Shimpo Aspire: A lightweight wheel with a 7” wheelhead and 1/3 HP motor (Shop Aspire at Blick)

For full size wheels that can easily be converted to table top wheels, there are another two options:

Brent IE models: an entry-level full sized wheel that without legs is just 13” tall and can be used on a table top. (Shop IE at Blick) (Note: The IE models appear to have been discontinued as of 2021)

Shimpo VL-Whisper: Our top pick for a full size wheel, the VL-Whisper has a unique magnetic motor design that allows it to be used without legs as a table top wheel. (Shop VL-Whisper at Blick)

This guide will cover each of these models to help you make the decision that is right for you.


Table of Contents

  1. Speedball Artist Portable Wheel

  2. Shimpo Aspire Portable Wheel

  3. Brent IE Wheel

  4. Shimpo VL-Whisper

  5. Other Table Top Options

  6. Comparison Chart

  7. Summary


Speedball Artista Table Top Wheel

The Speedball Artista wheel is designed for table top use but has optional leg attachments.

The Speedball Artista wheel is designed for table top use.

The Speedball Artista is a popular table top pottery wheel that has optional foot pedal and leg attachments. It has a 1/3 horse power motor, an 11” wheelhead, can center up to 25 lbs of clay, and weighs just 26 pounds. The wheelhead, which has standard 10” bat pins, sits just 3 5/8” above whatever surface you set this on. That’s a lot of options in a small package that usually costs around $450 to $500.

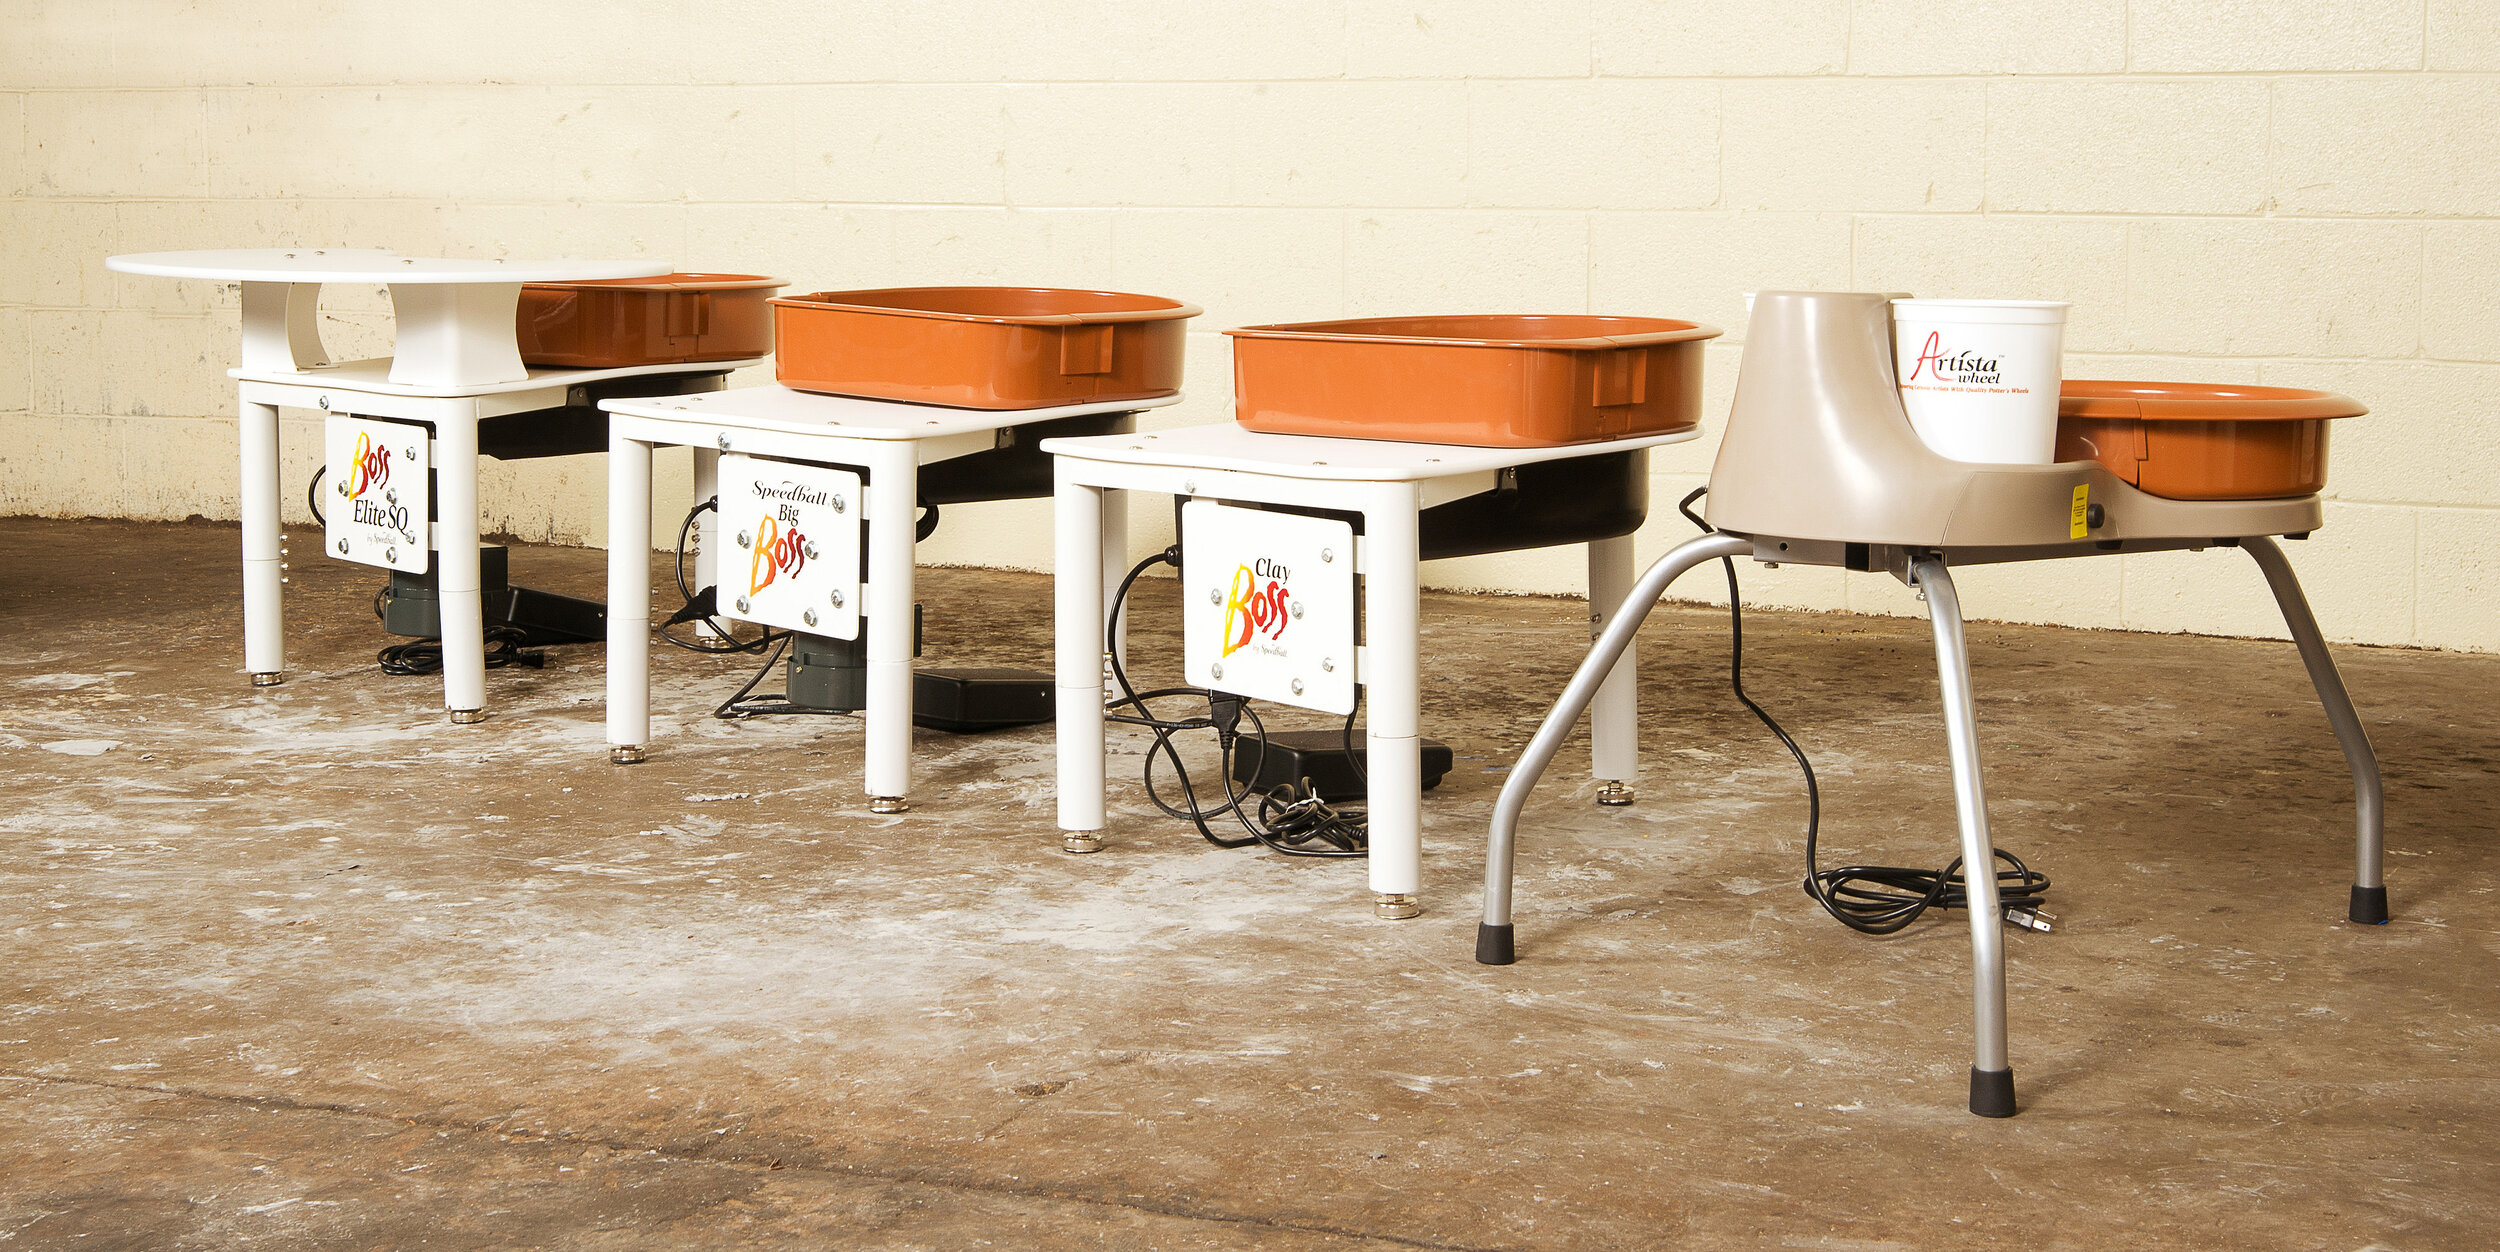
The Speedball line of wheels. At right is the Artista with the optional leg and foot pedal attachments.

The Speedball line of wheels. At right is the Artista with the optional leg and foot pedal attachments.

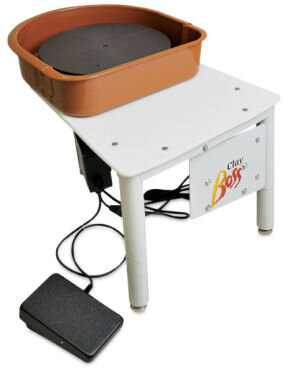
The optional legs and foot pedal will add about another $200 to the cost, giving you basically a full size pottery wheel. I wouldn’t recommend getting the Artista and all the attachments if what you really want is a full-size wheel (Check out the Speedball Clay Boss for that), but if you need something that you can move around, put away when not in use, and set up in a variety of places, then this is great option. It’s also a great wheel for kids, hobbyists, or that you can add to the corner of a classroom or home studio.


Shimpo Aspire Table Top Wheel

The Shimpo Aspire pictured with the optional foot pedal.

The Shimpo Aspire pictured with the optional foot pedal.

The Aspire is Shimpo’s table top option, with a 1/3 horse power, belt-driven 7 inch wheel head. It is rated to a 20 lb centering capacity, and the wheel has a max speed of 230 rpm via the hand lever, and up to 250 rpm if controlled by the optional foot pedal. The whole unit weighs 31 lbs, making it relatively easy to put away on a shelf or closet when not in use.

The Aspire costs about the same as the Speedball Artista, generally around $480 to $530, but unlike the Artista, it is solely a table top wheel. It does not have optional legs, but there is an optional foot pedal for an extra $60. The wheel head is small, but adequate for the amount of clay it can handle. And there are a variety of bats that will fit the 6” bat pin spacing.

The decision here is a bit simpler than with the Artista because it is a dedicated table top machine that is lightweight and dependable. Aside from the optional foot pedal, it doesn’t have a lot of bells and whistles but it’s a quality Shimpo machine that might be the right wheel for your situation.


Brent IE Pottery Wheel

The Brent IE-X, the upgraded 1/3 HP version of Brent’s entry-level wheel.

The Brent IE-X, the upgraded 1/3 HP version of Brent’s entry-level wheel.

Note: as of spring 2021, the IE wheels are no longer listed on Brent’s website and appear to have been discontinued. You may still find them at some suppliers, or used.
The IE is the entry-level wheel from Brent, and while not exactly a portable wheel, it does feature adjustable legs that allow it to be easily used as a table top wheel. In this configuration, the wheelhead sits 13” above the surface it is placed on. The IE weighs around 90 lbs so once it is placed on a table top, you’re probably not going to want to move it that often.

The IE has a 1/4 horse power motor, a 12” wheelhead, a 75 lb centering capacity, a top speed of 240 RPM, and the legs are adjustable from 20 high to 25” high. The base IE model can be upgraded to the same features with a reversing switch (the IE-R model), or the IE-X features a 1/3 HP motor with a 14” wheelhead.

The IE will give you the same dependable quality that Brent is known for, but to me, it’s a model that doesn’t really fill a niche. With a base price of around $1200 to $1300, it is a LOT more expensive than an entry-level budget wheel such as the Speedball Clay Boss. And it’s not too much cheaper than a really great, more powerful wheel found in the Brent line or other manufacturers.

Where the IE does shine is the flexibility for table top use. If you want a full-size table top wheel and you prefer Brent wheels, than this is the wheel for you.


Shimpo VL-Whisper

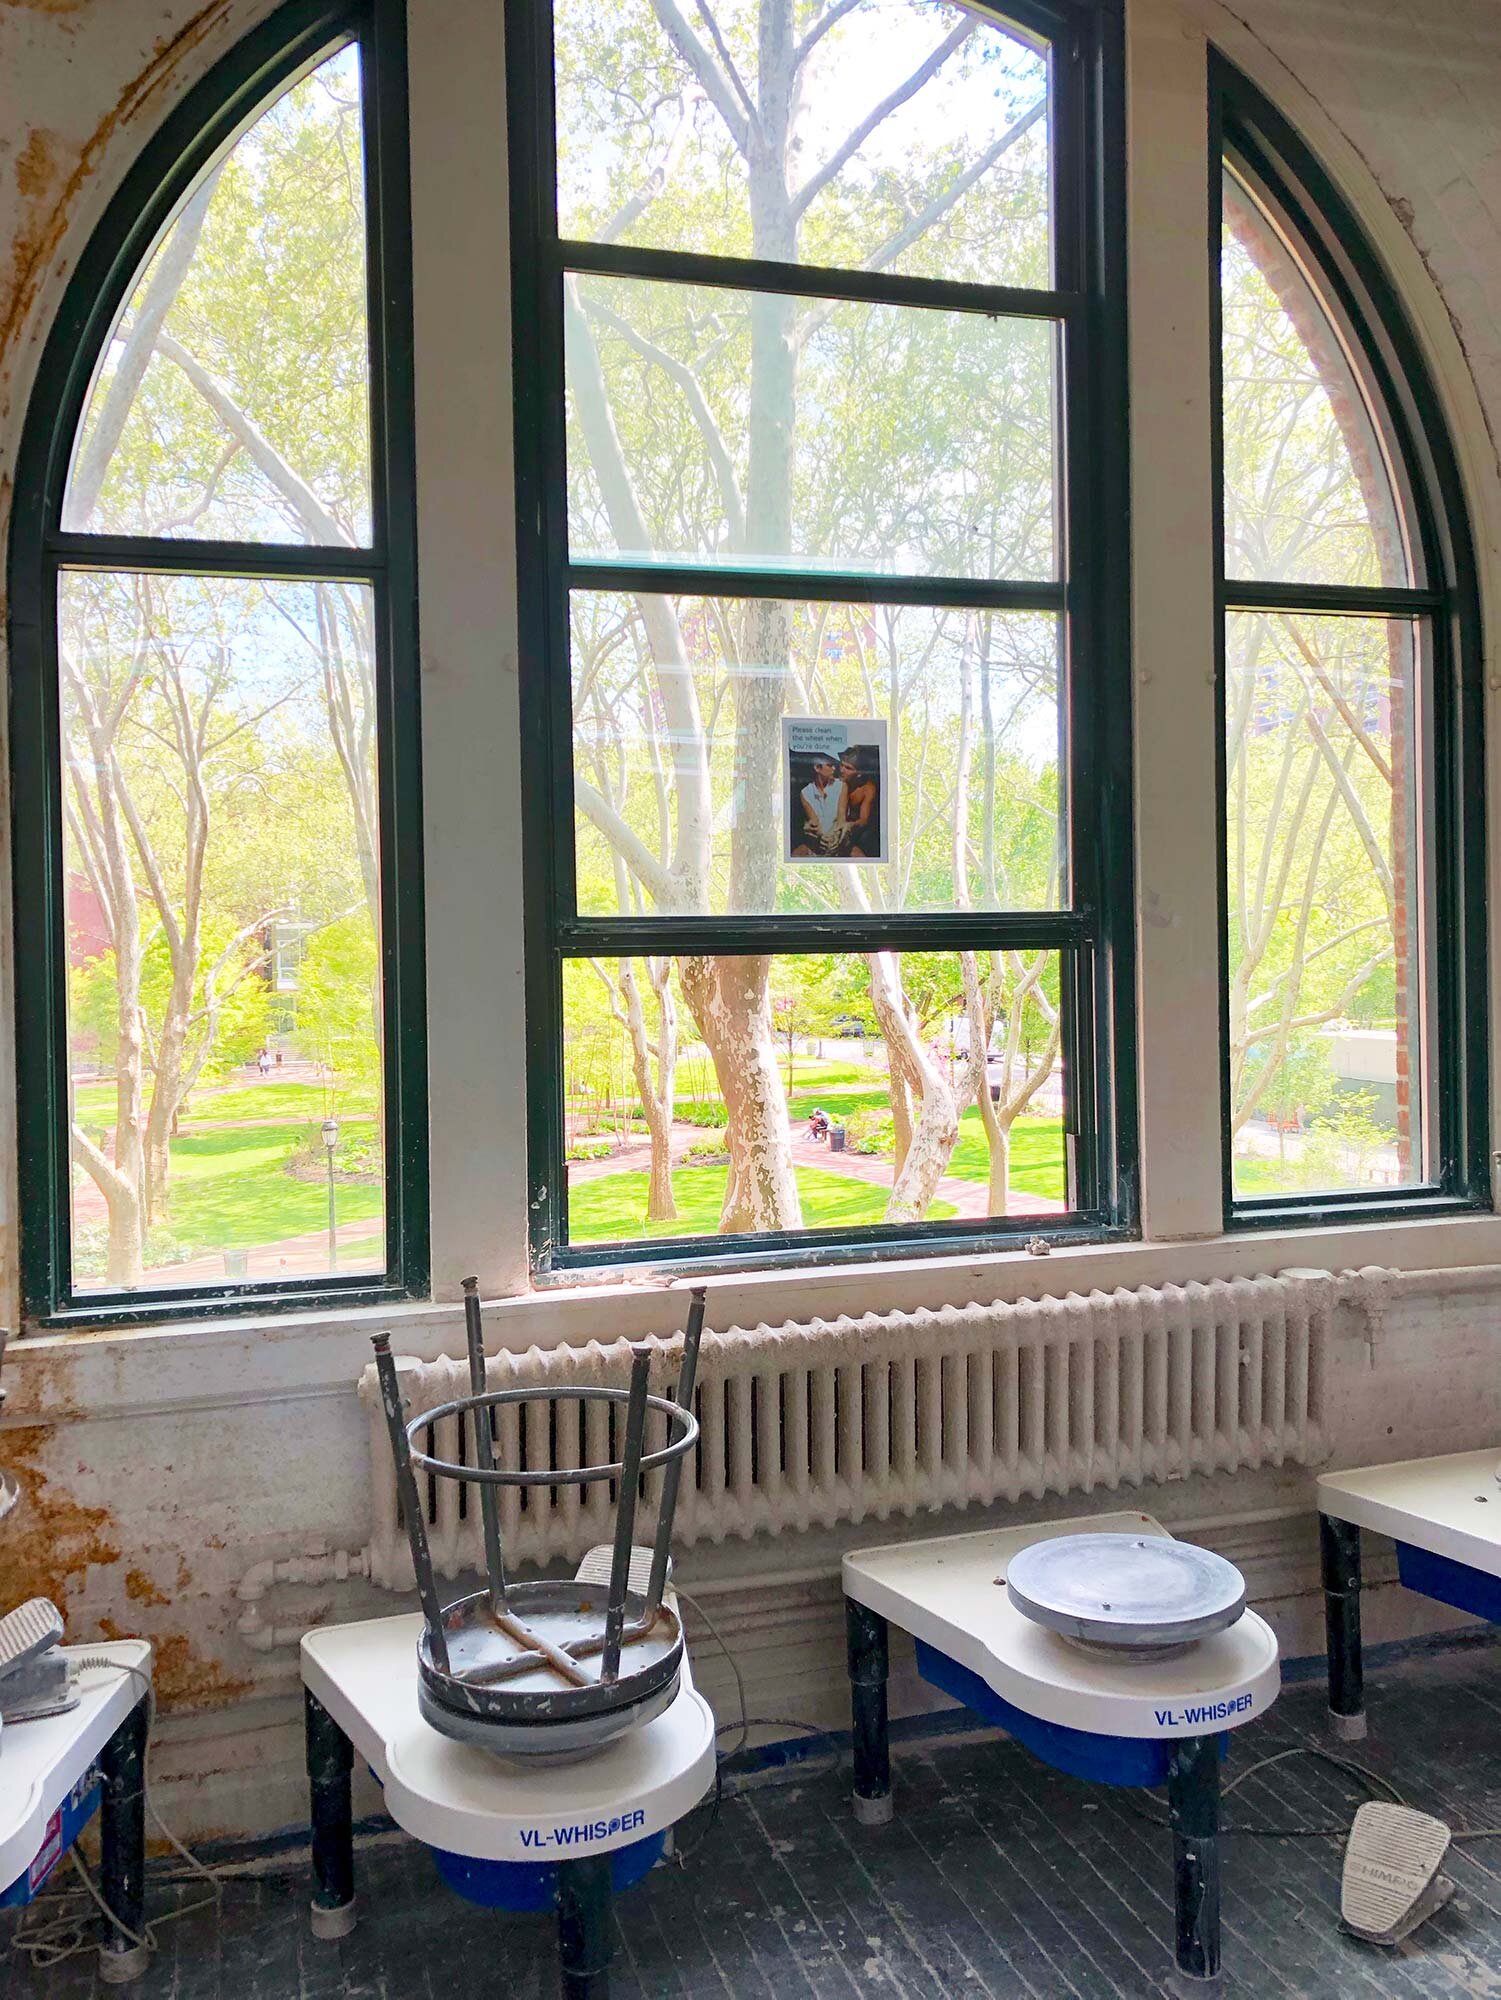
With the legs removed, the Shimpo VL-Whisper makes a great table top wheel.

With the legs removed, the Shimpo VL-Whisper makes a great table top wheel.

The Shimpo VL-Whisper is not only our top-rated full-size wheel, it is also a great option for table top use. With the virtually silent, magnet-driven wheel, the VL-Whisper has a flat design that can sit on a table top when the legs are removed. Like the IE, the wheelhead does sit relatively high off the table top, but if you want a table-top or standing wheel with all the bells and whistles of a top-of-the-line wheel, this is a great option.

Rather than a motor and belt, the VL-Whisper is driven by a virtually silent series of magnets that spin the wheel.

Rather than a motor and belt, the VL-Whisper is driven by a virtually silent series of magnets that spin the wheel.

The VL-Whisper (or Velocity) has a 1/2 horse power motor, a 14” wheel head, a reversible switch, and can center up to 100 lbs. At around 135 lbs, it is heavy, but it’s a sturdy machine with the quietest motor on the market. At a typically price of $1350–$1450, it hits that sweet spot of great performance and options, while being in about the middle of the price range for full size wheels.

While it can be a table top wheel, the VL-Whisper is certainly not portable or that easy to move and put away. But if you are comparing it to the IE, it’s got a lot more options for just a bit more money. It’s a great wheel.


Other Table Top Wheel Options

US Art table top wheel.jpg

Another option is the U.S. Art Supply 3/4 HP Table Top pottery wheel. It has a stronger motor than other table top options, an 11” wheelhead with proprietary 3-pin bats, can go forward and reverse, tops out at 300 rpm, has a foot pedal, and weighs around 43 lbs.

They have really packed a lot of features into this table top wheel and it is in the same price range as the Artista and Aspire—around $500, though it is heavier.

The reviews on this wheel are really mixed. Some people love it and have had great success, recommending it for beginners or intermediate potters. Some say it wobbles but others describe it as quite sturdy. In general, everyone agrees that the splash pan is not the best. With a one-year warranty, I can only recommend this wheel with reservations. For the price, I would go with the Artista or Aspire. And for around $200 more, you could get a full-size wheel like the Speedball Clay Boss.

In addition to the U.S. Art Supply table top wheel, there are a variety of generic wheels for sale. They range anywhere in price from $150 to $500, so they seem like a great budget option. But you may end up with a machine that breaks down quickly and is not well built. In general, I would go with the trusted pottery wheel manufacturers that provide a 2, 5, or even 10 year warranty on their wheels. The last thing you want is to buy a junky machine, so go with a wheel that will stand the test of time.


Table Top Pottery Wheel Comparison Chart

Below is a chart with all the wheels mentioned in this post.

Table Top Pottery Wheels

Click the model name to shop at Dick Blick or Amazon.
Model Typical Price Motor (HP) Wheelhead
Diameter
Bat Pin
Diameter
Reversible Dimensions Weight Speed (RPM) Warranty Capacity
Speedball Artista $459–$567 1/3 HP 11" 10" No, but available as R or L handed 24 x 18 x 9" 26 lbs 0-220 2 years 25 lbs
Shimpo Aspire $480–$565 1/3 HP 7" 6" No 14.5 x 20 x 9" 31 lbs 0-230 hand, 0-250 foot pedal 5 years 20 lbs
US Art Table Top $500 3/4 HP 11" Custom 3 pin design Yes, switch 17 x 26 x 13" 42.3 lbs 0-300 1 year 25 lbs
Brent IE $1,198–$1,475 1/4 HP 12" 10" Optional upgrade 21 x 26 x 13" high or 20-25 with legs" 93 lbs 0-240 5 years 75 lbs
Brent IE-X $1,348–$1,685 1/3 HP 14" 10" Yes, switch 21 x 26 x 13" high or 20-25 with legs" 93 lbs 0-240 5 years 100 lbs
VL-Whisper $1,250–$1,550 1/2 HP, 400w 14" 10" Yes, switch 23.2 x 27.5 x 22.75" 122 lbs 0-250 5 years 100 lbs

For a comparison of all types of wheels including full size wheels, click here.

And for our buyer’s guide to full-size wheels, click here


Summary

Table top pottery wheels are great options for a wide variety of potters. Portable wheels work for kids, classrooms, home use, or if you need to bring a wheel for a demo. If you just want table top wheels, you can also easily modify a few heavier full-size wheels to use on table tops. The wheels covered in this post are all well-built, dependable options for table top use, and a few are light enough to be truly portable. Given the choice, I would recommend a full-size wheel such as the VL-Whisper, but if you are going for your first wheel or need a lightweight, portable option, dropping $500 on the Shimpo Aspire or Speedball Artista will get you a wheel that will hold up under years of use.

What table top pottery wheels do you prefer? Let us know in the comments.


Pottery Wheel Comparison Chart

The Shimpo VL-Whisper, the top pick in our Pottery Wheel Buyer’s Guide.

The Shimpo VL-Whisper, the top pick in our Pottery Wheel Buyer’s Guide.

Note: Updated prices and info as of October 2023

This chart includes every wheel made by dependable manufacturers, including Bailey, Brent, Lockerbie, Pacifica, Shimpo, Skutt Thomas Stuart, Soldner, and Speedball. The chart includes specifications, typical price ranges, and other information to help you make a decision when shopping for a wheel.

Click here for our complete 2023 Pottery Wheel Buyer’s Guide, including our top picks, tips on how to buy, and a complete description of each manufacturer.

Note: The chart below uses affiliate links with Dick Blick and Amazon. If you click a link and make a purchase, we may receive a small commission at no extra cost to you.

Bailey Pottery Wheels

Available at baileypottery.com
Model Typical Price Motor (HP) Wheelhead
Diameter
Bat Pin
Diameter
Reversible Dimensions Weight Speed (RPM) Warranty Capacity
ST $1,351 1/4 HP 12" 10" Yes, plug 22.5 x 25.5 x 21" 93 lbs 0-200 5/10 years 50 lbs
ST-X $1,541 1/4 HP 13" 10" Yes, switch 24.5 x 29 x 20.25" 103 lbs 0-200 10 years 50 lbs
ST-XL $1,702 1/2 HP 13" 10" Yes, switch 24.5 x 29 x 20.25" 123 lbs 0-200 10 years 100 lbs
PRO-50R $1,499 1/4 HP 12" 10" Yes, plug 24.25 x 29 x 20.25" 92 lbs 0-200 10 years 50 lbs
PRO-X $1,581 1/4 HP 13" 10" Yes, switch 24.5 x 29 x 20.25" 102 lbs 0-200 10 years 50 lbs
PRO-XL $1,692 1/2 HP 13" 10" Yes, switch 24.5 x 29 x 20.25" 116 lbs 0-200 10 years 100 lbs

Brent Pottery Wheels

Click links in the chart to shop at Blick.
Model Typical Price Motor (HP) Wheelhead
Diameter
Bat Pin
Diameter
Reversible Dimensions Weight Speed (RPM) Warranty Capacity
B $1,898 1/2 HP 12" 10" Yes, switch 21 x 28 x 21.5" 119 lbs 0-240 10 years 150 lbs
B Black $1,938 1/2 HP 12" 10" Yes, switch 21 x 28 x 21.5" 119 lbs 0-240 10 years 150 lbs
C $1,983 3/4 HP 14" 10" Yes, switch 21 x 28 x 21.5" 121 lbs 0-240 10 years 225 lbs
C Black $2,023 3/4 HP 14" 10" Yes, switch 21 x 28 x 21.5" 121 lbs 0-240 10 years 225 lbs
CXC $2,064 1 HP 14" 10" Yes, switch 21 x 28 x 21.5" H 129 lbs 0-240 10 years 300 lbs
CXC Black $2,104 1 HP 14" 10" Yes, switch 21 x 28 x 21.5" H 129 lbs 0-240 10 years 300 lbs
Model 16 $3,855 1/2 HP 12" 10" Yes, switch 36 x 36 x 21-35" H 287 lbs 0-240 2 years 150 lbs

Lockerbie Pottery Wheels

Available at axner.com and other ceramic suppliers.
Model Typical Price Motor (HP) Wheelhead Diameter Bat Pin Diameter Reversible Dimensions Weight Speed (RPM) Warranty Capacity
Kickwheel $1,575 N/A 13" 10" N/A 42 x 36 x 30" 325 lbs N/A 5 years N/A
Electric $1,881 1/3 HP 13" 10" No 42 x 36 x 30" 365 lbs 0-157 5 years 50 lbs
Electric-Reversible $2,024 1/3 HP 13" 10" Yes 42 x 36 x 30" 365 lbs 0-157 5 years 50 lbs


Pacifica Pottery Wheels

Click the links to shop at Blick.
Model Typical Price Motor (HP) Wheelhead
Diameter
Bat Pin
Diameter
Reversible Dimensions Weight Speed (RPM) Warranty Capacity
GT400 $1,260 1/4 HP 13" 10" Yes 31 x 27 x 20" 92 lbs 0-260 5 years 80 lbs
GT800 $1,485 1/2 HP 13" 10" Yes 31 x 27 x 20" 105 lbs 0-260 5 years 100 lbs

Shimpo Pottery Wheels

Click the links below to shop at Blick.
Model Typical Price Motor (HP) Wheelhead
Diameter
Bat Pin
Diameter
Reversible Dimensions Weight Speed (RPM) Warranty Capacity
Aspire table top $569 1/3 HP 100w 7" 6" No 14.5 x 20 x 9" 25 lbs 0-230 hand, 0-250 foot 5 years 20 lbs
VL-Lite $858 1/2 HP 100w 12" 10" Yes, switch 22 x 28 x 21" 85 lbs 0-250 5 years 25 lbs
RK-Whisper $1,310 1/2 HP, 400w 12" 10" Yes, switch 20 x 21 x 20" 118 lbs 0-250 5 years 100 lbs
VL-Whisper $1,532 1/2 HP, 400w 14" 10" Yes, switch 23.2 x 27.5 x 22.75" 122 lbs 0-250 5 years 100 lbs

Skutt Pottery Wheels

Click the links in the chart to shop at Blick.
*Note that Skutt does not provide RPMs or Centering Capacity.
Model Typical Price Motor (HP) Wheelhead
Diameter
Bat Pin
Diameter
Reversible Dimensions Weight Speed (RPM) Warranty Capacity
Prodigy $1,320 1/3 HP 12" 10" No 24 x 30 x 24" 94 lbs - 10 years -
Removable splash pans:
Legend $1,849 1/3 HP 14" 10" Yes, switch 24 x 30 x 24" 117 lbs - 10 years -
Legend $1,980 1/2 HP 14" 10" Yes, switch 24 x 30 x 24" 119 lbs - 10 years -
Legend $2,100 1 HP 14" 10" Yes, switch 24 x 30 x 24" H 128 lbs - 10 years -
Built-In Splash Pans:
Classic $1,900 1/3 HP 14" 10" Yes, switch 24 x 30 x 24" 127 lbs - 10 years -
Classic $2,153 1/2 HP 14" 10" Yes, switch 24 x 30 x 24" 128 lbs - 10 years -
Classic $2,189 1 HP 14" 10" Yes, switch 24 x 30 x 24" 140 lbs - 10 years -

Soldner Pottery Wheels

*Prices listed are as of 2022.
Model Typical Price Motor (HP) Wheelhead
Diameter
Bat Pin
Diameter
Reversible Dimensions Weight Speed (RPM) Warranty Capacity
S50 $1,409 1/6 HP 14" 10" Yes, switch 24 x 24 x 19-25" 85 lbs 0-250 2 years 50 lbs
S100 $1,576 1/4 HP 14" 10" Yes, switch 24 x 24 x 19-25" 95 lbs 0-250 2 years 100 lbs
P100 $1,891 1/4 HP 14" 10" Yes, switch 29 x 38 x 22-28" 130 lbs 0-250 2 years 100 lbs
P200 $2,079 1/2 HP 14" 10" Yes, switch 29 x 38 x 22-28" 145 lbs 0-250 2 years 200 lbs
P400 $2,438 3/4 HP 14" 10" Yes, switch 29 x 38 x 22-28" 160 lbs 0-250 2 years 400 lbs

Speedball Pottery Wheels

Click the model name to shop at Blick.
Model Typical Price Motor (HP) Wheelhead
Diameter
Bat Pin
Diameter
Reversible Dimensions Weight Speed (RPM) Warranty Capacity
Artista table top $549 1/3 HP 11" 10" No 24 x 18 x 9" 26 lbs 0-220 2 years 25 lbs
Clay Boss $1038 1/2 HP 14" 10" Yes, plug 21 x 26 x 19.5" 83 lbs 0-240 10 years 100 lbs
Big Boss $1,271 0.85 HP 14" 10" Yes, plug 21 x 26 x 19.5" 89 lbs 0-250 10 years 150 lbs
Boss Elite SQ $1,428 1 HP 14" 10" Yes, plug 21 x 26 x 19.5" 96 lbs 0-240 5 years 175 lbs

Sources and Research

The information in the chart was compiled by visiting manufacturers’ websites, reviewing product manuals, and researching products on various retailers’ websites. Every effort has been made to provide accurate, up-to-date info. If you notice any errors, please contact us.

Click here for our complete 2023-24 Pottery Wheel Buyer’s Guide.

Or check out our 2023-24 Table Top Wheel Buyer’s Guide.

Other posts of interest:

Gift Guide For Potters and Ceramic Artists

Best Loop Tools for Trimming Pottery

For more info on Pottery Wheels and where this data was sourced from:

Bailey: baileypottery.com

Brent: amaco.com/t/equipment/brent/wheels

Lockerbie: www.lagunaclay.com/potterswheels

Pacifica: www.lagunaclay.com/potterswheels

Shimpo: Japan www.nidec-shimpotougei.jp/en/pe; North America: www1.ceramics.nidec-shimpo.com

Skutt Thomas Stuart: skutt.com/pottery-wheels

Soldner: bluebird-mfg.com

Speedball: speedballart.com


Pottery Wheel Buyer's Guide — The Best Wheels For All Studios

 
A classroom set of our top pick, the Shimpo VL-Whisper pottery wheel. The latest model of the Whisper has a slightly different table top shape but same super-quiet motor.

A classroom set of our top pick, the Shimpo VL-Whisper pottery wheel. The latest model of the Whisper has a slightly different table top shape but same super-quiet motor.


Note: CLICK HERE to read our new and updated guide for 2023-2024

There are a number of great pottery wheels on the market for all sorts of budgets and skill levels. But it can be confusing to figure out which wheel is right for you. This guide is here to help you pick the size, style, and type of wheel that is best for your studio and budget.

TOP PICK: Our top pick for all studios is the Shimpo VL-Whisper. It’s a super-quiet workhorse with a 1/2 horse power motor that usually costs around $1,300-1,400. Shop at Blick

BUDGET PICK: For a budget / entry level wheel, we love the Speedball Clay Boss, which you can usually find for just over $700. It’s got a 1/2 HP belt-driven motor. Shop at Blick

PRO PICK: And for a professional pick, we love the Soldner P200 or any of the higher-end Skutt / Thomas Stuart Wheels, which typically cost $1,400 to $2,000. Shop at Blick

In addition to reviews and recommendations of top wheels, this guide will cover:

  • What to look for when buying a wheel

  • Tips on where and how to buy

  • Provide a side-by-side comparison chart of just about every wheel on the market so that you can make the most informed decision.

Note on cheap generic wheels:
This guide only covers wheels from dependable manufacturers including Bailey, Brent, Lockerbie, Pacifica, Shimpo, Skutt, Soldner, and Speedball. There are numerous other generic wheels that are available online for $200 or less. These generics receive very mixed reviews, are small and have small wheelheads, have very weak motors, don’t have bat pins, and don’t hold up under regular use. You might try these, but that $200 would be better put towards any wheel listed below, which will last 10 to 20 years or longer when used properly.

For a complete review and guide, keep scrolling.


Table of Contents

  1. Top Pick: Shimpo VL-Whisper

  2. Budget Pick: Speedball Clay Boss

  3. Pro Pick: Soldner Wheels or Skutt Wheels

  4. Other Great Wheels

  5. Understanding Pottery Wheels

  6. How To Shop For A Wheel

  7. Pottery Wheel Comparison Charts


Top Pick: Shimpo VL-Whisper

The Nidec-Shimpo VL-Whisper pottery wheel, our top pick for a wheel. It has a super-quiet motor, adjustable legs, and a lot of thoughtful features.

The Nidec-Shimpo VL-Whisper pottery wheel, our top pick for a wheel. It has a super-quiet motor, adjustable legs, and a lot of thoughtful features.

Our top pick for all types of studios and skill levels is the Nidec-Shimpo VL-Whisper pottery wheel. Introduced about 10 years ago, this has become one of the top-selling wheels mainly due to its innovative 1/2 horse power, direct-drive DC motor that uses magnets to drive the wheel. This system makes the VL-Whisper truly the most quiet wheel on the market. Almost every other wheel uses a belt-drive system that makes more noise and has more moving parts that can break down over time.

The Shimpo VL-Whisper with the legs removed, for use as a table top wheel if you prefer to stand while throwing.

The Shimpo VL-Whisper with the legs removed, for use as a table top wheel if you prefer to stand while throwing.

Along with being super quiet, the VL-Whisper magnetic drive has instant torque and is powerful enough for most potters. The rest of the wheel is well designed with a three legs, sturdy plastic top, 2-part splash pan that surrounds a 14” wheelhead, a moveable floor pedal, and a switch to run the wheel clockwise or counterclockwise. The 1/2 horsepower 400 watt motor is rated to a centering capacity of 100 lbs and the wheel comes with a 5 year warranty.

The VL-Whisper has other thoughtful engineering touches, including adjustable, removable legs that allow for tabletop use or a variety of heights on the floor. The wheelhead also turns freely at 0 rpm, allowing for use as a banding wheel. The VL-Whisper weighs around 120 lbs and measures 23 1/8” x 27 1/2” and can range from 11” to 21” in height.

With all this great stuff there are basically no drawbacks, which is why it is our top pick. Some pro potters may want a more powerful motor, and some beginners may find the price tag prohibitive (typically $1400), but I can really say without a doubt that this is the best overall wheel on the market. What really sets it apart is the quiet motor, adjustable legs, 0 rpm banding wheel option, and how it is just a thoughtfully designed, sturdy machine.

This wheel is available at just about every ceramic supplier worldwide. There are often vendors on Amazon selling a package with shipping included, or the wheel is readily available at Dick Blick art stores in North America.


Budget Pick: Speedball Clay Boss

The Speedball Clay Boss, our top pick for a budget wheel. It’s got a 1/2 horse power motor and lighter body construction that many prefer.

The Speedball Clay Boss, our top pick for a budget wheel. It’s got a 1/2 horse power motor and lighter body construction that many prefer.

The Speedball Clay Boss is our top pick for an entry-level pottery wheel. It’s a great for students, beginners, but still works for pros who want a lightweight wheel. It’s got a 1/2 horse power motor, a belt-driven wheel, 14” wheelhead, and a standard triangular design that clocks in at just over 80 lbs, making it one of the lightest pottery wheels on the market with a motor of that size. Known for lightweight wheels with a devoted fan base, the Speedball wheels build on the tradition of Creative Industries, a ceramics company that Speedball acquired in 2009.

The Clay Boss measures 26” x 21” x 19.5” high, has a detached foot pedal, and is reversible by switching the direction of the plug, so it will work for throwing clockwise or counter clockwise. It also comes with a 10 year warranty. The Clay Boss can usually be found at just over $700, making it the most affordable wheel from a dependable manufacturer on the market, and if you need a more powerful motor, there are upgrades available within the Speedball line.

There aren’t any big downsides to this wheel, but there are trade offs. For example, it’s quite light for a wheel because it doesn’t have a beefy table or legs. I wouldn’t stand on top of this wheel, but it is easy to move. And it’s belt-driven, so it will be noisier than our top pick, the Shimpo VL-Whisper. But it’s still a great wheel that will get the job done. Many of the old Creative Industries wheels are still going strong after 20 or 30 years, and I would expect these Speedball wheels to have the same longevity.


Pro Pick: Soldner Wheels or Skutt Wheels

The Soldner P-200, a 1/2 horse power pottery wheel. Soldner wheels are known for their ultra-responsive foot pedal and plywood table tops.

The Soldner P-200, a 1/2 horse power pottery wheel. Soldner wheels are known for their ultra-responsive foot pedal and plywood table tops.

For the professional potter, the best wheels are made by Soldner Wheels or from the Skutt / Thomas Stuart Line. These wheels feature large, oversized motors and extra-responsive, upgraded foot pedals, combined with sturdy legs and tops. Do you need a wheel like this? If you are serious potter, spending a few hours a day on the wheel or more, the larger motors will really deliver for you and not overheat (The Shimpo VL-Whisper is great in this regard too). Many also prefer the super-sensitive foot pedals and various upgrades available in these wheels.

Soldner wheels are the only wheels on the market with wooden tops. Made by Bluebird Manufacturing in Fort Collins, Colorado, the finished, marine-grade plywood is attractive and super strong. And the Soldner wheels are known for their smooth, strong motors with a top-of-the-line foot pedal that will adjust to every touch you give. These wheels are a pleasure to use. For most, we would recommend the P200 model that has a half moon table and a 1/2 horse power motor.

The Skutt / Thomas Stuart Elite, a 1/2 horsepower pottery wheel with a built-in splash pan. Note the extra large motor on the Skutt wheels.

The Skutt / Thomas Stuart Elite, a 1/2 horsepower pottery wheel with a built-in splash pan. Note the extra large motor on the Skutt wheels.

The Skutt / Thomas Stuart line has 8 different wheels. These wheels are distinguished by large splash pans, large motors, and really sturdy construction. Seven of the models are available with an optional “SSX” foot pedal upgrade, which gives you an ultra-responsive, smooth response that puts these in the same range as the Soldner wheels. The best options for most potters, in our opinion, are the two 1/2 horse power models: The Revolution comes with a removable splash pan while the Elite has basically the same features but with a built-in splash pan. And if you are considering the SSX foot pedal upgrade and optional leg extensions to convert these to a standing wheel, consider the Steven Hill option which includes these features.

Soldner and Skutt wheels are usually found at speciality ceramic suppliers.


Other Great Wheels: Brent Wheels and Others

The Brent B, a 1/2 horse power pottery wheel that is one of the most popular wheels on the market.

The Brent B, a 1/2 horse power pottery wheel that is one of the most popular wheels on the market.

In addition to the options above, there are other pottery wheel options to consider, particularly wheels from Brent, Bailey, and Pacifica. For many potters, their favorite wheels are made by Brent. Known for their distinctive yellow ochre plastic tops and splash pans, you have probably seen or used a Brent as they are arguably the best-selling wheels in North America. (This data isn’t public but Brent and Shimpo seem to be the two most common wheels).

As a point of comparison, the Brent B is closest to the other wheels we have recommended above. It has a 1/2 horsepower motor, can go forward and reverse, and has a 12 inch wheel head. When new, these wheels are very quiet even though they utilize a belt-driven system, and with a 10-year warranty, you can be assured that Brent wheels will last for decades.

While the Brent wheels are incredibly popular, they are not my top pick for two reasons: The Shimpo VL-Whisper is much quieter. And the Soldner and Skutt wheels come with added features, such as better foot pedals and oversized motors. Brent doesn’t have these upgrades, but if you go beyond the Brent B into the C, CXC, or EX model, you do get some of the most powerful motors on the market. If you need a 1 1/2 horse power motor, the EX is your only option on the market.

For a complete guide to Brent wheels, click here.


Understanding Pottery Wheels, a Pottery Wheel Buying Guide

In this section, we’ll go through each part and feature to help you understand wheels and how to choose the best one for you.

Motor

The biggest difference between wheels, even within a manufacturer’s product line, is usually the motor. Ranging from 1/4 horsepower to 1 1/2 horsepower, most potters will find that a 1/2 HP motor is the sweet spot of plenty of power without paying extra. If you are able to test wheels in person, you will see the difference in size of motors too. Not all motors are created equally, even if they are rated to the same HP. In this case, a bigger motor both in size and HP is usually better as it will accommodate more use and and can better withstand overheating under heavy use. With that in mind, if you can afford it, go for the biggest motor you can afford to give yourself more longevity.

Centering Capacity

A similar consideration to the motor power, centering capacity is often mentioned with wheels. It’s a somewhat useful metric that is basically a stand-in for horsepower. Skutt, however, refuses to provide this centering capacity number, arguing that it is a useless metric. But since most manufacturers use it, we’ve kept it in our chart below. Centering capacity is related to both the power of the motor, the torque it gives at start up, and the sensitivity of the foot pedal. If it matters to you, and you have the money, you won’t be disappointed with a bigger motor with more centering capacity. Realistically, most potters aren’t centering more than 10 or 20 lbs on a wheel so wheels advertising 200 or 300 lb centering capacities are really indicating that they have an overbuilt motor that will be able to take a lot of use.

Table Top, Legs, Frame

The next biggest difference is the material and design of the table and legs. Most wheels have a sturdy plastic top, and metal legs. Some have beefier legs, metal tops, or in the case of Soldner wheels, a marine-grade plywood top. Manufacturers typically have one or maybe two table styles, and will build different features on top of these frames. These frame constructions will determine the dimensions and some of the weight of the wheel. When choosing a wheel, consider the size, weight, and type of frame and table top that will work for your studio.

Splash Pan

Another point of comparison is the splash pan. Typically a two-part plastic pan that clips around the wheelhead, splash pans are useful for collecting throwing water or trimming scraps. Some wheels, such as Baileys and Skutts, have large one-piece splash pans that cover the whole top of the frame. Some of these one-piece splash pans are removable, and others are built in and can be cleaned and emptied via a drain plug. As cleanup is a big part of throwing, choosing a splash pan that suits you can be important.

Weight / Dimensions

Most wheels are about the same size and shape, with some variation in Soldner and Lockerbie wheels. The weight is determined by the size of the motor and the frame construction. A lighter wheel, such as a Speedball, is easier to move while pro-type wheels, such as Skutt, have marketing pictures of potters standing on top of the wheel. How you are going to use a wheel and your studio space will really determine if you need a light or heavyweight wheel.

Wheelhead

Most wheels have a 12”, 13” or 14” wheelhead with bat pins spaced 10” a part. Some smaller wheels or table top wheels will have different styles. Measure a wheelhead that you like using to determine the size you like, although most wheels now have a 14” wheel. Another point of consideration is if the wheelhead can be removed or replaced. Typically, this is only possible in pro wheels, such as Skutt or Soldner wheels. For ongoing maintenance, most wheelhead ball bearing assemblies are completely sealed and not designed to be oiled or repacked with grease. If your wheelhead develops a grinding sound, you may have to replace it.


Foot Pedal

A foot pedal may seem just like a simple speed control, but the pro-level Skutt and Soldner wheels use their ultra-responsive (and more expensive) pedals as a selling point. In addition to the upgraded pedal options, also consider if the foot pedal and on-board electronics are providing some kind of computer-controlled speed modulation to keep things even (such as Pacifica wheels), or just letting you control the speed with the pedal (such as Brent, Shimpo, Soldner, and Skutt wheels.) The more experienced you are, the less you’ll want the wheel making decisions for you.

One other point of consideration with foot pedals is whether it is fixed or not. Every model listed below has a moveable foot pedal except the Shimpo RK-Whisper, which has an attached pedal on the right side. A moveable foot pedal lets you to choose which side to place it, and allows you to raise the pedal on bricks if needed.

Speed

Many manufacturers provide a rotations per minute (RPM) figure in relation to motors, which we’ve included below. Once again, these give you a rough approximation of motor power and torque, but they are all within a range that is about the same, ranging from 0 to 240-260 rpm max. The Lockerbie motor has a much lower max rpm but it’s a super beefy 1/3 HP motor that trades a high speed for great torque.

Reversability

Most good wheels these days come with a convenient switch where you can reverse the direction of the motor, allowing you to throw clockwise or counter clockwise. Some lower-priced wheels have a reversible plug, where you have to manually switch the cord. Some wheels are not reversible at all.

Leg extenders

Some manufacturers make leg extenders, so that a wheel can be converted to a standing wheel. This style of throwing can be more comfortable for your lower back. Definitely consider this when choosing a wheel, or look at the models such as the Shimpo Whisper, which has removable legs so that it can be easily placed on a table.

Shipping and Assembly

Some wheels arrive completely assembled, others need some assembly such as attaching legs. They also vary on whether they ship via FedEx / UPS or by freight. Expect to pay extra for shipping and delivery, unless you are picking a wheel up in person. Also consider how you will get the wheel into your studio as they can be heavy. Some vendors will include free shipping so definitely compare prices with shipping included to find the best deal.

Warranty

Warranties on wheels range from 2 to 10 years. But every wheel listed below is a top-quality product that should last for decades. If you are careful and respectful with tools, I wouldn’t worry too much about a shorter warranty. But if you are buying for an educational or communal studio where wheels can really be abused, you might want to consider wheels with longer warranties.

In my experience, the main upkeep on wheels is keeping them clean and trying to occasionally add some oil to moving parts. Foot pedals can be adjusted, electronics such as switches can be replaced. The biggest concern would be a wheelhead bearing assembly getting repeatedly swamped with too much water in the splashpan. But if you are careful, a wheel may never need any major repairs.

Just please, don’t buy these generic $100 to $400 dollar wheels that have been popping up online…who knows if those will last one month, let alone a few years.

Price

All the factors above contribute to the price. The lowest price possible is often the driving force of any purchase, and if that is you, we recommend the Speedball wheels, which typically cost around $800. For this lower price you are getting a lighter, less beefy frame and most likely a noisier wheel but one that will still get the job done for you. Professional-grade wheels typically cost $1,300 to $1,500and up to $2,000 or more, depending on the options you select. If you are on the fence when choosing upgrades such as a bigger motor or a better foot pedal, consider how you will feel in 5 to 10 or 20 years. You won’t think about the extra few hundred dollars, you’ll be happy that you got the upgrades to make your wheel last a lifetime.


Where to Shop and Buy Pottery Wheels

Before buying a wheel, think about what you have used and what features you need. If you currently have a favorite style or brand of wheel, you’ll probably be happy sticking with that style. For research, the best place to start is your local ceramic shop where you can hopefully “test drive” different models to see what feels good to you. Consider asking if they have floor models or special deals on wheels already in stock.

If you are shopping online, we have provided links to some wheels at Dick Blick (North America) and Amazon. Some ceramic suppliers advertise a price that includes shipping, while others add it on in your cart. So definitely shop around and see where you can find the best deals. If you order from online vendors, the wheel is most likely going to be shipped directly from the manufacturer anyway, so you should try to find the best deal.

Kiln Repair and Warranty

After buying a wheel, you will be dealing with the manufacturer if you need any repairs, although a relationship with a local ceramic shop is a great resource if you need help with repairs or adjustments. Manufacturers such as Skutt and Bailey are known for the great online and phone customer service. Other manufacturers, such as Brent, provide lots of support both in person and with repair videos on YouTube.

Most likely, nothing will go wrong with your wheel in the short term but you should expect to make adjustments to foot pedals. And if you are messy, or have an academic studio, expect students to jam clay into any open spot on the wheel, potentially damaging parts such as on/off switches or swamping the wheelhead with water, getting water into the bearing assembly. For most quality wheels, repair parts are readily available from ceramic suppliers or the manufacturer. The good news is that manufacturers are increasingly using sealed switches and other waterproof parts.


Pottery Wheel Comparison Chart

This chart is in alphabetical order by manufacturer, including Bailey, Brent, Lockerbie, Pacifica, Shimpo, Skutt / Thomas Stuart, Soldner, and Speedball. These are all trustworthy brands and any of the wheels listed below will last a long time. We have done our best to compile a typical range of prices found online and in store, along with each wheel’s features, updated as of September 2022. There is also a description of what to expect from each manufacturer’s wheels.

The Bailey Pro-XL Pottery Wheel is our pick for the best Bailey wheel. It has a 1-piece splash pan and a 1/2 HP motor.

The Bailey Pro-XL Pottery Wheel is our pick for the best Bailey wheel. It has a 1-piece splash pan and a 1/2 HP motor.

Bailey Pottery Wheels

Bailey Wheels are manufactured by the Bailey Pottery Corporation of Kingston, New York. Known for innovative and high quality slab rollers, kilns, extruders, and other equipment for ceramic studios, the Bailey wheels are characterized by a large, table-sized splash pan. There are two main models, the ST and the PRO model, which each come in three different options. The ST models have a 2-piece, removable splash pan while the PRO models have a 1-piece, counter-sized fixed splash plan with a plug and a drain tube.

Bailey sells optional leg extenders that work with all the models, which can extend the height from 29 to 37 inches.

All the models utilize a standard belt drive system, and have detached foot pedals.

For the best option, go with the ST-XL or PRO-XL, which both feature a 1/2 HP motor, 13” wheelhead, and a reversing switch.

Bailey Pottery Wheels

Available at baileypottery.com
Model Typical Price Motor (HP) Wheelhead
Diameter
Bat Pin
Diameter
Reversible Dimensions Weight Speed (RPM) Warranty Capacity
ST $1,351 1/4 HP 12" 10" Yes, plug 22.5 x 25.5 x 21" 93 lbs 0-200 5/10 years 50 lbs
ST-X $1,541 1/4 HP 13" 10" Yes, switch 24.5 x 29 x 20.25" 103 lbs 0-200 10 years 50 lbs
ST-XL $1,702 1/2 HP 13" 10" Yes, switch 24.5 x 29 x 20.25" 123 lbs 0-200 10 years 100 lbs
PRO-50R $1,499 1/4 HP 12" 10" Yes, plug 24.25 x 29 x 20.25" 92 lbs 0-200 10 years 50 lbs
PRO-X $1,581 1/4 HP 13" 10" Yes, switch 24.5 x 29 x 20.25" 102 lbs 0-200 10 years 50 lbs
PRO-XL $1,692 1/2 HP 13" 10" Yes, switch 24.5 x 29 x 20.25" 116 lbs 0-200 10 years 100 lbs


Brent Pottery Wheels

The Brent B Pottery Wheel, a full-sized wheel with a 1/2 HP motor.

The Brent B Pottery Wheel, a full-sized wheel with a 1/2 HP motor.

Brent wheels are the workhorses of the ceramics world. These are some of the most popular wheels and you will see these yellow ochre machines just about everywhere. Founded in 1967 by Robert Brent, the wheels have been manufactured by the American Art Clay Company (AMACO) since 1978. The wheels are sturdy, dependable, and easy to adjust and repair. Expect these machines to easily last 15 to 20 years or more even under the heaviest of uses.

The product line is straightforward with one style of frame that is yellow ocher and also available in black on the B and C models.

The B and C models are where most will find the sweet spot of power and price within the Brent product line. The difference in these models are the size of the motor (1/2 HP vs 3/4 HP) and the wheelhead diameter (12” vs 14”). The CXC and the EX model are basically the same as the C, but with bigger motors.

One note is the Brent centering capacity, as listed below. These are some really big numbers — Brent claims a 150 lb centering capacity for the Model B with a 1/2 HP motor. Most other manufacturers claim 50 lbs for a 1/2 HP motor. So these numbers may be a bit inflated but we’ve included Brent’s numbers below.

Brent wheels are available at ceramic suppliers or click the links in the chart to shop at Dick Blick. For a complete overview of the product line, click here.

Brent Pottery Wheels

Click links in the chart to shop at Dick Blick.
Model Typical Price Motor (HP) Wheelhead
Diameter
Bat Pin
Diameter
Reversible Dimensions Weight Speed (RPM) Warranty Capacity
B $1,660 1/2 HP 12" 10" Yes, switch 21 x 28 x 21.5" 119 lbs 0-240 10 years 150 lbs
B Black $1,700 1/2 HP 12" 10" Yes, switch 21 x 28 x 21.5" 119 lbs 0-240 10 years 150 lbs
C $1,740 3/4 HP 14" 10" Yes, switch 21 x 28 x 21.5" 121 lbs 0-240 10 years 225 lbs
C Black $1,760 3/4 HP 14" 10" Yes, switch 21 x 28 x 21.5" 121 lbs 0-240 10 years 225 lbs
CXC $1,839 1 HP 14" 10" Yes, switch 21 x 28 x 21.5" H 129 lbs 0-240 10 years 300 lbs
EX $1,960 1 1/2 HP 14" 10" Yes, switch 21 x 28 x 21.5" H 130 lbs 0-240 10 years 450 lbs
Model 16 $3,396 1/2 HP 12" 10" Yes, switch 36 x 36 x 21-35" H 287 lbs 0-240 2 years 150 lbs

Lockerbie Pottery Wheels

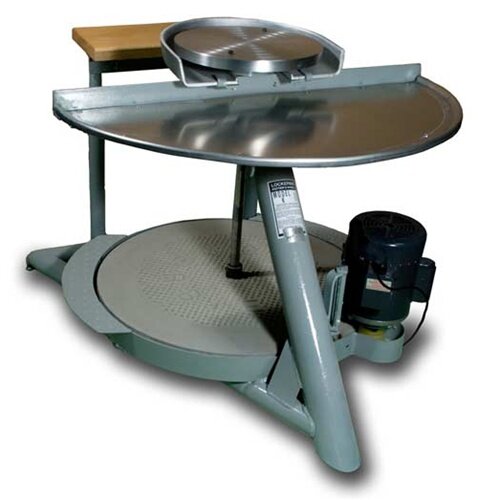
The Lockerbie Motorized Kick Wheel, a true workhorse of a wheel with possibly the biggest motor on the market.

The Lockerbie Motorized Kick Wheel, a true workhorse of a wheel with possibly the biggest motor on the market.

Lockerbie Wheels are an interesting option manufactured by Laguna Clay in California. There are three models: a kickwheel (K), a motorized kickwheel (EK), and a reversible motorized kickwheel (EK-R). These are big, heavy wheels but if you want to switch between a kickwheel and a motor, this is the best option on the market. All models feature an adjustable wooden seat, a metal splash pan, and an all-metal frame with a concrete flywheel.

The flywheel results in a steady, even spin when used as a kickwheel. While centering and throwing can take a lot of work, trimming on a kickwheel is an absolute pleasure. The upgraded model with a motor is where this wheel really shines. It’s got a large, powerful motor that while only rated to 1/3 HP and a max of 157 rpm, has a lot of torque and can definitely handle more than the rated 50 lbs centering capacity. When you press the pedal, the motor engages the flywheel through a rubber wheel, or what Laguna calls “rubber friction drive.” This rubber wheel does wear out over time but is easily replaced. When you release the pedal, the kickwheel will continue to spin, until you stop it with a foot or let the flywheel come to a stop.

Lockerbie wheels have been around since the 1960s and in 2007, the company merged with Laguna Clay. The wheel style and design has been virtually unchanged for decades but it is a tough, well-designed beast of a wheel. It’s a great option for educational studios or if you want to have a kickwheel option. The simple, no frills design results in a relatively low price but you will need to pay for freight shipping.

Lockerbie Pottery Wheels

Available at axner.com and other ceramic suppliers.
Model Typical Price Motor (HP) Wheelhead Diameter Bat Pin Diameter Reversible Dimensions Weight Speed (RPM) Warranty Capacity
Kickwheel $1,575 N/A 13" 10" N/A 42 x 36 x 30" 325 lbs N/A 5 years N/A
Electric $1,881 1/3 HP 13" 10" No 42 x 36 x 30" 365 lbs 0-157 5 years 50 lbs
Electric-Reversible $2,024 1/3 HP 13" 10" Yes 42 x 36 x 30" 365 lbs 0-157 5 years 50 lbs

Pacifica Pottery Wheels

The Pacifica GT400, one of two wheels from Pacifica with 1/4 HP motor and a 13” wheelhead.

The Pacifica GT400, one of two wheels from Pacifica with 1/4 HP motor and a 13” wheelhead.

Pacifica has been making wheels since 1972 and was purchased by Laguna Clay in 1992. There are currently two wheels in the product line, the GT400 and GT800. Both wheels are have belt driven, 13” wheelheads, optional leg extensions, and a water-resistant foot pedal. The difference is in the size of the motor, 1/4 HP for the GT400 and 1/2 HP for the GT800.

Pacifica differs from other manufacturers in claiming that, through it’s belt and electronic system, it’s 1/4 HP motor has an effective 1/2 HP, and the 1/2 HP motor has an effective 1 HP. Should these claims be believed? It’s hard to know. What can be said is that these wheels have on-board systems that attempt to modulate the wheel speed and torque to provide even power. In my opinion, the more experienced you are the less you will want these electronic modifications deciding for you.

Pacifica wheels do have some of the highest RPMs on the market, topping out at 260 rpms, which is slightly higher than most wheels. Expect these wheels to have a lot of torque. In addition, these wheels are affordable and are a great option for students, educational studios, or serious hobbyists.


Pacifica Wheels are available at ceramic suppliers or click the links in the chart to shop at Dick Blick.

Pacifica Pottery Wheels

Click the links to shop at Dick Blick.
Model Typical Price Motor (HP) Wheelhead
Diameter
Bat Pin
Diameter
Reversible Dimensions Weight Speed (RPM) Warranty Capacity
GT400 $1,260 1/4 HP 13" 10" Yes 31 x 27 x 20" 92 lbs 0-260 5 years 80 lbs
GT800 $1,485 1/2 HP 13" 10" Yes 31 x 27 x 20" 105 lbs 0-260 5 years 100 lbs

Shimpo Wheels

The Shimpo VL-Whisper, a 1/2 HP wheel with the quietist motor on the market and a 14” wheelhead.

The Shimpo VL-Whisper, a 1/2 HP wheel with the quietist motor on the market and a 14” wheelhead.

Shimpo has a straightforward line of three different full-sized wheels and a table top wheel. Founded in Tokyo, Japan in 1952, Shimpo wheels are distributed world wide. North American operations opened in Chicago, Illinois in 1974 as the Nidec-Shimpo Corporation.

Shimpo’s top-of-the-line VL-Whisper (VL stands for Velocity) is our favorite pottery wheel due to its innovative and quiet magnetic direct drive 1/2 HP 400 watt motor. The wheel is reversible, has a 14” wheelhead, and a detached foot pedal. The wheelhead on the VL-Whisper and RK-Whisper models also turns freely at 0 rpm, for use as a banding wheel.

The classic Shimpo RK-Whisper has been updated to feature the same super-quiet magnetic motor as the VL-Whisper, but with a 12” wheelhead and fixed foot pedal.

The classic Shimpo RK-Whisper has been updated to feature the same super-quiet magnetic motor as the VL-Whisper, but with a 12” wheelhead and fixed foot pedal.

The classic Shimpo RK model now has this same super quiet 1/2 HP 400 watt magnetic Whisper motor, but with a 12” wheel head. Most importantly, this model has a fixed foot pedal on the right side and hand lever. Many love this fixed foot pedal but definitely try this out before buying.

Rounding out the Shimpo product line, the VL-Lite model is a strong competitor for Speedball and other budget models. It features a 1/2 HP 100 watt belt-driven motor, 14” wheelhead and detached foot pedal.

Note that the info below includes both the horse power and wattage for the motor. Not every manufacturer provides the wattage info, but in this case it helps distinguish between the two motors with the VL-Lite having a lower wattage and less powerful motor.

Shimpo Wheels are available at ceramic suppliers, Amazon, or click the links in the chart to check prices at Dick Blick.

Shimpo Pottery Wheels

Click the links below to shop at Dick Blick.
Model Typical Price Motor (HP) Wheelhead
Diameter
Bat Pin
Diameter
Reversible Dimensions Weight Speed (RPM) Warranty Capacity
Aspire table top $509 1/3 HP 100w 7" 6" No 14.5 x 20 x 9" 25 lbs 0-230 hand, 0-250 foot 5 years 20 lbs
VL-Lite $793 1/2 HP 100w 12" 10" Yes, switch 22 x 28 x 21" 85 lbs 0-250 5 years 25 lbs
RK-Whisper $1,208 1/2 HP, 400w 12" 10" Yes, switch 20 x 21 x 20" 118 lbs 0-250 5 years 100 lbs
VL-Whisper $1,399 1/2 HP, 400w 14" 10" Yes, switch 23.2 x 27.5 x 22.75" 122 lbs 0-250 5 years 100 lbs

Skutt Thomas Stuart Pottery Wheels

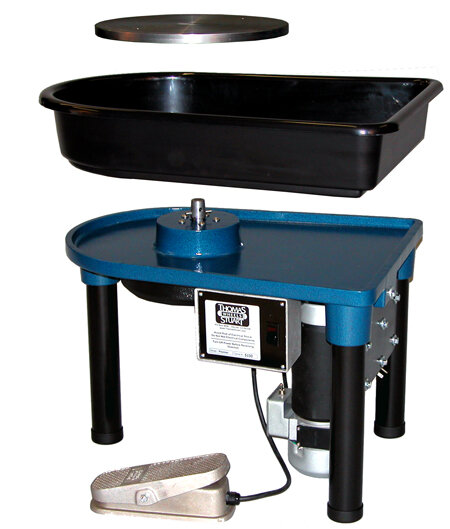
An “exploded” view of the Skutt Premier 1 HP wheel, which features a removable wheel head and removable one-piece splash pan on top of an all-metal base.

An “exploded” view of the Skutt Premier 1 HP wheel, which features a removable wheel head and removable one-piece splash pan on top of an all-metal base.

Skutt is well known as a manufacturer of electric kilns, but they acquired Thomas Stuart Wheels in 2008 and have maintained and improved the already sterling reputation of the wheels, which are beloved by all types of potters.

The Skutt Thomas Stuart line of wheels has eight wheels that fall in to three categories

  • The entry-level Prodigy wheel

  • Removable one-piece splash pan

  • Built-in splash pan that has a plug and drain tube for cleaning

The Skutt Steven Hill Signature Wheel, which has a 1/2 HP motor, a built-in one-piece splash pan, removable wheelhead, SSX foot pedal upgrade, and leg extensions.

The Skutt Steven Hill Signature Wheel, which has a 1/2 HP motor, a built-in one-piece splash pan, removable wheelhead, SSX foot pedal upgrade, and leg extensions.

For all the wheels except the Prodigy, the wheelhead is removed for cleaning with a simple twist and turn. The removable splash pan can then be taken off for cleaning. Skutt’s target market these wheels (Prodigy, Legend, Revolution, and Premier) are students, educational studios, and hobbyists. The built-in-splash pan options (Classic, Elite, Professional, and Steven Hill) are aimed at professional potters. But if you review the chart below, you can see that the wheels match up almost 1 to 1, so make your choice based on the horse power, wheelhead size, and splash pan option.

If you read through Skutt’s information, they claim to have the thickest wheelheads, beefiest frames, and oversized motors that can go all day without overheating. Skutt also doesn’t make claims on the centering capacity of their models, arguing that this commonly-used metric is almost meaningless. We agree that it’s just a stand-in for horsepower, so you can judge accordingly by reviewing the chart below.

For most potters, the 1/2 HP options (Revolution, Elite, or Steven Hill) will be plenty powerful. The Skutt Thomas Stuart wheels also have an optional SSX foot pedal upgrade. If you are considering one of these wheels, strongly consider adding that upgrade. If you are going for a premier wheel, you definitely want to get the best options available. Note that the Steven Hill model already includes the SSX foot pedal and leg extensions.

Finally there are also optional leg extensions that allow these wheels to be converted to standing options. These are awesome wheels that would work for just about everyone. They do come at a premium price, but the features and quality deliver and Skutt is well known for its customer service and commitment to its products.

Skutt Thomas Stuart Wheels are available at ceramic suppliers or click the links in the chart for models available at Dick Blick.

Skutt Thomas Stuart Pottery Wheels

Click the links in the chart to shop at Dick Blick, or visit skutt.com.
*Note that Skutt does not provide RPMs or Centering Capacity.
Model Typical Price Motor (HP) Wheelhead
Diameter
Bat Pin
Diameter
Reversible Dimensions Weight Speed (RPM) Warranty Capacity
Prodigy $1,299 1/3 HP 12" 10" No 24 x 30 x 24" 94 lbs - 5 years -
Removable splash pans:
Legend $1,749 1/3 HP 14" 10" Yes, switch 24 x 30 x 24" 117 lbs - 5 years -
Revolution $1,799 1/2 HP 14" 10" Yes, switch 24 x 30 x 24" 119 lbs - 5 years -
Premier $1,969 1 HP 14" 10" Yes, switch 24 x 30 x 24" H 128 lbs - 5 years -
Built-In Splash Pans:
Classic $1,639 1/3 HP 14" 10" Yes, switch 24 x 30 x 24" 127 lbs - 5 years -
Elite $1,739 1/2 HP 14" 10" Yes, switch 24 x 30 x 24" 128 lbs - 5 years -
Professional $1,929 1 HP 14" 10" Yes, switch 24 x 30 x 24" 140 lbs - 5 years -
Steven Hill $2,029 1/2 HP 14" 10" Yes, switch 24 x 30 x 24" 144 lbs - 5 years -

Soldner Wheels

The Soldner P series features a half-moon shaped table with 1/4 HP, 1/2 HP, or 3/4 HP motor options.

The Soldner P series features a half-moon shaped table with 1/4 HP, 1/2 HP, or 3/4 HP motor options.

Paul Soldner was one of the original innovators of motorized pottery wheels and founded Soldner Wheels in 1955. For decades, they have been manufactured by Bluebird Manufacturing of Fort Collins, Colorado. The wheels are known for their ability to handle large amounts of clay, ultra-smooth, proprietary foot pedal, and distinctive tops made from polyurethane coated marine-grade plywood.

The Soldner S series has a studio-sized wheel head in 1/6 HP or 1/4 HP motor options.

The Soldner S series has a studio-sized wheel head in 1/6 HP or 1/4 HP motor options.

The wheels come with optional splash pans, or the two-piece Brent splash pans will fit every model. The wheels also feature adjustable legs, which can accommodate a variety of heights for seated pottery. The S-series wheels range from 19” to 25” in height, and the P series range from 22” to 28” high.

Soldner wheels are less common but they have a devoted fan base. They are an absolute pleasure to use, with the foot pedal delivering even, steady power. And the plywood table top is distinctive and very pleasant in the studio environment, as well as being super-tough.

Of the models, the 1/2 horse power, half-moon shaped P-200 is our favorite.

Soldner Wheels are available at speciality ceramic suppliers.

Soldner Pottery Wheels

Soldner Wheels are available at most ceramic suppliers.
Model Typical Price Motor (HP) Wheelhead
Diameter
Bat Pin
Diameter
Reversible Dimensions Weight Speed (RPM) Warranty Capacity
S50 $1,409 1/6 HP 14" 10" Yes, switch 24 x 24 x 19-25" 85 lbs 0-250 2 years 50 lbs
S100 $1,576 1/4 HP 14" 10" Yes, switch 24 x 24 x 19-25" 95 lbs 0-250 2 years 100 lbs
P100 $1,891 1/4 HP 14" 10" Yes, switch 29 x 38 x 22-28" 130 lbs 0-250 2 years 100 lbs
P200 $2,079 1/2 HP 14" 10" Yes, switch 29 x 38 x 22-28" 145 lbs 0-250 2 years 200 lbs
P400 $2,438 1/4 HP 14" 10" Yes, switch 29 x 38 x 22-28" 160 lbs 0-250 2 years 400 lbs

Speedball Pottery Wheels

The Speedball Clay Boss, a 1/2 HP pottery wheel with a 14” wheelhead. Our top pick for a budget wheel.

The Speedball Clay Boss, a 1/2 HP pottery wheel with a 14” wheelhead. Our top pick for a budget wheel.

Speedball Pottery Wheels are known for being lighter-weight wheels that still deliver a professional quality motor. Speedball started making wheels in 2009 when they acquired Creative Industries of Cajon, California, which began making wheels in 1971. Many of those Creative Industries wheels are going strong today, although Speedball has changed the table shape and upgraded the line with newer features.

There are three regular-sized wheels in the Speedball product line:

The Clay Boss is our top pick for an affordable, entry-level wheel. It features a 1/2 HP belt-drive motor, a 14” wheel head, reversible motor by switching the direction of the plug, and can handle 100 lbs of clay. Building on the Clay Boss, the Big Boss and Boss Elite have virtually similar frames and options, but with bigger motors and larger centering capacity.

The Speedball wheels are a great option if price and weight are concerns. There is a trade off with a lighter-weight frame but that also allows you to easily move the wheels around as needed.

Speedball Wheels are available at ceramic suppliers or click the links in the chart to shop at Dick Blick.

Speedball Pottery Wheels

Click the model name to shop at Dick Blick.
Model Typical Price Motor (HP) Wheelhead
Diameter
Bat Pin
Diameter
Reversible Dimensions Weight Speed (RPM) Warranty Capacity
Artista table top $520 1/3 HP 11" 10" No 24 x 18 x 9" 26 lbs 0-220 2 years 25 lbs
Clay Boss $989 1/2 HP 14" 10" Yes, plug 21 x 26 x 19.5" 83 lbs 0-240 10 years 100 lbs
Big Boss $1,241 0.85 HP 14" 10" Yes, plug 21 x 26 x 19.5" 89 lbs 0-250 10 years 150 lbs
Boss Elite SQ $1,398 1 HP 14" 10" Yes, plug 21 x 26 x 19.5" 96 lbs 0-240 5 years 175 lbs


The Best Banding Wheel for Pottery and Ceramics

blue nidec shimpo banding wheel

The Nidec Shimpo 9 1/2” wide banding wheel. Get it at Blick.

Note: Updated and edited October 2022

A banding wheel is a great tool for handbuilding, decorating, and carving. Potters and sculptors definitely needs one or more of these in the studio.

This post will cover quality banding wheels that can handle the weight of clay and be cleaned. You don’t want to mess with cheap plastic options, or lazy susans that aren’t designed to get dirty and be cleaned again.


Top Pick: Nidec Shimpo Banding Wheels

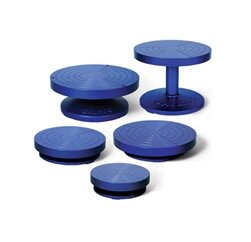
The complete line of Shimpo Banding Wheels.

The complete line of Shimpo Banding Wheels.

Nidec Shimpo banding wheels are made of cast iron and painted with rust-resisted blue paint and are heavy, durable and will last a lifetime. They have sealed ball bearings, a one-piece design that will not come apart when picked up, and the weight of the cast iron results in a smooth, even spin. These banding wheels are a pleasure to use whether you are coil building, painting, carving, or sculpting.

Shimpo banding wheels come in five sizes ranging from 7” to 11 3/4” wide. The three smaller wheels are all 2 1/4” tall, while the two taller sizes are 4 3/4” tall and 7 1/2” tall. My preference is for the shorter, lower-profile banding wheels but a pedestal-style banding wheel may work for your studio. Some may find these banding wheels to be on the heavy side, but the weight works to your advantage to create a steady, even, long-lasting spin.

Shopping tip: These banding wheels tend to be cheaper at Blick than Amazon.

The Shimpo 25L Banding Wheel is 9 7/8” x 2 1/4” and is the most versatile size.

The Shimpo 25L Banding Wheel is 9 7/8” x 2 1/4”

Shimpo Banding Wheel Specs:
Model, diameter, height, and weight.

18L 7” x 2 1/4”, 6.5 lbs, $64-$79 (Shop 7” at Amazon)

22L 8 3/4” x 2 1/4”, 13 lbs, $77-$90

25L 9 1/2” x 2 1/4”, 15 lbs, $89-$120 (Shop at Amazon)

25H 9 7/8” x 7 1/2”, 19 lbs, $117-$132 (Shop at Amazon)

30M 11 3/4” x 4 3/4”, 28 lbs, $138-160 (Shop at Amazon)

More pics of the Nidec Shimpo banding wheel

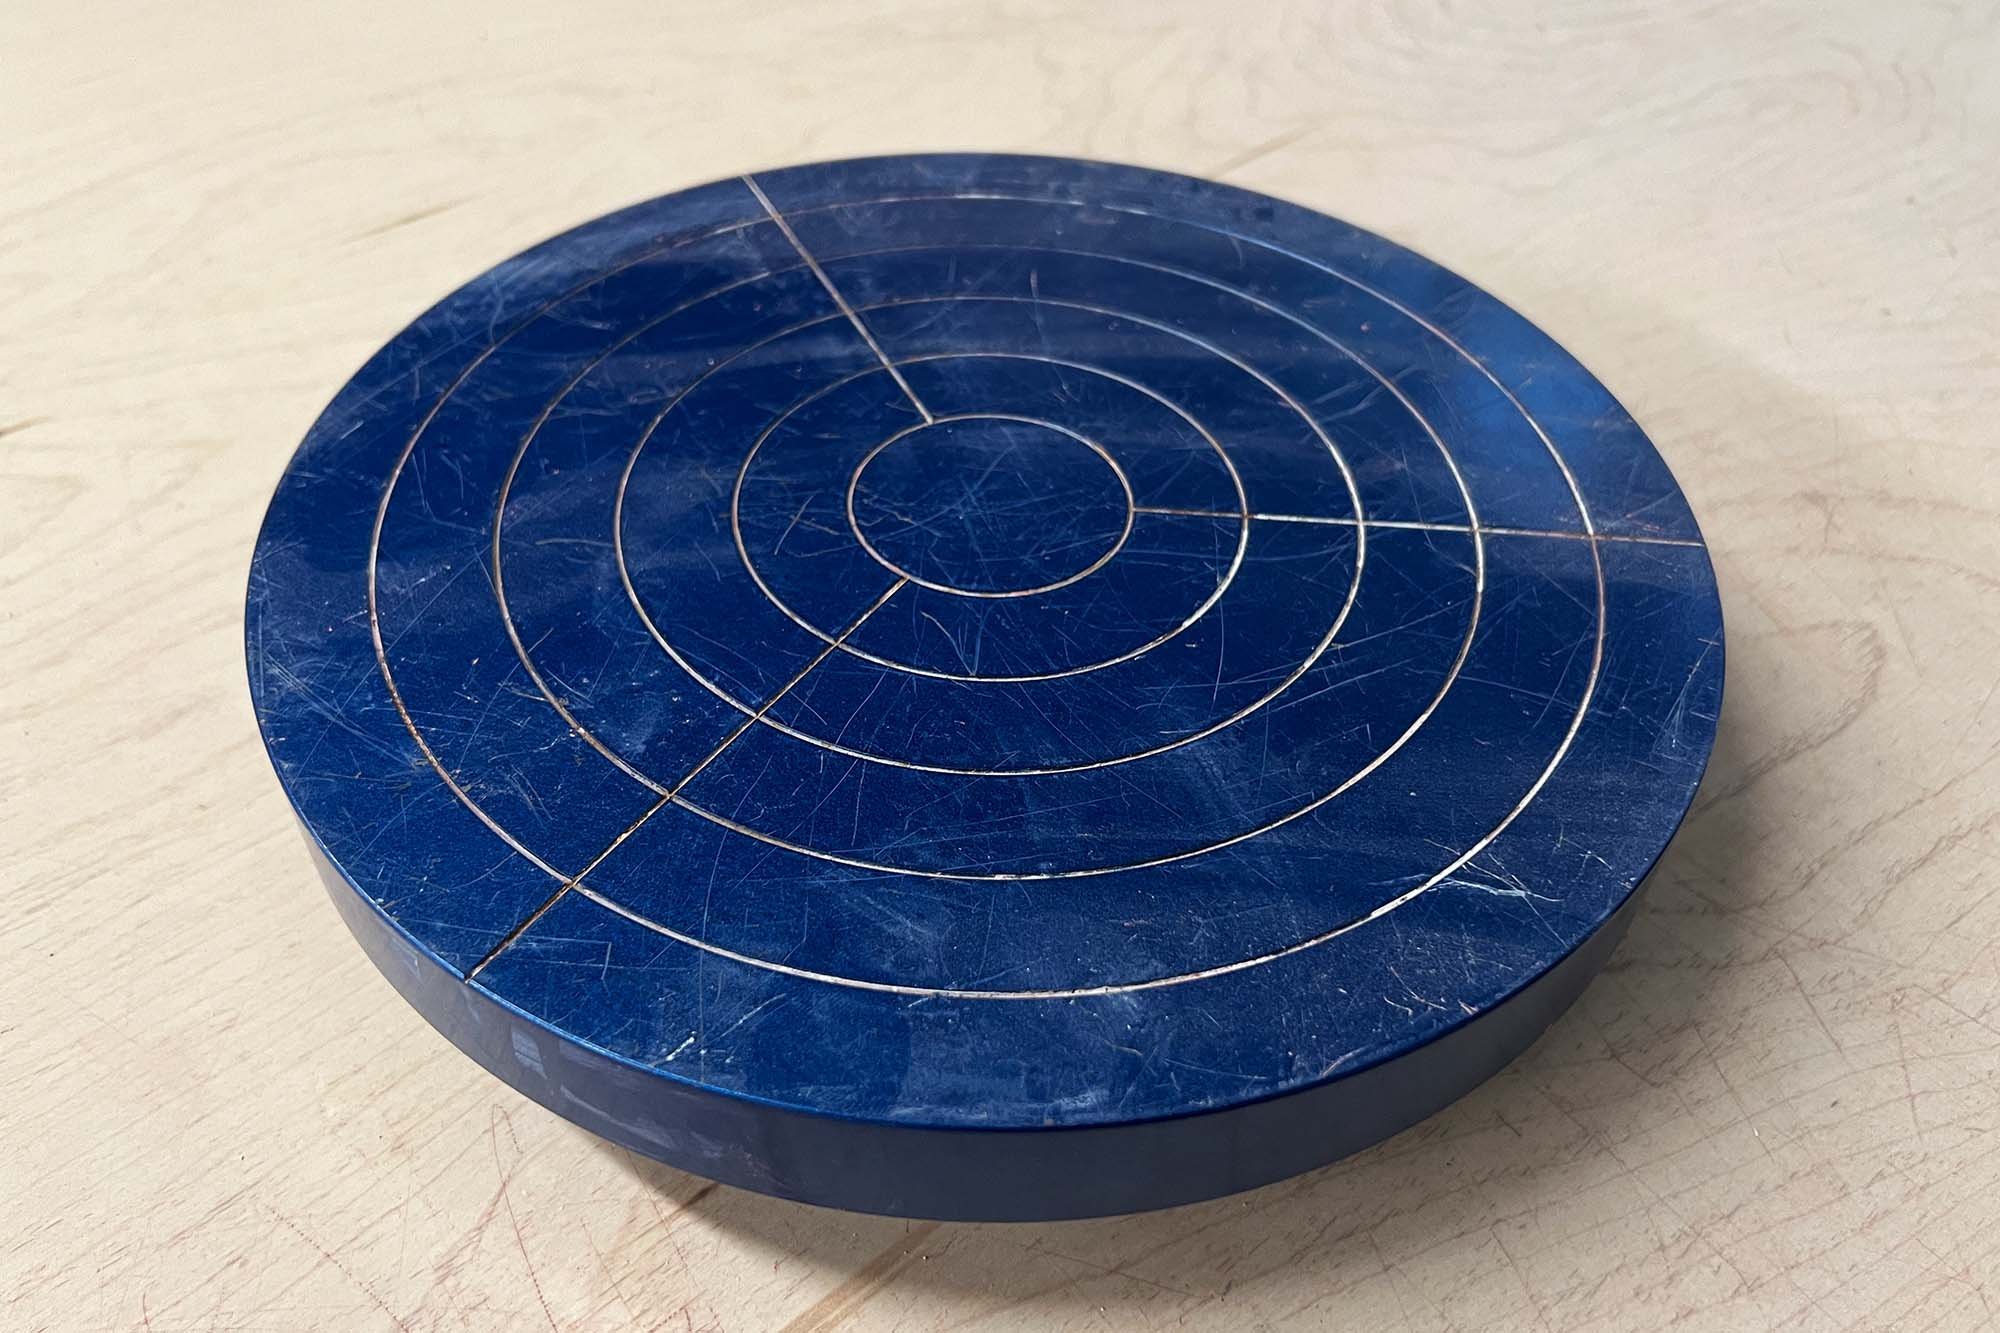
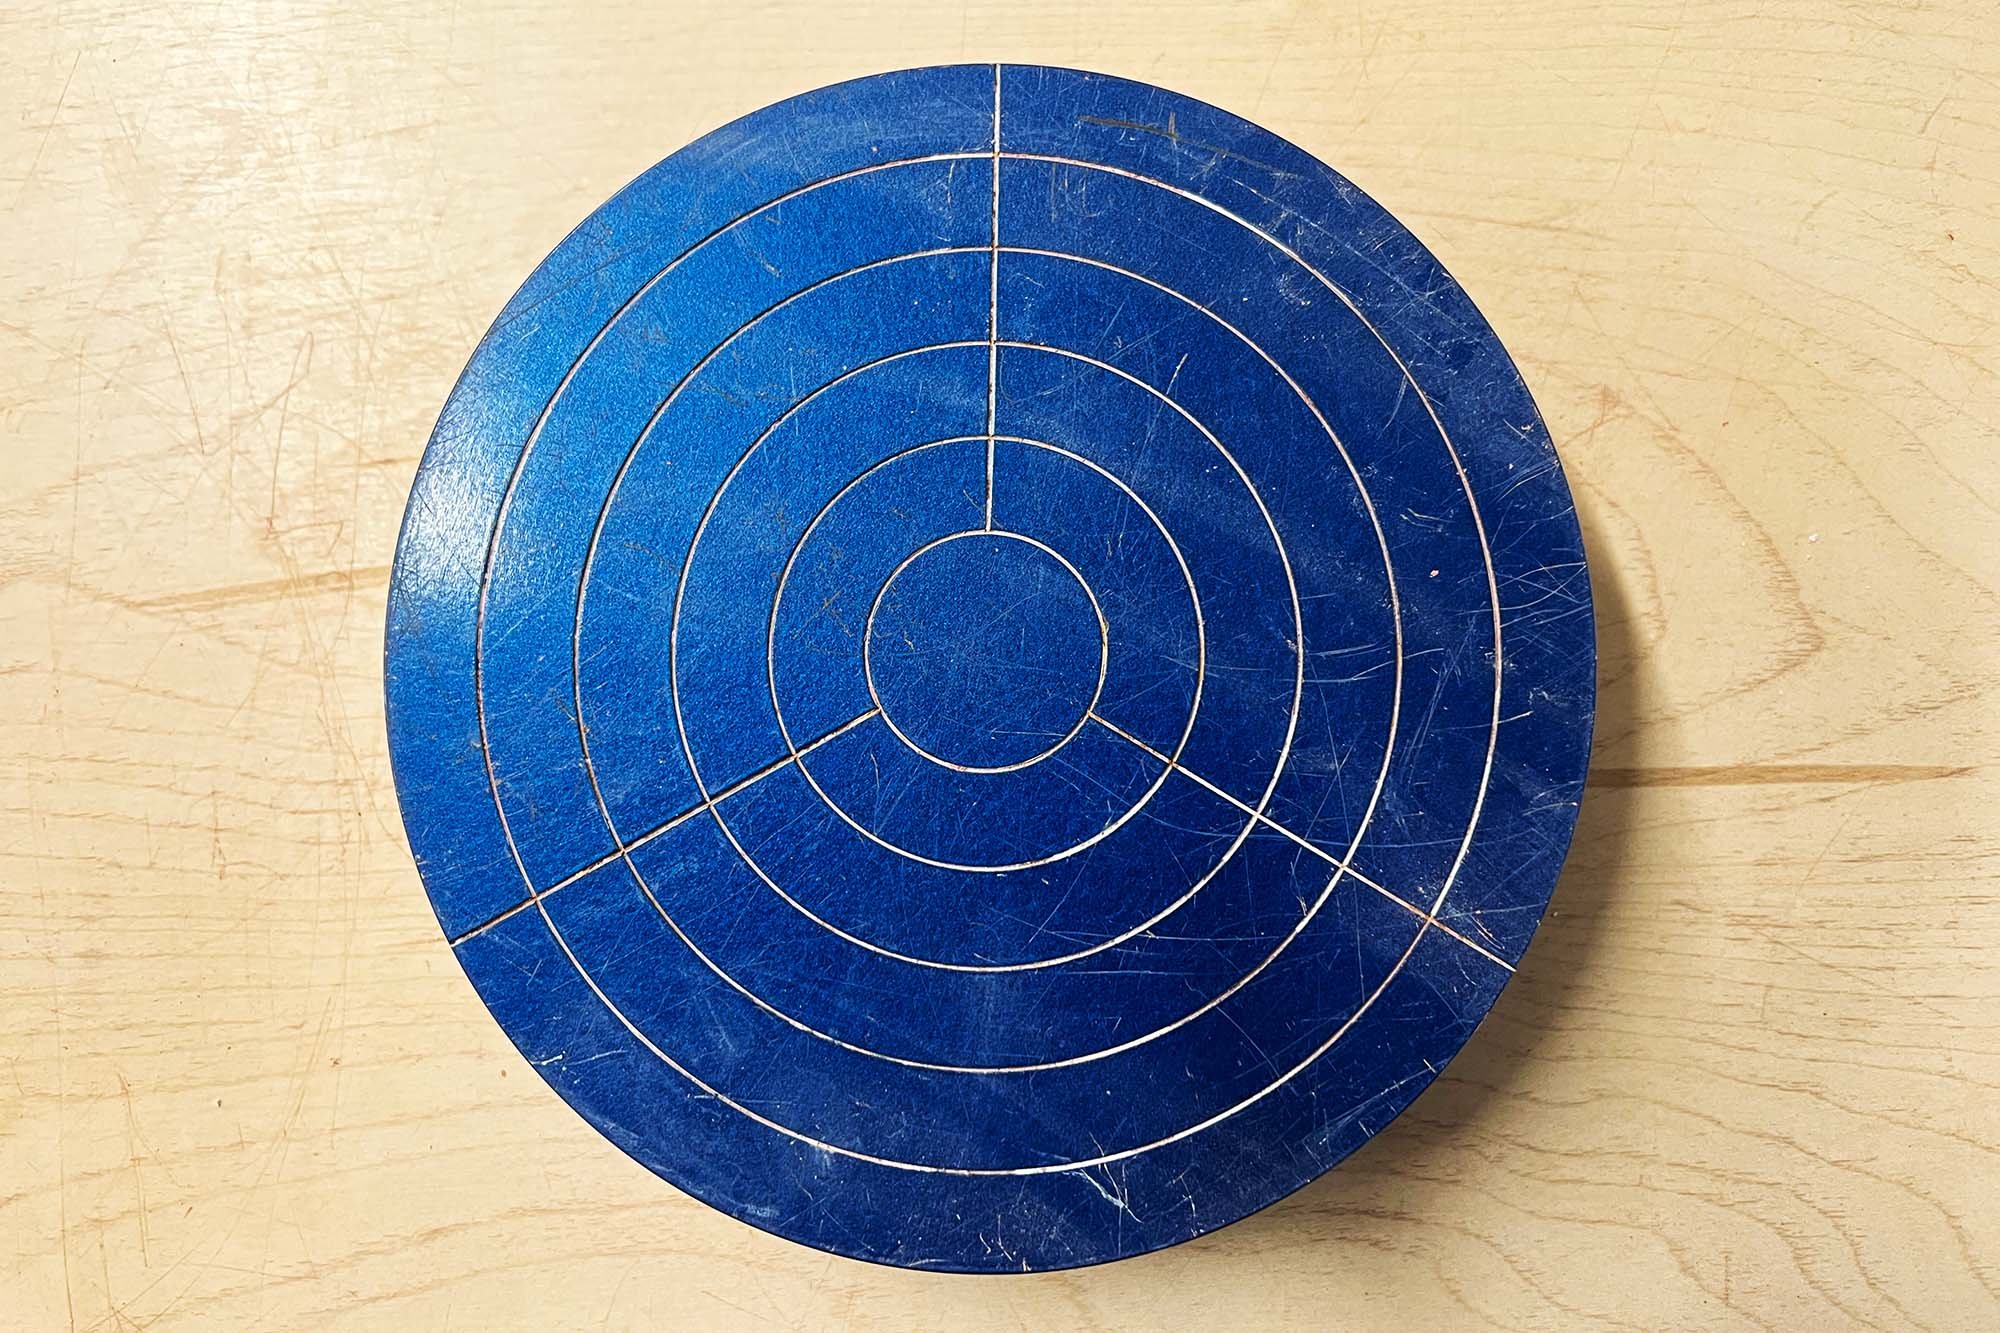
Top view nidec shimpo banding wheel

Top view

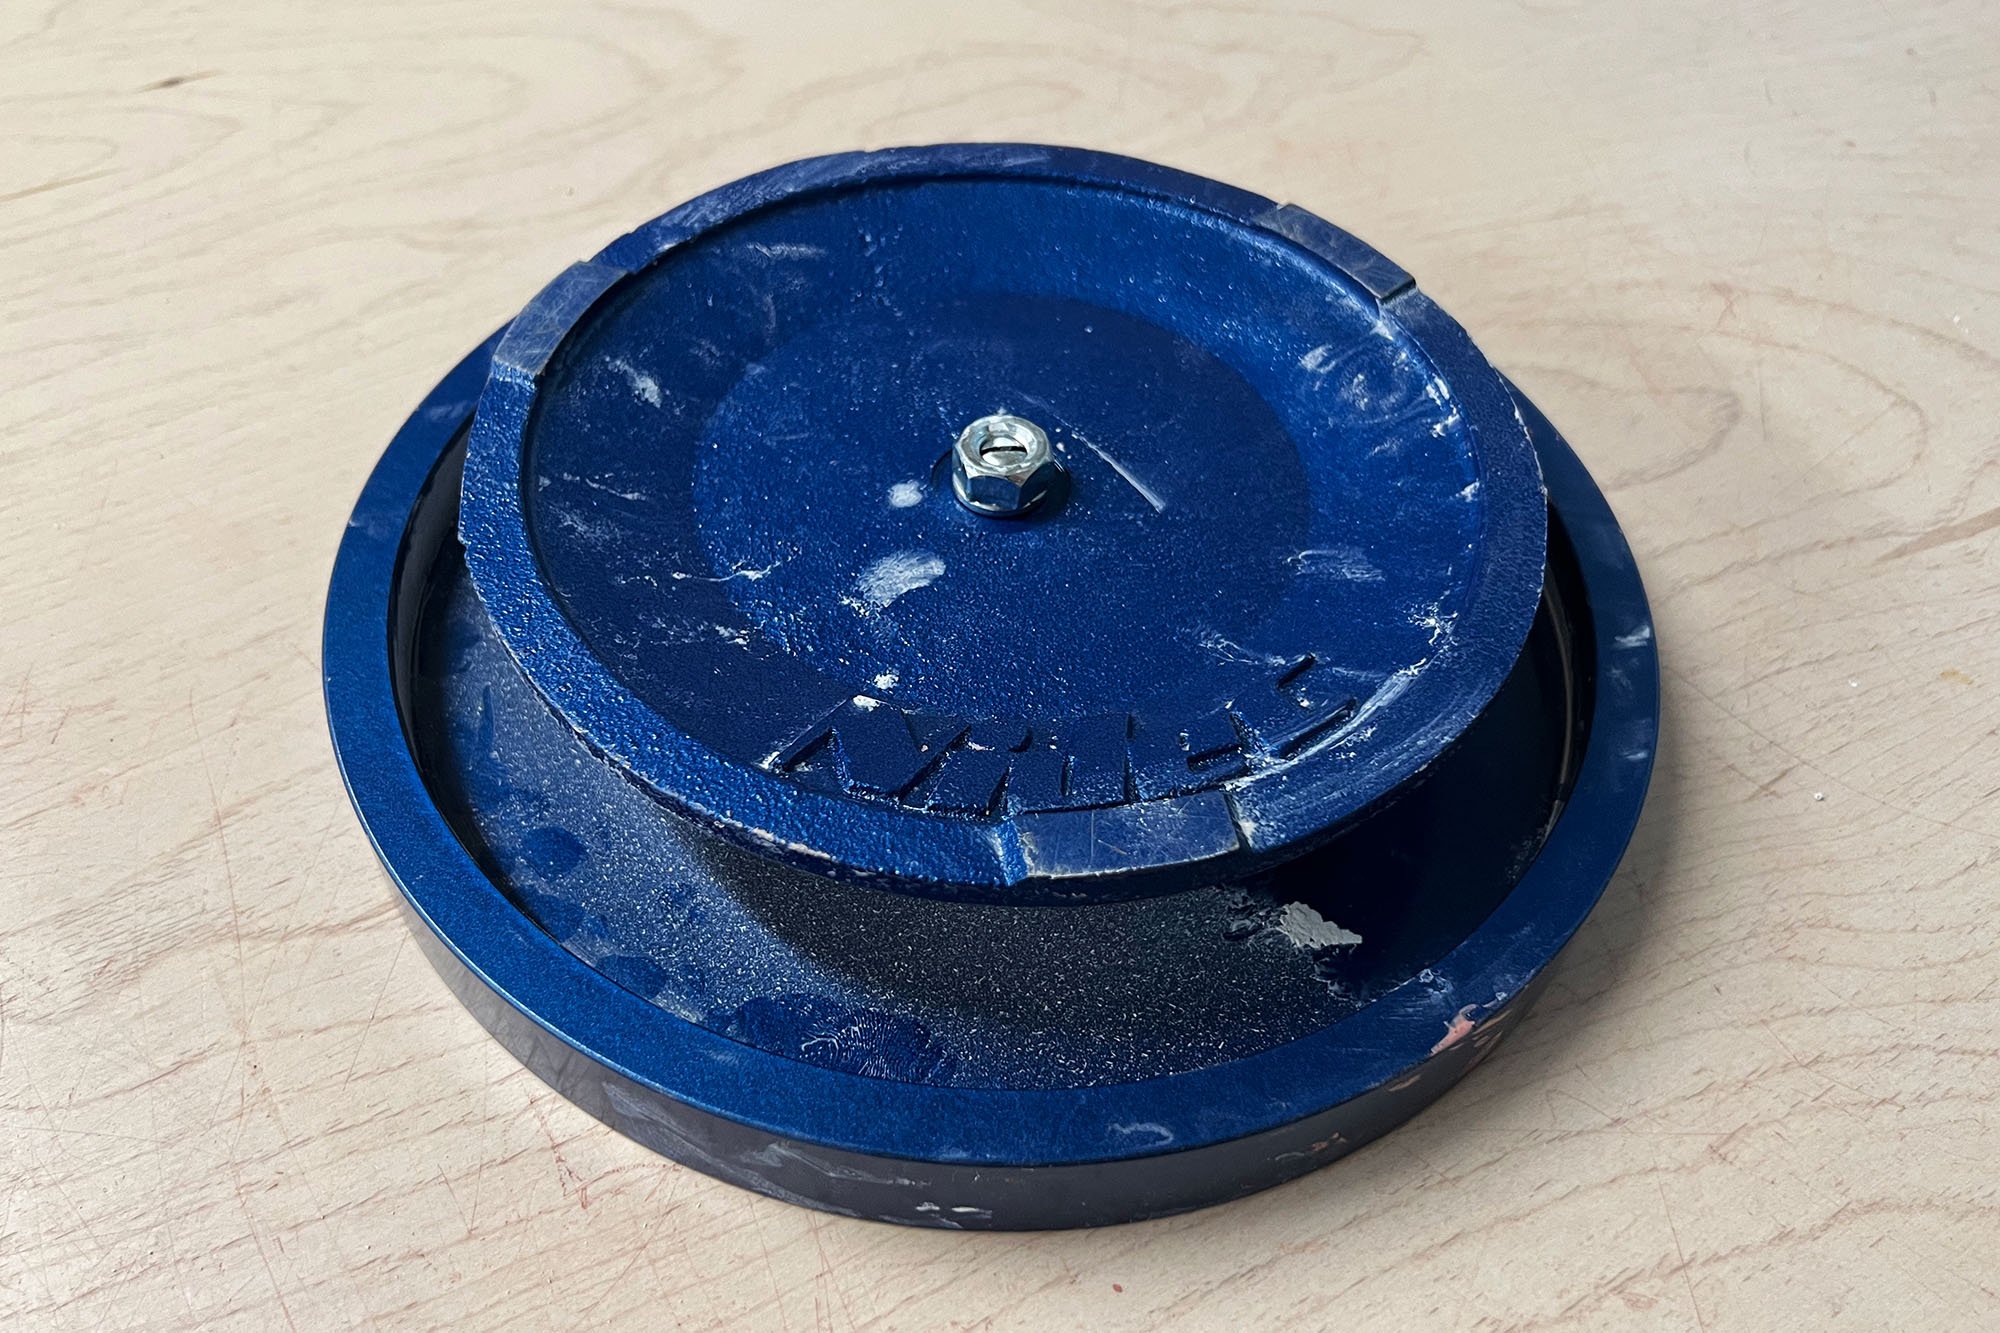
bottom view of Nidec Shimpo Banding wheel

Bottom view


Table of Contents

  1. Top Pick: Shimpo Banding Wheels

  2. Budget Pick: CSI Banding Wheels

  3. Great option: Amaco Banding Wheels

  4. Other Banding Wheels

  5. Summary


Budget Pick: CSI Banding Wheels

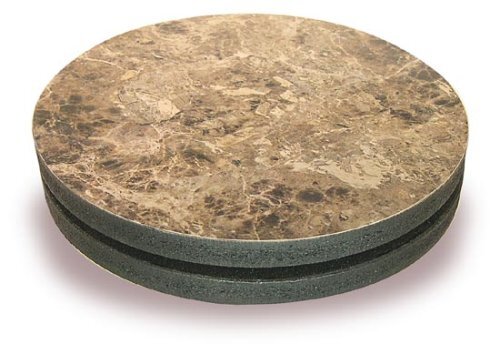
CSI Banding Wheels come in sizes ranging from 8” to 16” in diameter.

CSI Banding Wheels come in sizes ranging from 8” to 16” in diameter.

CSI Banding Wheels are heavy-duty, economical banding wheels made from two Formica-covered particle boards with stainless steel ball bearings. They are 2 inches tall and range from 8 to 16” in diameter. These banding wheels are portable and stackable, are lighter than cast-iron options such as the Shimpo. They have decent turning capacity but they don’t turn as readily and easily as the Shimpo banding wheels.

For heavy sculptures or vessels these are great options. The 8” and 10” wheels have a 200 lb capacity, the 12” is rated to 300 lbs, and the 14” and 16” are rated to an 800 lb capacity.

The CSI banding wheels range in price from around $29 to about $47. That’s an incredibly great deal for a heavy-duty banding wheel, making this a great option for educational studios, beginners, or those more focused on sculpture and handbuilding rather than spinning decoration.


Great option: Amaco #5 Banding Wheel

Amaco #5 banding wheel.jpg

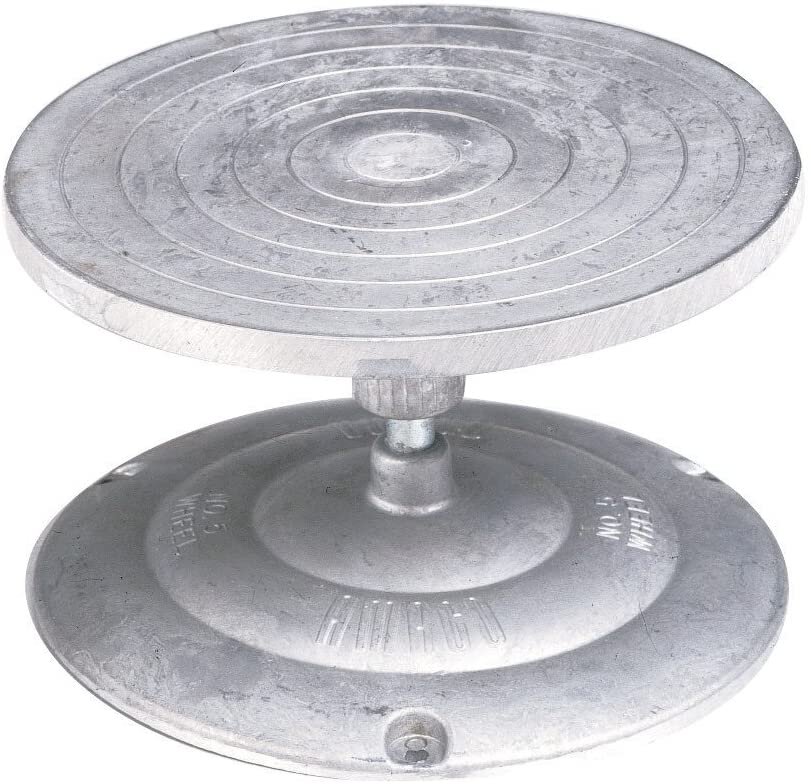
The Amaco #5 Banding Wheel is a 7” wide aluminum banding wheel that sits on a pedestal stand. Along with the Shimpo and CSI banding wheels, it’s quite common to see this in many ceramic studios. The smaller size, lighter weight, and pedestal stand makes it popular for decorating, carving, scraffitto work, and painting. It is not designed for heavy weight, but it is sturdy.

The drawbacks with this stand is that it is in two pieces and will separate if picked up by the top piece. There are also a variety of mixed reviews online, mentioning poor construction quality. AMACO may be having production issues with this unit, but in my experience, it’s a quality turntable that is great for small decorative tasks.


Other Banding Wheels options

Plastic Banding Wheels

Plastic banding wheel.jpg

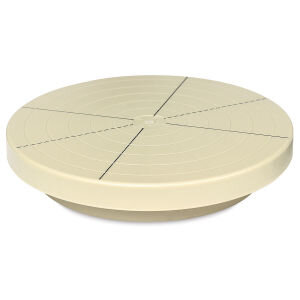
To be completely honest, I feel that plastic banding wheels are not worth buying. They can’t really be used for painting or banding, as the light weight doesn’t result in any lasting spin. They are also prone to breaking. You’ll be better off spending a bit more to get a CSI wheel.

The only reason I can see to get a plastic banding wheel is for working with young children. They are lightweight and stackable (but not robust…treat them carefully!) Or the other reason if you just need a lightweight turntable for detail work such as carving or fine detail sculpting.


Metal Banding Wheels

US Art Supply metal banding wheel.jpg

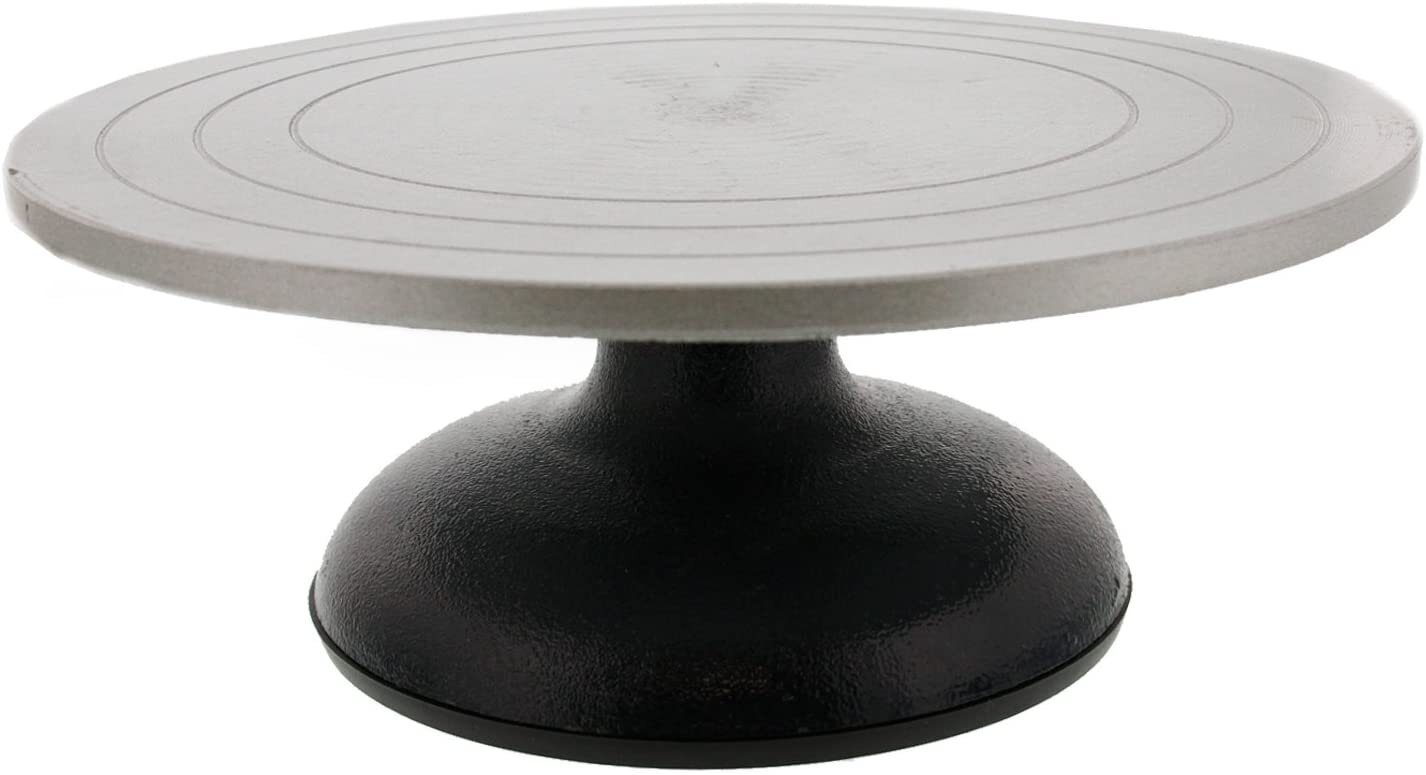
These generic metal banding wheels, available under a variety of names online such as Falling In Art or US Art Supply, are highly rated and run about half the price of the Shimpo banding wheels. Available in 7” and 12” diameter, with a 4 inch pedestal, and a weight of about 10 lbs, these wheels have a set screw to hold the top and bottom pieces together. They are not quite as heavy as the Shimpo, but much heavier than other options such as the CSI Turntables or plastic wheels.

These wheels have numerous positive online reviews and are overall highly rated, but there are also some very negative reviews.

7” banding wheel is generally $29 to $39, while the 12” banding wheel is $39 to $49.


Jack Richeson Mobile Sculpture Stand and Turntable

Sculpture Stand.jpg

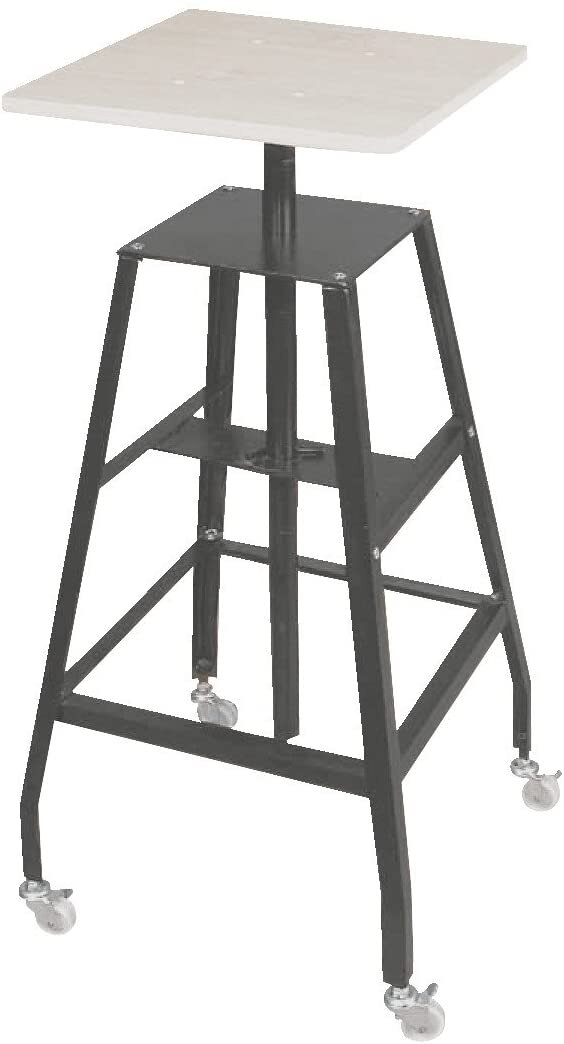
A mobile sculpture stand gives you the freedom to work on pottery and sculptures from all sides, and roll your work station out of the way if needed. This can be a great option for figurative sculpture, or if you want to create an additional workspace without adding another table. To work on this stand comfortably, you’ll need a tall stool or work standing up. The center shaft is adjustable for a working height of 39.5 to 44 inches. The wooden work surface is 12 inches square, and the base is 29 inches square with 4 locking caster wheels. It’s a great stand for working on sculptures, pottery, or as a display stand. It retails for $208.


Summary

This post has covered a variety of banding wheels, turntables, and sculpture stands. In general, the best option is the heavy-duty cast iron Shimpo banding wheels, especially if you need to get a smooth, steady spin for painting pottery. If you are working with heavy sculptures, the CSI Turntables are a sturdy, economical option. And there are other cheaper and lighter options.

What banding wheels do you use? Let us know in the comments.



The Best HEPA Vacuum for Potters, Sculptors, and Woodworkers

If you work with anything that creates dust, such as clay, wood, or plaster, you need a high quality HEPA vacuum. In our opinion, the Oneida Air Systems Dust Cobra is the best HEPA vacuum for medium to large studios and the Nilfisk Aero 21 HEPA Vacuum is the best option for personal studios.

Both of these machines meet or exceed HEPA standards (high-efficiency particulate air) for containing particulates such as silica dust, both from the machine exhaust and other areas on the unit. You’ll pay extra for this full-unit HEPA quality but it is worth it. Inferior vacuums often have a slapped-on HEPA filter but will leak in other parts of the vacuum, potentially creating worse air quality in your workspace. You definitely don’t want to play around with your lung health, so a high-quality vacuum should be one of the tools in your cleaning arsenal.

In addition to the Dust Cobra and Aero 21, this post will cover a few high-quality vacuums that will work for a variety of studio and workshop situations. Expect to spend $300 to $1500 or more to get the right system. This is a big outlay, but your health is worth it. And in the long run, these well-built vacuums will last for decades if treated with care, and your only ongoing cost will be replacement filters and bags. After the vacuum reviews, this post also will cover some relevant safety issue and cleaning suggestions to create the best, cleanest, and healthiest workspace.

Top Pick for Larger Studios: Oneida Air Systems Dust Cobra
An industrial vacuum, the Dust Cobra is designed to meet all OSHA HEPA requirements, is self-cleaning, and was designed with ceramic studios, wood shops, and light industrial applications in mind. It’s not cheap, generally around $1500 or more, but the unit was designed with ease of use and utilizes off-the-shelf HEPA filters, making ongoing costs and maintenance quite affordable.

Top Pick for Personal Studios: Nilfisk Aero 21 HEPA Vacuum
An upgraded version of a standard plastic shop vac, the HEPA version of this vacuum meets all the OSHA standards for silica dust extraction in a well-engineered vacuum that you can usually find for just over $300.


Table of Contents

  1. Top Pick for Larger Studios: Oneida Air Systems Dust Cobra system

  2. Top Pick for Personal Studios: Nilfisk Alto Aero 21 HEPA vacuum

  3. Upgrade Pick: Festool CT 26 E Dust Collector

  4. Classic Pick: Nilfisk GM-80 HEPA Vacuum

  5. Further Info: Safety Considerations and Cleaning Recommendations

  6. Summary


Top Pick for Larger Studios: Oneida Air Systems Dust Cobra

The Oneida Air Systems Dust Cobra is the best vacuum on the market for ceramic studios, wood shops, and other art studios. Designed in conjunction with Clayscapes Pottery of Syracuse, New York, it’s a high quality unit that will work for the avid hobbyist, educational studio, or small production facility. This unit will filter 99.97% of particles down to 0.3 microns.

The Dust Cobra is a lot bigger than your average vacuum or shop vac, but it’s on the smaller side for an industrial-quality vacuum. It would fit happily in the corner of a basement woodshop, or could be deployed at a larger academic studio or production facility. The vacuum sits on an airtight, metal drum that can be lined for easy disposal, and the drum is available in a 17 or 35 gallon capacity. The standard set-up comes with a high-quality dolly, but it can be used as a stationary tool too.

The Dust Cobra uses a rotating gravity funnel that Oneida calls “cyclonic action” to pre-filter the incoming dust and dirt and has a built-in filter cleaning system that can be deployed to prevent clogging and loss of suction. The standard kit comes with a 25-foot flexible hose that is designed to connect to tools such as a chop saw or miter saw, or it can be used as a standard floor vacuum.

One of the best features is that this vacuum uses an off-the-shelf Craftsman Gore HEPA filter, which is available for under $50 online or at hardware stores. Most other companies use expensive proprietary HEPA filters that can cost $150 each or more. Although a fully equipped Dust Cobra with the drum, wheeled dolly, and 25 foot hose starts around $1500, the ongoing operating costs of this unit is quite affordable. All that is needed is replacement filters and plastic drum liners.

To conclude, this is a durable, functional, well-thought-out unit with a target market of ceramic studios, shops using small power tools, wood shops, and educational studios.

The Oneida Air Systems Dust Cobra.

The Oneida Air Systems Dust Cobra.

For more info on the Dust Cobra, check out the manufacturer’s page or watch this short promotional video below:

Check out The Dust Cobra made by Oneida Air for ceramic studios!


Top Pick for Personal Studios: The Nilfisk Aero 21 HEPA Vacuum

The Nilfisk Aero 21, a small but powerful wet/dry vacuum that can be ordered with a HEPA filter.

The Nilfisk Aero 21, a small but powerful wet/dry vacuum that can be ordered with a HEPA filter.

The Nilfisk Aero 21 HEPA Wet/Dry Vacuum is a turbocharged little shop vac that can do a lot. It’s got great suction wet or dry, and with the HEPA option, this unit will filter 99.97% of dust down to 0.3 microns, It also has a built-in filter cleaning system to extend filter life and prevent loss of suction.

This unit has a 5-gallon (20 liter) plastic drum canister and an 11.5 foot foot hose. The vacuum kit includes an aluminum extension tube, along with floor, crevice, and universal nozzles. The unit is 20 inches tall, 15 inches in diameter, and has four wheels including two swiveling front casters.

Built with Nilfisk’s quality German engineering, this is one of the smallest and most affordable vacuums that the company makes. This is not an industrial machine, but for a personal studio or job site this is a great option that usually costs just over $300 with the HEPA filter.

Nilfisk makes all sorts of vacuums, ranging from shop vacs to industrial-level systems. There are variations in size, suction, and other features, but the HEPA option on their vacuums maintains the filtration level of 99.97% down to 0.3 microns or higher. When ordering, make sure to select the HEPA option so that you get the proper filters needed for silica and other fine particles. You can also be assured that the machine is engineered so that there are no leaky areas for non-filtered air and dust to escape.

If you like the Aero 21 but need a larger vacuum, consider these options from Nilfisk:

Nilfisk Aero 26 HEPA: A larger version of Aero 21

Nilfisk Alto Attix 33 HEPA: Increased power and suction with adjustable suction control

There are a lot of shop vacs on the market, but Nilfisk has done a great job of making a relatively affordable wet/dry vacuum that has an extremely high HEPA filtration rate. If you are working with clay, wood, or plaster, this is probably the smallest and most affordable vacuum that maintains top quality levels of small particle filtration.


Other Options

In addition to these top picks, there are a number of great HEPA vacuums on the market. For dust collectors, we are not fans of the brands typically found at big box stores, and instead have found speciality vacuum manufactures to offer the best in quality and functionality. With any shop vac advertising itself as a HEPA model, you’ll want to make sure all points on the vacuum are tightly sealed and that the filter is rated to at least 99.9% filtration down to 0.3 micron particle size.


Upgrade Pick: Festool CT 26 E HEPA Dust Extractor

The Festool 26 CT E Dust Extractor. Built with hose and cord storage.

The Festool 26 CT E Dust Extractor. Built with hose and cord storage.

Festool is a German manufacturer of high-quality power tools that is especially popular with woodworkers, and the company’s line of HEPA dust extractors is one of the best designed on the market. These vacuums would be an upgrade pick from the Nilfisk vacuums, based on both price and the standard options such as automatic tool start plugs and adjustable suction.

The Festool CT 26 E HEPA Dust Extractor is the company’s most popular vacuum with a collection size of 26 liters or about 6.5 gallons, although the line includes sizes ranging from 15 to 48 liters.

The CT 26 E, like all Festool vacuums, has thoughtful features such as built-in cord and hose storage, and easy to clean filters, all in a small unit with a low center of gravity. It comes with a 11 1/2 foot long flexible hose, with a collection capacity of 26 liters or about 6.5 gallons.

The entire line is certified to meet or exceed OSHA standards, meaning that it filters 99.7% of particles down to 0.3 microns. But Festool has taken a further step to get its units independently certified to make sure that there is no leakage anywhere in the unit. This full-unit certification really gives you the peace of mind that you are not creating any hazardous air, and it puts Festool a step above the competition. Many shop vacs and dust extractors are listed as HEPA certified, but only the exhaust air is being filtered. If there is leakage anywhere else in the unit (usually where the motor section is connected to the collection bin) that can defeat the whole purpose of a HEPA vacuum. With Festool, you know the full unit is certified.

If you are using this with small power tools, most Festool vacuums (including the CT 26 E) have a great feature: the tool-triggered auto-on function. Simply plug your tool into this Festool unit, and the dust collector will turn on and off when you engage the tool. It’s ingenious.

These features and certifications do come at a premium: the Festool CT 26 E costs around $740.. This vacuum is a step up from the Nilfisk in cost. With that you get the same level of HEPA cleaning but with extra features such as cord storage and the tool-triggered auto on. For many, Festool is the brand they turn to first and if you want top quality and safety assurance, it’s a great option for personal studios and job sites.


Classic Pick: Nilfisk GM-80 HEPA Vacuum

The Nilfisk GM-80. The hose parts and attachments are interchangeable, depending on your needs.

The Nilfisk GM-80. The hose parts and attachments are interchangeable, depending on your needs.

The Nilfisk GM-80 is a classic canister-style vacuum that is used and loved by many potters, sculptors, and artists. This model has been on the market for decades, and replacement parts are readily available online or at speciality vacuum stores. Within the Nilfisk product line, it’s in between the plastic-body Aero or Attix models and the high end industrial-grade machines. Consider it sort of a light-industrial option.

The GM-80 costs around $1,300 or more, and with that you get an all-metal body and a filtration level of 99.97% down to 0.3 microns. For extra filtration, there is a stepped-up Museum version with a variable speed control and the option for an ULPA Filter (Ultra-Low Particulate Air) which filters 99.999% of particles down to 0.12 microns. Either way, any Nilfisk vacuum with a HEPA or ULPA filter will return extremely clean exhaust air to your workspace with no leakage from the unit.

For HEPA filtering, the GM-80 utilizes four levels of proprietary Nilfisk parts: a paper dust bag, a thick cotton main filter, an optional motor dust filter, and a HEPA exhaust filter. These proprietary parts are not cheap to replace. The paper dust bag ($25 for a 5 pack) captures most of the dust, and the cotton main filter ($100) gets just about everything else. Unfortunately, this cotton filter and the GM-80 do not self clean, and the cotton filter is not designed to be washed. You could take it outdoors to tap off some of the accumulated dust, but this is a messy situation where you’ll want to have a dust mask on. The good news is that almost no dust gets to the HEPA filter, which costs $150-$200 to replace. The HEPA filter is rated for 1000 hours of use. If you are vacuuming in 10 or 15 minute bursts, it will take years before you’ll need a replacement HEPA filter.

There are a few tradeoffs with this device. It is not built with cord or hose storage, so these have to be wrapped around the device. For rolling, only one of the three wheels has a full 360 rotation, so it isn’t the easiest to move. It also uses expensive, proprietary filters.

The GM-80 is a trusted, well-rated vacuum that many have used to safely remove silica dust and other fine particles for years. If you are looking for a small vacuum and want a really high level of dust removal, this is a classic option that has worked for many artists for decades.


Further info:

OSHA Standards for Silica Dust

In 2016, the Occupational Safety and Health Administration (OSHA) in the United States introduced heightened standards for silica dust, and manufacturers have responded with high-quality vacuums that are HEPA certified and include improvements such as self-cleaning filters. In practice, this means that a HEPA certified vacuum or dust collector must filter at least 99.97% of particulates down to 0.3 microns. Keep in mind though, that while many vacuums will filter the exhaust air through a HEPA filter, not all units are fully sealed and can be truly safe if you are working with fine particulates such as silica dust.

Click here for the OSHA Fact sheet on the 2016 silica dust exposure regulations. There is also a comprehensive OSHA page on silica here.

Silica-safe.org has a lot of info on how to properly work with silica dust.

Click here for Nilfisk’s page on silica dust exposure and OSHA compliance.

How to Clean Your Studio: Never Vacuum?

To clean up, OSHA recommends a HEPA vacuum or wet mopping. But if you look at various forums for pottery and other workshops, most comments will say “never vacuum” and instead suggest wet mopping. Wet mopping is good advice, but a high-quality HEPA vacuum designed to capture silica dust is the other recommendation from OSHA. Not recommended practices include dry sweeping, moving dust with an air hose, or other practices that introduce dust into the air. If you have a personal studio, you should follow this advice too. Therefore, whether you are cleaning the inside of a kiln, using woodworking tools, or creating dust in any way, a high-quality vacuum system should be part of your studio.

Recommended Cleanup Procedures

As mentioned before, wet mopping or using a quality HEPA vacuum are the best ways to remove dangerous particulates such as silica dust from your workspace. As detailed in our post on recommended cleanup tools, here are cleanup suggestions for workspaces:

Tables and countertops Use bench brush and dust pan to carefully clean large chunks. Then wipe clean with water and large yellow sponges.

Floors
Spot-sweep as needed with broom and long-handled dust pan.
Vacuum dust and particles with a high-quality HEPA vacuum.
If sweeping is needed, use sweeping compound to help contain dust and sweep gently. Vigorous sweeping can produce airborne dust, so work slowly and carefully.
After sweeping, then mop floors. If needed, a second mopping should get things spotless.

Kiln room
Kilns are vacuumed as needed with a HEPA vacuum.
Floors are cleaned as described above.
As kiln rooms are sources of a lot of dust from ware storage, kiln wash, kiln shelf maintenance, etc, be extra vigilant about cleaning frequently in kiln rooms.

What to do if you have an old leaky shop vac?

If you are not in a position to upgrade your old vacuum, consider a few alternatives.
1. If you have outdoor space, keep your vacuum outside and run an extra long hose into your workspace for cleanup. Wait for outside air to clear before moving vacuum.
2. Only clean up with sweeping compound, a wet mop, or water and sponge.

Your health and safety is worth it! Be very mindful of all aspects of cleanup, but a high quality HEPA vacuum as reviewed above will significantly help your cleanup routine.


Summary

To conclude, the 2016 OSHA regulations on silica dust have resulted in new and improved options for vacuums and you should consider it an important part of your health, safety, and organizational approach to your studio. An affordable model such as the Nilfisk Aero 21 HEPA Vacuum will get you a full-unit HEPA quality cleaning for not that much more than a standard, leaky shop vac. An upgrade option is the Festool CT 26 E Dust Collector, which is a well-designed workhorse. The Nilfisk GM-80 is a classic canister style unit, while the Oneida Air Systems Dust Cobra is an industrial-quality vacuum at an affordable price for that type of system.

Do you have other suggestions for HEPA vacuums? Let us know in the comments.


Best Ceramic Textbooks and Guidebooks

Updated June 10, 2021

The Workshop Guide to Ceramics by Duncan Hooson and Anthony Quinn, our top pick for a ceramics textbook.

The Workshop Guide to Ceramics by Duncan Hooson and Anthony Quinn, our top pick for a ceramics textbook.

These days, there’s a ton of information, guides, and videos online that will help you learn about ceramics. But it can also be nice to have everything in well thought out and comprehensive book. This is especially the case when you are in the studio with dirty hands and it’s hard to use a device.

There are a lot of speciality books for ceramics, focusing on aspects such as wheel throwing or glazing, with more coming out every year. But the goal of this post is to review a few books that cover the whole spectrum of the ceramic process, not just one specialized area such as wheel throwing or hand building.

Many of these books are more than a decade old and out of print, but they still are good resources for a comprehensive overview of clay, pottery, and ceramics.

TOP PICK:

The Workshop Guide to Ceramics

By Duncan Hooson and Anthony Quinn, published 2012

The top pick for a complete guide to clay is The Workshop Guide to Ceramics by Duncan Hooson and Anthony Quinn. Published by Barrons in 2012, the hardcover book has 320 pages full of information, technique, and full-color images. Divided into eight parts, the text covers everything from a beginner’s guide, forming techniques, glazing and firing, to thoughts on how to have a professional practice. It’s a remarkable book, both for the breadth of information covered and how it is accessible and useful for beginners and professionals alike. It’s also full of images that illustrate technique and lots of finished work by accomplished artists.

Written by artists and educators (Quinn is a professor at Central Saint Martins College of Art and Design in London and Hooson is a teacher in London) the book is the best laid out and comprehensive textbook on ceramics that I have seen. Handbuilding, mold making, wheel throwing, glazing, surface decoration, lathe turning, you name it—this book has info on it. Flip through the images above to see some inside shots of the book, including the table of contents.

As of this writing, the book appears to be out of print (like almost every book covered in this post) but it’s available used. This book is worth it.

Shop Hardcover version:

Note: There is also a newer, paperback option by the same authors from 2017 that appears to be the same book but with a different title called Ceramics: The Indispensable Guide.


Other options:

The following guides and textbooks are all great options for your studio too. Most of these books are out of print, but that means you can often find a great deal used. And the books are often full of great examples of artwork by a wide variety of potters, artists, and ceramic specialists.

The cover of the third edition of Working With Clay by Susan and Jan Peterson.

The cover of the third edition of Working With Clay by Susan and Jan Peterson.

Working With Clay

By Susan and Jan Peterson, most recently published in 2009.

Working With Clay is full of color images throughout the book.

Working With Clay is full of color images throughout the book.

Working With Clay is a concise, illustrated guidebook of everything you need to know to work with clay and ceramic. It includes chapters on hand building, wheel throwing, glazing, firing, ceramic history, and a lot more. Written by ceramics legend Susan Peterson and her daughter Jan, it is illustrated throughout with many color photos. Although it is more than 10 years old, it contains all the main information you will need to get started with clay, and it has a lot more that makes it useful for advanced students and educators. Designed as a textbook, it’s still available used for around $30 at the time of this post. The color pictures in this text are great and the spiral binding makes it easy to leave open to the page you may need for reference.

Working With Clay by Susan and Jan Peterson, most recent edition is 2009 but any editions will be helpful reference books.


Although it’s almost 20 years old, Make It In Clay is still one of the best concise and comprehensive guidebooks to the ceramic process.

Although it’s almost 20 years old, Make It In Clay is still one of the best concise and comprehensive guidebooks to the ceramic process.

Make It In Clay: A Beginner’s Guide to Ceramics

By Charlotte F. Speight and John Toki, most recent edition is 2001

An interior page spread from Make It In Clay.

An interior page spread from Make It In Clay.

Almost 20 years old, this is still one of the best options for a comprehensive but concise overview to all aspects of ceramics. Similar to Working With Clay, it can be found in an easy-to-use spiral binding. This book covers every aspect of clay and ceramics, and includes a lot of suggestions for projects to get started. The book is illustrated with just black and white photos, making it less visually dynamic than our top pick. But it has great info and although it is almost 20 years old, this is still a worthy addition to your ceramic library. The information in the book is clearly presented, easy to follow, and covers all the basics. I’ve seen used copies online for between $20 and $40, which is a great deal for the amount of info packed into this book.

Make it in Clay, by Charlotte F. Speight and John Toki, 2001


The cover of the fourth edition (2003) of The Craft and Art of Clay, a ceramic textbook by Susan and Jan Peterson.

The cover of the fourth edition (2003) of The Craft and Art of Clay, a ceramic textbook by Susan and Jan Peterson.

The Craft and Art of Clay

By Susan and Jan Peterson, multiple editions but most recent is fifth edition, 2012

An interior spread from the 4th edition of The Craft and Art of Clay.

An interior spread from the 4th edition of The Craft and Art of Clay.

This is one of the most comprehensive guidebook / textbook covering ceramics. One Amazon reviewer describes it as the “end all, be all” of ceramic books. It has plenty of information for beginners, including step-by-step instructions. But it goes so much deeper than Working With Clay, which is by the same mother-daughter team, including a serious amount of ceramic history, profiles of contemporary artists, chart after chart of technical information. Written as a textbook for college classes, this is the book you’ll want if you are super serious about ceramics. I have owned the 3rd edition since I started working with clay, and after all these years I’ll flip it open and find new information or a deeper understanding of something I’m researching, such as glaze materials or firing info.

The book is illustrated with a combination of color and black and white photographs. The book is out of print and though any edition is probably fine, I would look for a used copy of either the fourth (2003) or fifth (2012) edition. At the time of this post, used prices for these editions were around $20 to $80 depending the the edition and condition of these books. The 3rd edition (1999) is often under $10 used and is great too, it’s just missing a bit of the updated information.

The Craft and Art of Clay, by Susan and Jan Peterson, various editions.


Hands in Clay 1.jpg

Hands in Clay

by Charlotte F. Speight and John Toki, multiple editions, most recent is 2003

Hands in Clay is the other option if you are looking for a big, comprehensive ceramics textbook. Continuously updated since the 1970s, this book has everything you need to get started in clay or if you are looking for one big book that is a ceramic reference. Full of how-tos, project ideas, and information on ceramic history, it’s a great option. The book is illustrated with a combination of color and black and white images. Of particular interest is the images and info detailing how to make large scale ceramic sculptures.

At the time of this post, used copies of the fifth edition ranged from $25 to $50, and the fourth edition was available for under $10. It’s a good deal for a large book!

Hands in Clay by Charlotte F. Speight and John Toki

An interior spread from the fifth edition of Hands in Clay, 2003

An interior spread from the fifth edition of Hands in Clay, 2003


The Potter’s Dictionary of Material and Techniques

By Frank and Janet Hamer, sixth edition, 2015

Continuously updated for more than 20 years, this Ceramics Dictionary is a great resource for intermediate to advanced students and ceramic professionals. Arranged alphabetically, this is a well-researched and comprehensive resource. But the drawback of a dictionary versus a textbook, is that you need to know where to start, so if you are a beginner it’s best to start with one of the books listed above. But, this can be a fun book to just flip through and read an entry or two that catch your eye. Many potters and ceramists swear by this book and it’s a great addition to any ceramic studio or library.

The Potter’s Dictionary of Materials and Techniques, by Frank and Janet Hamer

The Potter’s Dictionary, sixth edition


The Ceramic’s Process: a Manual and Source of Inspiration for Ceramic Art and Design

By Anton Reijnders and the European Ceramic Work Centre

This 2005 book is an impressive overview of techniques, recipes, and working processes used at the European Ceramic Workcentre in the Netherlands. The EKWC is an international center where ceramic specialists help artists, designers, and architects realize their projects in clay and ceramics. Reijnders worked there for many years, and the book contains recipes, how-to guides, and lots of pictures. The recipes use European ingredients, which makes it a bit hard for someone working in the United States, but if you read it carefully you can translate the materials into something available at your local clay supplier in any country. The recipes are also on the more general side, so expect to do some testing to get things to work in your studio.

Ceramic Process.jpg

The Ceramic Process by Anton Reijnders

The best part of this book is the color photographs throughout. The EKWC has been a place where countless artists and designers have realized their projects, and this book documents much of that work from 1990 to 2005. There is probably no better guide to this period of large-scale ceramic sculpture in Europe, and for that alone, the book is worth it. There is also information on paper clay, large-scale plaster sculptures, and other adventurous approaches to clay, making this a useful resource for ceramic sculptors and designers.

Out of print, this hardcover book is often listed at $200 to $500 used. If you see a copy available for $150 or less, it’s probably worth it. Or see if you can find a copy at your local library. The book was around $60-80 when it was in print. But it is a unique book that does cover every part of working with clay.

The Ceramic Process by Anton Reijnders, 2005


Summary

This post has covered a variety of ceramic guidebooks and textbooks. Although so much information is available online, it can still be useful to have a book where the information is laid out thematically or by alphabetically order. Due to changes in publishing, many of these books are out of print. However, the information is still good and a reference book can be a vital resource in the studio.

For more posts on books and ideas, click here.

Do you have any favorite ceramic guidebooks? Let us know in the comments.


The Best Cleanup Tools for Ceramic and Art Studios

The Carlisle Mop Bucket, one of two top picks for a studio mop bucket.

The Carlisle Mop Bucket, one of two top picks for a studio mop bucket.

Updated and revised, June 12, 2021

In a studio, it’s important to have the right clean up tools to keep things neat, organized, and safe. This is especially true in ceramic and sculpture studios, where dust can be an issue. And while any sort of clean up tool will be better than nothing, high-quality, well-designed tools do stand the test of time and most importantly, really work.

This post is an overview of quality clean-up tools that get the job done. These are the exact tools that I use in my studio.


Table of Contents

  • Dust Pan and Bench Brush

  • Long Handle Dust Pans / Lobby Pans

  • Brooms

  • Sweeping Compound

  • Mop and Bucket: Rubbermaid Commercial and Carlisle

  • Large Yellow Sponges

  • HEPA Vacuum

  • Walk Behind Floor Scrubbers

  • Clean-Up Recommendations

  • Summary


Dust Pan and Bench Brush/Duster

The Rubbermaid Commercial Dust Pan and Bench Brush/Duster are simply the best dust pan and brush combo that I’ve ever used. The pan is sturdy, functional, and hangs nicely on the wall. It is 12.25” wide and about 3 inches deep at the tallest point.

The bench brush is where you really step up your cleaning game: It’s a heavy-duty brush with relatively soft bristles that clean evenly and completely, and can be washed if needed.

This combo is great for cleaning dirty tabletops, sweeping up larger chunks of clay, sawdust, brushing off a kiln shelf, or for light-duty floor cleaning.

When compared to other dust pan and brush combos, there is simply no comparison. These are long-lasting, functional upgrades to your studio. They will last years, if not decades, under normal use.


Long Handle Dust Pans / Lobby Pans

A long handle dust pan and broom are your other tool for dealing with chunks and dust. They really save your back and make cleanup that much easier. And in a shared studio space such as a community studio, having a long-handled dust pan will greatly increase the likelihood of studio members doing their part to clean up.


Oxo Good Grips Sweeping Sets

The slightly larger Oxo Good Grips Sweep Set with the extendable handle broom.

The slightly larger Oxo Good Grips Sweep Set with the extendable handle broom.

The Oxo Good Grips Sweeping Sets are my favorite long-handle dust pans and broom combos. Thoughtfully designed and sturdy, it’s what I currently use in my studio and I even purchased the smaller combo for use at home.

The larger “extendable handle” set (shop at Amazon) has a 10.8” wide dust pan that is 3.5 inches tall. The dust pan handle is 35” high, and the broom handle can be extended from 35” to 53” inches.

The smaller set (shop at Amazon) has a 9.5 inch wide dust pan that is 3 inches tall, and the dust pan and broom are around 35 inches tall or 38.5 inches when hanging upright.

Both sets are made from the same sturdy plastic and design, including a swiveling dust pan that can lock in place. The thick rubber “comb” on the dust pan help clean the bristles of the broom. This is especially good for removing hair and dust balls that stick to the broom.

The dust pan handle also contains a handy snap, so the set clicks together for easy storage both upright or hanging. In the hanging mode, the head of the broom can be easily tucked into the dust pan. It’s an all-around great combo.


Rubbermaid Commercial Long Handled Lobby Dust Pan

Another great long-handle dust pan option is the Rubbermaid Commercial Lobby Dust Pan. It has a much larger dust pan than the Oxo version, making it perfect for academic studios and larger spaces, such as community or garage studios. It is heavy duty, holds a large amount of dust and trash, and the pan swivels for picking up and dumpling. For storage, it will sit on the ground or can be hung up by the handle hook.

Rubbermaid Commercial Lobby Broom. Just 7.5” wide, so a standard broom may be better for studios.

Rubbermaid Commercial Lobby Broom. Just 7.5” wide, so a standard broom may be better for studios.

This dust pan pairs well with either a standard angle broom or the small lobby broom. The lobby broom is 7.5” wide, putting it on the smaller side if your goal is to clean up dust. I generally prefer a standard angle broom (see below) but the lobby broom does have a shorter handle, hangs up easily, and is good for sweeping larger chunks into the dust pan.

My only complaint about this dust pan is it doesn’t have a clip to hold a broom in place. But like most other Rubbermaid Commercial products, this is a well-built tool that will last forever.


Brooms

The Rubbermaid 10.5” Angle Broom.

The Rubbermaid 10.5” Angle Broom.

Angle Broom

If you are working in a studio that generates dust, such as a ceramic studio or woodshop, you need to be mindful when sweeping and generating any sort of dust. Sweeping compound can help trap dust at the ground level before it gets in the air, but another way to avoid creating airborne dust is to sweep gently with a soft-bristled broom. Move dirt deliberately into piles, then get it into your dust pan and you should be fine.

The best all-purpose broom for a studio is a simple angle broom. My favorite is the Rubbermaid Commercial 10.5” angle broom. It’s a quality broom and if you ever do actually wear out the brush head, you can buy replacement heads.

Push Broom

Rubbermaid Commercial Smooth Surface Fine Duty brush head for a push broom.

Rubbermaid Commercial Smooth Surface Fine Duty brush head for a push broom.

For larger rooms, you may want to also have a push broom or two. These are especially great for larger academic studios, outdoor concrete pads, or hallways. It’s harder to maneuver these around table legs and chairs.

As mentioned above, the way to go with possibly dusty floors is to get the softest bristles possible. For a push broom, the Rubbermaid Commercial Smooth Surface Fine Duty brush head is the way to go. Pair it with a broom handle, and you’ll have a great broom.


Sweeping Compound

SpillFix all purpose absorbent / sweeping compound.

SpillFix all purpose absorbent / sweeping compound.

Anytime you are sweeping a dry or dusty floor, sweeping compound will greatly reduce or eliminate any potential airborne dust and help you grab all the dust and debris. Sweeping compound is typically some form of oily sawdust. It is tacky enough to grab dust and dirt, but dry enough that there is no trace of oil left on the floor. Some sweeping compounds also double as absorbents for oil or other materials.

The best way to use sweeping compound is to fill a plastic cup with a bit of sweeping compound and fling it in a low, horizontal motion in order to distribute it evenly. Then, sweep as normal.

For busy studios, sweeping compound can be ordered in large bags or drums from most hardware stores or warehouse supply stores. Sweeping compound will dry out over time, so it’s best to order what you can use in 6 to 12 months. For smaller studios or if you are trying sweeping compound for the first time, the smallish jar of SpillFix linked below is a great way to test it out. Once you start using sweeping compound, you’ll wonder how you ever swept a studio floor without it.


Mop and Bucket

A mop and wringer bucket is an important part of any studio clean-up operation, especially if you are working with clay and want to avoid dust. The best wringer bucket is the Rubbermaid Commercial Wavebreak Bucket Wringer Set and for the mop, my preference is the Rubbermaid Side Gate Mop Handle with a blue mop head.

Rubbermaid Side Gate Mop Handle

Rubbermaid Side Gate Mop Handle

I know this post is starting to seem like it’s all Rubbermaid Commercial products, but I have used and can vouch for the quality, durability, and design of these products. (For a review of a Rubbermaid product I don’t endorse, read about 10 gallon buckets here) The good news on wringer buckets is there are a variety of side-press wringer buckets that are all about the same price and are highly reviewed, including Carslisle and Amazon Basics.

The main additional feature of the Rubbermaid is the “WaveBreak” system, essentially two flanges inside the bucket to help control the water when you are rolling the bucket. For me, the WaveBreak doesn’t add much, but I do appreciate the quality of the caster wheels and the wringer system on the Rubbermaid.

For a mop head, I find that the blue headband-style mop heads hold the longest. I prefer the standard 20” length, but there are options out there.


The Carlisle Mop Bucket is available in a 35 and 26 quart size.

The Carlisle Mop Bucket is available in a 35 and 26 quart size.

Carlisle Mop Buckets

For an alternative to the Rubbermaid Mop Bucket, check out the Carlisle Mop Buckets. They are available in two sizes: 26 quart and 35 quart, and a variety of colors. Options are good! And the smaller size is appropriate for smaller studios. They do not feature the “Wavebreak” middle bumper found on the Rubbermaid bucket, but this actually makes it easier to clean out the grime that settles to the bottom of the bucket.

I use and stock the 35 quart Rubbermaid bucket in larger studios, but in my own personal studio, I have the 26 quart Carlisle bucket. The mop wringer top part is the same size as the larger model, but the 4.5 gallon bucket takes up less room while providing enough water for cleanup. The casters don’t seem as robust as the Rubbermaid buckets, but overall, it’s basically the same, well-built mop bucket.

The Carlisle Mop Buckets are also available in a five colors.

The Carlisle Mop Buckets are also available in a five colors.


Large Yellow Sponges

Large yellow sponges are one of the best cleanup tools for the size, versatility, and ability to pick up large volumes of liquid. I use them every day in the studio and have tried just about every brand name and generic out there.

My advice is to go for quality on yellow sponges, and my favorite is the Armaly ProPlus Grouting and Cleanup Sponge. It does cost more, but it lasts so much longer. The generic packs you’ll find online contain sponges that usually fall apart in weeks. The Armaly Pro sponges last 6 months or longer under heavy use in the community studio I manage, and should last even longer in a personal studio.

Another decent option is the QEP yellow sponge, which will also last longer than generics. For a full rundown of heavy-duty cleanup sponges, click here. If the prices online seem too high, you may be able to find these sponges for less at big box hardware stores.


HEPA Vacuum

A quality HEPA vacuum is a must-have in any studio, especially if you are working with clay, plaster, or wood and generating dust. It’s always best to wet mop (or use sweeping compound) to avoid putting dust in the air, but if you do use a vacuum, you want to know that you have good filters and are not putting the fine dust back in the air. And for situations like cleaning the inside of a kiln, you definitely need a good vacuum.

The Nilfisk Alto Aero HEPA vacuum is a good balance of quality, and design. It is certified for drywall dust abatement. It’s on the more expensive side for a wet/dry vac, but it’s on the cheaper side for high quality HEPA dust vacuums. (I personally use a 20-year-old Nilfisk GM80. Those are great vacuums if you have $1400…)

I have used other Nilfisk vacuums at various shops and have always been impressed with their quality. Expect this to be an investment that lasts for years or decades.

For a complete review of HEPA vacuums that work for silica dust abatement, click here.


Walk Behind Floor Scrubbers

The Clark Vantage 14, a walk behind floor scrubber made by Nilfisk-Advance.

The Clark Vantage 14, a walk behind floor scrubber made by Nilfisk-Advance.

For larger studios, a battery-operated floor scrubber can be a quick and effective way to clean up. These machines put water down, scrub and clean with a rotating head, and then a rear squeegee helps collect water that is sucked back into the machine.

Available in a variety of sizes, these machines will make short work of even thousands of square feet of studio space. They do costs thousands of dollars, making them more appropriate for larger studios. But in the end, a unit like this will save time and result in cleaner floors. One piece of advice is to definitely get a cordless model.

A smaller option for this type of machine is the Clarke Vantage 14, which is made by Nilfisk-Advance. It has a 14 inch scrubber head, 3 gallon capacity, 100 minutes of battery life, and produces a relatively quiet 64 dB of noise when in operation.

Tennant T2 Walk Behind Floor Scrubber

The Tennant T2 floor scrubber.

The Tennant T2 floor scrubber.

A larger, battery-powered floor scrubber is the Tennant T2. It has a 17 inch wide scrubbing disc, a 7 gallon capacity for water or cleaning solution, and a 9.5 gallon reservoir for soiled water. It has a quiet, 68 dB operating noise and is somewhat compact at 44 inches long, 27 inches wide, and 36 inches tall.


Clean Up Recommendations

Here is how I clean up:

Tables and countertops
Use bench brush and dust pan to clean large chunks. Then wipe clean with water and large yellow sponges.

Floors
Spot-sweep as needed with broom and long-handled dust pan.
Use sweeping compound and sweep. Vigorous sweeping can produce airborne dust, so work slowly and carefully.
After sweeping, then mop floors. If needed, a second mopping should get things spotless.

Kiln room
Kilns are vacuumed as needed with a HEPA vacuum.
Floors are cleaned as described above.
As kiln rooms are sources of a lot of dust from ware storage, kiln wash, kiln shelf maintenance, etc, I am extra vigilant about cleaning frequently in kiln rooms.


Summary

This post has covered all the clean up tools I use in my own studio and studios that I manage. These recommendations are made based on years of personal experience and what has worked for me and other studio members. Cleaning up is an incredibly important part of the art making process, and you want to have the right tools to make the job efficient and effective.

What clean up tools do you use in your studio? Let us know in the comments.


How To Mix a Ceramic Glaze From Scratch

 
A red iron oxide glaze in the process of being run through a Talisman Glaze Sieve.

A red iron oxide glaze in the process of being run through a Talisman Glaze Sieve.


This post is an overview of how to mix a ceramic glaze from dry ingredients, including the tools, techniques and procedures to get you started.

Whether you buy a pre-mixed dry glaze or weigh each ingredient, there are a lot of advantages to mixing your own glaze:

  • Save money: Mixing glazes in your studio is always cheaper, sometimes as much as 80 to 90 percent cheaper than bottled glaze.

  • Customize: Learn how to modify slips and glazes to suit your kiln and clay bodies.

  • Learn glaze chemistry: Even a bit of info can help you get the results you want.

A variety of our favorite glaze recipes are posted here, and there are lots of websites and books with glaze recipes. There are endless amounts of glaze recipes, so if you are new to this, just start with one basic one such as a glossy clear. There are also pre-mixed, dry glazes which are effective and still save some money over buying bottled glazes.

Keep reading for the complete how to instructions.


Table of Contents

  • Glaze Mixing Tools and Accessories

  • How To Mix Glazes From Scratch

  • Testing and Storing Glazes

  • Summary


Glaze Mixing Tools and Accessories

Here’s what you need to mix glaze in your studio:


How To Mix Glazes From Scratch

  1. Review recipe.

    Check to make sure you have enough of each ingredient. It can be helpful to calculate and write out the amount of each material, to be used as a checklist.

  2. Prepare work area

    Put on a dust mask, clean your scale and work area. Get your materials, buckets, and scoops together.

  3. Zero scale

    Place your measuring pan or bowl on the scale and turn it on. If needed, press the tare button so that the scale is zeroed out.

  4. Weigh ingredients

    Weigh each ingredient (this is where your checklist is handy) and put them in a dry bowl or bucket. After measuring all the ingredients, mix the dry ingredients together. Some glaze ingredients, such as bentonite, are prone to clumping so it is important to mix everything dry first.

  5. Add to water and mix

    Add the mixed glaze materials to water and mix until it is thick cream or buttermilk consistency. An electric drill with a proper mixing blade greatly speeds up this process. A large plastic scraper will dislodge material from the side of the bucket. Once all the dry ingredients have been mixed with water, you can remove your mask if desired.

    Note: it’s best to add glaze materials to water. If you add water to a bucket of dry materials, it’s hard to get everything in the bottom corners mixed.

  6. Sieve and homogenize

    Prepare another clean bucket with a sieve, preferably a fine 80 mesh sieve. Run the glaze through the sieve this first time, to break up any clumps. A brush can help push material through the sieve, or a Talisman Glaze Sieve is a tool made specifically for mixing glaze into 5 or 10 gallon buckets.

    Then, clean the bucket where you will be storing the glaze. Run the glaze through the sieve a second time into this clean bucket.

  7. Test glaze consistency

    Glazes are typically mixed to a specific gravity, which measures the amount of dissolved solids in the water. Usually glazes are around 1.50, which means 50 parts dissolved solids to 100 parts water. Keep records and mix the glaze to a consistency that works for you.

    Specific gravity can be measured with a specialized (but fragile) hydrometer, or you can use a graduated cylinder on your scale. With your cylinder zeroed out on the scale, pour in 100ml of the mixed glaze and check the weight. Add water as needed, and mix.

  8. Label and store

    Glaze containers and lids should be labeled with the name, temperature, and any other information that will help you. Laminated, waterproof labels are best but packing tape can also protect a label for some time.


Testing and Storing Glazes

Testing Glaze

It is helping to make a test tile of a glaze, on each clay body you use. Vertical test tiles such as tubes from an extruder are best, as they show how a glaze will “move” with gravity. Dip your test tile with one and two dips to show how different thicknesses of glaze affect the color.

Some studios choose to make a test tile with each batch of glaze. But if you are careful to mix the glaze accurately to a similar specific gravity, and your firings are repeatable, you should get roughly the same glaze results each time. There are no guarantees with glaze though. It is important to keep records, both in a glaze book and a kiln log, in order to get standardized results. But, glaze materials do change over time so as necessary you can make new test tiles.

Storing glazes

Glazes can be stored in sealed containers or buckets almost indefinitely. Most glaze ingredients are inorganic and will not rot. But some ingredients, such as bone ash, can cause some rotting smells. To avoid this, make sure the glaze is mixed with some frequency. If the odor persists, you can add a trace amount of copper to any glaze (even white glazes!) without affecting the color. Copper is an anti-fungal and can cut down or eliminate odor. Read our post on that here.

Remixing glaze

As they are used, glazes do lose some moisture to evaporation and bisqueware can suck extra water out of the glaze mix. It can be helpful to mix and then do a quick visual check of the glaze. If necessary, you can re-check the specific gravity and add water. If a glaze seems thick or is glopping onto your pieces, it’s definitely time to check it and probably add water.

In addition, when I mix glaze, I will usually run all the old and new glaze through a sieve. Small bits of bisque and other contaminants can fall into a glaze bucket. When I’m using it, I want to know what I’ve got in that bucket. It does take extra work but having a double-sieved, homogenized glaze will result more even glaze application and hopefully, better results.


Summary

This post has covered a basic overview of mixing glazes from scratch. It covered the tools, techniques, and a few helpful hints to mix and store glazes. If you can follow a recipe, you can mix glaze. There is an overwhelming amount of glaze info out there, but if you start with just one basic recipe and grow from there, you will be a glaze master in no time and you will be able to customize and mix glazes to suit your own needs.

If you are looking for more info on mixing glazes, the glaze books by John Britt are some of the best resources.

The Complete Guide to Mid-Range Glazes

Buy at Bookshop.org

Buy at Amazon

The Complete Guide to High-Fire Glazes

Buy at Bookshop.org

Buy at Amazon

Questions or comments? Let us know in the comments.


The Best Glaze Mixing Accessories For Ceramic Studios

Mixing your own glazes from scratch is cost-effective and allows you to customize glazes to suit your studio. Whether you are mixing a powdered glaze with water, or weighing each ingredient and starting from scratch, having the ability to mix glazes opens up possibilities in your studio. You don’t need a huge set up to get started, a few simple tools and buckets are all you need. Below are reviews of our favorite glaze-mixing accessosories.

This list includes:

  • Drills

  • Immersion Blenders

  • Sieves and Strainers

  • Dust Protection

  • Mixer Blades

  • Scales


Drills

A drill is one of the most important glaze-mixing tools. Sure, you could get a big whisk or paddle and mix your glaze by hand, but….I wouldn’t recommend it.

For a drill, my favorite is the Milwaukee M12 3/8” Drill. It’s compact, well built, and affordable. And it has enough power to mix a 5 gallon bucket and just enough power to mix 10 gallons of glaze. It’s also cordless, which I find easier to use in the studio but you do sacrifice some power and you’ll have to deal with recharging batteries.

There are a lot of drill options out there, with all sorts of options, battery and cord styles. For more info, check out the Studio Manager Cordless Drill Review and our Corded Drill Review


Immersion Blender

For small batches of glaze, especially test batches, an immersion blender is a great tool. Designed for kitchen use, these definitely have enough power to hold up in the studio. I would just make sure you have one dedicated for studio use and a separate blender for kitchen use.

For an immersion blender, I have never noticed much of a difference between name brands and generics. You just want a blender that will work and get your glaze mixed. A great option for this is the Mueller Austria 9 Speed Immersion Blender. You probably don’t need all those speeds, but it does have a turbo button which speeds things up. And at around $30-35, this is one of the more affordable immersion blenders on the market.


Sieves and Strainers

A sieve is an important part of mixing glazes. A sieve insures that particles are broken up and that the ingredients are evenly distributed in the glaze. Proper mixing and straining also reduces glazes flaws, generally resulting in a more even glaze. If you are mixing glazes from dry powder or from scratch, you must run them through a sieve. Generally, I have a variety of sieves in the studio including a simple kitchen sieve, a smaller tea strainer, and specialized tools such as the Talisman Rotary Sieve.

The Talisman Rotary Sieve.

The Talisman Rotary Sieve.

Talisman Rotary Sieve

The best tool for sieving glazes is the Talisman Rotary Sieve. This is a large, hand-cranked sieve that will fit over a 5 or 10 gallon bucket. It has three brushes which can be removed for cleaning (or replaced if worn out) and removable screens. This allows you to choose which size of mesh to screen your glaze. Typically, this is done somewhere between 80 to 120 mesh. The Talisman Rotary Sieve is expensive, usually $200-250, but it makes short work of the sieving process and the brush system helps break up smaller particles, resulting in a uniform glaze batch. It’s an incredibly well-built tool and if handled with respect, it will hold up for decades of use. Talisman Rotary Sieves are typically only available from speciality clay supply stores, so shop clay stores online or contact your local clay supplier.

Talisman Test Sieve

Talisman Test Sieve

Talisman Test Sieve

Another option, especially for glaze test batches, is a cup sieve such as the Talisman Test Sieve. These small sieves are stackable, come in a variety of mesh sizes from 5 to 250, and are really well built. You probably just need one or a few, I’d suggest an 80 to start and in my own studio, I generally just use 40 mesh for a rough sieve and 80 mesh for a fine sieve.

Cuisinart Fine Mesh Steel Strainer

Cuisinart Fine Mesh Steel Strainer

Fine Mesh Steel Strainers

Another useful tool is a kitchen steel mesh strainer. These are not fine enough for a final glaze strain, but the wider mesh is still useful for quickly breaking up chunks of material. They are also great for quickly processing glaze in order to remove any bisque chunks or other small things.

When mixing glaze, materials such as Wollastonite, Soda Ash, Borax, Zinc Oxide, and most oxides used for colorants and others must be run through glaze sieve (usually 80 mesh), but if you start with a kitchen sieve, you’ll get the big chunks out quickly and can have an easier time with the glaze sieve. Smaller strainers such as a tea strainer are also useful for quickly running an underglaze or small batch through mesh. Sometimes, a simple mix and strain can bring a thickened glaze, underglaze, or slip back to being easy to use.

A great option for a kitchen steel mesh strainer is the Cuisinart 3 pack of Fine Mesh Metal Strainers. The all-metal design makes it easy to clean and maintain, and the variety of sizes will help with most small to medium glaze batches, or if you need to quickly strain a chunky material before running it through a finer mesh. There is also a link to a similar product by ExcelSteel at Home Depot.


Recommended Sieve Sizes

Here’s a useful chart of recommended sieve mesh sizes to use when mixing glaze, slip, and casting slip.

Suggested Sieve Size.jpg

Face Masks and Dust Protection

Dust protection and personal protection equipment is vital when mixing glazes. The main worry is any sort of airborne particles, particularly the finest particles such as silica. Repeated exposure to these particles, found in all dry glaze and clay materials, can lead to respiratory problems. Some also choose to wear plastic gloves when mixing and using glazes. The best thing when thinking about gloves is to assess your own risk and work to understand what is in glazes and what may be dangerous.

Respirator

The 3M Respirator

The 3M Half Facepiece Respirator with P100 cartridge style filters.

The best dust protection is a respirator. These devices are reusable, fit on your face more tightly than a dust mask, and the filters can be replaced as needed. Although moisture can build up, I find them to be more comfortable than a paper or surgical type mask, and they definitely provide a tighter fit. One drawback though, is you can’t really talk to anyone while they are on.

For a respirator, I have always used a 3M half facepiece respirator with P100 filters. They are usually widely available, so it’s easy to find replacement filters in stores or online. It can be hard to tell if the filters are getting full of dust, so I generally buy new filters every 6 months. It can round around $20 for new filters, but as someone who works full time in ceramic studios, I don’t want to take any risks with my lungs.

If you don’t want to get a respirator, at the very least get a N95 or KN95 mask and wear it whenever you are working with dry glaze or clay materials. Also be aware, fine particles can remain in the air for a while, use caution when mixing and try to keep dust out of the air. For more, see our complete article on dust masks for studios.


Mixing Blades and Paddles

The right mixer blade will make your glaze and slip mixing quick and efficient. It’s best to stock different size mixers for mixing different amounts of glaze. These are the mixing blades I stock in my own studio.

The small Jiffy LM10 Mixer Blade

The small Jiffy LM10 Mixer Blade, also called a laboratory mixer.

Small Mixer Blade

To mix pint jars and small cups, the Jiffy LM10 Mixer Blade is just the right size. It’s 10 1/4” long with a 1 1/4” head.

 
Helix mixer blade for 1 to 2 gallon buckets

Helix mixer blade for 1 to 2 gallon buckets

MEDIUM MIXER BLADE

For one to two gallons, I prefer a helix mixer designed for 1 gallon buckets. It’s cheaper than a metal blade but it can really mix. As long as you don’t grind the plastic blades against buckets, these economical blades should last for years and also work well for jobs such as mixing plaster.

 
The Jiffy ES Mixer Blade for 2 to 10 gallon buckets of glaze.

The Jiffy ES Mixer Blade for 2 to 10 gallon buckets of glaze.

LARGE MIXER BLADE

For 5 or 10 gallon buckets, the Jiffy ES mixer blade is the way to go. It has a 20 1/2” long, 3/8” shaft and the head is 3 3/4” wide. It’s perfect for 5 gallon buckets and it will mix up to 10 gallons as long as you have a strong enough drill (usually a corded drill or a higher powered cordless drill)


Scales and Accessories

A scale is a must-have for mixing glazes. An accurate, durable scale is a great investment. My favorite is the Oxo 11 Pound Scale. To read about other scale options, the Studio Manager scale review can be found here.

The Oxo 11 Pound / 5 KG Scale is great for home or studio use.

The Oxo 11 Pound / 5 KG Scale is great for home or studio use.

The Oxo 11 Pound Scale is designed for kitchen use but it’s a just as useful in the studio. It runs on 4 AAA batteries, and is accurate to 1/8 ounce or 1 gram. A great feature is the pull-out, light up display that allows you to use the scale with larger bowls. The scale has four buttons: a lb/kg toggle, light switch, zero button, and power. The top stainless steel platform can also be removed for cleaning. This scale can accommodate up to 11 pounds or almost 5 kilograms at a time. It’s an incredible amount of features in a scale that typically costs about $50.


Ohaus Maxi-Scoop Bowl

The Ohaus Maxi-Scoop bowl.

The Ohaus Maxi-Scoop bowl.

The Ohaus Maxi-Scoop is my favorite bowl to use when weighing dry ingredients. Made of polypropylene, it is 10 inches wide, has a pouring spout, and is durable and easy to clean. It holds a lot of material, typically up to about 2500 grams, and the open, wider design makes it easier to use in my opinion. Of course, you can use any sort of bowl to measure dry ingredients, but this one just seems to be ideal for scales and it’s the one I reach for first when I’m mixing glaze.


Metal Scoops

metalscoop.jpg

A quality metal scoop makes working with dry materials so much easier. In a pinch, I’ve repurposed small yogurt containers as scoops, but a durable, long-lasting metal scoop is better. For large storage bins or bags, you might get a scoop for each material. Or if you have a collection of 2 to 4 different sizes, you can get through most glaze batches without contaminating between materials, and then wash the scoops after glazing. For really strong ingredients such as red iron oxide, I leave small scoops in each bin so I don’t have to clean the scoops each time I use them.


Wrap-Up

This post has listed my favorite tools and accessories for use when mixing glaze, including drills, immersion blenders, sieves and strainers, dust protection, mixer blades, and scales. It may seem like a lot of stuff, but each tool has it’s role to play in the glaze-mixing process. If you are new to mixing glaze, start with the basics such as a scale, dust-protection and maybe just a wooden spoon, and go from there. You can always add tools as needed.

What are your favorite tools to use when mixing glaze? Let us know in the comments.


The Best Scales for Ceramic Studios and Workshops

Updated and revised, June 14, 2021

The OXO 11 Pound Food Scale is the top pick for a studio scale. It is accurate, affordable, durable, and has a pull-out, light-up display. It’s shown here with the Ohaus Maxi-Scoop bowl and a metal scoop.

The OXO 11 Pound Food Scale is the top pick for a studio scale. It is accurate, affordable, durable, and has a pull-out, light-up display. It’s shown here with the Ohaus Maxi-Scoop bowl and a metal scoop.

A scale for a studio or workshop is a heavily-used tool that needs to be accurate, easy to use, and durable. These days, you can get a great scale without spending a lot of money. This post will cover affordable but durable scales that get the job done and hold up under the heavy use of an academic or community ceramic studio.

TOP PICK: OXO 11 Pound Food Scale

The OXO 11 Pound Scale, going strong after years of studio use.

The OXO 11 Pound Scale, going strong after years of studio use.

The OXO Good Grips 11 Pound Scale is the top pick for a scale in a ceramics or art studio. With accuracy to 1 gram, this scale has a large enough capacity for most glaze or plaster-mixing needs. It’s made for home kitchen use but is super tough and has thoughtful design features such as a pull-out, light-up display. It runs on 4 AAA batteries, and is accurate to 1/8 ounce or 1 gram. It is simply incredible that a scale under $50 is this accurate. For similar or more accurate scales (options like this reviewed below) you’ll easily pay $100 or more.

The pull-out, light-up display on the OXO 11 Pound Scale.

The pull-out, light-up display on the OXO 11 lb capacity scale (Shop at Amazon)

The scale has four buttons: lb/kg toggle, light switch, zero, and power. It’s simple and intuitive, and the pull-out display helps if you are using wide bowls. The top stainless steel platform can also be removed for cleaning.

This scale can accommodate up to 11 pounds or almost 5 kilograms at a time. The display will help you know when you’re reaching capacity by displaying more bars on the right-hand side. When mixing glaze, the 5,000 gram capacity is definitely enough. But if you work with larger amounts of material, a higher-capacity scale is reviewed below.

Prior to working with the OXO 11 Pound Scale, I only wanted to use more professional scales with 0.1 gram accuracy. But this is an affordable, durable, well built, and most importantly, accurate scale. The 1 gram accuracy is exact enough for most purposes, and it will survive many years of use in any studio. I liked this scale so much that I bought the smaller OXO 5 Pound Food Scale for use at home.


Table of Contents

  • Top Pick: OXO Good Grips 11 Pound Scale

  • Budget Pick: Accuteck All-In-One Scale

  • Upgrade pick: MyWeigh iBalance 5500

  • Heavy Duty Pick: MyWeigh HD-300 Shipping Scale

  • Manual Scale Pick: LEM Stainless Steel Scale

  • Other Scale Options

  • Scale Accessories

  • Summary


Budget Pick: Accuteck All-in-One Digital Scale

The Accuteck All-In-One 50lb Digital Scale (Shop at Amazon) is a great budget option. It can weigh up to 50lbs of material, is well-built, and is very affordable—usually priced under $20. I have been using one in a busy community ceramics studio for 3 years and it has held up under heavy use.

This scale runs on 3 AAA batteries or an optional 5V plug-in adapter. It is accurate to 0.2 ounce, or about 2 grams. It is definitely not as accurate as our top pick, but if you need something for the occasional glaze batch, it will be ok. It is also great to keep on the wedging table for measuring pieces of clay.

When I originally purchased this, I didn’t expect it to be so well built and have been extremely happy with the purchase. In a world full of low-quality generics and knock offs, I would definitely recommend this scale if you are on a budget. The only drawback is that it is only accurate to about 2 grams. This scale wouldn’t be very accurate if you were measuring small quantities of glaze materials.


Upgrade Pick: MyWeigh iBalance 5500

The MyWeigh iBalance 5500 scale is accurate to 0.1 grams and has a 5500 gram / 12 lb capacity.

The MyWeigh iBalance 5500 scale is accurate to 0.1 grams and has a 5500 gram / 12 lb capacity.

The MyWeigh iBalance 5500 (Shop at Amazon) is a great upgrade pick for a studio scale. It’s accurate to 0.1 grams while maintaining a large capacity of 5500 grams or about 12 pounds. It has a stainless steel top, optional AC power adapter, simple and intuitive buttons, and a 3 year warranty. The four feet can be independently leveled too.

It’s a workhorse for glaze mixing that allows you to do large batches, or fine tune a small amount of material to a high degree exactitude. You’ll pay more for this accuracy — around $150 at the time of this post — but if you need the range from a few grams to larger amounts, this scale will deliver. There are other models in the MyWeigh iBalance line too, ranging up to 11000 gram capacity.


Heavy Duty Pick: MyWeigh HD-300 Shipping Scale

MyWeigh 300 shipping scale.jpg

The MyWeigh HD-300 Heavy Duty Shipping Scale (shop at Amazon) is the top pick for a shipping scale, but it’s also accurate enough for large batches of plaster, concrete, or other studio materials. It can measure up to 300 pounds with an accuracy of 0.1 lbs or to within about 2 ounces. It has a steel top and a remote display on a six foot cord, so you can easily get the weight of even the largest package. It’s powered by 4 AA batteries or an optional AC power adapter. It also has a built-in USB port, if you want to set up communication with printers or other devices. Finally, it has adjustable feet and easy to clean surfaces. This is a great heavy duty scale that comes in around $130. There are plenty of cheaper shipping scales, but if you read online reviews closely, you’ll see that they fail or are inaccurate, while this scale is built too withstand the test of time.


Manual Scale Pick: LEM Stainless Steel Scale

The LEM Stainless Steel Scale.

The LEM Stainless Steel Scale.

The LEM Stainless Steel Scale is a great option for weighing wet clay, plaster, or as a shipping scale. It has a 10” x 8” steel platform, and can weigh up to 44 lbs / 20 kg with an accuracy of 2 ounces or around 50 grams. It’s not accurate enough for mixing glazes, but for just about everything else, this is a great option that is affordable, durable and doesn’t need any batteries or plugs. Sometimes it’s good to keep it simple and for $30, you can’t go wrong with this scale.


Other Scale Options

Rubbermaid Commercial 150lb Digital Scale

The Rubbermaid Commercial 150 Pound Scale is another option for a rugged scale that can measure packages, plaster, or any type of material.

It has a wide metal platform, and the display can be mounted on the wall or pulled to the side with a 9 foot cord. The scale has a capacity of 150 pounds or 68 kilograms, and runs on a 9V battery or option AC adapter.

The drawback of this scale is that it is only accurate to about 1/2 pound. Previous models of this scale were more accurate to around 2/10 of a pound, so it is disappointing that Rubbermaid has let the quality drop. There are also complaints online about this unit, specifically the controller, breaking after a few months of use. That hasn’t been my experience though, so I would still recommend this with the caveat that you treat the control / display panel carefully. It’s priced about the same as the MyWeigh shipping scale, or around $130.


The Ohaus CX1201 Scale, 1200 gram capacity with 0.1 gram accuracy.

The Ohaus CX1201 Scale, 1200 gram capacity with 0.1 gram accuracy.

Ohaus Digital Scale

Ohaus is one of the most trusted names in scales, and the the Ohaus Portable Balance CX1201 is accurate to 0.1 grams with a capacity of 1200 grams or about 2.6 pounds. It costs a bit over $100 and runs on 3 AA batteries or an optional plug.

I prefer the larger capacity of the MyWeigh 5500, but this scale has a balance of accuracy, cost, and quality that is hard to beat. If you regularly measure smaller batches of glaze and need 0.1 gram accuracy, this scale will deliver.


Triple Beam

The Ohaus Triple Pro Scale

The Ohaus Triple Pro Scale

“Triple-beam lyrical dream” as Biggie used to rap, these types of scales were the standard for drug dealers and glaze chemists alike. Now, almost everyone has switched to digital scales. I definitely have. But, if you want to go old school or want to keep it simple and not worry about batteries or breakdowns, a triple-beam scale is the way to go. They are extremely accurate, long-lasting, and durable. It just takes longer to get a measurement.

Ohaus makes a great scale, the Triple Pro Mechanical Triple Beam with a 610 to 2610 gram capacity that is accurate to 0.1 grams. The scale has a basic capacity of 610 grams, but you can add counterweights to increase the capacity to 2610 grams. If you want to invest in a long-term piece of equipment, this is the kind of tool you could pass down to your grandchildren.


Favorite Scale Accessories

The Ohaus Maxi-Scoop bowl for weighing dry materials.

The Ohaus Maxi-Scoop bowl for weighing dry materials.

Ohaus Maxi-Scoop Bowl

The Ohaus Maxi-Scoop is my favorite bowl to use when weighing dry ingredients. Made of polypropylene, it is 10 inches wide, has a pouring spout, and is durable and easy to clean. You can get quite a bit of dry material piled up in this bowl, and the open, wider design makes it easy to use. Of course, you can use any sort of bowl to measure dry ingredients, but this one just seems to be ideal for scales and it’s the one I reach for first when I’m mixing glazes.


metalscoop.jpg

Metal Scoops

Metal scoops are the easiest way to pick up glaze materials, plaster, or any dry material. They are also long lasting and easy to clean. A variety of sizes works, or some people like to keep an individual scoop in each bucket of material.


Ohaus Footed Scoop Bowl

The Ohaus Footed Scoop Bowl.

The Ohaus Footed Scoop is another great option for mixing dry materials. It doesn’t hold as much material as the Maxi-Scoop, but the design of this bowl is much easier to pour. There’s also a metal option in this design, which is super long lasting, but it’s very expensive.


Summary

This post has covered a variety of scale options suitable for a ceramics, sculpture, or art studio. Many of these will work at home too. My top pick is the OXO 11 Pound Scale for it’s combination of accuracy, durability, and price. But there are a variety of other options too, along with my favorite accessories for mixing glaze and other materials.

What scale do you use in your studio? Let us know in the comments.



Tools for Home and Studio

There are many tools that are equally valuable at home or in the studio. Sometimes, it seems like most tools that are useful in a kitchen can also be put to use in the studio.

This post includes reviews of a few favorites that will hopefully give you some ideas for new tools to use, either at home or in the studio. What do you use in both the kitchen and studio? Please share in the comments.

Swedish Notched Rolling Pin

This notched, diamond-pattern wooden rolling pin or kruskavel can be used in the studio to roll out textured clay slabs. It’s especially useful for making test tiles. Or put it to use at home making crackers. It’s designed to make Swedish knaackebrods but the simple pattern looks great on a variety of baked goods.

Uses:

At home: roll out dough crackers, flatbreads, Swedish knaackebrods, or add notches to baked goods
In the studio: add the diamond texture to clay slabs and test tiles

Linden Sweden Deep Notched Rolling Pin

Swedish Notched Rolling Pin

Swedish Notched Rolling Pin


Patterned Wooden Rolling Pins

clay roller 2.jpg

This set has 10 wooden rolling pins with a variety of patterns. It’s is probably more useful in the studio than at home, but it can be used on crackers and flatbreads just as easily as clay slabs. These roller are relatively small, ranging from 3.5 to about 5 inches wide.

Uses:

At home: patterned crackers
In the studio: textured slabs, roll patterns on to thrown pots, create textured slabs to add to other pieces.

10-pack of textured clay rollers

10-pack of textured clay rollers

Set of 10 Wooden Pattern Rollers
This set is listed twice on amazon. Find it here or try this link.


Wooden Meat Tenderizer Mallet

wooden mallet.jpg

An all-wood meat tenderizer mallet is another texture tool for the studio, or a useful addition to your kitchen. Wood is less likely to stick to clay than metal, so this all-wood option is the way to go.

Uses:

At home: tenderizing steaks, fish, poultry, etc. Great for making flattened chicken breasts.
In the studio: similar to the diamond-pattern of the Swedish rolling pin, this is also a great tool for making patterns on individual test tiles

Double Side Heavyweight Wooden Meat Tenderizer Mallet


Round Cutters in Graduated Sizes

This set of circular cutters is another tool that is equally at home in the kitchen or studio. Great for biscuits or other round baking needs, it’s also perfect for making circles out of clay slabs. The simple design makes it easy to clean, and the container helps organize the pieces for storage.
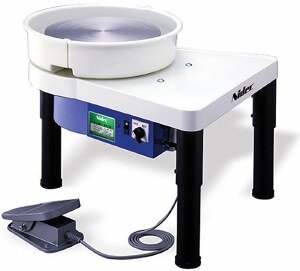
There are also fluted circular cutters, which can add some nice patterns to your work. It’s best to stick with firm metal cutters, the softer plastic options are often not strong enough for the kitchen or studio.

Uses:
At home:
cut biscuits, bread, English muffins, fondant decoration
In the studio: cut circular slabs, trace circles

Nesting Round Metal Cutters Set
There are name brand and many generic versions of this type of tool. Pictured is the Kayaso version, but there are other options such as this or this 6 piece option from Wilton.

For a fluted option, try this 11-piece set from Jokumo, or a 6-piece set from Wilton.


Wooden Thread Spiral Rolling Pin

wood thread rolling pin.jpg

Another simple but useful tool, this wooden rolling pin will add texture to your baking or clay projects. All wood is great because it’s less likely to stick to clay.
Uses:

At home: add texture to cookies, dumplings, pastas
In the studio: add texture to slabs. Great for adding texture and then stretching
Spiral Threaded Wooden Rolling Pin


Silicone Mats for baking or studio use

The Amazon Basics silicone mat

The Amazon Basics silicone mat

A non-stick work surface is vital if you are baking or working with clay. Products like Silpats or silicone baking mats give you that flexibility and are a tool for the home or studio. It’s handy to have these around for working on craft projects, or handbuilding with clay.
If you are looking for ceramic-specific work mats, the Ceramic Shop in Philadelphia has a variety of options. Those are nice options, but a silicone baking mat is often cheaper, almost as stiff, and can be used in a variety of ways.

Amazon Basics Silicone Baking Mat


Green Bell G-1008 Nail Clippers

The Green Bell G-1008 Nail Clipper

The Green Bell G-1008 Nail Clipper

If you are cooking or working in the studio, long nails can get in the way. Nail clippers may seem like the most mundane thing, but upgrading to a pair of Green Bell clippers shows how just about any other clippers is not as good.

I discovered the Green Bell Clippers years ago via this rhapsodic review, and they truly are the best nail clippers I’ve ever used. Made in Japan, these clippers effortlessly cut nails with a perfect tension. They also have a built-in nail file and are constructed with a weight, finish, and somewhat hefty quality that is just a step above any other nail clipper. Sure, they are now about $21 but you’ll most likely never need another clipper.

Green Bell Nail Clippers
I recommend the Green Bell G-1008 at amazon. For a smaller, narrower option, try the Green Bell G-1205


GorillaPod Phone Tripod

GorillaPod GripTight Pro

GorillaPod GripTight Pro

A flexible phone tripod is a handy tool to have anywhere these days, but especially at home or in the studio. Need to set up your phone to read a recipe? Trying to capture the perfect selfie? Or maybe you’re getting into timelapse recording of your work? This is the perfect tool for that.

GorillaPod Mini

GorillaPod Mini

There are numerous knockoff options, many that will do a fine job, but I have been very happy with the original version of this product, the Joby GorillaPod. I frequently use the phone option, and I have the larger 3K kit that can hold my big DSLR camera. They do cost a bit more, but Joby products stand the test of time.

Currently, there are two options for phone holder. The pro-grade phone stand that retails for almost $60, and a newer mini option that is $15 or less. The pro-grade model gives you longer legs that will allow the tripod to grip unusual objects, such as a stick or pole. The smaller option is good for a simple tripod or to stand on an uneven surface, but I wouldn’t expect it to grip too tightly.

GripTight GorilliaPod Phone Stand / Tripod

What are the essential tools that work in your home or studio? Please share in the comments.